background image

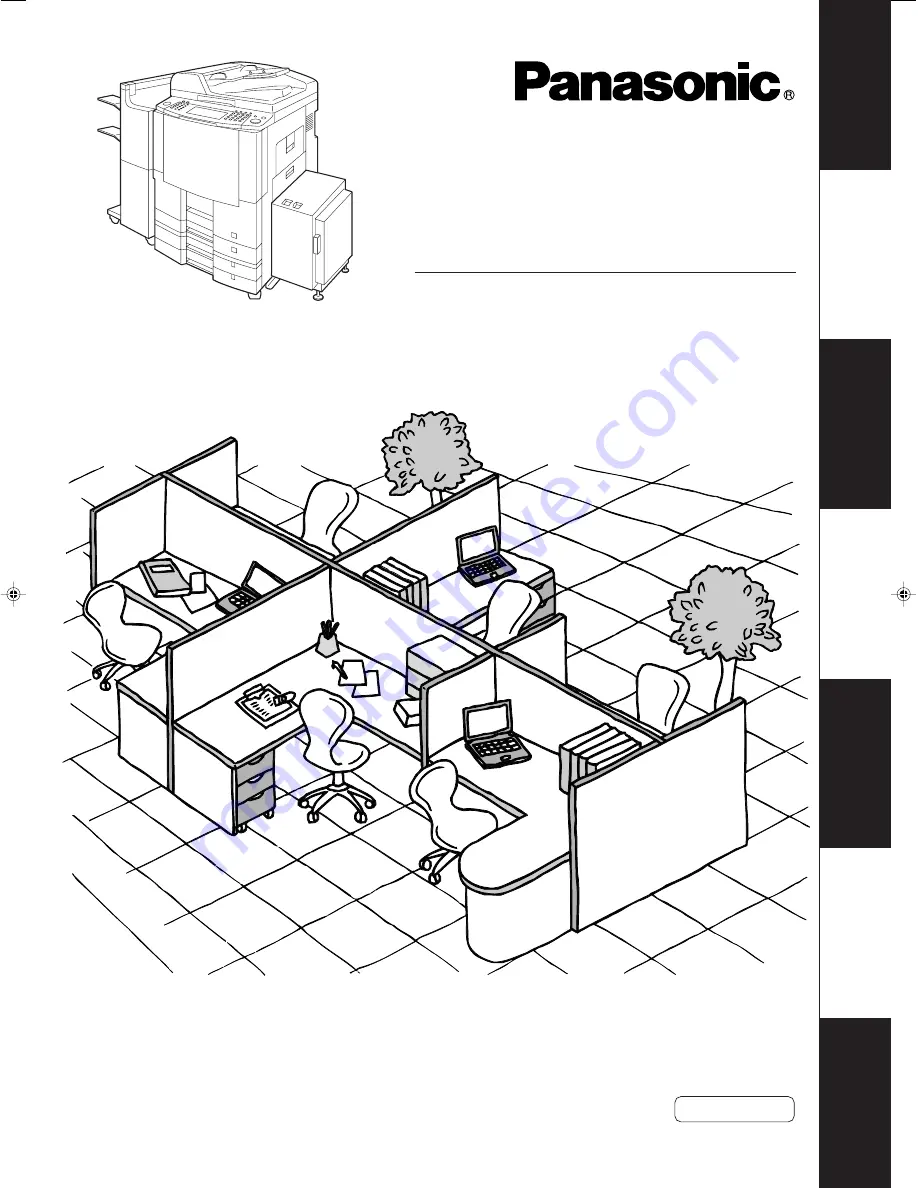
Digital Imaging Systems

Before operating this equipment, please read the instructions completely and keep these operating instructions
for future reference.

Getting T

o

 Kno

w

Y

our Machine

Bef

ore Star

ting

Making Copies

Options

Model No.

  DP-3510/4510/6010

Operating Instructions

(For Copier & Network Scanner)

English

Netw

ork Scanner

J
?

I

Other

s

P001_4510(pb).p65

7/31/02, 10:44 AM

1

Summary of Contents for Workio DP-6010

Page 1: ...the instructions completely and keep these operating instructions for future reference Getting To Know Your Machine Before Starting Making Copies Options Model No DP 3510 4510 6010 Operating Instruct...

Page 2: ...r Service Telephone Number Model and Serial Number Copyright 2002 by Matsushita Graphic Communication Systems Inc All rights reserved Unauthorised copying and distribution is a violation of law Printe...

Page 3: ...tatus Monitor and or Document Management System Useful Office Functions DP 3510 4510 6010 Operating Instructions 1 2 3 4 Copier Copy up to A3 size Capable of copying text photos halftone originals Net...

Page 4: ...he original 1 4 5 2 Reduction or Enlargement Copies the original at a fixed reduction or enlargement ratio 1 3 4 2 5 CIf the fusing temperature drops excessively on the DP 4510 6010 during a multi cop...

Page 5: ...amping Centering Image Repeat or Inverse Mode selection 38 E INSERTION OVERLAY CInsertion OHP Interleaving Overlay or File Edit Mode selection 46 F JOB MEMORY CJob Memory Mode selection 54 B 2 SIDED O...

Page 6: ...ain energy consumption and usage standards This product will automatically power down after a specified period of non use The use of this ENERGY STAR compliant product will reduce energy consumption a...

Page 7: ...ering 42 Stamping Date Stamp 43 Stamping Issue Number Stamping 44 Centering Image Repeat Inverse Copy 45 Insertion Overlay 46 Insertion Overlay Button 46 Cover 47 Page Insertion 48 OHP Interleaving 49...

Page 8: ...g 105 Adding Paper k 105 Replacing the Toner Bottle 107 Removing a Misfed Paper 108 Troubleshooting 119 Before Calling Service 119 Replacing the Battery 121 Others Specifications 122 Options and Suppl...

Page 9: ...laser Only qualified service personnel should attempt to service this device due to possible eye injury CAUTION USE OF CONTROLS ADJUSTMENTS OR PERFORMANCE PROCEDURES OTHER THAN THOSE SPECIFIED HEREIN...

Page 10: ...other metal objects into the copier Toner and Paper Store toner drum and paper in cool areas with low humidity CUse high quality 60 90 g m2 Sheet Bypass 55 133 g m2 paper CFor optimum performance it i...

Page 11: ...ical fume concentration CIn areas with extreme vibration CWith unstable or uneven conditions floors etc Installation Precautions Before Starting FOR YOUR SAFETY The maximum power consumption is 1 45 k...

Page 12: ...Y 13 AMP SOCKET If a new plug is to be fitted please observe the wiring code as shown below If in any doubt please consult a qualified electrician WARNING THIS APPLIANCE MUST BE EARTHED IMPORTANT The...

Page 13: ...m or an alarm status is activated the Alarm LED lights up or begins to flash LED Lights Machine detected a trouble status ANo paper in the selected tray or toner has run out AMachine detected trouble...

Page 14: ...ntrol Panel Touch Panel Display ATTENTION Touch Panel Display CUse only soft finger pressure to activate the Touch Panel Display DO NOT USE SHARP OBJECTS such as pens fingernails etc as this may damag...

Page 15: ...ne Outline with Tray Selection 1 Paper Level and Size Indication 2 Paper Tray Selection Button 3 Tandem Remote Button Indication 4 Tandem Remote Button 5 Density Indicator 7 steps 6 Manual Exposure Se...

Page 16: ...and A5 size can be switched between Portrait and Landscape mode Manual Exposure Select buttons LIGHTER and DARKER Touch the LIGHTER or DARKER button Select the Original s TEXT Originals are mainly co...

Page 17: ...with an authorised Panasonic dealer for advice regarding non standard paper types Panasonic has tested 3M PP2500 transparency film and found it to be compatible Making Copies Do not load paper above t...

Page 18: ...in the paper tray use sheet bypass See page 17 CPress the RESET key to cancel the reduction or enlargement mode 4 Press START Example Reduction ORIGINAL SIZE COPY SIZE A3 A4 The correct ratio is autom...

Page 19: ...opies desired Set PROOF SET button Press START then one Proof Copy is made CIf the Proof Copy is OK press the YES button and the remaining number of sets will be printed CIf the Proof Copy is NG press...

Page 20: ...asic Menu 2 COPY SIZE Reduction Enlargement Only 4 SetTandem Remote Copying 3 Number of Copies 5 Press START Select TANDEM REMOTE button on BASIC MENU CThe selected Remote printing copier must be eith...

Page 21: ...ct 35 Tandem user parameter 5 Then enter the machine name by using the QWERTY keyboard then touch the OK button Up to 15 characters Ex Panasonic Making Copies Register the parameter of the user machin...

Page 22: ...tor ID code will be required when regitering a machine for selection Scroll to screen 04 04 and select 19 Key operator mode button Scroll to screen 05 05 and select 20 Add new tandem desti 1 Press the...

Page 23: ...tandem desti Making Copies Enter the New IP Address by using the Keypad and then touch the OK button Ex 123 123 012 002 NOTE When entering a one or two digit address add 00 or 0 in front of the numer...

Page 24: ...registered machine name and touch the OK button 5 6 To delete the registered machine Scroll to screen 05 05 and select 22 Delete tandem desti Touch the YES button to confirm the deletion Use the same...

Page 25: ...e Key Operator s Password however the COPY JOB QUEUE does not require a password CThe Job Queue selection function is only available when the optional HDD is installed You can select to delete multipl...

Page 26: ...r detail 1 Place the Original s 2 Set function and Completion Notice 3 Number of Copies 4 Press START Pop up screen will be shown on your PC Touch the COMPLETION NOTICE button Select the desired PC Ad...

Page 27: ...in 1 From two four or eight 1 Sided originals side by side to 1 Sided copies See page 31 BOOKLET Formats output in order so document can be folded and or saddle stitched like a book See page 33 MULTI...

Page 28: ...Using i ADF Procedure i ADF Face Up 1 Place the Original s 2 COPY SIZE Reduction Enlargement Only 3 Select 2 SIDED ORIG COPY Touch 1 2 2 1 or 2 2 4 Number of Copies 5 Press START CTo reset each menu...

Page 29: ...FORMAT FLIPPING 1 Place the Original on the Platen 2 COPY SIZE Reduction Enlargement Only 3 Select 2 SIDED ORIG COPY Select Book 2 Mode and Copy Format 4 Number of Copies 5 Press START CTo reset each...

Page 30: ...opying two facing pages or a A3 size original on two separate A4 size sheets Procedure 1 Place the Original 2 COPY SIZE Reduction Enlargement Only 3 Select 2 SIDED ORIG COPY Touch 2 Page Mode 4 Number...

Page 31: ...ch panel When 2 in 1 copying with different paper size of original select desired copy size with COPY SIZE Key not PAPER TRAY button of the LCD Touch Panel 8 in 1 Copy From six 1 Sided originals side...

Page 32: ...2 8 1 2 8 2 1 1 2 1 2 2 1 4 3 2 1 4 2 3 1 3 4 1 2 2 4 1 3 2 1 1 2 4 3 2 1 4 2 3 1 3 4 1 2 2 4 1 3 4 3 2 1 4 2 3 1 3 4 1 2 2 4 1 3 2 in 1 4 in 1 8 in 1 See page 31 See page 31 See page 31 1 2 3 4 5 6...

Page 33: ...1 Bin Saddle Stitch Finisher 40 images 2 Bin Saddle Stitch Finisher 60 images CFor Booklet Copy use A4 or A5 originals only CTo reset each menu mode touch the CANCEL button on the touch panel CWhen u...

Page 34: ...on Procedure i ADF Face Up 1 Place the Originals 2 COPY SIZE Reduction Enlargement Only Multi Size Feeding Use this function when copying mixed A3 A4 size originals using the i ADF Original size can b...

Page 35: ...See the Example below Before using this feature the SADF Mode must be enabled in the copier function settings See page 67 Procedure SADF Mode 2 Sided Original Copy i ADF Face Up 1 A 7 Place the Origi...

Page 36: ...Y menu and select SADF c Touch the SORT FINISH menu and select the desired sorting finishing end result d Press the START key e After scanning the first 70 sheets you can place the remaining 30 sheets...

Page 37: ...f individual pages are stacked in alternate direction rotate NON SORT Copy is stored on the tray Sort Finish Sort Finish Button When using Sort Mode without optional Finisher 1 Features Sort Rotate So...

Page 38: ...nates dark inner binding shadows See page 41 MARGIN Shifts image to right or left See page 41 STAMPING Prints a page number date or issue number on the copies See page 42 44 CENTERING Auto centres the...

Page 39: ...uttons or the keypad and then touch the OK button To set the width and length Zoom Ratio Individually Touch the A or B buttons and adjust the Zoom Ratio using the G F buttons or the keypad then touch...

Page 40: ...CTo reset each menu mode touch the CANCEL button on the touch panel CAn incorrect exposure may occur when there is a black line at the edge of the original or an image which the copier interprets as...

Page 41: ...touch the OK button When the vertical and horizontal void areas are different select vertical or horizontal edge Adjust each void width by using the F G buttons Touch the OK button Initial setting Fac...

Page 42: ...ng Zoom Effects Feature The page number can be automatically printed on each page 5 Press START Select the Orientation Select the Layout for Page Numbering Select the Starting Page to begin page numbe...

Page 43: ...the Orientation Select the Layout for print date Select the date for stamp Touch the OK button CThe i ADF is required for Data Stamp CTo reset each menu mode touch the CANCEL button on the touch panel...

Page 44: ...y Stamping Issue Number Stamping Zoom Effects Feature The issue number can be automatically printed on each page 5 Press START Select the Orientation Select the Layout for print Issue Number Select th...

Page 45: ...e the originals from the i ADF before selecting the Centering and Image Repeat mode When in Inverse mode this step is not needed CAn incorrect position detection of the original may occur when a stron...

Page 46: ...page 49 PRESENTATION Inserts paper between OHP film and make copy Sets for hand outs See page 50 OVERLAY Overlays a second image onto the first by using a second original or a file stored in memory S...

Page 47: ...es 5 Press START 1 Place the Originals Up to 70 80 g m2 paper 3 Select COVER mode Select BLANK COPY with Front or Front Back Select PAPER TRAY Touch the OK button 2 3 Select Blank Copy and select PAPE...

Page 48: ...als Up to 70 2 Select Blank Copy and select PAPER TRAY 3 5 Number of Copies 6 Press START 3 Select PAGE INSERTION mode Select BLANK COPY Select PAPERTRAY Touch the OK button 4 Input insert page positi...

Page 49: ...t BLANK COPY Select PAPERTRAY Touch the OK button 4 Select Blank Copy and select PAPER TRAY Making Copies CTo reset each menu mode touch the CANCEL button on the touch panel CCertain types of transpar...

Page 50: ...Bypass 2 Select INSERTION OVERLAY mode and select Presentation mode 3 5 Number of Copies 6 Press START 4 Select PRESENTATION mode Select BLANK COPY Select PAPERTRAY Touch the OK button 4 Select Blank...

Page 51: ...RLAY Mode 4 Number of Copies 5 Press START 1 Place the Originals Up to 70 2 3 Select Overlay Mode Overlay Insertion Overlay NOTE ATTENTION CDo not turn Off the power switch if the file has been stored...

Page 52: ...ile Edit Insertion Overlay ERASE Select the File Key to erase Touch the ERASE button Touch the OK button FILE NAME EDIT Select the File Key to edit Touch the FILE NAME EDIT button Change the file name...

Page 53: ...5 Press START 1 Place the Original 2 3 Insertion Overlay CFunction to select the files is only available when the optional Hard Disk Drive DA HD60 is installed When the optional Hard Disk Drive is no...

Page 54: ...M3 M4 or M5 button To recall a job stored in memory Touch the JOB MEMORY button Touch the M1 M2 M3 M4 or M5 button Press START When touching the M1 M2 M3 M4 or M5 button recalled job stored in memory...

Page 55: ...s the scanning was completed 5 Press START 2 Place the Original 3 Select Function 1 Touch RESERVE A JOB button 4 Number of Copies Procedure Making Copies Job set and press START Complete scanning of c...

Page 56: ...INTERRUPT key the indicator will light Make another copy job Touch the INTERRUPT key again to continue the original job CEnergy saver time 15 minutes and Sleep Auto Off time 90 minutes can be changed...

Page 57: ...iginal on the platen Opening the Platen Cover ADF 3 Press START Press the FUNCTION Key Touch the COPIER SETTINGS button Touch the button to advance to the 02 04 Display Screen of Copier Settings menu...

Page 58: ...ginal s size Touch the OK button If using i ADF place original on the centre position of ADF Tray The i ADF tray can be fed only 50 105 g m2 plain paper CWhen changing the M1 or M2 Size consult with t...

Page 59: ...R b A A A A A A A b b A b b b b b b b b b b b b b b b b b b b b b b b b b b R b b b b b b A b b A b b b b b b b b b b b b b b b A b A A b b A b A b b b b b b b b b b b b b b b A A A b b A b A b b b b...

Page 60: ...creen instructions After setting touch the OK button on the Display Panel Press the RESET key then exit the Function mode CPlease refer to each operating instructions for options function settings Pri...

Page 61: ...CCopy Printer Scanner 00 Power on default mode Adds toner manually COff On 01 Manual add toner Copy GENERAL FUNCTIONS Off Indicates the sorting memory status COff On 02 Sort memory status Indicates t...

Page 62: ...e N in 1 for space Selects the book void width C15 mm 20 mm 25 mm 30 mm 02 Book value default Selects the reduction ratio in margin mode CNo Yes 03 Margin reduction default 5 mm 20 mm No No No Enables...

Page 63: ...Sort Staple sort Shift Group 13 Sort mode default FB copy Reduce Sort Non sort Selects the staple position CLandscape Portrait 14 Staple position setting 04 04 Selects the stamping mode CPage Date Iss...

Page 64: ...CLongedge Shortedge 01 Compression mode default 04 Bind position 2 sided original T P 02 02 To add new address CPC DD FTP 05 Add new address Sets the resolution setting C150 dpi 300 dpi 600 dpi 02 Re...

Page 65: ...s the paper tray setting CAuto Bypass Tray 1 Tray 2 Tray 3 Tray 4 Auto 03 Print direction Sets the print direction setting CPortrait Landscape Portrait 04 Auto tray selection Sets the auto tray settin...

Page 66: ...Sets point size PCL C4 00 999 75 12 12 Lines Page PCL Sets lines page PCL C5 123 60 13 Return character PCL Sets return character PCL CCR CR LF CR 14 Mutual A4 LTR Converts A4 to Letter automatically...

Page 67: ...Sheet Bypass LCT 05 Special paper tray 1 06 Special paper tray 2 None Sets the paper drawer for special paper ex coloured CNone Paper Tray 1 Paper Tray 2 Paper Tray 3 Paper Tray 4 Sheet Bypass LCT Se...

Page 68: ...Panel Soft Consult with an authorised service dealer 04 09 C 4 4 mm 15 Fold position A3 LDG Monitors copy usage of each department 1 Print usage of each department 2 Print limit of each department 3...

Page 69: ...ss Sets the DNS server CNo Yes Function Selects the hard disk format CStop Start 27 Hard disk format Selects the hard disk error check CStop Start 28 Hard disk error check Making Copies NOTE Not requi...

Page 70: ...achine 35 Tandem user parameter Input group ID for address book C0 99 34 Address book group ID 36 Community Name 1 Selects to change the SNMP of Community Name 1 CEnables read only Function Selects to...

Page 71: ...s contrast for Text mode C1 7 02 Text contrast 02 05 4 06 Interleaving default Selects OHP interleaving paper CBlank Copy Blank 09 SADF mode Enables or disables the use of SADF function CNo Yes Yes CI...

Page 72: ...orm when memory overflow occurs CPrint Cancel Print 17 Toner save mode T Selects the toner save in Text mode CNone Level 1 Level 2 None 18 Toner save mode T P Selects the toner save in Photo Text mode...

Page 73: ...nputs a new destination to split the copy job Edits a copy destination 21 Edit tandem destination Deletes a copy destination 22 Delete tandem destination Function Making Copies Print the copier settin...

Page 74: ...n this page When the No 12 function is set turn OFF and ON the Power Switch Function Sets the font list of PS CStop Start Sets the spool function COff On On Prints text page only COff On On Sets the a...

Page 75: ...adjusted automatically for text and photographic originals 1 FUNCTION Key 2 Touch COPIER SETTINGS Function Proceed to next page Select 08 Auto contrast adjust Select whether Auto Exposure is to be per...

Page 76: ...ed as Follows Touch GENERAL FUNCTIONS Select 04 Set key operator code button Input ID Code 4 digits and touch the OK button Select 00 Paper size Touch the Paper Tray you wish to change and touch the S...

Page 77: ...Pinch the stopper to move the paper guide b Change the paper size indicator For Tray 2 Insert the paper size indicator which showing the same paper size selected at then the paper size will be automat...

Page 78: ...screen 03 09 and select 14 Dept Counter mode Touch the TOTAL COUNTER button to display the sum of all the active department counters NOTE CTo reset the function mode press the RESET button CContact yo...

Page 79: ...mit Number of Copies for Each Department Touch the MAX COPIES button Select the desired department using the scroll button Input the maximum number of copies Max 8 digits Touch the OK button 4 Exit fu...

Page 80: ...elect 04 Set key operator code button Input ID Code 4 digits and touch the OK button Scroll to screen 05 09 and select 21 Weekly timer NOTE CTo reset the function mode press the RESET or FUNCTION key...

Page 81: ...rk condition 22 DHCP default 24 TCP IP subnet mask 25 TCP IP default gateway 26 DNS server address Making Copies FUNCTION Key 2 Touch GENERAL FUNCTIONS Select 04 Set key operator code button Input ID...

Page 82: ...PS Printing for Fonts Security Print Mailbox Tandem copy Concurrent copy I FAX without mail server 1 000 Station registration Print Job Spooling OneRIP Account Management Expansion Board DA EM600 CEx...

Page 83: ...out binding 1 sheet W binding 2 to 15 sheets including single cover page Paper Capacity 10 sets stack of 11 to 15 sheets 15 sets stack of 6 to 10 sheets 25 sets stack of 5 sheets or less Saddle Stitch...

Page 84: ...nit SHIFT SORT Multiple copies are sorted automatically and stacked with shift STAPLE SORT Following functions can be selected by pressing Staple Sort button 1 Top left corner 1 position except A5 C F...

Page 85: ...tridge The message shown on the left appears when the staples run out 3 Replace the Staple Case 4 1 Staple Cover Staple Cartridge Empty New Tape 5 Reinstall the Staple Cartridge Insert the staple cart...

Page 86: ...5 When supplying the saddle stitcher unit with staples 1 2 3 4 Supplying the Saddle Stitcher Unit with Staples 5 6 7 Until it stops Close the Lower Front Cover 8 Green Handle Empty Cartridge New Cartr...

Page 87: ...the instructions below 3 Options Residual Staple Staple Cartridge When the punch hole residue container is full For Punch Unit DA SP31 When the punch hole residue indicator lights up this indicates th...

Page 88: ...ic sorting A4 Punch and Shift Punch and Staple CSort by stapling sets CUp to 30 sheets A4 CPaper weight 64 80 g m2 COffset using punching and electronic sorting A4 CSort by punching and stapling sets...

Page 89: ...re punched and exited onto tray Except Rotate Sort and Rotate Group modes SHIFT SORT Lower bin only Copied sets are offset and exited onto tray STAPLE SORT Lower bin only Sorted copies are stapled and...

Page 90: ...run out 3 4 Stapler Cover Stapler Unit Lock Lever 5 Replace the Staple Case 6 Tape 7 8 9 Close the stapler cover Return the finisher to the original position 10 Check the operation Select the staple...

Page 91: ...ple replacing procedures steps 1 to 4 See page 90 1 2 Reinstall the staple cartridge according to staple replacing procedures steps 7 to 10 and check operation See page 90 Pull out the finisher Pull o...

Page 92: ...FLS size is not applicable for Shift sort and Shift group CStaple electronic sort copy CUp to 50 sheets A4 A4 R 25 sheets A3 B4 CPaper weight 64 80 g m2 CStack by punch 4 hole A4 A3 Staple sort Shift...

Page 93: ...ng Staple Sort button 1 Top left corner 1 position except A5 C 2 Left 2 positions except A5 C 3 Bottom left corner 1 position except A5 C SHIFT GROUP Multiple copies are stored by shifting NON SORT Co...

Page 94: ...th control panel and print the desired data Accessories 4 Replacing the staple cartridge 1 3 The message shown on the left appears when the staples run out 4 5 Empty Staple Case 2 Tape 1 Bin Saddle St...

Page 95: ...teps 1 to 4 See Page 94 1 Lift up the Cartridge Knob Remove the jammed staple Return the Cartridge Knob 2 Reinstall the staple cartridge according to staple replacing procedures steps 7 to 9 and check...

Page 96: ...96 memo...

Page 97: ...ation from the ADDRESS BOOK Select the Resolution Select the Original mode Select the Exposure Press the START key Document Scanning The Scanner Reception Notice appears on the destination PC The docu...

Page 98: ...oard then touch the OK button Up to 15 characters Ex SALES DEPT Touch Scanner Settings button and touch 05 Add new address Press Function Key Button Name Function CAPS Used to input upper case letter...

Page 99: ...dress Book cannot be changed or erased until the communication has finished To change or erase the settings wait until finish communication Network Scanner Option Network Scanner 6 If you want to assi...

Page 100: ...ton Ex 123 001 056 220 NOTE When entering one or two digit address add 00 or 0 before that address 4 Editing the Address Book If you have to change or erase any of the Address Book stations follow the...

Page 101: ...the incorrect character press C CLEAR key then re enter a new character Network Scanner Option 6 Delete the current button name using the Back Space button Then enter a new button name Ex PANASONIC 7...

Page 102: ...anner Option 2 Enter the station you wish to delete and touch the OK button Ex SALES DEPT 3 4 To delete an entry from the Address Book Touch the Scanner Settings button and touch 07 Delete address Tou...

Page 103: ...ding the DD Server IP Address Input the DD Server s IP Address into the Address Book To add the DD Server IP Address follow the steps below Use the same procedure as Adding a New PC s IP Address See p...

Page 104: ...10 Do not change the default Port Number without your Network Administrator s approval Up to 65535 default is 21 11 Select SAVE or RETRIEVE then touch the OK button 12 Select whether to display the s...

Page 105: ...special paper Adding Paper k k k k k ATTENTION CDo not use paper with folds or wrinkles Refer to page 67 for details on changing the paper size for the Paper Tray CUnused paper should always be placed...

Page 106: ...n the tray A4 size only portrait 3 Up to 3000 sheets 75 g m2 paper 4 Close the door 3000 Sheet Large Capacity Paper Tray LCT DA MA301 Adding Paper Problem Solving NOTE When using papers with one side...

Page 107: ...copy quality use the recommended Panasonic toner Store toner in a cool dark place Do not unseal toner before use Use it as fast as possible after unsealing Hopper Toner Bottle 4 5 6 Close the Front C...

Page 108: ...ion s will be displayed on the Touch Panel Display Paper Misfeed Locations Finisher Copier ADU Paper Feed Unit LCT i ADF H Finisher See page 109 A System Console See page 117 B Paper Entry Area See pa...

Page 109: ...the Misfeed Indicator resets after removing all misfed paper 3 Finisher Misfed Paper Push Release button Punch Cover 4 5 6 Inner Cover 7 Transport Cover Close the Finisher Upper Cover Return the Fini...

Page 110: ...sfeed Indicator resets after removing all misfed paper 1 2 3 Finisher Push Release button Lower Front Cover 4 5 Push and Turn Misfed Paper Saddle Exit Cover 6 Misfed Paper Infeed Cover 7 Close the Low...

Page 111: ...sure that the misfeed indicator resets after removing all misfed paper 2 Bin Finisher DA FS330 I Upper Cover Misfed Paper Knob A Misfed Paper When paper cannot be removed 4 5 When the misfed paper is...

Page 112: ...ake sure that the misfeed indicator resets after removing all misfed paper 1 Bin Saddle Stitch Finisher DA FS355 Misfed Paper Finisher 5 Return the finisher to original position 4 Upper Cover Upper Co...

Page 113: ...icator resets after removing all misfed paper 5 Close the Finisher Front Cover 1 Bin Saddle Stitch Finisher DA FS355 4 Misfed Paper Finisher Front Cover Lower Knob Stitch Tray 6 7 Finisher 8 Inner Cov...

Page 114: ...per Transport Area Problem Solving 4 Transport Release Lever Paper Transport Knob Push and Turn 5 Ensure to close the Front Cover 1 Paper Entry Area 2 Right Cover Misfed Paper 3 4 Push back the Paper...

Page 115: ...ator resets after removing all misfed paper Problem Solving Front Cover Exit Cover Fuser Knob 4 Magnet Heat Roller Cover 5 Ensure to close the Heat Roller Cover Exit Cover and the Front cover Caution...

Page 116: ...e that the Misfeed Indicator resets after removing all misfed paper Problem Solving 4 1 2 Transport Release Lever Automatic Duplex Unit Knob 5 Centre 5 6 2 1 Knob 5 Right 7 Push back the ADU into the...

Page 117: ...3 or 4 Close the Right Cover Lower Right Cover Lower Misfed Paper Large Capacity Paper Tray DA MA301 1 Hold the latch and slide the large capacity paper tray to the right Misfed Paper Latch 2 Misfed P...

Page 118: ...re that the Misfeed Indicator resets after removing all misfed paper 3 ADF Cover Inner Cover Misfed Paper ADF Tray 4 P9250577 Green LabelledTab Exit Guide 5 Misfed Paper 6 Exit Guide 7 8 Close the ADF...

Page 119: ...A FS355 See page 95 Does the Add Staples indicator and message appear on the display Add paper See page 105 Remove the misfed paper See page 108 Does the paper misfeed indicator and message appear on...

Page 120: ...ont Cover is open U18 Code Check Points Code U4 Finisher is pull out U20 U6 Right Cover is open U21 U7 Right Cover Lower is open U30 Total Copy Count is limit consult your Key Operator Check Points AD...

Page 121: ...nt the battery requires replacement the following message will be displayed Battery Replacement Message Battery Replacement Procedure 3 Reinstall the Battery Holder 4 Ensure to close the Front Cover T...

Page 122: ...200 Variable from 101 400 in 1 increments Reduction Ratios Preset 87 82 71 58 50 Variable from 99 25 in 1 increments Paper Feed Paper tray 1550 sheets 550 sheets Sheet bypass 50 sheets System Console...

Page 123: ...75 g m2 Weight 12 3 kg Applicable Models DP 3510 4510 6010 Others System Console 2 DA DS602 Combination 600 730 290 mm Electrical Requirements Dimensions W D H Paper Tray 2 Paper Size A5 A4 B4 FLS A3...

Page 124: ...copier 2 30 sheets A4 R B4 A3 80 g m2 A4 R A3 Paper Capacity Saddle Stitch Dimensions W D H 670 613 1500 mm Weight 52 5 kg Applicable Models DP 4510 6010 2 Bin Finisher DA FS600 Paper Size A5 A4 A4 R...

Page 125: ...64 80 g m2 Paper Size A4 R B4 A3 Paper Weight 64 80 g m2 Stack 6 10 sheets 10 sets 1 5 sheets 20 sets Electrical Requirements Supplied from copier Dimensions W D H 550 600 464 mm Weight 27 2 kg Appli...

Page 126: ...DA FS355 DA SP41 For DP 6010 4510 DA FS605 2 Bin Saddle Stitch Finisher For DP 3510 DA FS330 2 Bin Finisher For DP 3510 DA FS355 1 Bin Saddle Stitch Finisher Exit Tray DA XT600 DA SM16B Image Memory...

Page 127: ...5 FQ SS50 Staple Cartridge DQ SS35 Staple Cartridge Staple Cartridge FQ SS32 Staple Cartridge Refills 3 for DA FS605 Saddle Stitch Staple Cartridge Refills 3 for DA FS355 Staple Cartridge Refills 3 fo...

Page 128: ...io Indication 14 15 16 Copy Size Indication 14 15 Cover 47 D Density Indicator 7 steps 14 15 Department Counter 78 79 Digital Skyshot Mode 57 Document Scanning 97 E Edge 41 Editing the Address Book 10...

Page 129: ...ue DA SP31 87 Replacing the Battery 121 Replacing the staple cartridge DA FS355 94 95 Replacing the staple cartridge DA FS330 90 91 Replacing the Staple Cartridge DA FS600 FS605 85 86 Replacing the To...

Page 130: ...Matsushita Electric Industrial Co Ltd Osaka 542 8588 Japan S0802 DZSD001600 1 August 2002 Printed in Japan For Service Call...

Reviews: