background image

02/2000

5-1

DocuPrint N2025/N2825

Parts-list

Initial Issue

5 Parts-list

Introduction .....................................................................................................................

5-3

 Covers

PL 1.1 Covers .................................................................................................................

5-4

 Paper Trays

PL 2.1 Paper Tray (A3/Ledger) .......................................................................................

5-5

PL 2.2 Paper Tray (A4/Letter) .........................................................................................

5-6

 Paper Feeder

PL 3.1 Paper Feeder.......................................................................................................

5-7

 MBF Assembly

PL 4.1 MBF Assembly.....................................................................................................

5-8

PL 4.2 Paper Handler......................................................................................................

5-9

 Paper Transport

PL 5.1 Paper Transport...................................................................................................

5-10

 Exit Assembly  Fuser

PL 6.1 Rear Cover Assembly..........................................................................................

5-11

PL 6.2 Fuser....................................................................................................................

5-12

 Frame  Drives

PL 7.1 Frame & Drives ....................................................................................................

5-13

 Xerographics

PL 8.1 Xerographics........................................................................................................

5-14

 Electrical

PL 9.1 Electrical ..............................................................................................................

5-15

PL 9.2 Electrical ..............................................................................................................

5-16

 Offsetting Catch Tray

PL 10.1 Offsetting Catch Tray (1 of 2) ............................................................................

5-17

PL 10.2 Offsetting Catch Tray (2 of 2) ............................................................................

5-18

 Optional Feeder 1

PL 11.1 500 Sheet Feeder (1 of 3)..................................................................................

5-19

PL 11.2 500 Sheet Feeder (2 of 3)..................................................................................

5-20

PL 11.3 500 Sheet Feeder (3 of 3)..................................................................................

5-21

 High Capacity Feeder

PL 12.1 2000 Sheet Feeder (1 of 4)................................................................................

5-22

PL 12.2 2000 Sheet Feeder (2 of 4)................................................................................

5-23

PL 12.3 2000 Sheet Feeder (3 of 4)................................................................................

5-24

PL 12.4 2000 Sheet Feeder (4 of 4)................................................................................

5-25

 Duplex

PL 13.1 Duplex................................................................................................................

5-26

Содержание DocuPrint N2025

Страница 1: ...nter Service Manual 721P52440 February 2000 This Service Manual contains information that applies to the DocuPrint N2025 N2825 Laser Printer CAUTION These components are susceptible to electrostatic d...

Страница 2: ...ration Copyright 2000 Xerox Corporation All rights reserved Copyright protection claimed includes all forms of matters of copyrightable materials and information now allowed by statutory or judicial l...

Страница 3: ...customer operation The laser and output of the laser scanner unit produces a beam that if looked into could cause eye damage Service procedures must be followed exactly as written without change When...

Страница 4: ...ntents 4 1 Parts List 5 1 Section Contents 5 1 General Procedures 6 1 Section Contents 6 1 Wiring Data 7 1 Section Contents 7 1 Introduction The DocuPrint N2025 N2825 Service Manual is the primary doc...

Страница 5: ...tions to help identify the type of defect that exists the test pattern to use and actions required to correct the defects Section 4 Repair Adjustment This section contains the instructions for removal...

Страница 6: ...ng device Operation of the equipment in a residential area may cause unacceptable interference to radio and TV reception requiring the operator to take whatever steps are necessary to correct the inte...

Страница 7: ...er Product Performance Standards set by the United States Department of Health and Human Services as a Class 1 product This means that it is a laser product that does not emit dangerous laser radiatio...

Страница 8: ...66 2 2000 3 1 2 2000 3 2 2 2000 3 3 2 2000 3 4 2 2000 3 5 2 2000 3 6 2 2000 3 7 2 2000 3 8 2 2000 3 9 2 2000 3 10 2 2000 3 11 2 2000 3 12 2 2000 3 13 2 2000 3 14 2 2000 3 15 2 2000 3 16 2 2000 3 17 2...

Страница 9: ...000 6 47 2 2000 6 48 2 2000 6 49 2 2000 6 50 2 2000 6 51 2 2000 6 52 2 2000 6 53 2 2000 6 54 2 2000 6 55 2 2000 6 56 2 2000 6 57 2 2000 6 58 2 2000 6 59 2 2000 6 60 2 2000 6 61 2 2000 6 62 2 2000 6 63...

Страница 10: ...DocuPrint N2025 N2825 Revision Control List 02 2000 x Page Revision Page Revision Page Revision Page Revision Page Revision Page Revision Initial Issue...

Страница 11: ...nt N2025 N2825 Service Call Procedures Initial Issue 1 Service Call Procedures 1 0 Introduction 1 3 1 1 Machine Orientation 1 3 1 2 Call Flow 1 4 1 3 Initial Actions 1 5 1 4 Corrective Actions 1 5 1 5...

Страница 12: ...02 2000 1 2 DocuPrint N2025 N2825 Initial Issue Service Call Procedures...

Страница 13: ...tions a Yes response will lead you to the next step A No response will indicate the next step to perform or will direct you to a Repair Analysis Procedure RAP RAPs will provide the instructions to iso...

Страница 14: ...e manual sections as follows Section 1 Initial Actions Corrective Actions and Final Actions Section 2 Status Indicator Repair Analysis Procedures RAPs Section 3 Image Quality Repair Analysis Procedure...

Страница 15: ...story press and release 1 or 5 until Print Menu is dis played Then press and release 2 or 6 until Display Faults is displayed Next press press 3 to display the last fault that occurred Continue to pre...

Страница 16: ...t is black or blank perform IQ RAP 10 or IQ RAP 2 If the text is garbled Per form RAP 44 The print quality of the Menu Map is acceptable Y N Perform Image Quality Checkout Enter Diagnostics and select...

Страница 17: ...02 2000 1 7 DocuPrint N2025 N2825 1 4 Service Call Procedures Initial Issue Figure 3 Figure 4 Figure 5 Figure 6 Figure 7 Figure 8 Figure 9 Figure 10 Figure 11 Figure 12...

Страница 18: ...e all required adminis trative tasks 4 Clean the covers and ensure all labels are readable 5 Switch the printer power on If any of the customer selections were changed return them to the customer s pr...

Страница 19: ...33 MBF No Paper Sensor 2 34 RAP 34 Tray 1 No Paper Sensor 2 35 RAP 35 Stack Full Sensor 2 36 RAP 36 E5 MBF Extended Insert MBF 2 37 RAP 37 Size Switch 2 38 RAP 38 Registration Clutch 2 39 RAP 39 Turn...

Страница 20: ...02 2000 2 2 DocuPrint N2025 N2825 Initial Issue Status Indicator Repair Analysis Procedures...

Страница 21: ...ction 3 RAPs will normally isolate a problem to a specific component or subassembly excluding the wire harnesses In the Y N Yes No steps of the RAPs a Yes No response will either lead you to the next...

Страница 22: ...02 2000 2 4 DocuPrint N2025 N2825 Introduction Measurements Initial Issue Status Indicator Repair Analysis Procedures...

Страница 23: ...me interval after Laser warm up is completed Power Off and On Go to RAP 17 Fuser Failure Power Off On U4 Fuser Fail 1 Fuser temperature drops below the set temperature after the Fuser warm up is compl...

Страница 24: ...lock is closed 4 Exit Sensor turns from OFF to ON at Erase Cycle Open Top Cover remove EP Cartridge and remove any paper Go to RAP 11 Paper Jam Open Top Cover Remove Print Car tridge Clear Paper Path...

Страница 25: ...eder and remove the sheets Then close the cover Go to RAP 62 Tray 3 misfeed with 2000 Sheet Feeder installed as Tray 3 Tray 3 Jam Open Tray 3 Open Rear TrayDr Clear Paper Path E2 13 E2 1 Misfeed Jam 1...

Страница 26: ...ll paper size switches not actuated Install Tray 1 Go to RAP 4 Insert Tray 2 C3 Tray 2 Error Tray 2 is not detected in printer all paper size switches not actuated Install Tray 2 Go to RAP 4 Insert Tr...

Страница 27: ...m Controller Board ASIC failure Go to RAP 12 0001 TIMER 4 System Controller Board Timer failure Go to RAP 12 0001 PWPM 5 System Controller Board PWPM failure Go to RAP 12 0001 DMA 5 System Controller...

Страница 28: ...stem Controller PWB REP 8 1 3000 Token Ring 3000 Serial 3000 E Net 10 Base 2 16 Replace the appropriate network card PL 9 1 Replace System Controller PWB REP 8 1 5000 Memory None Memory size not large...

Страница 29: ...following Measure the AC voltage between AC Line and Neutral between AC Line and Ground and between AC Neutral and Ground The voltage between Line and Neutral and between Line and Ground is 104 to 127...

Страница 30: ...oltage between the bottom of Fuse F101 and P J167 pin 3 The voltage matches the line voltage Y N Replace the LVPS REP 8 6 Problem Solved Measure the voltage between LVPS P J162 pin 3 and frame ground...

Страница 31: ...Cover Reconnect all the P Js to the LVPS Disconnect the following from the Print Engine Controller PWB P J11 Laser P J21 Print Cartridge Sensor P J14 Toner Sensor P J12 Tray 1 Feed head components Tr...

Страница 32: ...r on the LCD increments each time you press and release one of the actuators Y N Go to RAP 37 Check the size cam on the left side of the paper tray The cams are in good condi tion not broken and rotat...

Страница 33: ...1 PL 2 2 Remove Tray 1 Manually actuate the Tray 1 No Paper and Low Paper sensors The No Paper and Low Paper Actuators move smoothly Y N Replace the Tray 1 No Paper Actuator REP 2 6 or Low Paper Actua...

Страница 34: ...e error code reap pears Y N Problem solved Open the Rear Cover Press and release the Stack Full Actuator The flag of the Stack Full Actuator alternately clears and obscures the detecting points of the...

Страница 35: ...and down movement of the paper tray If the problem continues replace the MBF Assembly REP 2 1 Replace with fresh dry paper Remove Tray 1 and remove all paper Open the printer Top Cover remove the Prin...

Страница 36: ...edure The paper loaded in the paper tray wrinkled or damaged Y N The paper size used is within specifications Y N Replace with paper meeting size specifications Open the Rear Cover Open the Rear Fuser...

Страница 37: ...select Test Print Run 25 prints from Tray 1 When the E4 Exit Jam is displayed there is paper on the Exit Sensor Y N Select Component Test and scroll to Sensor Input test Press the Enter Key 4 Actuate...

Страница 38: ...connected to the rear of the System Control ler PWB Remove the Left Side Cover REP 1 1 Remove all options from the System Control ler PWB Switch the printer power on The printer boots up correctly an...

Страница 39: ...open Dis connect P J21 from the Print Engine Controller PWB Open and close the Top Cover Check for continuity between J21 4 and J21 3 and J21 2 and J21 1 as you lift and lower the Print Cartridge Ther...

Страница 40: ...REP 5 1 Manually rotate the rotor of the Motor clock wise The rotor of the Main Motor rotates smoothly Y N Replace the Main Motor REP 6 2 Replace the Fuser Assembly REP 5 1 Replace the Print Cartridge...

Страница 41: ...eft Side Cover REP 1 1 Remove the Print Engine Controller PWB Cover REP 8 5 Disconnect P J11 from the Print Engine Controller PWB Switch the printer power on Check the voltage between P11 7 and P11 8...

Страница 42: ...under IDT Diagnostics The data is set properly Y N The incorrect data is read only Y N Set the data to the default value Replace the Print Engine Controller PWB REP 8 5 Go to RAP 44 RAP 20 Fan Abnorma...

Страница 43: ...User Menus select Tray Menu then select MBF Size The paper size displayed on the LCD matches the size actually in the MBF Y N Enter the User Menu and select Tray Menu Scroll to MBF size Set MBF size t...

Страница 44: ...ts Config Sheet or Demo Page and inspect the print quality The print quality meets specifications Y N Go to IQ RAP 1 Remove Tray 1 Remove the MBF REP 2 1 Enter Diagnostics and select Component Test Sc...

Страница 45: ...voltage on P J3 between pins 1 and 2 if there are no options installed follow the No path The voltage is 3 3VDC Y N Replace the System Controller PWB REP 8 1 Switch the printer power off Reinstall th...

Страница 46: ...ower off Reconnect P J18 to the System Controller PWB Switch the printer power on Check the voltages between the pins listed in Table 1 and frame ground All the voltages listed in the column with P J1...

Страница 47: ...The printer generates test prints Y N Switch the printer power off Disconnect P J168 from the LVPS Assembly Switch the Main Power on Check the voltage between P161 pin 10 and frame ground The voltage...

Страница 48: ...30 P J21 Print Cartridge Sensor RAP 13 P J14 Toner Sensor RAP 42 P J12 Tray 1 Feed head components Tray 1 Low Paper Sensor RAP 21 P J22 Registration Clutch RAP 38 P J13 Feeder 2 3 PL 11 1 P J17 Fuser...

Страница 49: ...the LVPS REP 8 6 Replace the Print Engine Controller PWB REP 8 5 Replace the LVPS REP 8 6 With the Top Cover Interlock still cheated Enter Diagnostics and select the Component Test Scroll to Main Mot...

Страница 50: ...the Lower Rear Cover REP 1 7 Discon nect P J16 from the Print Engine Controller PWB Measure the resistance between pin 5 of the disconnected plug and P J161 pin 10 on the LVPS There is continuity betw...

Страница 51: ...inuity between P J172 pin 3 and both sides of the Rear Cover Interlock Switch Y N Repair or replace the Fuser Wiring Harness PL 9 2 or replace the Rear Cover Inter lock Switch as necessary PL 9 2 Repl...

Страница 52: ...per from the MBF Enter Diagnostics and select Compo nent Test Scroll to Sensor Input test and press Enter 4 Actuate and deactuate the MBF No Paper Sensor Actuator The number on the LCD increments each...

Страница 53: ...6 and frame ground Both voltages are 3 28VDC Y N Replace the Print Engine Controller PWB REP 8 5 WARNING P12 pin 10 is a 24VDC supply line if accidently shorted to pin 9 you will destroy the Print Eng...

Страница 54: ...the voltage between P J16 pin 4 and frame ground The voltage is 3 3VDC Y N Replace the LVPS REP 8 6 Replace the Print Engine Controller PWB REP 8 5 Switch the printer power off Reconnect P J19 to the...

Страница 55: ...Extend the MBF and inspect the MBF Home Switch The MBF Home Switch is in good con dition and the actuator moves freely Y N Replace the MBF Home Switch REP 3 7 Enter Diagnostics and select Component T...

Страница 56: ...ages on P J13 pin 5 as you actuate the switches see Table 1 All voltages are correct Y N Check for continuity between P J13 pin 5 Print Engine Controller PWB and P J131 pin 5 and between P J131 pin 5...

Страница 57: ...C Y N Replace the LVPS REP 8 6 Replace the Print Engine Controller PWB REP 8 5 Switch the printer power off Reconnect P J22 Enter Diagnostics and select Component Test Scroll to Reg Clutch Measure the...

Страница 58: ...r PWB and frame ground The voltage is 24VDC Y N Measure the voltage between P J16 pin 9 and frame ground The voltage is 24VDC Y N Replace the LVPS REP 8 6 Replace the Print Engine Controller PWB REP 8...

Страница 59: ...urn Roll Clutch and press Enter Scroll to Tray 1 Feed Sol and press Enter A sheet of paper is fed from Tray 1 to the Registration Rolls Y N Replace the Tray 1 Feed Solenoid REP 2 9 Problem solved RAP...

Страница 60: ...cartridge is installed Y N Replace the Right Print Cartridge Guide Assembly REP 7 2 or the Print Cartridge PL 8 1 as necessary Inspect the Seal Guide on the rear end of the Right Print Cartridge Guid...

Страница 61: ...r at least twenty feet away from other devices The Electrical Noise problem is still present Y N Problem solved Check the AC wall outlet and power cord see RAP 1 The AC wall outlet is correctly wired...

Страница 62: ...sembly REP 5 1 Paper Transport Assembly REP 4 1 HVPS Harness Assembly PL 9 2 Replace the HVPS PWB Assembly REP 8 2 RAP 45 0101 DIMM 1 Procedure Switch off the printer power Remove the Left Side Cover...

Страница 63: ...System Controller PWB and go to Final Actions Replace the System Controller PWB REP 8 1 Replace the DIMM PL 9 1 Replace the System Controller PWB REP 8 1 RAP 47 0101 DIMM 3 Procedure Switch off the pr...

Страница 64: ...02 2000 2 46 DocuPrint N2025 N2825 RAP 46 RAP 47 Initial Issue Status Indicator Repair Analysis Procedures...

Страница 65: ...r Diagnostics and select Test Print and run a test print from the problem Tray The LCD displays a C5 error code Y N Go to RAP 5 The paper is curled damaged or damp Y N The paper size is within specifi...

Страница 66: ...ge between P133 pin 1 and frame ground and between P133 pin 3 and frame ground Both readings are 3 2VDC Y N Replace the Feeder PWB REP 11 8 Switch the printer power off Reconnect P J133 Switch the pri...

Страница 67: ...e Feeder Harnesses P J132 to P J131 and P J131 to P J13 Repair or replace as necessary PL 11 3 Replace the Feeder PWB REP 11 8 Switch the printer power off Reconnect P J133 Enter Diagnostics and selec...

Страница 68: ...and P132 11 P13 13 and P132 12 P13 14 and P132 13 P13 15 and P132 14 There is continuity between all pins measured Y N Repair or replace the harness between P J13 and P J131 PL 9 1 or between P J131...

Страница 69: ...ou actuate and deactuate the sen sor Y N Switch the printer power off Remove the Left Side Cover REP 1 1 and the Print Engine Controller PWB Cover REP 8 5 Disconnect P J17 from the Print Engine Contro...

Страница 70: ...ator PL 11 2 Enter Diagnostics and select Component Test Scroll to Sensor Input test and press Enter Press and release the Pre Registration Actuator The number on the LCD increments each time you pres...

Страница 71: ...and frame ground and between P133 pin 6 and frame ground Both readings are 3 2VDC Y N Replace the Feeder PWB REP 11 8 Switch the printer power off Reconnect P J133 Switch the printer power on Measure...

Страница 72: ...02 2000 2 54 DocuPrint N2025 N2825 RAP 56 Initial Issue Status Indicator Repair Analysis Procedures...

Страница 73: ...nt Engine Control ler PWB Switch the printer power on Check the voltage between P J19 pin 5 and frame ground The voltage is 3 3VDC Y N Replace the Print Engine Controller PWB REP 8 5 Switch the printe...

Страница 74: ...and select Component Test Scroll to Sensor Input test and press Enter Actuate and deactuate the Stack Full Sensor Actuator The number on the LCD increments each time you press and release the actuato...

Страница 75: ...5 Disconnect P J19 from the Print Engine Controller PWB Switch the main power on Measure the voltage between P19 pin 4 on the Print Engine Controller PWB and frame ground The voltage is 3 3VDC Y N Rep...

Страница 76: ...02 2000 2 58 DocuPrint N2025 N2825 RAP 59 RAP 60 Initial Issue Status Indicator Repair Analysis Procedures...

Страница 77: ...paper Run a test print The error still occurs Y N Problem solved Pull out the 2000 Sheet Feeder Tray Assembly Check the paper condition and size The paper is dry and the size is within specifications...

Страница 78: ...per Link The voltage is 3 2VDC when the link is released and 0 0VDC when the link is pressed Y N Replace the Paper Height Sensor REP 12 17 Replace the Print Engine Controller PWB REP 8 5 Replace the P...

Страница 79: ...ne Controller PWB Cover REP 8 5 Disconnect P J13 from the Print Engine Controller PWB and P J604 from the 2000 Sheet Feeder PWB Check continuity between the following pins P601 1 to P13 1 P601 2 to P1...

Страница 80: ...een P19 pin 13 and frame ground when the Stack Full Sensor is deactuated and 0 0VDC when actuated Y N Switch the printer power off Open the Rear Cover Disconnect P J527 3 pin con nector on HVPS Cover...

Страница 81: ...P 10 1 Rotate the 14 33 Idler Gear counter clockwise manually Observe the correct contact between the 14 33 Idler Gear and the 29 Gear and Offset Gear All of the gears rotate smoothly Y N Replace part...

Страница 82: ...ex Interface PWB REP 8 3 Replace the OCT PWB REP 10 14 Switch the printer power off Reconnect P J524 to the OCT PWB Switch the printer power on Measure the voltage between P524 pin 1 and frame ground...

Страница 83: ...Replace the OCT PWB REP 10 14 RAP 72 Offset Operation Not Performed Procedure Manually move the Offset Assembly from one side to the other The Offset Assembly moves smoothly Y N Replace the Offset Ass...

Страница 84: ...t Test Scroll to Sensor Input test and press Enter On the Duplex Interface PWB measure the voltage between P J504 pin 4 and frame ground There is 3 3VDC between P J504 pin 4 and frame ground when the...

Страница 85: ...ars 3 9 Spots 3 9 Other Print Defects 3 10 IQ RAP 1 Light Undertoned Prints 3 10 IQ RAP 2 Blank Prints 3 11 IQ RAP 3 Spots 3 12 IQ RAP 4 Horizontal Scan Deletions 3 13 IQ RAP 5 Vertical Process Deleti...

Страница 86: ...02 2000 3 2 DocuPrint N2025 N2825 Initial Issue Image Quality Repair Analysis Procedures...

Страница 87: ...ality Checkout Table 1 Image Quality Defect Definitions Defect Definitions Go To LIGHT PRINTS The overall image density is too light IQ RAP 1 BLANK PRINTS Prints with no visible image IQ RAP 2 SPOTS T...

Страница 88: ...prints Make five 5 prints of the System Controller Test Print Figure 1 GP 6 1 Discard the first two prints and retain the remaining prints for image quality analysis The Image quality Checkout is use...

Страница 89: ...ensity is uniform Y N Go to IQ RAP 12 Uneven Density The prints are too faint Y N The prints are black Y N Go to IQ RAP 11 Background Go to IQ RAP 10 Black Prints Go to IQ RAP 1 Light Prints The Solid...

Страница 90: ...l Deletions Figure 1 Line Band or Spot Deletions Fusing Procedure NOTE The operating environment of the printer is from 41o F 5o Celsius at 15 relative humidity to 95o F 35o Celsius at 85 relative hum...

Страница 91: ...orners should be uniform in appear ance The three checks arrows 1 2 3 are within specification Y N Go to IQ RAP 18 Resolution The printed test patterns meet the Resolution specification Go to the Regi...

Страница 92: ...re 1 Y N Go to IQ RAP 15 Registration The printed test patterns meet the lead edge to trail edge registration specification Go to Skew Figure 1 Registration Lead Edge to Trail Edge Skew Procedure Ente...

Страница 93: ...igure 1 Skips Smears Spots Procedure From the menu mode run a Config Sheet Inspect the print for spots Figure 1 Within a 208 x 95 mm square There should be no spots larger than or equal to 0 5 mm visi...

Страница 94: ...rint Cartridge ground contact points are clean Ensure there are no obstructions in the Laser path Procedure Load fresh dry paper Run a test print The image density meets specifications Y N Install a n...

Страница 95: ...nts Initial Actions Inspect the printer paper path for items such as staples paper clips and paper scraps Check installation of the Print Cartridge Check that the Print Cartridge ground contact points...

Страница 96: ...e REP 7 2 Problem solved IQ RAP 3 Spots There are spots of toner randomly scattered on the page Figure 1 Figure 1 Spots Initial Actions Check that the paper supply is clean dry and fresh recycled pape...

Страница 97: ...ly light Horizontal dele tions extend across the long dimension of the page Figure 1 Figure 1 Horizontal Deletions Initial Actions Check that the paper supply is dry and fresh Inspect the printer pape...

Страница 98: ...PS PWB REP 8 2 Right Print Cartridge Guide REP 7 2 BTR Assembly REP 7 7 Paper Transport Assembly REP 4 1 Laser Assembly REP 7 1 Print Engine Controller PWB REP 8 5 Fuser Assembly REP 5 1 MBF Assembly...

Страница 99: ...arked with irregular white areas Figure 1 Spot Deletions Initial Actions Check that the paper supply is dry and fresh Inspect the printer paper path for items such as staples paper clips and paper scr...

Страница 100: ...e ground contact points are clean Check that the paper is within specifications Inspect the paper path between feed and exit for contamination or obstructions Procedure Enter Diagnostics and select Te...

Страница 101: ...ks Initial Actions Check that the paper supply is dry and fresh Inspect the printer paper path for items such as staples paper clips and paper scraps Check installation of the Print Cartridge Check th...

Страница 102: ...xit Assembly Remove the Fuser Assembly Turn the Fuser Assembly upside down Rotate the fuser idler gear manually and inspect the Heat Roll Turn the Fuser Assembly right side up Open the fuser jam acces...

Страница 103: ...ng in order until the defective component is found BTR Assembly REP 7 7 Fuser Assembly REP 5 1 HVPS PWB REP 8 2 Right Print Cartridge Guide REP 7 2 IQ RAP 10 Black Prints A totally black output print...

Страница 104: ...Carefully remove the Print Cartridge and inspect the toner image on the drum just before the transfer area BTR The undeveloped areas of the drum are clean and without background Y N Go to RAP 43 Remo...

Страница 105: ...ns Install a new Print Cartridge PL 8 1 Run a Test Print The Test Print output image con tains uneven print Y N Problem solved Go to 1 5 Final Actions Check the Bias Transfer Roll BTR for contaminatio...

Страница 106: ...ary Check the feed chute between Tray 2 and Tray 1 Check for obstruc tions or contamination Clean as necessary Check the Tray 1 Lower Turn Rolls Check for obstructions or contam ination Clean or repla...

Страница 107: ...paper with fresh dry standard paper Run a Test Print The paper is still dam aged Y N Problem solved Open the Exit Assembly Remove the Fuser Assembly Turn the Fuser Assembly upside down Rotate the fus...

Страница 108: ...cification Check that the paper supply is dry and fresh and loaded correctly Check that the Paper Tray guides are set correctly Check that rollers and other components in the paper path are clean and...

Страница 109: ...e Print Cartridge PL 8 1 IQ RAP 17 Unfused Image The printed image is not fully fused to the paper The image rubs off easily Figure 1 Figure 1 Unfused Image Initial Actions Check to ensure that the pa...

Страница 110: ...5 1 Replace the following in order until the defective component is found Fuser Assembly REP 5 1 Print Engine Controller PWB REP 8 5 Low Voltage Power Supply REP 8 6 IQ RAP 18 Resolution The two pixe...

Страница 111: ...REP 5 2 Stack Full Sensor 4 29 REP 5 3 Stack Full Actuator 4 30 REP 5 4 Exit Gate Chute 4 31 REP 5 5 Exit Roll Assembly 4 32 Drive Assembly REP 6 1 Main Gear Drive Assembly 4 35 REP 6 2 Main Motor Ass...

Страница 112: ...EP 12 1 Removing Printer from 2000 Sheet Feeder 4 77 REP 12 2 Left Side Cover 4 78 REP 12 3 Upper Rear Cover 4 78 REP 12 4 Lower Rear Cover 4 79 REP 12 5 Right Side Cover 4 79 REP 12 6 Front Cover 4 8...

Страница 113: ...e tasks Step by step removal procedures for a specific component or assembly are provided Numbers in the illustrations refer to steps in the procedure For example if step 3 in a procedure instructed y...

Страница 114: ...02 2000 4 4 DocuPrint N2025 N2825 Introduction Initial Issue Repair Adjustment...

Страница 115: ...Parts List on PL 1 1 Removal WARNING Switch off the power and disconnect the Power Cord 1 Open the Rear Cover 2 Remove the OCT if installed REP 10 1 3 Open the Top Cover and remove the Print Cartridg...

Страница 116: ...Cartridge cavity to catch any dropped hardware 4 Remove the Left Side Cover REP 1 1 5 Remove the 8 screws that secure the Top Cover Assembly to the printer Figure 1 6 Remove the two screws that secure...

Страница 117: ...F Assembly Door lift slightly and pull the assembly out approximately 2 inches 51 mm 7 Remove the 2 screws that secure the Front Cover to the printer Figure 1 8 Pull the Front Cover out then up to rem...

Страница 118: ...printer Remove the Stop per Figure 1 5 Remove the six screws that secure the HVPS Cover to the printer Figure 1 6 Lower the cover and disconnect P J502 and P J505 from the Duplex Interface PWB Fig ure...

Страница 119: ...e cover 5 Release the locking tabs and remove the harness from the MBF Cover Figure 1 Figure 1 MBF Gear Cover Replacement 1 Reinstall the components in the reverse order REP 1 9 Rear Cover Parts List...

Страница 120: ...02 2000 4 10 DocuPrint N2025 N2825 REP 1 8 REP 1 9 Initial Issue Repair Adjustment...

Страница 121: ...front of the cover and rotate the cover clockwise to remove Figure 1 5 Release the harness from the underside of the cover Figure 1 6 Disconnect the in line connector P J121 Figure 1 7 Push the MBF in...

Страница 122: ...he back side of the feed rolls indicate direction of rotation REP 2 3 Tray 1 Turn Roll Clutch Assembly Parts List on PL 4 1 Removal WARNING Switch off the power and disconnect the Power Cord 1 Remove...

Страница 123: ...Parts List on PL 3 1 Removal WARNING Switch off the power and disconnect the Power Cord 1 Remove the MBF Assembly REP 2 1 2 Remove the MBF Gear Cover REP 1 8 3 Remove the Pick up Spring from the MBF...

Страница 124: ...ord 1 Remove the MBF Assembly REP 2 1 2 Remove the MBF Gear Cover REP 1 8 3 Disconnect P J126 from the sensor assembly Figure 1 4 Remove the screw that secures the Tray 1 No Paper Sensor Assembly Brac...

Страница 125: ...right and remove the shaft from the MBF Figure 1 6 Remove the screw that secures the support bracket to the MBF Figure 1 Remove the Bracket 7 Insert a screwdriver between the left side of the MBF and...

Страница 126: ...MBF Feed Solenoid to the MBF Assembly Figure 1 Figure 1 MBF Feed Solenoid Replacement 1 Reinstall the components in the reverse order REP 2 9 Tray 1 Feed Solenoid Parts List on PL 4 2 Removal WARNING...

Страница 127: ...ray 1 Feed Roll Replacement 1 Reinstall the components in the reverse order Note the arrows on the side of the enve lope feed rolls The arrows indicate the direction of rotation NOTE Note the arrows o...

Страница 128: ...02 2000 4 18 DocuPrint N2025 N2825 REP 2 10 REP 2 11 Initial Issue Repair Adjustment...

Страница 129: ...ve Figure 1 Retard Chute Assembly Replacement 1 Reinstall the components in the reverse order REP 3 2 Rear Chute Assembly Parts List on PL 3 1 Removal WARNING Switch off the power and disconnect the P...

Страница 130: ...e left bearing Figure 1 9 Move the Lower Turn Roll Assembly to the left until the right end is free of the assembly Figure 1 10 Lift and remove the Lower Turn Roll Assembly Figure 1 Lower Turn Roll As...

Страница 131: ...rd Chute Assembly REP 3 1 9 Remove Front Cover REP 1 4 10 Carefully push down on the locking tab that secures the rod to the paper level actuator Figure 1 11 Remove the paper level assembly from the s...

Страница 132: ...3 1 6 From the left side of the printer disconnect P J201 from the Tray 1 Size Sensor Figure 1 7 Remove the six screws that secure the Tray 1 left Guide Assembly to the printer Figure 1 8 Use a small...

Страница 133: ...r the cartridge to protect it from light 2 Remove Tray 1 3 Remove the Left Side Cover REP 1 1 4 Remove the MBF Assembly REP 2 1 5 Remove the Retard Chute Assembly REP 3 1 6 Remove Tray 1 Left Guide As...

Страница 134: ...02 2000 4 24 DocuPrint N2025 N2825 REP 3 7 Initial Issue Repair Adjustment...

Страница 135: ...Disconnect plug P185 R from the top of transformer T503 on the HVPS PWB Figure 1 10 Remove the screw that secures the Detack Saw Wire to the assembly Figure 1 11 Remove the wires from cable clamps 12...

Страница 136: ...ly REP 2 1 6 Remove the Left Side Cover REP 1 1 7 Remove the Top Cover Assembly REP 1 3 8 Remove the HVPS Cover REP 1 6 9 Remove the Paper Transport Assembly REP 4 1 10 Note the position of the actuat...

Страница 137: ...tal Registration Roll Parts List on PL 5 1 Removal WARNING Switch off the power and disconnect the Power Cord 1 Open the Rear Cover 2 Remove the Fuser Assembly REP 5 1 3 Open the Top Cover and remove...

Страница 138: ...from the Registration Roll Figure 1 14 Remove the left and right bearings from the Registration Roll Figure 1 15 Lift the right end of the Registration Roll and remove Figure 1 Figure 1 Rubber Registr...

Страница 139: ...erse order NOTE Install the locating pins first REP 5 2 Stack Full Sensor Parts List on PL 6 1 Removal WARNING Switch off the power and disconnect the Power Cord 1 Open and remove the Rear Cover REP 1...

Страница 140: ...ews go in the right end of the Lower Exit Chute Assembly Figure 1 REP 5 3 Stack Full Actuator Parts List on PL 6 1 Removal WARNING Switch off the power and disconnect the Power Cord 1 Open the Rear Co...

Страница 141: ...t Chute Assembly Figure 1 Remove the assembly 3 Note the position of the gate spring Unhook the gate spring Figure 2 4 Carefully bend the Exit Gate in the middle until the left end is free of the Rear...

Страница 142: ...d remove the Gear Z15 from Upper Exit Roll Assembly Figure 3 7 Remove the left and right bearings from the Exit Roll Figure 3 8 Remove the two paper tabs from the shaft Figure 3 9 Move the Exit Roll S...

Страница 143: ...02 2000 4 33 DocuPrint N2025 N2825 REP 5 5 Repair Adjustment Initial Issue Figure 4 Lower Exit Roll Assembly Replacement 1 Reinstall the components in the reverse order...

Страница 144: ...02 2000 4 34 DocuPrint N2025 N2825 REP 5 5 Initial Issue Repair Adjustment...

Страница 145: ...y REP 2 1 7 Remove the Left Side Cover REP 1 1 8 Remove the Top Cover Assembly REP 1 3 9 Loosen the two thumb screws and remove the System Controller PWB Shield Cover Fig ure 1 10 Remove the System Co...

Страница 146: ...val WARNING Switch off the power and disconnect the Power Cord 1 Remove the Gear Assembly REP 6 1 2 Remove the three screws that secure the Motor Assembly to the Gear Assembly Figure 1 3 Remove the Mo...

Страница 147: ...e Left Side Cover REP 1 1 4 Remove the Top Cover Assembly REP 1 3 5 Remove the screw that secures the Right Side Cover to the Laser Cover Figure 1 6 Remove the Front Cover REP 1 4 7 Remove the six scr...

Страница 148: ...sembly REP 7 7 9 Disconnect P J186 R and P J187 W from the HVPS PWB Figure 1 10 Disconnect P J177 and P J178 from the Fuser Interlock Switch Figure 1 11 Disconnect P J162 from the LVPS PWB Figure 1 12...

Страница 149: ...if installed 3 Open the Top Cover and remove the Print Cartridge Cover the cartridge to protect it from light 4 Remove the Left Side Cover REP 1 1 5 Remove the Top Cover Assembly REP 1 3 6 Remove the...

Страница 150: ...er and disconnect the Power Cord 1 Open the Rear Cover 2 Open the Top Cover 3 Remove the Left Side Cover REP 1 1 4 Remove the Top Cover Assembly REP 1 3 5 Remove the Right Side Cover REP 1 2 6 Remove...

Страница 151: ...ssembly and Pin Link from the printer Figure 1 Figure 1 Left Print Cartridge Guide Assembly Replacement 1 Reinstall the components in the reverse order REP 7 7 BTR Assembly Parts List on PL 5 1 Remova...

Страница 152: ...02 2000 4 42 DocuPrint N2025 N2825 REP 7 6 REP 7 7 Initial Issue Repair Adjustment...

Страница 153: ...the System Controller PWB to the printer Figure 2 6 Slide the System Controller PWB toward the rear of the printer to disconnect P J14 from the Print Engine Controller PWB Figure 2 7 Remove the System...

Страница 154: ...ptible to electrostatic discharge Observe all ESD procedures to avoid damage WARNING Turn the power off and disconnect the Power Cord 1 Remove the Rear Cover REP 1 9 2 Remove the HVPS Cover REP 1 6 3...

Страница 155: ...Fan Parts List on PL 9 1 Removal CAUTION These components are susceptible to electrostatic discharge Observe all ESD procedures to avoid damage WARNING Switch off the power and disconnect the Power C...

Страница 156: ...ntroller PWB Shield Cover and remove the cover Figure 1 3 Remove the four screws that secure the Print Engine Controller PWB Cover Remove the cover Figure 2 4 Disconnect P J11 P J12 P J13 P J14 P J16...

Страница 157: ...VPS Assembly to the printer Figure 1 4 Remove the LVPS Assembly Figure 1 Low Voltage Power Supply LVPS Replacement 1 Reinstall the components in the reverse order REP 8 7 LVPS FAN Parts List on PL 9 2...

Страница 158: ...e 1 7 Remove the two screws that secure the AC Input PWB to the LVPS Assembly Figure 1 8 Flex the Right Cover out as you remove the AC Input Assembly Figure 1 AC Input Assembly Replacement 1 Reinstall...

Страница 159: ...2000 4 49 DocuPrint N2025 N2825 REP 8 9 Repair Adjustment Initial Issue Figure 2 Print Engine Controller PWB Cover Figure 3 5 VDC Power Supply Replacement 1 Reinstall the components in the reverse ord...

Страница 160: ...02 2000 4 50 DocuPrint N2025 N2825 REP 8 9 Initial Issue Repair Adjustment...

Страница 161: ...Motor Assembly Parts List on PL 13 1 Removal WARNING Switch off the power and disconnect the Power Cord 1 Remove the Duplex Assembly REP 9 1 2 Remove the two screws that secure the Motor Assembly to...

Страница 162: ...ly Parts List on PL 13 1 Removal WARNING Switch off the power and disconnect the Power Cord 1 Remove the Duplex Assembly REP 9 1 2 Remove the Exit Motor Assembly REP 9 2 NOTE The type and size of scre...

Страница 163: ...ssembly Figure 1 4 Remove the Belt pulley and bearing from the right end of the Roll Assembly Figure 1 5 Remove the Lower Roll Assembly Figure 1 Figure 1 Lower Roll Assembly Replacement 1 Reinstall th...

Страница 164: ...tab and lift the Duplex PWB Figure 1 4 Remove the PWB Figure 1 Figure 1 Duplex PWB Replacement 1 Reinstall the components in the reverse order REP 9 8 Drive Motor Assembly Parts List on PL 13 1 Remov...

Страница 165: ...OCT straight up and remove Figure 1 4 Remove OCT Solenoid Assembly REP 10 5 if removal is permanent Figure 1 Offset Catch Tray Replacement 1 Reinstall the components in the reverse order REP 10 2 Top...

Страница 166: ...ight bracket to disengage the cover from the frame Figure 1 4 Remove the cover Figure 1 Figure 1 OCT Rear Cover Replacement 1 Reinstall the components in the reverse order REP 10 4 Front Cover Parts L...

Страница 167: ...eplacement 1 Reinstall the components in the reverse order REP 10 6 Eliminator Assembly Parts List on PL 10 2 Removal WARNING Switch off the power and disconnect the Power Cord 1 Open the OCT Rear Cov...

Страница 168: ...or Figure 1 Figure 1 Stack Full Sensor Replacement 1 Reinstall the components in the reverse order REP 10 8 Stack Full Sensor Actuator Parts List on PL 10 2 Removal WARNING Switch off the power and di...

Страница 169: ...rom the Offset Motor Assembly Figure 1 Figure 1 Offset Motor Assembly Replacement 1 Reinstall the components in the reverse order REP 10 10 Drive Motor Assembly Parts List on PL 10 2 Removal WARNING S...

Страница 170: ...the three upper gears 8 Remove the E ring that secures the Lower Gear 29 Figure 1 Remove the three lower gears 9 Remove the OCT from the printer REP 10 1 10 Remove the E rings and bearings from both...

Страница 171: ...the Offset Assembly REP 10 11 7 Remove the E rings and bearings from both ends of the Offset Roller Figure 1 8 Remove the roller Figure 1 Figure 1 Offset Roller Replacement 1 Reinstall the components...

Страница 172: ...15 P J517 P J520 and P J524 from the OCT PWB Figure 1 5 Remove the two screws that secure the OCT PWB Figure 1 Remove the PWB Figure 1 OCT PWB Replacement 1 Reinstall the components in the reverse ord...

Страница 173: ...or safety reasons have someone assist you in removing the printer and setting it in a safe place 4 Remove the printer Figure 1 Printer Removal Replacement 1 Reinstall the components in the reverse ord...

Страница 174: ...screws that secure the Left Cover Figure 1 Remove the cover Figure 1 Left Cover Replacement 1 Reinstall the components in the reverse order REP 11 4 Right Cover Parts List on PL 11 1 Removal WARNING...

Страница 175: ...e 1 Remove the cover Figure 1 Rear Cover Replacement 1 Reinstall the components in the reverse order REP 11 6 Drive Assembly Parts List on PL 11 2 Removal WARNING Switch off the power and disconnect t...

Страница 176: ...er Drive Motor Replacement 1 Reinstall the components in the reverse order REP 11 8 Feeder PWB Parts List on PL 11 2 Removal CAUTION These components are susceptible to electrostatic discharge Observe...

Страница 177: ...ver REP 11 2 4 Remove the Left Cover REP 11 3 5 Disconnect P J13A P J13P and P J135 from the Feed Head Assembly Figure 1 6 Remove the screw that secures the Feed Head to the feeder frame Figure 1 7 Pu...

Страница 178: ...replacing the envelope feed rolls rotate the feed roll shaft to access the locking tabs press the locking tabs and remove the rolls Figure 1 Figure 1 Feed Rolls Replacement 1 Reinstall the components...

Страница 179: ...e E rings and bearings from the left end of the turn shaft Figure 1 9 Remove the Turn Roll Assembly Figure 1 Figure 1 Turn Roll Assembly Replacement 1 Reinstall the components in the reverse order REP...

Страница 180: ...3 Remove the Front Cover REP 11 2 4 Remove the Left Cover REP 11 3 5 Remove the 500 Sheet Feed Head Assembly REP 11 9 6 Remove the Retard Chute REP 11 13 7 Disconnect P J133 and P J138 and harness cli...

Страница 181: ...mbly REP 11 9 6 Remove the Retard Chute REP 11 13 7 Carefully push down on the locking tab that secures the rod to the paper level actuator Figure 1 8 Remove the paper level assembly from the stud on...

Страница 182: ...Figure 1 Figure 1 Retard Holder Assembly Replacement 1 Reinstall the components in the reverse order REP 11 17 Retard Turn Roll Assembly Parts List on PL 11 2 Removal WARNING Switch off the power and...

Страница 183: ...elease the two locking tabs and remove the sensor Figure 1 Figure 1 Paper Size Sensor Replacement 1 Reinstall the components in the reverse order REP 11 19 Paper Tray Sensor Parts List on PL 11 3 Remo...

Страница 184: ...t Cover REP 11 3 5 Remove the 500 Sheet Feed Head Assembly REP 11 9 6 Remove the screw that secures the sensor cover Figure 1 Remove the cover 7 Remove the No Paper Actuator REP 11 21 8 Release the Pa...

Страница 185: ...etaining clips Figure 1 No Paper Actuator Replacement 1 Reinstall the components in the reverse order REP 11 22 Preregistration Sensor Parts List on PL 11 2 Removal WARNING Switch off the power and di...

Страница 186: ...02 2000 4 76 DocuPrint N2025 N2825 REP 11 21 REP 11 22 Initial Issue Repair Adjustment...

Страница 187: ...nstalled REP 10 1 3 Remove Tray 1 from the printer 4 Remove the two screws that secure the printer Figure 1 NOTE For safety reasons have someone assist you in removing the printer and setting it in a...

Страница 188: ...of the cover out and up to remove Figure 1 Figure 1 Left Side Cover Replacement 1 Reinstall the components in the reverse order REP 12 3 Upper Rear Cover Parts List on PL 12 1 Removal WARNING Switch...

Страница 189: ...e screws that secure the Lower Rear Cover Figure 1 3 Remove the cover Figure 1 Figure 1 Lower Rear Cover Replacement 1 Reinstall the components in the reverse order REP 12 5 Right Side Cover Parts Lis...

Страница 190: ...e cover out and up to remove Figure 1 Figure 1 Front Cover Replacement 1 Reinstall the components in the reverse order REP 12 7 Tray Assembly Parts List on PL 12 4 Removal WARNING Switch off the power...

Страница 191: ...that secure the Left Foot Figure 1 4 Remove the foot Figure 1 Figure 1 Left Foot Replacement 1 Reinstall the components in the reverse order REP 12 9 Right Foot Parts List on PL 12 1 Removal WARNING S...

Страница 192: ...ure 1 3 Remove the four screws that secure the PWB Figure 1 4 Remove the PWB Figure 1 Figure 1 2000 Sheet Feeder PWB Replacement 1 Reinstall the components in the reverse order REP 12 11 Tray Lift Mot...

Страница 193: ...ensor Replacement 1 Reinstall the components in the reverse order REP 12 13 Casters Parts List on PL 12 2 Removal WARNING Switch off the power and disconnect the Power Cord 1 Remove the Printer 500 Sh...

Страница 194: ...nnector to the frame Figure 1 7 Guide the harness through the holes in the frame as you remove it Figure 1 Figure 1 Harness Assembly Replacement 1 Reinstall the components in the reverse order REP 12...

Страница 195: ...n the roll you wish to change Fig ure 1 5 Slide the roll off the end of the shaft Figure 1 Figure 1 Feed Nudger and Retard Roll Replacement 1 Reinstall the components in the reverse order REP 12 17 Pa...

Страница 196: ...d Motor Assembly 5 Disconnect P J609 from the Feed Motor Assembly Figure 1 Figure 1 Paper Feed Motor Assembly Replacement 1 Reinstall the components in the reverse order REP 12 19 Link Stopper Parts L...

Страница 197: ...that secure the sensor Figure 1 Remove the sensor Figure 1 No Paper Sensor Replacement 1 Reinstall the components in the reverse order REP 12 21 No Paper Sensor Actuator Parts List on PL 12 3 Removal...

Страница 198: ...connect the Power Cord 1 Open the 2000 Sheet Feeder Tray Assembly until it stops 2 Remove all paper from the tray 3 Press the Side Guide Latch and lift the guide to remove Figure 1 Replacement 1 Insta...

Страница 199: ...ING Switch off the power and disconnect the Power Cord 1 Open the 2000 Sheet Feeder Tray Assembly until it stops 2 Remove the two screws that secure the Wire Cover to the Tray Assembly Figure 1 3 Pull...

Страница 200: ...aft Cover Assembly Replacement 1 Reinstall the components in the reverse order REP 12 25 Drive Shaft Assembly Parts List on PL 12 4 Removal WARNING Switch off the power and disconnect the Power Cord 1...

Страница 201: ...ARNING Switch off the power and disconnect the Power Cord 1 Remove the 2000 Sheet Feeder Tray Assembly REP 12 7 2 Remove the Shaft Cover Assembly REP 12 24 3 Remove the Brake Assembly REP 12 26 4 Remo...

Страница 202: ...at the top of the pulleys Figure 1 2 Reinstall the components in the reverse order 3 The longer wire goes to the front of the tray REP 12 29 Retard Assembly Parts List on PL 12 3 Removal WARNING Swit...

Страница 203: ...02 2000 4 93 DocuPrint N2025 N2825 REP 12 29 Repair Adjustment Initial Issue Figure 2 Retard Assembly Replacement 1 Reinstall the components in the reverse order...

Страница 204: ...02 2000 4 94 DocuPrint N2025 N2825 REP 12 29 Initial Issue Repair Adjustment...

Страница 205: ...the adjustment below 7 Repeat steps 1 through 6 for each paper tray Adjustment 1 Enter Diagnostics and select NVM Config 2 Enter the NVM Password 0734 3 Scroll to process Process Tray X or scan Scan T...

Страница 206: ...02 2000 4 96 DocuPrint N2025 N2825 ADJ 1 1 Initial Issue Repair Adjustment...

Страница 207: ...PL 6 2 Fuser 5 12 Frame Drives PL 7 1 Frame Drives 5 13 Xerographics PL 8 1 Xerographics 5 14 Electrical PL 9 1 Electrical 5 15 PL 9 2 Electrical 5 16 Offsetting Catch Tray PL 10 1 Offsetting Catch Tr...

Страница 208: ...02 2000 5 2 DocuPrint N2025 N2825 Initial Issue Parts list...

Страница 209: ...eneral Procedures Information Section lists the name and purpose of the Tag In some cases you will go to the parts lists and find a part number listed as with Tag Go to the Change Tag Index for a desc...

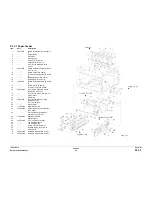
Страница 210: ...0 Latch right 11 Latch left 12 Tray Guide right 13 Tray Guide left 14 Tray Extension 15 50E88420 Tray Stopper 16 101K31281 Control Panel Assembly 17 48E64122 Right Cover 18 Front Cover 19 48E64102 Low...

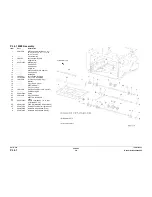
Страница 211: ...de 11 Plate End Guide Spring 12 End Plate Guide 13 Tray 1 Long Housing 14 Rack 15 Pinion 16 Bottom Cover Long 17 Sector Gear Long 18 Idler Gear 19 End Guide Lock 20 Tray 1 Cover 21 Size Cam Long 22 Pi...

Страница 212: ...ight 8 Spring 9 Ground Spring 10 End Guide 11 Spring Plate End Guide 12 End Plate Guide 13 Tray 1 Short Housing 14 Rack 15 Pinion 16 Bottom Cover Short 17 Sector Gear Short 18 Idler Gear 19 End Guide...

Страница 213: ...O item 8 14 Retard Arm P O item 8 15 Turn Gear left P O item 8 16 600K72189 Tray 1 Guide Assembly right includes 5 6 17 19 17 Tray 1 Guide right P O item 16 18 GG Actuator 19 GG Spring 20 32K93788 Tr...

Страница 214: ...aring 8 12 3K85941 Latch Assembly right 13 121K20060 Tray 1 Turn Roll Clutch 14 59K13064 Turn Roll Assembly Tray 1 15 Bracket 16 Tray 1 Pick Up Gear 17 MBF Idle Gear 1 18 Tray 1 Core Roll 19 59K11930...

Страница 215: ...or Assembly includes13 15 13 Tray 1 No Paper Actuator 14 19K94931 No Paper Sensor 15 Tray 1 Sensor Holder 16 50E89012 MBF Door 17 600K72210 MBF Lo No Paper Sensor includes 9 18 20 18 No Low Sensor Spr...

Страница 216: ...Sensor Spring 7 Registration Spring 8 Registration Gear Rubber 9 Right Bearing Rubber 10 Registration Gear Metal 11 Metal Bearing 12 Registration Roll Rubber 13 Registration Roll Metal 14 Left Bearin...

Страница 217: ...s 14 Duplex Bearing 15 Full Stack Sensor Holder P O item 31 16 Full Stack Sensor P O item 31 17 Full Stack Actuator P O item 31 18 162K43700 Full Stack Sensor Harness 19 Exit Gate Spring 20 Exit Gate...

Страница 218: ...Part Description 1 802K04575 Rear Cover Assembly 2 Exit Strap Kit 2 pieces 3 Exit Spring Ground 4 Exit Plate Ground 5 109R00481 Fuser Assembly 110V customer purchase 109R00482 Fuser Assembly 220V cus...

Страница 219: ...Clamp 8 Clamp 9 Clamp 10 Drive Gear Assembly includes 4 11 12 11 7K84845 Motor Assembly includes19 20 P O item 10 12 Main Drive Motor Gear Assembly P O item 10 13 OCT Bush Harness 14 HV Bush 15 OCT Br...

Страница 220: ...bly P O item 5 9 Guide Seal P O item 5 10 Developer Plate P O item 5 11 Xerographic Plate P O item 5 12 Print Cartridge Guide Right P O item 5 13 29E29870 Hinge Pivot Pin P O item 21 14 12K93720 Acces...

Страница 221: ...640 Feeder Harness Assembly Tray 2 3 J13 P131 17 162K42820 System Controller PWB to User Interface Harness Assembly J18 J421 18 162K42880 Harness Assembly Laser NS J11 J112 J114 19 Harness Assembly 20...

Страница 222: ...J3 4 162K42800 System Controller Harness Assembly 5V J169 J168 J13 5 127E81781 LVPS Exhaust Fan 6 Inlet Assembly includes 11 12 13 7 177K99110 Power Cord US 8 Fuse 9 110E98300 Rear Cover Fuser Interl...

Страница 223: ...Top Cover 3 3E47341 Paper Weight 4 48K76362 Rear Cover Assembly includes 5 8 5 Rear Cover 6 Holder Magnet 7 Turn Pinch Roll 8 OCT Pinch Spring 9 1E39851 Strap 10 OCT Sub Assembly same as PL 14 2 item...

Страница 224: ...bly includes 11 14 11 Offset Chute Assembly 12 Exit Bearing 13 Offset Roll 14 Offset Shaft 15 OCT Chute 16 162K47140 OCT Motor Harness Assembly J517 J518 17 127K24581 Offset Motor Assembly 18 Spring S...

Страница 225: ...1 Rear Cover Assembly includes 3 10 3 Latch P O item 2 4 802E03102 Front Cover P O item 2 5 802E03081 Left Cover P O item 2 6 Rear Cover P O item 2 7 19K94731 Pinch Roll Assembly includes 8 10 P O ite...

Страница 226: ...13 600K73122 Feed Roll Assembly includes 14 17 14 600K73132 Envelope Feed Roll Assembly 15 59K14640 Feed Roll 16 Core Roll 17 Pick Up Shaft 18 Pick Up Gear 19 809E15350 Pick Up Spring 300 20 121K18810...

Страница 227: ...P O Item 7 12 19K94613 Retard Holder Assembly P O Item 7 13 Retard Arm P O Item 7 14 Turn Gear Left P O Item 7 15 600K72189 Guide Assembly Right includes 16 18 16 Guide Right 17 Paper Level Actuator 1...

Страница 228: ...e Cover Assembly 3 2000 Sheet Feeder R H Cover Assembly 4 Folder Magnet 5 48K77533 2000 Sheet Feeder Rear Cover Door Assembly 6 802K05400 Rear Bottom Cover 7 48K77451 Right Side Cover Assembly 8 48K69...

Страница 229: ...ay Lift Motor Assembly 7 2000 Sheet Feeder PWB Bracket 8 Tray Guide 9 110E93440 A4 Paper Sensor 10 Clamp 11 17E91980 Caster 12 17E91970 Locking Caster 13 600K78420 Roller Kit 14 162K43610 2000 Sheet F...

Страница 230: ...er Feed Bearing 14 Gear 50T P O Item 35 15 Gear 22T P O Item 35 16 Gear 47T P O Item 35 17 127K24911 Feed Motor Assembly 18 162K47530 2000 Sheet Feeder Feed Motor Harness Assembly J606 J609 19 600K784...

Страница 231: ...Drive Shaft Assembly P O item 30 15 7E55100 Bevel Gear P O item 30 16 Bearing P O item 30 17 Gear Bracket 18 Elevator Shaft Assembly P O item 29 19 Cable Pulley P O item 29 20 Gear 33 P O item 29 21 3...

Страница 232: ...P O item 28 13 Duplex Pinch Spring 14 Duplex Roll Assembly Upper P O item 28 15 Duplex Top Bracket 16 Duplex Bracket Right 17 Exit Bearing 18 Synchronous Pulley 19 Collar 20 23E15680 Duplex Drive Belt...

Страница 233: ...ansportation 6 56 GP 5 3 Print Image Creation 6 57 GP 5 4 Drive Power Transmission 6 58 GP 5 5 Drive Power Transmission to the MBF Feed Roll Assembly or CST 1 of 2 6 59 GP 5 6 Drive Power Transmission...

Страница 234: ...02 2000 6 2 DocuPrint N2025 N2825 Initial Issue General Procedures Information...

Страница 235: ...space electrical or environmental problems call for management or sales assistance as needed Tools and consumables contains a listing of the required tools and supplies needed to correctly repair and...

Страница 236: ...02 2000 6 4 DocuPrint N2025 N2825 GP 1 1 Initial Issue General Procedures Information...

Страница 237: ...1 Printing Speed for the First Sheet Out Table 7 7 2 Consecutive Printing Speed after the First Sheet Out Table 8 8 Printing Media Feeding Means 8 1 Long Cassette 500 Sheet Universal Cassette Standard...

Страница 238: ...guaranteed in a 4 mm border from all edges in the printable area Paper storing capacity MBF Feeder 1 Feeder 2 Feeder 3 Optional 150 500 500 500 Sheets of standard paper Xerox 4024DP 20lb paper or FX L...

Страница 239: ...20 0 or 35 40 C 5 15 or 80 95 RH Without condensation The assured altitude is 0 3000 m above sea level When transported by air in a cargo room pressurized over 70 93 kPa the assured altitude is 0 150...

Страница 240: ...r safety regulations and standards 100 120V Version UL 1950 3rd Edition CSA C22 2 No 950 M95220 240V Version IEC60950 2nd Edition CE Directive Nordic Agency Approvals NEMKO SEMKO SETI and DEMKO Table...

Страница 241: ...4 Legal 14 SEF 355 6 215 9 Legal 13 SEF 330 2 215 9 Letter SEF 279 4 215 9 Letter LEF 279 4 215 9 Executive LEF 266 7 184 2 Statement LEF 215 9 139 7 A3 SEF 420 297 B4 SEF 364 257 A4 SEF 297 210 A4 L...

Страница 242: ...gsm White Nekosa m 80 gsm 3R9xxxx RX80 m 3 R90 120 m 3 R90 061 m Re d 3R9 0208 Black 3R90 008 m3R 9000 0 90 gsm White Nekosa m m m m m 90 gsm 3R91854 RX90 m3R9 1854 Table 14 Printing Accuracy Item Acc...

Страница 243: ...p to two assemblies may be added NOTE In the pages that follow the cassette paper supply inside the base engine is called Tray 1 the 500 Sheet Feeder immediately below the base engine Tray 2 the 500 S...

Страница 244: ...paper cassettes are capable of supplying to the feeder assembly A circle indicates a paper size that may be used 1 5 Replacement Parts Although we make no recommendations as to parts to be replaced a...

Страница 245: ...ed and using standard A4 size sheets During standby 35 0 dB with MBF assembly closed and using standard A4 size sheets NOTE The noise levels without the options installed are as follows During printin...

Страница 246: ...aper and then ejects the sheet into the tray Prints made in the duplex mode are called duplex prints 1 4 2 Duplex Print Processing There are two types of duplex printing producing different page seque...

Страница 247: ...s we expect the replacement interval for users of nonstandard sizes A3 sheets etc to be less than half that for users of standard A4 landscape sheets Note that duplex printing is counted as two pages...

Страница 248: ...ifications 1 2 1 Power Supply 1 3 Physical Specifications 1 3 1 OCT Assembly Dimensions and Weight 1 4 Function 1 4 1 OCT Function 1 4 2 Offset Function 1 5 Paper 1 5 1 Paper Sizes 1 6 Periodical Repl...

Страница 249: ...5 Paper 1 5 1 Paper Sizes The paper sizes available for the offset print are shown in Table 1 NOTE A circle indicates a supported paper size mode combination 1 6 Periodical Replacement Parts Although...

Страница 250: ...Characteristics 1 2 1 Power Supply 24V DC and 3 3V DC are supplied from the Print Engine Controller PWB directly or through the PWB Feeder 2 1 3 Mechanical Characteristics 1 3 1 Dimensions and Weight...

Страница 251: ...02 2000 6 19 DocuPrint N2025 N2825 GP 3 1 General Procedures Information Initial Issue GP 3 1 Control Panel Hardware Figure 1 Control Panel Control Panel Character Set...

Страница 252: ...6 20 DocuPrint N2025 N2825 GP 3 1 Initial Issue General Procedures Information The International Character set supported by the N2025 N2825 Control Panel Display Figure 2 Figure 2 Control Panel Charac...

Страница 253: ...to bottom unless a higher priority message is displayed This will preempt menu navigation Menu scrolling is available with out going to the Off line state Scrolling wraps such that if the displayed me...

Страница 254: ...press sequence This sequence assumes starting from an On line Ready state Value Down If in the menu system and an item is displayed this key causes the Control Panel to scroll through the values for...

Страница 255: ...resses The following examples illustrate the menu navigation and display message sequences that take place when setting default parameters Example 1 and when involving a printer action Example 2 Examp...

Страница 256: ...el when locked Job Menu Password Menu Tray Menu Print Menu Reset Menu GP 3 3 Menu Maps This chapter shows the menu structure in graphical format Refer to Chapter 5 for an explana tion of the items in...

Страница 257: ...02 2000 6 25 DocuPrint N2025 N2825 GP 3 3 General Procedures Information Initial Issue Figure 2 Password Menu...

Страница 258: ...02 2000 6 26 DocuPrint N2025 N2825 GP 3 3 Initial Issue General Procedures Information Figure 3 Tray Menu...

Страница 259: ...02 2000 6 27 DocuPrint N2025 N2825 GP 3 3 General Procedures Information Initial Issue Figure 4 PCL Menu...

Страница 260: ...02 2000 6 28 DocuPrint N2025 N2825 GP 3 3 Initial Issue General Procedures Information Figure 5 System Menu...

Страница 261: ...02 2000 6 29 DocuPrint N2025 N2825 GP 3 3 General Procedures Information Initial Issue Figure 6 Parallel Menu Figure 7 Serial Menu...

Страница 262: ...02 2000 6 30 DocuPrint N2025 N2825 GP 3 3 Initial Issue General Procedures Information Figure 8 USB Menu...

Страница 263: ...02 2000 6 31 DocuPrint N2025 N2825 GP 3 3 General Procedures Information Initial Issue Figure 9 Ethernet Menu...

Страница 264: ...02 2000 6 32 DocuPrint N2025 N2825 GP 3 3 Initial Issue General Procedures Information Figure 10 Token Ring Menu...

Страница 265: ...02 2000 6 33 DocuPrint N2025 N2825 GP 3 3 General Procedures Information Initial Issue Figure 11 Novell Menu...

Страница 266: ...02 2000 6 34 DocuPrint N2025 N2825 GP 3 3 Initial Issue General Procedures Information Figure 12 Print Menu Figure 13 Reset Menu...

Страница 267: ...e All Jobs Reset Menu selection to delete all Secure and Proof jobs from the disk The display indicates Please Wait on the bottom line while this action is being processed and returns to ready when th...

Страница 268: ...t the method used to assign the IP address including Subnet Mask and Default Gateway Job Menu Menu selection to invoke the Job Menu The Job Menu allows the user to cancel the job currently processed b...

Страница 269: ...PCL Menu Pitch Menu setting for the pitch when the default font already selected is a scalable fixed pitch font Point Size Menu setting in PCL for the point size when the default font already selected...

Страница 270: ...the USB port XIE Menu setting to select the default image resolution enhancement mode used in PCL and PostScript GP 3 5 Non Menu Control Panel States Printer States After power is turned on the printe...

Страница 271: ...input data for current job 3 Remove formatted pages from IOT print queue 4 Stop processing multiple Print Quantity of current page 5 Discard input data until end of job is detected 6 Force end of job...

Страница 272: ...he host interfaces is disabled in this mode This mode is persistent across power cycles until canceled via the procedure described in sec 5 under Demo Mode Details of the Demo Page s contents and assi...

Страница 273: ...itial Issue OFF ON 600 OFF ON 600 OFF ON 1200 Quality 1200 OFF ON 600 ON OFF 600 ON OFF 600 ON OFF 1200 Quality 1200 OFF OFF 1200 ON ON 600 OFF ON 600 ON ON 1200 Quality 1200 OFF ON 600 Table 4 Imagin...

Страница 274: ...02 2000 6 42 DocuPrint N2025 N2825 GP 3 5 Initial Issue General Procedures Information...

Страница 275: ...onboard Ethernet failure IOT Communication 1000 1000 IOT 8 System Controller PWB IOT handshake failure Hard Disk 0010 0010 DISK 9 Hard disk failure DIMM 0101 0101 DIMM1 10 DIMM board 1 failure DIMM 2...

Страница 276: ...nd options motors clutches etc Table 1 summarizes the operation of the Control Panel keys for entering IOT diagnostics The IOT diagnostic mode menu has the following selections COMPONENT TEST NVM CONF...

Страница 277: ...6 45 DocuPrint N2025 N2825 GP 4 3 General Procedures Information Initial Issue The following table summarizes the operation of the Control Panel keys in IOT Diagnostics Mode Figure 1 Figure 1 Diagnost...

Страница 278: ...le selections in the selected menu above Item Up Item Down 2 6 With Test Print selected scrolls between Input Tray Output Tray Duplex Tray Print Pattern Value Up Value Down 3 7 Input Tray scrolls thro...

Страница 279: ...e 22 Scan MBF 4 Read Write 23 Print Speed 0 28 ppm 1 20 ppm Read Table 2 NVM Table Menu Seq Menu Selection Default Read Write Table 1 Component Key Table Key Numbers Actions Enter Diagnostics Item Up...

Страница 280: ...ivate the fuser reset function If keys 0 and 5 are not pressed within 5 seconds of the IOT message printer will go to the normal boot process 5 Wait for message Reset Completed Please reboot to appear...

Страница 281: ...ICE sub menu password protected containing the following Print System Controller Test Pattern selected from any input output sources Hex Dump Error Log enablement and print capability Active Faults Fa...

Страница 282: ...02 2000 6 50 DocuPrint N2025 N2825 GP 4 8 Initial Issue General Procedures Information...

Страница 283: ...le toner image 4 Transfer Transfers the toner image from the drum surface to the paper 5 Detack Partially neutralizes the charge on the paper to allow the paper peel off the drum surface 6 Fusing Perm...

Страница 284: ...The discharge occurs in the very small gaps between the BCR and the drum surface Any unevenness in the charge on the drum surface resulting from the previous cycle is leveled by the AC discharge betwe...

Страница 285: ...agnetic Roll into a very thin layer with a silicone rubber blade The toner is given a negative electric charge by the friction with the silicone rubber As the Magnet Roll rotates the toner is transpor...

Страница 286: ...e BTR Bias Transfer Roll applies a positive charge to the back side of the paper when the paper travels between the BTR and the drum The negatively charged toner image transfers from the drum surface...

Страница 287: ...the paper to neutralize the positive charge that was applied by the BTR By this neutralization of charge the attrac tive force which causes the paper to stick to the drum surface disappears and the p...

Страница 288: ...p is collected in the used toner compart ment separate from the fresh toner compartment The transfer rate is greater than 90 but varies according to the image coverage and the environmental conditions...

Страница 289: ...the host com puter through the parallel port Both types of data are referred to as host data The Controller buffers the host data in rasterized bit image data or converted host data in a PDL Page Des...

Страница 290: ...ser Assembly The drive power transmitted to the P H Assembly is then transmitted through the Gear MBF IN to the MBF Feed Roll Assembly the Roll Assembly Feed ENV and the Turn Roll Assembly The drive p...

Страница 291: ...the MBF Feed Solenoid or CST is actuated the MBF Pick Up Gear or CST is pulled into engagement by the Spring Pick Up or the Spring and rotates one turn Then it disengages from the Gear MBF IN Driven...

Страница 292: ...utch Assembly of the Turn Roll Assembly through the Gear Assembly Main the Gear MBF IN the Gear Idle MBF 1 and the Gear Idle MBF 2 Figure 1 When the Turn Clutch Assembly is activated the drive power i...

Страница 293: ...Clutch through the Gear Assembly Main Figure 1 Figure 2 When the Registration Clutch is activated the drive power is transmitted through the Registra tion Clutch to the Rubber Registration Gear the Ru...

Страница 294: ...ssion to the Drum and the BTR Assembly The drive power generated by the Motor Main is transmitted to the Drum in the Print Cartridge through the Main Gear Assembly Figure 1 Figure 2 The drive power is...

Страница 295: ...xit Roll Assembly The drive power generated by the Main Motor is transmitted to the Fuser through the Main Gear Assembly Figure 1 Figure 2 The drive power transmitted to the H R Gear is further transm...

Страница 296: ...nd holds the paper stack in place in the front and rear direction When the Guide End is moved to come into contact with the rear side of paper stack the Cam Size at the left side of the Cassette Assem...

Страница 297: ...te the longer arm of the actuator which end contacted on the Latch Assembly is pushed up by the Latch Assembly and the shorter arm opposite side of the fulcrum is pushed down and actuates the Low Pape...

Страница 298: ...After one revolu tion the MBF Pick Up Gear disengages from the Gear MBF IN because of its sector shaped cutout and is latched by the pawl of the Solenoid Feed CST Turn Roll Assembly The rotation of t...

Страница 299: ...to stop the rotation of the Turn Roll Assembly and thereby keeps the pre fed paper waiting just before the Registration Sensor and then actuates the Turn Clutch Assembly again when it receives the su...

Страница 300: ...Metal Registration Roll and Rubber Registration Roll The rotation of these Rolls is controlled by means of the Registration Clutch so as to register the paper with the image on the drum Registration...

Страница 301: ...sensor is used to maintain the temperature of the Heat Roll sur face within the specified range by switching the power to the Heater Rod on and off The signal is also used for the first stage overhea...

Страница 302: ...02 2000 6 70 DocuPrint N2025 N2825 GP 5 15 Initial Issue General Procedures Information Figure 1 Fuser Assembly Figure 2 Fuser Assembly...

Страница 303: ...mbly Includes five drive gears and transmits the drive power that is transmitted from the Motor Main through the Gear Assembly Main to the Gear MBF IN Registration Clutch An electromagnetic clutch tha...

Страница 304: ...Holds toner on its surface in a thin layer and transports it to the gap between the drum and the Magnet Roll Toner is supplied to the Magnet Roll by the two Agitators inside the Toner Compartment CM...

Страница 305: ...the Heater Rod switching circuit and has Main Power Switch connected to it HVPS Assembly Produces high AC and DC voltages applied to charge BCR development Magnet Roll transfer BTR and detack Detack...

Страница 306: ...tial Issue General Procedures Information Duplex Interface PWB Supplies DC power to the Duplex Unit and offers the interface port between the Print Engine Controller PWB and the Duplex Unit PWA 5V Sup...

Страница 307: ...open or the connector is disconnected the output voltage of the circuit begins to decrease after about 1 minute and the output is stopped To reset this open circuit protection switch off the printer...

Страница 308: ...and Tray 2 or 2000 Sheet Feeder are out of paper and Tray 3 is loaded with paper Tray 3 or 2000 Sheet Feeder is selected Print Area The guaranteed print area is the entire page except a 4 mm border on...

Страница 309: ...s have been produced in a more than 20 prints job One duplex print is counted as two prints This fuser temperature control switching is not used in the Thick Paper Mode described below The Print Engin...

Страница 310: ...bly Dup is actuated during the Erase Cycle It restarts the Erase Cycle when the interlock switches are actuated again or printer power is switched off and back on again The printer does not start an E...

Страница 311: ...nter with the optional Duplex Assembly installed Figure 2 Paper Path Components Drive Power Transmission The optional Duplex Assembly has its own motors Motor Assembly Dup and Motor Assembly Exit for...

Страница 312: ...agram that shows the gear arrangement of the Duplex Assembly Figure 3 Duplex Assembly Gear Arrangement Figure 4 is a cut away side view of the Duplex Assembly that shows the drive power transmis sion...

Страница 313: ...ex Interface PWB Duplex Sensor Assembly Detects the paper between the Duplex Roll Assembly Upper and the Duplex Roll Assembly Lower in the Duplex Assembly Duplex Motor Assembly Generates the drive pow...

Страница 314: ...r it has received the SWITCH PRINTING MODE command Figure 8 NOTE For the description of the interface signals Commands and Statuses refer to Control ler in Section 13 Principles of Operation of the Ba...

Страница 315: ...the printer Page one image is then printed on side 2 of the sheet 2 Sheet Batch Duplex printing control sequence The first sheet is fed and Page two image is printed on side 1 of the first sheet The s...

Страница 316: ...r is transmitted from the Motor Feeder via drive gears and provides the force to drive the paper transport The transmission paths are as shown below Figure 3 Figure 4 Figure 5 Figure 6 NOTE In the pag...

Страница 317: ...02 2000 6 85 DocuPrint N2025 N2825 GP 5 22 General Procedures Information Initial Issue Figure 4 Transmission Path Figure 5 Transmission Path...

Страница 318: ...ssettes since their major components function in basically the same fashion as the corresponding components of the base engine and standard Cassette Assembly included with the base engine If necessary...

Страница 319: ...02 2000 6 87 DocuPrint N2025 N2825 GP 5 22 General Procedures Information Initial Issue Figure 8 Major Components Figure 9 Major Components...

Страница 320: ...ansportation of the printer with the optional OCT Assembly installed Figure 2 Paper Transportation Drive Power Transmission The optional OCT Assembly has its own motors Motor Assembly OCT and Motor As...

Страница 321: ...diagram that shows the gear arrangement of the OCT Assembly Figure 3 Figure 3 OCT Gear Arrangement The Figure below is a cut away side view of the Duplex Assembly that shows the drive power transmissi...

Страница 322: ...he Duplex Interface PWB The OCT PWB also relays the signals from the sensors and switches connected to it to the Duplex Interface PWB OCT Sensor Detects the paper jam between the Roll Inlet and the Ro...

Страница 323: ...is discharged to the standard exit tray The timing chart shows the Exit Gate control at simplex mode Figure 8 Flapper Solenoid Control Timing NOTE For the description of the interface signals Commands...

Страница 324: ...02 2000 6 92 DocuPrint N2025 N2825 GP 5 23 Initial Issue General Procedures Information...

Страница 325: ...er The system will now enter the Diagnostics Mode 2 Main Menu Component Test appears on the Display Panel 3 Using key 1 or 5 scroll until Test Print is displayed Select the Input Tray for feeding 4 Us...

Страница 326: ...02 2000 6 94 DocuPrint N2025 N2825 GP 6 1 GP 6 2 Initial Issue General Procedures Information...

Страница 327: ...sable Plastic Bags 99P30234 Drop Cloth 5P1737 Film Remover 43P45 Formula A Cleaner 43P48 Polyurethane Pads 600S4653 Towel heavy duty 35P3191 XE Unique Cleaner 8R90175 Cleaning Pad Kit 600S4372 Cloth 8...

Страница 328: ...02 2000 6 96 DocuPrint N2025 N2825 GP 7 1 Initial Issue General Procedures Information...

Страница 329: ...ferences in diagnostic repair installation or adjustment procedures A tag num ber may also be required to identify the presence of optional hardware special nonvolatile memory programming or if mandat...

Страница 330: ...02 2000 6 98 DocuPrint N2025 N2825 GP 8 1 Initial Issue General Procedures Information...

Страница 331: ...7 1 DocuPrint N2025 N2825 Wiring Data Initial Issue 7 Wiring Data Section Contents 7 3 Introduction 7 3 Base Engine 7 4 500 Sheet Feeder 7 32 Duplex Assembly 7 37 Offset Catch Tray 7 40 2000 Sheet Fee...

Страница 332: ...02 2000 7 2 DocuPrint N2025 N2825 Initial Issue Wiring Data...

Страница 333: ...lex Assembly Location of P J Connectors Wiring Diagrams and Signal Information 4 Offset Catch Tray Location of P J Connectors Wiring Diagrams and Signal Information 5 2000 Sheet Feeder Location of P J...

Страница 334: ...t Engine Controller PWB HVPS Print Cartridge BCR and MAG ROLL BTR and DETACK SAW Figure 7 Table 6 Table 7 5 Print Engine Controller PWB REG CLUTCH and REG SENSOR Figure 8 Table 8 6 Print Engine Contro...

Страница 335: ...PS INTER LOCK SWITCH and FANs 2 Print Engine Controller PWB FUSER ASSEMBLY FUSER PWB 3 Print Engine Controller PWB Laser and Print Cartridge SENSOR ASSEMBLY Print Car tridge SWITCH and LD SWITCH 4 Pri...

Страница 336: ...02 2000 7 6 DocuPrint N2025 N2825 Base Engine Initial Issue Wiring Data Wiring Diagram Notations...

Страница 337: ...PWB LVPS INTER LOCK SWITCH and FANs Figure 3 Printer Engine Controller PWB LVPS Interlock Switches and Fans Table 1 Signal names for the Print Engine Controller PWB LVPS path Signal Name Description F...

Страница 338: ...tion of the Interlock Switch FAN LOW ON L 24V Fan speed switching signal that switches the speed of rotation of the Fuser Fan and LVPS Fan between High and Low Low speed High High speed FAN HIGH ON L...

Страница 339: ...02 2000 7 9 DocuPrint N2025 N2825 Base Engine Wiring Data Initial Issue 2 Print Engine Controller PWB FUSER ASSEMBLY FUSER PWB Figure 4 Print Engine Controller PWB Fuser Assembly Fuser PWB...

Страница 340: ...r This signal is Low when the Exit Sensor is actuated TEMP Temperature monitor signal analog signal from the Temperature Sensor Assembly Thermistor that indicates the temperature of the Heat Roll sur...

Страница 341: ...ring Data Initial Issue 3 Print Engine Controller PWB Laser and Print Cartridge SENSOR ASSEMBLY Print Cartridge SWITCH and LD SWITCH Figure 6 Print Engine Controller PWB Laser and Print Cartridge Sens...

Страница 342: ...Signal names for the Print Engine Controller PWB Laser path Signal Name Description Laser CLK Clock signal to Laser MOTOR MOT ON TTL Scanner Motor Control signal that switches the Scanner Motor on an...

Страница 343: ...h the TR on and off H 5 6V L 0V CR DC Control signal to switch the DC component of the CR and PRB on and off H 24V L 0V CR AC Constant frequency pulse signal that provides the source of oscillation fo...

Страница 344: ...ine Controller PWB REG CLUTCH and REG SENSOR Figure 8 Print Engine Controller PWB Reg Clutch and Reg Sensor Table 8 Signal names for the Print Engine Controller PWB REG Clutch and Reg Sensor Signal Na...

Страница 345: ...DocuPrint N2025 N2825 Base Engine Wiring Data Initial Issue 6 Print Engine Controller PWB FEED SOLENOID TURN CLUTCH NO PAPER SEN SOR Figure 9 Print Engine Controller PWB Feed Solenoid Turn Clutch No...

Страница 346: ...is signal is Low and deactuated when High TURN ON L 24VDC Turn Clutch control signal The Turn Clutch is actuated when this sig nal is Low and deactuated when High NO PAPER0 TTL Signal from the No Pape...

Страница 347: ...t N2025 N2825 Base Engine Wiring Data Initial Issue 7 Print Engine Controller PWB LOW PAPER SENSOR P H UNIT TRAY 1 PAPER SIZE SWITCH Figure 10 Print Engine Controller PWB Low Paper Sensor P H Unit Tra...

Страница 348: ...nal from the Size witch Goes Low when SIZE 1BIT of Size witch is actu ated SW2 Signal from the Size witch Goes Low when SIZE 2BIT of Size witch is actu ated SW3 Signal from the Size witch Goes Low whe...

Страница 349: ...02 2000 7 19 DocuPrint N2025 N2825 Base Engine Wiring Data Initial Issue 8 Print Engine Controller PWB MAIN MOTOR Figure 11 Print Engine Controller PWB Main Motor...

Страница 350: ...Motor path Signal Name Description MOT HALF TTL Control signal to switch the speed of the Main Motor between Normal and Half Low Half speed High Normal speed MAIN MOT TTL Main Motor monitor signal Go...

Страница 351: ...02 2000 7 21 DocuPrint N2025 N2825 Base Engine Wiring Data Initial Issue 9 Print Engine Controller PWB TONER SENSOR Figure 12 Print Engine Controller PWB Toner Sensor...

Страница 352: ...25 Base Engine Initial Issue Wiring Data Table 14 Signal names for the Print Engine Controller PWB Toner Sensor path Signal Name Description NO TONER TTL Signal from the Toner Sensor Goes Low when ton...

Страница 353: ...23 DocuPrint N2025 N2825 Base Engine Wiring Data Initial Issue 10 Print Engine Controller PWB Duplex Interface PWB FULL STACK SENSOR Figure 13 Print Engine Controller PWB Duplex Interface PWB Full Sta...

Страница 354: ...itial Issue Wiring Data Table 15 Signal names for the Print Engine Controller PWB Duplex Interface PWB FULL STACK SENSOR path Signal Name Description FULL STACK TTL Signal from the Full Stack Sensor G...

Страница 355: ...02 2000 7 25 DocuPrint N2025 N2825 Base Engine Wiring Data Initial Issue 11 CONTROLLER Control Panel Figure 14 Controller Control Panel...

Страница 356: ...ata 12 Print Engine Controller PWB DIAGNOSTIC TOOL Plug Jack P J Connector Locations for Engine Contents 4 Plug Jack P J Connector Locations 4 1 Plug Jack P J Connector Location Table Table 16 4 2 Plu...

Страница 357: ...e Controller PWB and Duplex I F PWB 20 H 20 Print Engine Controller PWB PL 8 1 SNS Harness Assembly PL 3 1 Connects Print Engine Controller PWB and CSTL Guide Assem bly CST Sensor Size Switch 21 H 18...

Страница 358: ...Note 3 Item 162 F 42 LVPS PL 9 2 I L Harness Assembly 6 Connects LVPS Assembly and Inter lock Switch Fuser Interlock Switch I R switch 163 F 42 LVPS PL 9 2 System Controller PWB 3 3V Har ness Assembl...

Страница 359: ...le Assembly and MCV PWB Table 16 Plug Jack P J Connector Locations P J Coordinate s Location Note 1 Harness Note 2 Notes Location Name PL Harness Name Note 3 Item 501 I 34 Duplex I F PL 9 2 Duplex I F...

Страница 360: ...P J Connector Location Diagrams Figure 15 CN2 F 42 Motor Assembly PL 7 1 Main Motor PL 7 1 Connects Main Drive Motor Controller PWB to Main Motor Table 16 Plug Jack P J Connector Locations P J Coordi...

Страница 361: ...02 2000 7 31 DocuPrint N2025 N2825 Base Engine Wiring Data Initial Issue Figure 16 Figure 17...

Страница 362: ...arness Assembly J136 of the Upper Feeder Feeder 1 or Feeder 2 131 B10 Feeder Assembly PL 11 2 Harness 28 Connects the Har ness Assembly J131 to the Harness Assembly J131 of the Lower Feeder Feeder 3 1...

Страница 363: ...sor No Paper Sensor Tray 1 Feed Sole noid Switch Size and Motor Feed 3 Figure 3 20 Print Engine Controller PWB Feeder 2 PWB Feeder 3 PWB Low Paper Sensor No Paper Sensor Tray 1 Feed Solenoid Switch Si...

Страница 364: ...nformation between Components 20 Print Engine Controller PWB Feeder 2 PWB Low Paper Sensor No Paper Sen sor Tray 1 Feed Solenoid Switch Size and Feed Motor 2 Figure 2 Wiring and Signal Information bet...

Страница 365: ...PER 3 TTL Signal from the No Paper Sensor 3 No Paper Sensor of the Feeder 2 This signal is Low when the No Paper Sensor 3 is actuated FEEDER CK Signal that indicates the Feeder configuration ENV_OP Si...

Страница 366: ...ler PWB and the voltage across the resis tance R10K changes according to the number of 500 Sheet Feeders added Therefore the Feeder configuration can be detected from the voltage of the FEEDER CK sign...

Страница 367: ...igure 1 Cross reference the letter and number of the P J coordinates with the letters and numbers on the map The P J connector is located within the area where the coordinates cross Figure 1 P J Map T...

Страница 368: ...B Duplex PWB Duplex Motor Assembly Exit Motor Assembly and Duplex Sensor Assembly Figure 3 Table 2 This section contains a Master Wiring Diagram for the optional Duplex Assembly The Master Diagram sho...

Страница 369: ...5 Duplex Assembly Wiring Data Initial Issue Wiring and Signal Information between Components 30 Print Engine Controller PWB Duplex Interface PWB Duplex PWB Duplex Motor Assembly Exit Motor Assembly an...

Страница 370: ...at commands High speed rotation in clockwise of the Duplex Motor Assembly and the Exit Motor Assembly A ON The signal activates the Motor synchronizing with A CLK signal B ON The signal activates the...

Страница 371: ...he interconnections of the printer the optional OCT Assembly and the com ponents of it The remainder of this section shows the signal names pin numbers and other information in detailed diagrams Maste...

Страница 372: ...Initial Issue Wiring Data Master Wiring Diagram Figure 2 Master Wiring Diagram Wiring and Signal Information between Components 40 Duplex Interface PWB OCT PWB OCT Motor Assembly Offset Motor Assembl...

Страница 373: ...paper in the OCT Assembly STA RX Motor control signal STA TX Motor control signal FRP CHK Signal through the Exit Gate Solenoid This signal informs the Exit Gate Sole noid operation Table 3 Signal nam...

Страница 374: ...2000 Sheet Feeder NPS Harness to the 2000 Sheet Feeder PWB P J 603 J5 Connects the 2000 Sheet Feeder FRDY Harness to the 2000 Sheet Feeder PWB P J 604 J4 Connects the 2000 Sheet Feeder SW Harness to...

Страница 375: ...ion shows the sig nal names pin numbers and other information in detailed diagrams Master Wiring Diagram Figure 2 Wiring and Signal Information Between Components Figure 3 Table 2 50 Print Engine Cont...

Страница 376: ...sue Wiring Data Wiring and Signal Information Between Components 50 Print Engine Controller PWB 2000 Sheet Feeder PWB Motor Assembly 2000 Sheet Feeder Motor Assembly Feed Drive Assembly Turn Figure 3...

Страница 377: ...l Name Description FEEDER CHK Resistance that informs which the 2000 Sheet Feeder is installed as the 500 Sheet Feeder or not FEED MOTOR ON Motor control signal 2000 Sheet Feeder TX Transmitted data f...

Страница 378: ...eet Feeder PWB Switches A4 Letter Rear Cover and Drawer In The Switch A4 Letter detects the paper size A4 or Letter with the position of the Side Guide L of the OCT Tray Assembly The Switches rear Cov...

Отзывы: