


02/2000
3-22
DocuPrint N2025/N2825
IQ RAP 13
Initial Issue
Image Quality Repair Analysis Procedures
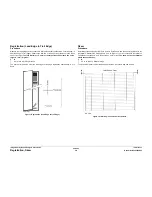
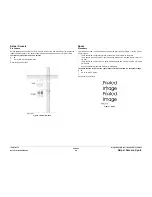
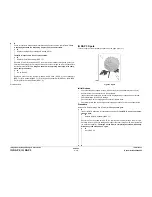
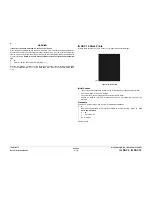
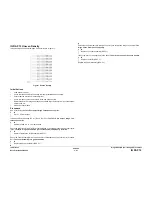
IQ RAP 13 Skewed Image
The image is not parallel to the edges of the print sheet (Figure 1).
Figure 1 Skewed Image
Initial Actions
•
Check the paper tray(s) installation and the paper in the tray(s).
•
Load fresh dry paper.
•
Paper meets specification.
•
Check the paper path for any obstructions or debris that might hamper the passage of the
paper.
•
Ensure the Print Cartridge is properly installed.
Procedure
Run 5 test prints, single sided, from each paper tray. If the printer has a Duplex Assembly, run
five duplexed prints from each tray. The skewed image appears only on duplexed prints.
Y
N
The skewed image occurs on prints fed from all trays.
Y
N
The skewed image occurs on prints fed from the MBF Tray.
Y
N
The skewed image occurs on prints fed from Tray 1.
Y
N
The skewed image occurs on prints fed from Tray 2.
Y
N
•
Check the Tray 3 Feed Rolls. Clean or replace if necessary.
•
Check the Tray 3 Retard Pad/Retard Roll. Clean or replace if
necessary.
•
If a 2000 Sheet Feeder, check the Nudger Roll. Clean or replace
if necessary.
•
Check the feed chute between Tray 3 and Tray 2. Check for
obstructions or contamination. Clean as necessary.
•
Check the Tray 2 Lower Turn Rolls. Check for obstructions or
contamination. Clean or replace as necessary.
•
Check the Tray 2 Rear Chute. Check all rolls for obstructions or
contamination. Clean or replace as necessary.
•
Check the Tray 2 Feed Rolls. Clean or replace if necessary.
•
Check the Tray 2 Retard Pad/Retard Roll. Clean or replace if neces-
sary.
•
If a 2000 Sheet Feeder, check the Nudger Roll. Clean or replace if
necessary.
•
Check the feed chute between Tray 2 and Tray 1. Check for obstruc-
tions or contamination. Clean as necessary.
•
Check the Tray 1 Lower Turn Rolls. Check for obstructions or contam-
ination. Clean or replace as necessary.
•
Check the Tray 1 Rear Chute. Check all rolls for obstructions or con-
tamination. Clean or replace as necessary.
•
Check the Tray 1 Feed Rolls. Clean or replace if necessary.
•
Check the Tray 1 Envelope Feed Rolls. Clean or replace if necessary.
•
Check the Tray 1 Retard Pad. Clean or replace if necessary.
•
Check the Tray 1 Turn Rolls. Check for obstructions or contamination.
Clean or replace as necessary.
•
Check the feed chute between Tray 1 and the Registration Rolls. Check for
obstructions or contamination. Clean as necessary.
•
Check the MBF Feed Rolls. Clean or replace if necessary.
•
Check the MBF Retard Pad. Clean or replace if necessary.
•
Check the MBF Chute. Check for obstructions or contamination. Clean or
replace as necessary.
•
Check the Registration Sensor. Check actuation and for obstructions or con-
tamination. Clean or replace as necessary.
•
Check the Registration Sensor. Check actuation and for obstructions or contamina-
tion. Clean or replace as necessary.
•
Check the Registration Rolls. Clean or replace if necessary.
•
Check the BTR Roll and bearings. Clean or replace if necessary.
•
Check the Print Cartridge. Replace if necessary.
•
Check the Paper Transport Assembly. Check for obstructions or contamination.
Clean or replace as necessary.
•
Check the Fuser Assembly. Check for worn parts or rolls. Check for obstructions or con-
tamination. Clean or replace as necessary.
•
Check all rolls and drives in the Exit Assembly. Check for obstructions or contamination.
Clean or replace as necessary.
•
Check the Duplex assembly. Check for worn parts or rolls. Check for obstructions or con-
tamination. Clean or replace as necessary.
A
A
B
B
C
C
D
D
E
E
Содержание DocuPrint N2025
Страница 12: ...02 2000 1 2 DocuPrint N2025 N2825 Initial Issue Service Call Procedures...
Страница 20: ...02 2000 2 2 DocuPrint N2025 N2825 Initial Issue Status Indicator Repair Analysis Procedures...
Страница 64: ...02 2000 2 46 DocuPrint N2025 N2825 RAP 46 RAP 47 Initial Issue Status Indicator Repair Analysis Procedures...
Страница 72: ...02 2000 2 54 DocuPrint N2025 N2825 RAP 56 Initial Issue Status Indicator Repair Analysis Procedures...
Страница 76: ...02 2000 2 58 DocuPrint N2025 N2825 RAP 59 RAP 60 Initial Issue Status Indicator Repair Analysis Procedures...
Страница 86: ...02 2000 3 2 DocuPrint N2025 N2825 Initial Issue Image Quality Repair Analysis Procedures...
Страница 114: ...02 2000 4 4 DocuPrint N2025 N2825 Introduction Initial Issue Repair Adjustment...
Страница 120: ...02 2000 4 10 DocuPrint N2025 N2825 REP 1 8 REP 1 9 Initial Issue Repair Adjustment...
Страница 128: ...02 2000 4 18 DocuPrint N2025 N2825 REP 2 10 REP 2 11 Initial Issue Repair Adjustment...
Страница 134: ...02 2000 4 24 DocuPrint N2025 N2825 REP 3 7 Initial Issue Repair Adjustment...
Страница 144: ...02 2000 4 34 DocuPrint N2025 N2825 REP 5 5 Initial Issue Repair Adjustment...
Страница 152: ...02 2000 4 42 DocuPrint N2025 N2825 REP 7 6 REP 7 7 Initial Issue Repair Adjustment...
Страница 160: ...02 2000 4 50 DocuPrint N2025 N2825 REP 8 9 Initial Issue Repair Adjustment...
Страница 186: ...02 2000 4 76 DocuPrint N2025 N2825 REP 11 21 REP 11 22 Initial Issue Repair Adjustment...
Страница 204: ...02 2000 4 94 DocuPrint N2025 N2825 REP 12 29 Initial Issue Repair Adjustment...
Страница 206: ...02 2000 4 96 DocuPrint N2025 N2825 ADJ 1 1 Initial Issue Repair Adjustment...
Страница 208: ...02 2000 5 2 DocuPrint N2025 N2825 Initial Issue Parts list...
Страница 234: ...02 2000 6 2 DocuPrint N2025 N2825 Initial Issue General Procedures Information...
Страница 236: ...02 2000 6 4 DocuPrint N2025 N2825 GP 1 1 Initial Issue General Procedures Information...
Страница 257: ...02 2000 6 25 DocuPrint N2025 N2825 GP 3 3 General Procedures Information Initial Issue Figure 2 Password Menu...
Страница 258: ...02 2000 6 26 DocuPrint N2025 N2825 GP 3 3 Initial Issue General Procedures Information Figure 3 Tray Menu...
Страница 259: ...02 2000 6 27 DocuPrint N2025 N2825 GP 3 3 General Procedures Information Initial Issue Figure 4 PCL Menu...
Страница 260: ...02 2000 6 28 DocuPrint N2025 N2825 GP 3 3 Initial Issue General Procedures Information Figure 5 System Menu...
Страница 262: ...02 2000 6 30 DocuPrint N2025 N2825 GP 3 3 Initial Issue General Procedures Information Figure 8 USB Menu...
Страница 263: ...02 2000 6 31 DocuPrint N2025 N2825 GP 3 3 General Procedures Information Initial Issue Figure 9 Ethernet Menu...
Страница 264: ...02 2000 6 32 DocuPrint N2025 N2825 GP 3 3 Initial Issue General Procedures Information Figure 10 Token Ring Menu...
Страница 265: ...02 2000 6 33 DocuPrint N2025 N2825 GP 3 3 General Procedures Information Initial Issue Figure 11 Novell Menu...
Страница 274: ...02 2000 6 42 DocuPrint N2025 N2825 GP 3 5 Initial Issue General Procedures Information...
Страница 282: ...02 2000 6 50 DocuPrint N2025 N2825 GP 4 8 Initial Issue General Procedures Information...
Страница 324: ...02 2000 6 92 DocuPrint N2025 N2825 GP 5 23 Initial Issue General Procedures Information...
Страница 326: ...02 2000 6 94 DocuPrint N2025 N2825 GP 6 1 GP 6 2 Initial Issue General Procedures Information...
Страница 328: ...02 2000 6 96 DocuPrint N2025 N2825 GP 7 1 Initial Issue General Procedures Information...
Страница 330: ...02 2000 6 98 DocuPrint N2025 N2825 GP 8 1 Initial Issue General Procedures Information...
Страница 332: ...02 2000 7 2 DocuPrint N2025 N2825 Initial Issue Wiring Data...
Страница 336: ...02 2000 7 6 DocuPrint N2025 N2825 Base Engine Initial Issue Wiring Data Wiring Diagram Notations...
Страница 361: ...02 2000 7 31 DocuPrint N2025 N2825 Base Engine Wiring Data Initial Issue Figure 16 Figure 17...