background image

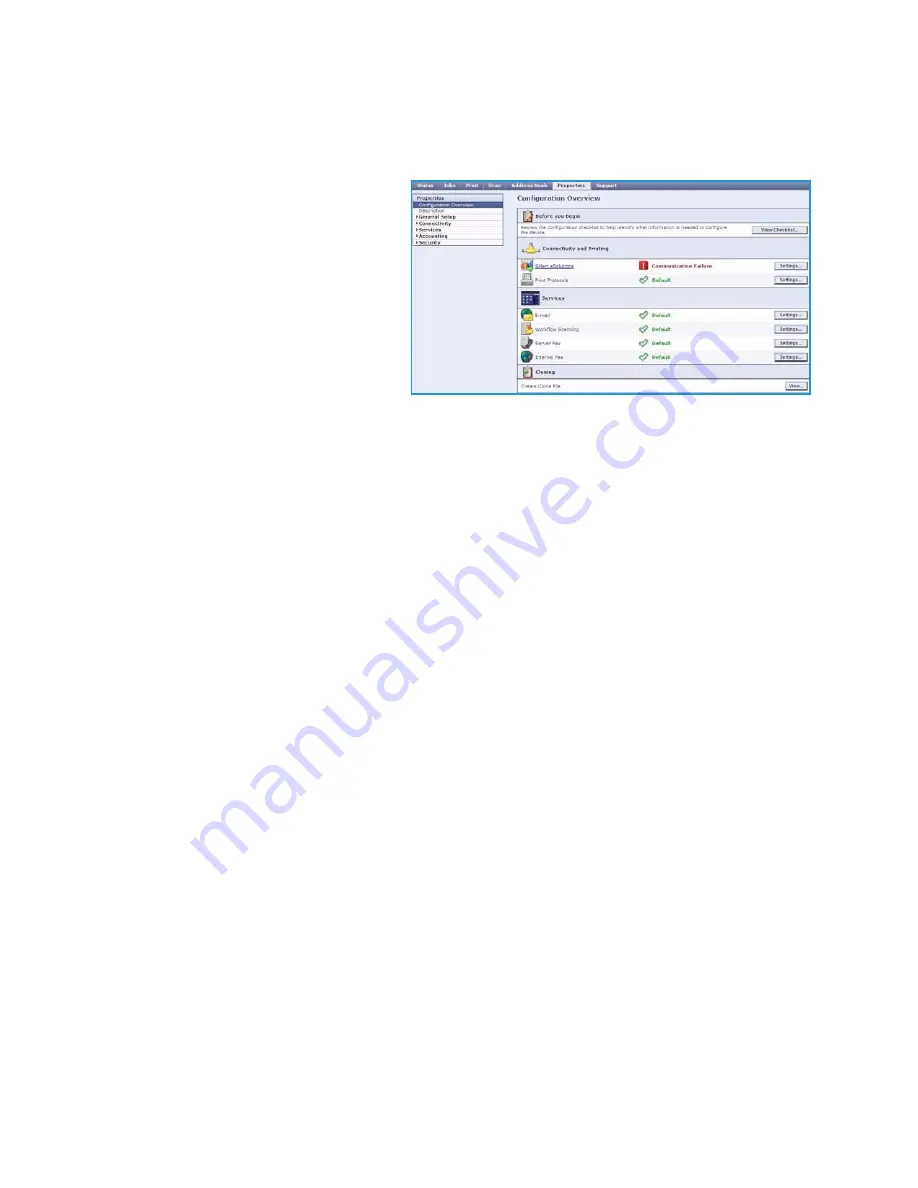
Properties

ColorQube™ 9301/9302/9303

Internet Services

231

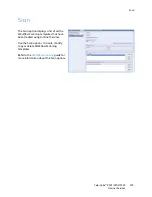
Properties

The 

Properties

 option contains all the 

settings, setups and default values for 
installing and setting up the device. These 
are protected by a user name and 
password and should only be changed by 
your System Administrator.

Refer to the 

System Administrator Guide


for information about configuring your 
device.

Содержание ColorQube 9303

Страница 1: ...Version 1 0 09 10 Xerox ColorQube 9301 9302 9303 User Guide...

Страница 2: ...reproduced in any form without permission of Xerox Corporation XEROX XEROX and Design and ColorQube are trademarks of Xerox Corporation in the United States and or other countries Changes are periodic...

Страница 3: ...Fax 58 Image Quality 60 Layout Adjustment 62 Fax Options 65 Job Assembly 73 Secure Faxes 75 Log In Out 76 Server Fax 77 Introduction 80 Dialing Options 81 Server Fax Options 84 Image Quality 86 Layou...

Страница 4: ...w Scanning Options 150 Advanced Settings 153 Layout Adjustment 156 Filing Options 159 Job Assembly 162 Creating Templates 163 Scan to Mailbox 169 Scan to Home 173 Log In Out 176 E mail 177 Introductio...

Страница 5: ...238 Trays 1 and 2 239 Tray 3 241 Tray 4 Bypass 242 Tray 5 244 Tray 6 Inserter 245 Media Types 247 Storage and Handling 252 Machine and Job Status 253 Introduction 256 Job Status 257 Machine Status 26...

Страница 6: ...ons 325 Notices and Safety 328 Safety Labels and Symbols 329 Operational Safety Information 330 Basic Regulations 334 Copy Regulations 336 Fax Regulations 339 Material Safety Data 342 Product Recyclin...

Страница 7: ...Version 1 0 09 10 Xerox ColorQube 9301 9302 9303 Copy...

Страница 8: ...reproduced in any form without permission of Xerox Corporation XEROX XEROX and Design and ColorQube are trademarks of Xerox Corporation in the United States and or other countries Changes are periodic...

Страница 9: ...Options 20 Image Enhancement 20 Color Presets 21 Color Balance 21 Layout Adjustment 22 Original Orientation 22 Original Size 23 Book Copying 24 Image Shift 25 Edge Erase 25 Invert Image 26 Output Form...

Страница 10: ...mages based on the selections made Most feature screens include these buttons to confirm or cancel your choices Undo resets the current screen to the values that were displayed when the screen was ope...

Страница 11: ...to select color output from your original Single Color to select a single color output regardless of the color of your original Choose from Red Green Blue Cyan Green Yellow Magenta Reduce Enlarge A va...

Страница 12: ...nistrator The selected proportional ratios in percentages are shown next to the button together with an example application When Auto is selected the device chooses the best ratio to reduce or enlarge...

Страница 13: ...tains the size and type of paper you require The size and type of media loaded in each tray is displayed When the More button is selected the Paper Supply screen is displayed showing all the trays and...

Страница 14: ...the staple will be positioned in one of the long edge corners depending on how the originals are loaded Folding a new window opens providing access to the folding options Refer to Folding on page 15...

Страница 15: ...ed with one of the optional Hole Punch kits either 2 Hole 3 Hole 4 Hole Swedish 4 Hole or 2 Hole Legal Punch will be available Hole punching can only be selected for A4 LEF Legal SEF and A3 8 5x11 LEF...

Страница 16: ...ard or already formatted as a booklet Side 1 Image options are used to select if the image on the first side is printed inside or outside the fold Collation is used to select collated or uncollated ou...

Страница 17: ...or print process in the device For more information about using Tray 6 Inserter refer to the Paper and Media guide Booklet Maker The High Volume Finisher is also available with a Booklet Maker which e...

Страница 18: ...le The Convenience Stapler can staple between 2 sheets of 64 gsm 18 lb and 50 sheets of 80 gsm 20 lb The Staple Cartridge holds 5 000 staples To use the Convenience Stapler hold your documents face up...

Страница 19: ...uces sharper edges and is recommended for text and line art Photo is used specifically for originals containing photos magazine pictures or continuous tones without any text or line art Produces the b...

Страница 20: ...that have colored backgrounds by reducing or eliminating the background on the output copy This option is useful when your original is on colored paper Select Auto Suppression to automatically suppres...

Страница 21: ...ables you to adjust the balance between individual colors and the overall amount of color on the copies The options are Normal leaves the color the same as the original Basic Color adjusts the individ...

Страница 22: ...this option if your images are in the orientation matching the image shown when loaded in the document feeder Sideways Images refers to the direction the images are loaded in the document feeder Use t...

Страница 23: ...is used to enter a specific area for scanning Measure the area to be scanned on the original and enter the X and Y axis measurements into the fields provided Only the area specified is scanned Mixed S...

Страница 24: ...t Use the arrow buttons to specify an amount from 0 to 50 mm 0 to 2 to be deleted from the center of the book in order to delete unwanted marks reproduced from the gutter of the book Left Page use to...

Страница 25: ...used shift settings and are customized by the System Administrator using Tools Edge Erase Edge Erase enables you to specify how much of the image to erase around the edges of your document For example...

Страница 26: ...negative This feature is useful for originals that have a substantial amount of dark background or light text and images saving on ink usage The options are Mirror Image reverses the original image c...

Страница 27: ...nto the booklet automatically by selecting the Special Pages option from the Output Format tab If your device is fitted with the High Volume Finisher with Booklet Maker you can use the Booklet Creatio...

Страница 28: ...ed Originals according to the originals you are using 4 If available select either Fold or Fold and Staple as required and select Save to confirm your selections 5 Load your originals into the documen...

Страница 29: ...a right or left page as required blank pages are inserted automatically if needed Refer to Chapter Starts on page 31 Inserts enables blank pages to be inserted at designated places within your copy s...

Страница 30: ...page of your document onto side 1 of the front or back cover sheet Print on Side 2 is used to print the first or last page of your document onto side 2 of the front or back cover sheet Print on Both...

Страница 31: ...age number for the chapter start 5 Select either On Right Page to print on Side 1 or On Left Page to print on Side 2 6 Select the Add button to confirm your selections and add the programed Chapter St...

Страница 32: ...the Paper Settings screen and Confirm your selections 3 Select the Output Format tab Special Pages button and then Inserts 4 Select the After Page Number box and use the numeric keypad to enter the p...

Страница 33: ...ed 2 If required load special media into another paper tray ensuring that it is in the same orientation as the paper you are using for the body of your copies Update the Paper Settings screen and Conf...

Страница 34: ...e Page numbers are automatically increased by one For 2 sided copy output the page number is printed on both sides and counts as two pages Comment to add up to 50 alpha numeric characters in a specifi...

Страница 35: ...turn to the Annotations screen Program additional annotations as required 7 Program the Format Style options required for your Annotations Refer to Format and Style on page 38 for instructions 8 Selec...

Страница 36: ...tructions 9 Select Save to confirm your selections and run the job Date Use the following instructions to add the Date 1 Select the Output Format tab Annotations button and then Date 2 Select the On b...

Страница 37: ...to appear on All Pages or All Pages Except First 6 Use the scroll bar to browse the list of available prefixes and select the one you require To add a new prefix to the list highlight an empty entry a...

Страница 38: ...of font colors and select the one you require 5 Select the Side 2 Options from the following selections Same as Side 1 settings chosen will apply to both Side 1 and Side 2 of your output Mirror Side 1...

Страница 39: ...ins the transparencies 5 Select Save to confirm the selections and run the job Page Layout The Page Layout feature is ideal for handouts story boards or for archival purposes It allows up to 36 images...

Страница 40: ...esents the required number of images per page Alternatively select the Specify Rows Columns button and use the arrow buttons to select the number of rows and columns from 1 to 15 Select either Portrai...

Страница 41: ...size of the original is used to automatically calculate the maximum number of rows and columns that can be accommodated on the currently selected paper size To determine how the images are printed sel...

Страница 42: ...ndow between segments to view the Build Job screen during scanning Then select Save 3 Select the options required for the first segment of the job 4 Load the first segment originals and press Start 5...

Страница 43: ...ore printing the remaining sets 1 Select the Sample Set button on the Job Assembly tab 2 Select the On button and then select Save 3 Load the originals in the document feeder and program the job requi...

Страница 44: ...image Each time Saved Settings are retrieved and used the image must be scanned To Save 1 Program the required job features 2 Select the Save Current Settings button on the Job Assembly tab 3 Select...

Страница 45: ...s button on the Job Assembly tab 2 Select the required job settings from the list If required use the scroll bar to access all the settings 3 Select the Load Settings button to retrieve the programing...

Страница 46: ...t the Enter button 4 If an accounting system is in use on the device you may also need to enter additional information If Xerox Standard Accounting is enabled the user will also have to log in using t...

Страница 47: ...Version 1 0 09 10 Xerox ColorQube 9301 9302 9303 Fax...

Страница 48: ...reproduced in any form without permission of Xerox Corporation XEROX XEROX and Design and ColorQube are trademarks of Xerox Corporation in the United States and or other countries Changes are periodic...

Страница 49: ...2 Sided Scanning 58 Original Type 58 Resolution 59 Image Quality 60 Image Options 60 Image Enhancement 60 Layout Adjustment 62 Original Size 62 Reduce Split 63 Book Faxing 63 Fax Options 65 Confirmati...

Страница 50: ...An Extended Fax option is also available which utilizes two telephone lines Using two telephone lines provides the capability to simultaneously send and receive Note This device only faxes in black an...

Страница 51: ...tional dialing characters Refer to Dialing Characters on page 52 3 Select Add to add the number to the recipient list Enter additional numbers as required 4 To amend the Recipient List Select the entr...

Страница 52: ...ter before entering confidential numbers After the last confidential numbers select again to turn the mask data off Characters between the symbols will appear as Wait for Dial Tone suspends dialing un...

Страница 53: ...pient and select Add to Recipients from the drop down menu The number is added to the Recipients list Continue adding recipients as required 3 To add a Group entry to the list select the Individuals d...

Страница 54: ...lect Add to Recipient The recipients fax number is added to the number in the Recipient entry box Continue adding numbers using the numeric keypad or Address Book until the number is complete 4 Select...

Страница 55: ...the Edit Details option To delete the entry use the Clear Entry option Groups Group entries allow you to group individual entries under one number for regularly used broadcast transmissions When tran...

Страница 56: ...end a Group entry select the Edit Details option To delete a Group use the Clear Entry option Cover Sheet The Cover Sheet feature attaches a cover sheet to the document being transmitted This replaces...

Страница 57: ...the Keyboards button to access additional language keyboards Select Save 3 Select the From field and enter the name of the recipient using the keyboard and select Save 4 Select the comment required fr...

Страница 58: ...nal documents are double sided The document feeder must be used to scan your originals with this option 2 Sided Rotate Side 2 select if your original opens up like a calendar The document feeder must...

Страница 59: ...receiving fax terminal A higher resolution produces a better quality image A lower resolution reduces communication time The options are Standard 200x100 dpi is recommended for text originals It requi...

Страница 60: ...e the indicator down to darken the image or up to lighten the image Sharpness provides manual control to adjust the sharpness of the scanned images Move the indicator up to sharpen the image Move the...

Страница 61: ...ginals Contrast controls the image density on the output and compensates for an original that has too much or too little contrast on the image Select Manual Contrast to set the level of contrast yours...

Страница 62: ...alculate the size of your original and the scanned image You can also select Auto Detect for automatic size detection or Mixed Size Originals if scanning a mix of sizes The options are Auto Detect is...

Страница 63: ...nt is printed if your document paper size is larger than the receiving fax machine s capabilities The options are Reduce to Fit this option reduces the image to fit the paper size of the receiving fax...

Страница 64: ...Only use to scan the left page only Use the arrow buttons to specify an amount from 0 to 25mm 0 to 1 to be deleted from the right side of the page in order to delete unwanted marks reproduced from th...

Страница 65: ...ions displayed depend on the settings enabled in Tools Refer to the Administration and Accounting guide for more information The options are Print Confirmation Use to print a transmission report conta...

Страница 66: ...Correction Mode ECM Initial transmission speed is 33 600 Bits Per Second bps G3 14 4 Kbps Selects the transmission rate based on the maximum capabilities of the receiving fax machine Initial transmiss...

Страница 67: ...ypad to enter the hours and minutes If the device is set up to display the time using a 12 hour clock you must also select either the AM or PM button Select Save to save your selections and exit The f...

Страница 68: ...mailbox has been set up with a passcode of 0000 then any combination of numbers including no numbers can be entered as the passcode to gain access to the mailbox Select the Mailboxes button The option...

Страница 69: ...int Local Mailbox Documents button 2 Enter the Mailbox Number between 001 and 200 3 Enter the Mailbox Passcode 4 Select Print All Documents to print the contents of the mailbox The documents may be de...

Страница 70: ...mes depending on the Mailbox Polling Policies set Select the Local Polling button The options are Non Secure Polling This feature allows you to scan documents and store them in the memory of your devi...

Страница 71: ...al Document Documents stored in memory for local polling can be printed or deleted Select Print All to print the documents stored in memory Select Delete All to delete all stored documents A confirmat...

Страница 72: ...ay Send to program a specific time to poll the remote machine Refer to Delay Send on page 67 4 Select Poll Now to commence polling The remote device is polled and the retrieved document printed Select...

Страница 73: ...his window between segments to view the Build Job screen during scanning Then select Save 3 Select the options required for the first segment of the job Note The fax destination details must be entere...

Страница 74: ...Fax 74 8 Repeat these steps until all segments of your job have been programed and scanned 9 After the last segment has been scanned select Submit the Job to indicate you have finished scanning and t...

Страница 75: ...ure Receive feature all incoming faxes require a passcode in order to release them for printing 1 To release a Secure Fax for printing press the Job Status button and select the held fax in the list 2...

Страница 76: ...the Enter button 4 If an accounting system is in use on the device you may also need to enter additional information If Xerox Standard Accounting is enabled the user will also have to log in using th...

Страница 77: ...Version 1 0 09 10 Xerox ColorQube 9301 9302 9303 Server Fax...

Страница 78: ...reproduced in any form without permission of Xerox Corporation XEROX XEROX and Design and ColorQube are trademarks of Xerox Corporation in the United States and or other countries Changes are periodic...

Страница 79: ...Dialing Characters 81 Fax Directory 82 Server Fax Options 84 2 Sided Scanning 84 Original Type 84 Resolution 85 Image Quality 86 Image Options 86 Image Enhancement 86 Layout Adjustment 88 Original Ori...

Страница 80: ...y limit your faxing options For example the server may be set up to collect and send all faxes at off peak times Most feature screens include these buttons to confirm or cancel your choices Undo reset...

Страница 81: ...haracters button Use this option to enter the fax number if special characters are required To enter a fax number using the dialing characters 1 Select the Dialing Characters button 2 Use the numeric...

Страница 82: ...fax number and dialing characters required select Add to add the number to the recipient list 4 Select Close to return to the fax options Fax Directory The Fax Directory is used to store individual f...

Страница 83: ...Number field Use the C button to delete an incorrect entry or the Clear Text button to delete the entire entry Select Save The new entry is displayed in the list 4 To use the entry for the current jo...

Страница 84: ...ed 2 Sided is used if your original documents are double sided The document feeder must be used to scan your originals with this option 2 Sided Rotate Side 2 select if your original opens up like a ca...

Страница 85: ...d for text and line art Resolution The Resolution affects the appearance of the fax at the receiving fax terminal A higher resolution produces a better quality image A lower resolution reduces communi...

Страница 86: ...images Move the indicator down to darken the image or up to lighten the image Image Enhancement Image Enhancement provides options for improving the quality of the output by reducing the background o...

Страница 87: ...r an original that has too much or too little contrast on the image Select Manual Contrast to set the level of contrast yourself Move the indicator towards the More setting to reproduce more vivid bla...

Страница 88: ...r Use this option if your images are in the orientation matching the image shown when loaded in the document feeder Sideways Images refers to the direction the images are loaded in the document feeder...

Страница 89: ...r original from a list of pre set standard document sizes You can view the list by using the scroll bar Custom Scan Area is used to enter a specific area for scanning Measure the area to be scanned on...

Страница 90: ...nsmit faxes during off peak hours or when sending to another country or time zone Delay Send can also be used with Mailbox and Polling options The options are Specified Time Select Specified Time and...

Страница 91: ...the Build Job screen during scanning Then select Save 3 Select the options required for the first segment of the job Note The fax destination details must be entered prior to scanning 4 Load the firs...

Страница 92: ...lect the Enter button 4 If an accounting system is in use on the device you may also need to enter additional information If Xerox Standard Accounting is enabled the user will also have to log in usin...

Страница 93: ...Version 1 0 09 10 Xerox ColorQube 9301 9302 9303 Internet Fax...

Страница 94: ...reproduced in any form without permission of Xerox Corporation XEROX XEROX and Design and ColorQube are trademarks of Xerox Corporation in the United States and or other countries Changes are periodic...

Страница 95: ...99 2 Sided Scanning 100 Original Type 100 Advanced Settings 101 Image Options 101 Image Enhancement 101 Resolution 102 Quality File Size 103 Layout Adjustment 104 Original Orientation 104 Original Si...

Страница 96: ...et Faxes are automatically sent from the server to the device as print jobs Most feature screens include these buttons to confirm or cancel your choices Undo resets the current screen to the values th...

Страница 97: ...ent details 1 Select New Recipient 2 Select To or Cc for the recipient using the drop down menu to the left of the entry box 3 Using the keyboard enter the e mail address Up to 40 alphanumeric charact...

Страница 98: ...n to access additional language keyboards 4 Select Save to save and return to the previous screen or Cancel to exit The e mail address entered is displayed in the From field Subject To enter a subject...

Страница 99: ...required and add the recipient to the list using the drop down menu 5 To search different address books use the Public Address Book or Network Address Book option if available Select the Address Book...

Страница 100: ...e will contain medium quality pictures though the sharpness of text and line art is slightly reduced Photo is used specifically for originals containing photos magazine pictures or continuous tones wi...

Страница 101: ...ghten the image Sharpness provides manual control to adjust the sharpness of the scanned images Move the indicator up to sharpen the image Move the indicator down to soften the scanned image Saturatio...

Страница 102: ...rance of the scanned image A higher resolution produces a better quality image A lower resolution reduces communication time The options are 72 dpi recommended for output displayed on a computer It pr...

Страница 103: ...ile size delivers improved image quality but requires more time when transmitting over the network The options are Normal Quality produces small files by using advanced compression techniques Image qu...

Страница 104: ...eder Use this option if your images are in the orientation matching the image shown when loaded in the document feeder Sideways Images refers to the direction the images are loaded in the document fee...

Страница 105: ...nsing The size detected is matched to a standard size paper Preset Scan Areas allows you to define the size of your original from a list of pre set standard document sizes You can view the list by usi...

Страница 106: ...are Multi Page TIFF Tagged Image File Format produces a single TIFF file containing several pages of scanned images A more specialized software is required to open this type of file format PDF Portab...

Страница 107: ...age keyboards 2 Select Save to save the selections and exit Reply To The Reply To feature enables you to include an e mail address you want the recipient to reply to For example you can enter your per...

Страница 108: ...livery receipt when the job is received Once the receipt is received by the device the report is compiled and printed Note The report may be delayed depending on how quickly the recipient s respond Pr...

Страница 109: ...o view the Build Job screen during scanning Then select Save 3 Select the options required for the first segment of the job Note The recipient details must be entered prior to scanning 4 Load the firs...

Страница 110: ...elect the Enter button 4 If an accounting system is in use on the device you may also need to enter additional information If Xerox Standard Accounting is enabled the user will also have to log in usi...

Страница 111: ...Version 1 0 09 10 Xerox ColorQube 9301 9302 9303 Fax from PC...

Страница 112: ...reproduced in any form without permission of Xerox Corporation XEROX XEROX and Design and ColorQube are trademarks of Xerox Corporation in the United States and or other countries Changes are periodic...

Страница 113: ...ColorQube 9301 9302 9303 Fax from PC 113 Contents Introduction 114 Faxing from a PC 115 Fax from PC Options 117 Recipients 117 Preferences 117 Cover Sheet 119 Options 120...

Страница 114: ...on Fax must be enabled on the device There are 3 main screens that enable the setup and use of Fax from PC The Recipients screen is used to address your fax by either entering recipients individually...

Страница 115: ...led correctly contact your System Administrator for advice 3 Select the Properties button to display the print driver printing preferences 4 Select Fax as the Job Type on the Paper Output screen of th...

Страница 116: ...the transmission of your fax Dialing options for a number prefix or credit card billing systems When you have selected all the options you require select OK 8 Select OK on the print driver screen and...

Страница 117: ...the Add From Phonebook button You can choose from 3 Phonebooks Personal Shared and Shared LDAP The Personal and Shared phonebook information is stored in data files The file for your Personal phonebo...

Страница 118: ...l phonebook if enabled LDAP is a protocol that is often used for corporate address books This phonebook is located on a network server and accessed by many users You can copy information from the LDAP...

Страница 119: ...er sheet Use Show Custom Text to customize the cover sheet with your own information Select the Sender s Information to print Use Show Sender s Information to print the sender s information on the cov...

Страница 120: ...4800 bps is a slower transmission rate but is less susceptible to errors In some regional areas the use of 4800 bps is restricted G3 14 4Kbps selects the transmission rate based on the maximum capabi...

Страница 121: ...choose the local time that you want the fax sent Fax Dialing Options Use if you need to add an external access number a country code or an area code to the recipient number or if a credit card number...

Страница 122: ...Fax from PC Options ColorQube 9301 9302 9303 Fax from PC 122...

Страница 123: ...Version 1 0 09 10 Xerox ColorQube 9301 9302 9303 Print...

Страница 124: ...reproduced in any form without permission of Xerox Corporation XEROX XEROX and Design and ColorQube are trademarks of Xerox Corporation in the United States and or other countries Changes are periodic...

Страница 125: ...8 Paper 130 2 Sided Printing 131 Finishing 131 Print Quality 132 Output Destination 133 Special Pages 134 Add Covers 134 Add Inserts 135 Add Exceptions 135 Color Options 137 Color Correction 137 Print...

Страница 126: ...to enable it to be used on all the popular computer operating systems They are provided on a disc with your device or you can download the latest versions from the Xerox website www xerox com Instruc...

Страница 127: ...er driver options revert to the default settings Cancel Closes the dialog and returns all settings in the tabs to the values that were in place before the dialog was opened Any changes made are lost H...

Страница 128: ...a passcode Secure Print is used for confidential or sensitive jobs The job is held at the device until a passcode is entered to release the job for printing When you select this job type the Secure P...

Страница 129: ...vice Select Public or Private to specify the folder to use for the saved job This determines whether the job is available to other users or in a private folder If the job requires a passcode enter the...

Страница 130: ...Select a paper type from the drop down menu Automatically Select use to enable the printer to select a type Select by Tray use this option to select a specific tray for printing the job The printer o...

Страница 131: ...Finishing Use to select the finishing options for the print job such as stapling or hole punching To change the finishing options select the button to the right of the summary to display the finishin...

Страница 132: ...to create a center margin for the booklet This option provides space for the booklet center fold Specify the horizontal distance in points between the page images A point is 1 72 or 35 mm Creep This o...

Страница 133: ...uality mode Standard This option is a high speed general purpose printing mode for crisp bright color prints Recommended for most office uses and quick color prints Fast Color This provides the fastes...

Страница 134: ...s in the table Undo is used to undo the last actions if you make an error Up and Down are used to move the entries up or down in the table Some features are only supported by specific printer configur...

Страница 135: ...e numbers Note To add an insert to the front of your document use the Before Page 1 option 3 Select the number of insert sheets required 4 Specify the page number before each insert If multiple insert...

Страница 136: ...raming applied to the main job 1 Sided Print prints the exception pages on one side only 2 Sided Print prints the exception pages on both sides of the sheet of paper with the images printed so the job...

Страница 137: ...er s colors as closely as possible to colors on other devices such as your computer screen or a printing press or converting the colors to grayscale Color Uses the best color correction for each graph...

Страница 138: ...Color Options ColorQube 9301 9302 9303 Print 138 Print Settings on the Page Prints the filename print quality mode and color settings of the print job on the edge of the page...

Страница 139: ...only supported by specific printer configurations operating systems or driver types You may see more features or options listed than your specific device supports Page Layout Pages Per Sheet N Up Sel...

Страница 140: ...Page Layout Options If the orientation is not already set in your application select the orientation from the first drop down menu Portrait prints the text and images across the shortest dimension of...

Страница 141: ...Select one of the following options Text uses the characters that you type in the Text field This is displayed in the document as the watermark Time Stamp uses a time stamp as the watermark Select whe...

Страница 142: ...center the watermark Preview Options selects the paper size and orientation to use for the preview image of the watermark Select Color or Black and White to display the watermark in the selected font...

Страница 143: ...d tab enables you to select advanced printing options that are rarely changed Note Some features are only supported by specific printer configurations operating systems or driver types You may see mor...

Страница 144: ...Advanced ColorQube 9301 9302 9303 Print 144...

Страница 145: ...Version 1 0 09 10 Xerox ColorQube 9301 9302 9303 Workflow Scanning...

Страница 146: ...reproduced in any form without permission of Xerox Corporation XEROX XEROX and Design and ColorQube are trademarks of Xerox Corporation in the United States and or other countries Changes are periodic...

Страница 147: ...e Size 155 Update Templates 155 Layout Adjustment 156 Original Orientation 156 Original Size 157 Edge Erase 158 Filing Options 159 File Name 159 File Format 159 If File Already Exists 160 Document Man...

Страница 148: ...er to Scan to Home on page 173 Scan to USB Flash Drive allows the user to store the images on a USB flash drive inserted into the device USB port refer to USB Port on page 209 Workflow Scanning is set...

Страница 149: ...nning job you must select a template from the device touch screen Template operations can either be performed using Internet Services or FreeFlow SMARTsend For information about FreeFlow SMARTsend tem...

Страница 150: ...hich have been created using optional scanning applications Scan to Home Templates are available if you have entered your login details into the device Images are scanned to a specific area for each u...

Страница 151: ...nned image will contain medium quality pictures though the sharpness of text and line art is slightly reduced Text produces sharper edges and is recommended for text and line art Photo is used specifi...

Страница 152: ...rposes This setting results in the smallest file sizes and normal image quality OCR is best for documents that are going to be processed by Optical Character Recognition OCR software This setting resu...

Страница 153: ...to lighten the image Sharpness provides manual control to adjust the sharpness of the scanned images Move the indicator up to sharpen the image Move the indicator down to soften the scanned image Satu...

Страница 154: ...options are 72 dpi recommended for output displayed on a computer It produces the smallest file size 100 dpi recommended for output that delivers low quality text documents 150 dpi recommended for av...

Страница 155: ...with some originals Higher Quality produces larger files with better image quality Highest Quality produces the largest files with the maximum image quality Large files are not ideal for sharing and...

Страница 156: ...der Use this option if your images are in the orientation matching the image shown when loaded in the document feeder Sideways Images refers to the direction the images are loaded in the document feed...

Страница 157: ...ou to define the size of your original from a list of pre set standard original sizes You can view the list by using the scroll bar Custom Scan Area is used to enter a specific area for scanning Measu...

Страница 158: ...in your original The options are All Edges is used to erase an equal amount from all the edges Use the arrow buttons to adjust the amount to be erased from 0 to 50 mm 0 to 2 0 All marks or defects wi...

Страница 159: ...name of the file Up to 40 alphanumeric characters can be entered To delete a character use the back arrow key or to clear the entire entry select Clear Text Use the Keyboards button to access addition...

Страница 160: ...mage Only optimises the file for viewing and printing and cannot be modified Searchable runs the file through an Optical Character Recognition OCR process This can take a few minutes but allows the te...

Страница 161: ...agement data requirements are individually defined and programed within the workflow scanning template The Document Management data fields can be either mandatory or optional If the data is mandatory...

Страница 162: ...play this window between segments to view the Build Job screen during scanning Then select Save 3 Select the options required for the first segment of the job 4 Load the first segment originals and pr...

Страница 163: ...d http 192 168 100 100 3 Press Enter to view the Home page The Internet Services options for your device are displayed Note To find out the IP address of your device print a configuration report Refer...

Страница 164: ...e the options required 4 Select Apply to save the selections and exit Copying a Template A template can be copied and used as a base for a new template using Internet Services 1 To copy a template sel...

Страница 165: ...u only require your originals to be scanned and stored in the designated filing location Fax is selected if you also require your scanned images to be faxed to a remote fax destination If this is sele...

Страница 166: ...ser Input Required Select Mask User Input if the data entered is confidential such as a passcode If details of the entry must be added to the log select Record User Input to Job Log 4 Select Apply to...

Страница 167: ...arger file size delivers improved image quality but requires more time when transmitting over the network Select Edit to change the options Select Apply to save the selections and exit Layout Adjustme...

Страница 168: ...completed Job Log allows you to print a list of the last jobs that the system has completed processing Workflow Scanning Image Settings These settings are used to set the image optimization the searc...

Страница 169: ...documents or download them to your PC The Workflow Scanning option needs to be installed before this feature can be used but it is NOT necessary for the Workflow Scanning repositories and templates t...

Страница 170: ...ettings to customize the scanning selections using the Edit option Select Apply after customizing each option When you have finished customizing your scanning options select Back to return to the Fold...

Страница 171: ...als and process the Workflow Scanning job Remove the originals from the document feeder or glass when scanning has completed The Workflow Scanning job enters the job list ready for filing 9 Select Job...

Страница 172: ...save a copy of the file to a specified location If Download is selected you will need to select Save and specify a file location Reprint can be used to print the file on the device The job is sent to...

Страница 173: ...sitories and templates to be configured Your System Administrator enables the Scan to Home option in Internet Services Your System Administrator also needs to enable Network Authentication for this fe...

Страница 174: ...settings are changed to the settings in the Scan to Home template 7 Make programing changes to Output Color 2 Sided Scanning Original Type and Scan Presets as required Additional Workflow Scanning op...

Страница 175: ...ing 175 9 Select Job Status to view all the job lists and check the status of your job Refer to the Machine and Job Status guide for more information The scanned images are filed to the location speci...

Страница 176: ...n select the Enter button 4 If an accounting system is in use on the device you may also need to enter additional information If Xerox Standard Accounting is enabled the user will also have to log in...

Страница 177: ...Version 1 0 09 10 Xerox ColorQube 9301 9302 9303 E mail...

Страница 178: ...reproduced in any form without permission of Xerox Corporation XEROX XEROX and Design and ColorQube are trademarks of Xerox Corporation in the United States and or other countries Changes are periodic...

Страница 179: ...2 Sided Scanning 184 Original Type 184 Scan Presets 185 Advanced Settings 186 Image Options 186 Image Enhancement 186 Resolution 187 Quality File Size 188 Layout Adjustment 189 Original Orientation 18...

Страница 180: ...it the subject line of the e mail message Most feature screens include these buttons to confirm or cancel your choices Undo resets the current screen to the values that were displayed when the screen...

Страница 181: ...Recipient 2 Select To Cc or Bcc for the recipient using the drop down menu to the left of the entry box 3 Using the keyboard enter the e mail address Up to 40 alphanumeric characters can be entered T...

Страница 182: ...lear Text Use the Keyboards button to access additional language keyboards 4 Select Save to save and return to the previous screen or Cancel to exit The e mail address entered is displayed in the From...

Страница 183: ...displayed Select the name required and add the recipient to the list using the drop down menu 5 To search different address books use the Public Address Book or Network Address Book option Select the...

Страница 184: ...contain medium quality pictures though the sharpness of text and line art is slightly reduced Photo is used specifically for originals containing photos magazine pictures or continuous tones without...

Страница 185: ...setting results in the smallest file sizes and normal image quality OCR is best for documents that are going to be processed by Optical Character Recognition OCR software This setting results in larg...

Страница 186: ...the image Sharpness provides manual control to adjust the sharpness of the scanned images Move the indicator up to sharpen the image Move the indicator down to soften the scanned image Saturation cont...

Страница 187: ...tion affects the appearance of the scanned image A higher resolution produces a better quality image A lower resolution reduces communication time The options are 72 dpi recommended for output display...

Страница 188: ...size delivers improved image quality but requires more time when transmitting over the network The options are Normal Quality produces small files by using advanced compression techniques Image quali...

Страница 189: ...his option if your images are in the orientation matching the image shown when loaded in the document feeder Sideways Images refers to the direction the images are loaded in the document feeder Use th...

Страница 190: ...define the size of your original from a list of pre set standard original sizes You can view the list by using the scroll bar Custom Scan Area is used to enter a specific area for scanning Measure the...

Страница 191: ...our original The options are All Edges is used to erase an equal amount from all the edges Use the arrow buttons to adjust the amount to be erased from 0 to 50 mm 0 to 2 0 All marks or defects within...

Страница 192: ...o 40 alphanumeric characters can be entered To delete a character use the back arrow key or to clear the entire entry select Clear Text Use the Keyboards button to access additional language keyboards...

Страница 193: ...earchable runs the file through an Optical Character Recognition OCR process This can take a few minutes but allows the text in the file to be searchable and editable If Searchable is selected the Doc...

Страница 194: ...nal e mail address If you logged in through authentication and your details are available in the Address Book your e mail address is displayed Using the keyboard enter the message required Up to 50 al...

Страница 195: ...the Build Job screen during scanning Then select Save 3 Select the options required for the first segment of the job Note The recipient details must be entered prior to scanning 4 Load the first segm...

Страница 196: ...ct the Enter button 4 If an accounting system is in use on the device you may also need to enter additional information If Xerox Standard Accounting is enabled the user will also have to log in using...

Страница 197: ...Version 1 0 09 10 Xerox ColorQube 9301 9302 9303 Print From...

Страница 198: ...reproduced in any form without permission of Xerox Corporation XEROX XEROX and Design and ColorQube are trademarks of Xerox Corporation in the United States and or other countries Changes are periodic...

Страница 199: ...ents Introduction 200 Using Print From 201 Using the ColorQube 9301 9302 9303 201 Using Internet Services 202 Saving Jobs for use with Print From 203 Using the Print Driver 203 Using Internet Services...

Страница 200: ...Services Print Submission Stored jobs are placed into a folder located on the device Stored jobs can be recalled and printed as many times as you need To print directly from a USB Memory Device inser...

Страница 201: ...appears Select Print from USB The list of folders and jobs is displayed 4 Select the folder required and the print ready job required If necessary use the Up and Down buttons to scroll through the li...

Страница 202: ...vice are displayed Note To find out the IP address of your device print a configuration report Refer to the Machine and Job Status guide for instructions 4 Select the Jobs tab This screen shows the jo...

Страница 203: ...e 9301 9302 9303 printer from the Printer Name drop down menu 3 Select Properties to access the print settings for the job 4 Select the Job Type drop down menu and select Saved Job The Saved Job optio...

Страница 204: ...nfiguration report Refer to the Machine and Job Status guide for instructions 4 Select Print to access the Job Submission options 5 Enter the file name of the job requiring saving or use the Browse op...

Страница 205: ...lic folders These are the other kind of folders you may see The Public folder has been created by a user It can be used by any user and has no access authority limitations Any user can access and modi...

Страница 206: ...or instructions 4 Select the Jobs option 5 Select Saved Jobs tab to access the folder options 6 Select Manage Folders The window displays all the Public folders and any Private folders belonging to yo...

Страница 207: ...lect the Enter button 4 If an accounting system is in use on the device you may also need to enter additional information If Xerox Standard Accounting is enabled the user will also have to log in usin...

Страница 208: ...Log In Out ColorQube 9301 9302 9303 Print From 208...

Страница 209: ...Version 1 0 09 10 Xerox ColorQube 9301 9302 9303 USB Port...

Страница 210: ...reproduced in any form without permission of Xerox Corporation XEROX XEROX and Design and ColorQube are trademarks of Xerox Corporation in the United States and or other countries Changes are periodic...

Страница 211: ...ColorQube 9301 9302 9303 USB Port 211 Contents Introduction 212 Scan to USB 213 Print from USB 214 Log In Out 215...

Страница 212: ...Drive select the Scan to USB option from the drop down menu The Workflow Scanning options are displayed Select the options required for scanning and scan the job The job is stored in the USB Flash Dr...

Страница 213: ...cated on the left side of the device The USB Drive Detected screen appears 3 Select Scan to USB The Workflow Scanning options are displayed and the USB Store template is selected 4 If required modify...

Страница 214: ...Down buttons to scroll through the list until the folder or job is displayed 4 Select the features required for your job Paper Supply use to select the paper source or select Auto for the device to c...

Страница 215: ...ect the Enter button 4 If an accounting system is in use on the device you may also need to enter additional information If Xerox Standard Accounting is enabled the user will also have to log in using...

Страница 216: ...Log In Out ColorQube 9301 9302 9303 USB Port 216...

Страница 217: ...Version 1 0 09 10 Xerox ColorQube 9301 9302 9303 Internet Services...

Страница 218: ...reproduced in any form without permission of Xerox Corporation XEROX XEROX and Design and ColorQube are trademarks of Xerox Corporation in the United States and or other countries Changes are periodic...

Страница 219: ...ices 221 Status 222 Welcome 222 Description Alerts 222 Billing Information 222 Usage Counters 223 Configuration 223 Consumables 223 Trays 224 Information Pages 224 SMart eSolutions 224 Jobs 227 Active...

Страница 220: ...er provides direct access to the device Internet Services enables users to perform many functions including Checking machine status billing information and consumable status Submitting print jobs over...

Страница 221: ...is also required To access Internet Services 1 Open the web browser from your Workstation 2 In the URL field enter http followed by the IP Address of the device For example If the IP Address is 192 1...

Страница 222: ...rmation about setting up and installing your device Once you have reviewed this page it can be switched off using the Don t Show Welcome Page again option Description Alerts A description of any probl...

Страница 223: ...umber of copied sheets number of printed sheets number of faxes and number of large sheets Configuration This section displays the configuration of the device and the option to print a configuration r...

Страница 224: ...ns provides the ability to automatically send data to Xerox to be used for billing supplies tracking and replenishment and for troubleshooting problems SMart eSolutions provides the following features...

Страница 225: ...For information about configuring the Meter Assistant settings refer to the System Administrator Guide Supplies Assistant The Supplies Assistant enables you to proactively manage ink and component sup...

Страница 226: ...to save or view a CSV file containing detailed information about device usage and any problems which have occurred on your device Use the Refresh button to view the latest status information For infor...

Страница 227: ...on to check the status of your job The Incomplete Jobs list displays a list of the current jobs and the status of each job Saved Jobs Jobs which have been saved to the device memory can be accessed us...

Страница 228: ...ipt file to the printer over the internet You can send the job from your desktop or from a remote location To use the Job Submission option Enter the file name of the job requiring printing or use the...

Страница 229: ...tion displays a list of all the Workflow Scanning templates that have been created using Internet Services Use the Scan options to create modify copy or delete Workflow Scanning templates Refer to the...

Страница 230: ...file Comma Separated Values format The Address Book tab is used to setup and manage a Public Address Book The file must be in a CSV Comma Separated Values format for the device to be able to read the...

Страница 231: ...ion contains all the settings setups and default values for installing and setting up the device These are protected by a user name and password and should only be changed by your System Administrator...

Страница 232: ...neral and Troubleshooting tabs The General tab displays the name and telephone number of your System Administrator and the telephone numbers you should use for Customer Support and Supplies Use the Tr...

Страница 233: ...button to display the Help screens The structure of the Help screens corresponds to the structure of the Internet Services options Use the menu on the left of the Help page to access descriptions and...

Страница 234: ...Help ColorQube 9301 9302 9303 Internet Services 234...

Страница 235: ...Version 1 0 09 10 Xerox ColorQube 9301 9302 9303 Paper and Media...

Страница 236: ...reproduced in any form without permission of Xerox Corporation XEROX XEROX and Design and ColorQube are trademarks of Xerox Corporation in the United States and or other countries Changes are periodic...

Страница 237: ...Tray 3 241 Tray 4 Bypass 242 Loading Tray 4 Bypass 242 Tray 5 244 Loading Tray 5 244 Tray 6 Inserter 245 Loading Tray 6 Inserter 245 Media Types 247 Plain 247 Pre Punched 247 Transparencies 248 Pre Pr...

Страница 238: ...dia sizes in the range A5 SEF to SRA3 SEF 5 5x8 5 SEF to 12x18 SEF The capacity for this tray is 100 sheets of 75 gsm or 20 lb paper Paper Tray 2 This tray is standard on the device It is a fully adju...

Страница 239: ...tray is opened a screen is displayed identifying the media that should be loaded in the tray If the wrong size of media is loaded or the tray guides are set incorrectly the device gives a warning to a...

Страница 240: ...the tray Load pre printed paper and labels face up and with the top towards the front of the device Load hole punched paper with the holes on the right edge Paper must not be loaded above the maximum...

Страница 241: ...pecified Loading Tray 3 Only A4 or 8 5x11 LEF sized media can be loaded The media size and type requested must be loaded in the tray and the settings cannot be adjusted by the user Note Your device do...

Страница 242: ...dia sizes in the range A5 SEF to SRA3 SEF 5 5x8 5 SEF to 12x18 SEF Envelopes sizes DL to C4 10 to 9x12 all envelopes must be fed Short Edge Feed SEF Media types Bond standard or recycled paper Card Pr...

Страница 243: ...loaded above the maximum fill line 3 Make sure that the guides just touch the paper The paper settings for the tray are displayed on the touch screen The tray detects the position of the side guide to...

Страница 244: ...pes tabs or carbonless paper Tray 4 Bypass can be used for these media types Loading Tray 5 The media size and type requested must be loaded in the tray and the settings cannot be adjusted by the user...

Страница 245: ...or recycled paper Card Pre printed media Hole punched paper Clear transparencies Tray 6 Inserter must not be used to feed labels envelopes tabs or carbonless paper Tray 4 Bypass can be used for these...

Страница 246: ...and Orientation Output Required Original Orientation Output Tray Orientation Inserter Orientation to match output A4 8 5x11 LEF Long Edge Feed Stapled Top Left or non stapled A4 8 5x11 SEF Short Edge...

Страница 247: ...n Pre punched Transparency Pre Printed Recycled Paper Labels Heavyweight Extra Heavyweight Pre Cut Tabs Envelopes Plain This media type is used for plain and colored paper as well as lightweight card...

Страница 248: ...lear transparencies allow maximum presentation space Note Only Tray 4 Bypass can be used to feed transparencies Load transparencies which have a white strip along one edge with the strip to the left a...

Страница 249: ...in Trays 1 and 2 Load labels face down and with the top towards the front of the device in Tray 4 Bypass Note Do not fan the label sheets before use unless the package instructs you to do so If jammin...

Страница 250: ...Bypass face down Envelopes must always be fed Short Edge Feed SEF The flaps should ALWAYS be closed Flap edge should be to the left or towards the front Your device can feed the following types of env...

Страница 251: ...aper and Media 251 Unacceptable Types The following envelope characteristics are not acceptable Side seamed construction Announcement or catalogue envelopes Windows Board backed Padded Self adhesive w...

Страница 252: ...The ream wrapper contains an inner lining that protects the paper from moisture Store on a flat surface to prevent the paper from folding or curling Stack reams of paper carefully on top of one anoth...

Страница 253: ...Version 1 0 09 10 Xerox ColorQube 9301 9302 9303 Machine and Job Status...

Страница 254: ...reproduced in any form without permission of Xerox Corporation XEROX XEROX and Design and ColorQube are trademarks of Xerox Corporation in the United States and or other countries Changes are periodic...

Страница 255: ...3 Machine and Job Status 255 Contents Introduction 256 Job Status 257 Active Jobs 257 Completed Jobs 258 Managing Jobs 260 Machine Status 262 Machine Information 262 Faults 264 Supplies 264 Billing In...

Страница 256: ...Status displays all the jobs in the job list waiting to be processed and the completed jobs Each list can be viewed by selecting the relevant tab Machine Status provides information about the install...

Страница 257: ...The Status is updated as the jobs are processed and printed The following Status information can be shown Printing the device is currently printing the job Scheduling the job has been converted into t...

Страница 258: ...ed and printed A held job does not hold up other jobs in the list There are various reasons why a job might be held for example the job is a secure print or fax job or the required resources are not a...

Страница 259: ...he Up and Down buttons to scroll through the jobs in the list To view the details of a completed job select the job The job details are displayed Select Close to exit the Job Details screen Select All...

Страница 260: ...elease is selected if a Secure Print job has been held in the list and a passcode is required in order for the job to print Promote is used to move a job to the top of the list It will be completed af...

Страница 261: ...quired to release the job for printing 5 Select the job in the list and select Release 6 Enter the passcode For Secure Print jobs it must match the passcode entered when the job was submitted using th...

Страница 262: ...general information about the device such as the device model serial number and software version It also provides options for access status information about the paper trays and consumables Further i...

Страница 263: ...hecking the quality and color settings Select the report guide or sampler page required and select Print Note Access to the Information Pages may be restricted Contact your System Administrator or ref...

Страница 264: ...ted for further information Current Messages displays a list of all the current fault messages Fault History provides a log of all the device errors Supplies The Supplies tab provides information on c...

Страница 265: ...at have passed through the device in each of the job categories Images Sent Counters displays the number of Fax Server Fax Internet Fax E mail and Workflow Scanning images which have been sent from th...

Страница 266: ...Machine Status ColorQube 9301 9302 9303 Machine and Job Status 266...

Страница 267: ...Version 1 0 09 10 Xerox ColorQube 9301 9302 9303 Administration and Accounting...

Страница 268: ...reproduced in any form without permission of Xerox Corporation XEROX XEROX and Design and ColorQube are trademarks of Xerox Corporation in the United States and or other countries Changes are periodic...

Страница 269: ...nting Enablement 284 Service Settings 285 Copy Service Settings 285 Embedded Fax Settings 288 Job Sheets 295 Service Plan 295 Network Settings 296 Online Offline 296 TCP IP Settings 296 Advanced Setti...

Страница 270: ...s button on the control panel Accessing Tools 1 Press the Machine Status button 2 Select the Tools tab To have access to all the Tools options you must be logged in as an Administrator 3 Select Log In...

Страница 271: ...272 Custom Keyboard Button on page 273 Xerox Customer Support on page 273 Entry Screen Defaults on page 273 Measurements on page 273 Paper Size Preference on page 273 Audio Tones on page 274 Energy Sa...

Страница 272: ...nd time on the device GMT Offset Time Zone Use this option to set the difference between your local time and Greenwich Mean Time Enter the GMT Offset time between 12 0 and 14 0 hours using the arrow b...

Страница 273: ...ire entry Entry Screen Defaults This feature can only be set using Internet Services It enables the System Administrator to set which screen the user sees first on the device Instructions for accessin...

Страница 274: ...Tone sounds when the device accepts your selection Select High Medium Low or Off Use the Test option to hear the tone selected Paper Management Select the Paper Management option to access the follow...

Страница 275: ...used to select the most frequently used paper size formats Inches for formats such as 8 5x11 or 11x17 Metric for formats such as A4 or A3 Tray Settings Use to apply attributes to each paper tray so t...

Страница 276: ...color of the media in a tray that has been designated as a dedicated tray Select a tray designated as a dedicated tray Change Size is used to select the size required for the tray Select the size of...

Страница 277: ...have been held in the job list for a specified period of time and have been abandoned by a user E mail network scanning incoming server fax embedded fax and internet fax jobs are not affected by this...

Страница 278: ...scanning This option allows you to customize the bias based on the type of originals being scanned and the output required Select the bias towards color or monochrome for scanning using the document g...

Страница 279: ...ables you to change the priority of print and copy jobs Priority enables you to choose which jobs have priority Copy or Print jobs Use the arrow buttons to set the priority for the Copy Jobs and Print...

Страница 280: ...us set making it easier to separate the sets There maybe occasions when you require the job to stack without offsetting Use this feature to enable or disable the offsetting Enable instructs the device...

Страница 281: ...e services will require a Reboot to activate them on the device Low Supply Warning This option is used to set up the warning period given for each of the device consumables The device will display a m...

Страница 282: ...nternet If you are unsure which IP setting to use select Enabled for both IPv4 and IPv6 Select Next to continue to the next screen Get IP Address from a DHCP Server is used if you want to have an IP a...

Страница 283: ...y use the backspace key or to delete the entire entry select Clear Select Next to continue to the next screen A completion screen is displayed with instructions for printing a configuration report if...

Страница 284: ...touch screen settings back to their original state when the device was setup at the factory A confirmation screen is displayed select Reboot to continue with the reset and to reboot the device Select...

Страница 285: ...rase Presets on page 286 Image Shift Presets on page 286 Reduce Enlarge Presets on page 287 Reading Order Options on page 287 Auto Image Rotation on page 288 Feature Defaults Use to select the default...

Страница 286: ...etion amounts for the Top Bottom Left and Right margins The parameters entered are the defaults shown when the preset is selected Image Shift Presets Enables you to setup the Image Shift pre set entri...

Страница 287: ...00 can be entered Reading Order Options This option allows you to show or hide the Reading Order option Book Copying and Booklet Creation options assume that the bound originals and booklets have a re...

Страница 288: ...is selected Select Auto Rotate as needed to allow automatic rotation or Disable Rotation to restrict the device from rotating the image Embedded Fax Settings Select the Embedded Fax Settings option to...

Страница 289: ...he Country required from the options shown Line 1 Setup The standard fax option supports one analogue telephone line If the Extended Fax option is installed the device can support two analogue telepho...

Страница 290: ...line Enter the time delay required between 0 and 15 seconds Junk Fax Prevention This setting enables you to prevent the receipt of unwanted junk faxes This is done by only allowing the receipt of faxe...

Страница 291: ...hole punch or 2 side your incoming faxes This utility is used to specify the output options you require for all your incoming faxes Staple staples all incoming fax output if enabled Hole Punch prints...

Страница 292: ...job including the cover page should be resent Audio Line Monitor When the device is transmitting a fax the dialing handshake and digital data creates audible beeps and buzzing sounds The audio line m...

Страница 293: ...ted A confirmation screen is displayed as this can cause the memory to become full very quickly Mailbox Setup Incoming Faxes can be stored in mailboxes prior to printing for convenience or added secur...

Страница 294: ...l transmission Report Options is used to determine when the report prints Select Always Print to print after each transmission Off if a report is not required or Print On Error if the report is requir...

Страница 295: ...es off the banner sheet option Output Error Sheets Enables the device to print an error report if an error occurs during a print job Enable is selected to print an Output Error Sheet Disable switches...

Страница 296: ...ministrator to enter the TCP IP settings for the device Advanced Settings This option enables the System Administrator to setup the Network Settings A warning screen is displayed prior to accessing th...

Страница 297: ...nce enabled the IP address of the device is entered and Xerox Standard Accounting can be setup Network Accounting is a feature of the device which automatically tracks print scan server fax and copy u...

Страница 298: ...ible with the Network Accounting function Customize Prompts allows you to customize the prompts that are provided to the users Code Entry Validation is used to check users accounting credentials prior...

Страница 299: ...nistrator Only Image Overwrite Security Image Overwrite If you have sent print jobs to the device that are confidential or sensitive you can setup the device to automatically remove any data stored on...

Страница 300: ...protocol enabled using Internet Services To disable IP Sec on the device select the Disable IP Sec option Valid Recipients This feature sets the parameters for allowed recipients in the E mail and In...

Страница 301: ...splayed Use the Print option to print the list Fix Image Quality Use this option to Print Test Pages to help you diagnose print issues Analyse the output and choose one of the options to fix the image...

Страница 302: ...Eco Fix is selected to correct banding when the device is not in use Always Fix is selected to correct banding when it is detected Off is selected if no action is required Resets Use this option to r...

Страница 303: ...ons are used to trouble shoot problems relating to the network connection Echo Test The Echo Test allows you to test the network connectivity Select the appropriate protocol and select the Start Test...

Страница 304: ...Troubleshooting ColorQube 9301 9302 9303 Administration and Accounting 304...

Страница 305: ...Version 1 0 09 10 Xerox ColorQube 9301 9302 9303 General Care and Troubleshooting...

Страница 306: ...reproduced in any form without permission of Xerox Corporation XEROX XEROX and Design and ColorQube are trademarks of Xerox Corporation in the United States and or other countries Changes are periodic...

Страница 307: ...ple Cartridges 311 Emptying the Waste Ink Tray 312 Emptying the Hole Punch Waste Container 313 Print Quality Maintenance 313 Cleaning Tasks 314 Troubleshooting 315 Defining the Problem 315 Faults 315...

Страница 308: ...selected the power down option will be cancelled and the device will be available for use Note It is recommended the device is only powered off if a problem occurs or if it is being moved Use the powe...

Страница 309: ...n setup the following Energy Saver options Intelligent Ready wakes up and sleeps automatically based on previous usage The device uses algorithms and data gathered on a usage profile to anticipate per...

Страница 310: ...tive giving your Company Name product number and the device serial number An option is available within Internet Services which allows the device to contact Xerox automatically to order units when req...

Страница 311: ...ak up the spillage Clean any residual slippery coating using a strong detergent soap solution and apply sand or other inert granular material to improve traction Dispose of all waste material in accor...

Страница 312: ...se the finisher door High Volume Finisher Booklet Maker Staple Cartridges 1 Open the finisher door Pull out the booklet maker module 2 Lower the lever to gain access to the staple cartridges Grip the...

Страница 313: ...sks your device performs automatically to ensure it is running at optimum print quality Automatic Print Quality Maintenance Your device contains a sub system that periodically monitors the quality of...

Страница 314: ...of such cleaners can result in a risk of explosion and fire Document Glass and Constant Velocity Transport Glass Apply Xerox Cleaning Fluid or Xerox Anti Static Cleaner to a lint free cloth Liquid sh...

Страница 315: ...ault Hard Down Faults Hard Down faults prevent a subsystem module or component from functioning properly There are three categories of Hard Down faults Low Level Fault this occurs when a subsystem or...

Страница 316: ...he user by one of two methods Interrupting Fault Interrupting faults are presented if the associated fault affects the entire device where the device is not capable of accepting input or output They a...

Страница 317: ...faults Usage counters are also available The Faults tab displays fault listings and the device error logs The faults are separated into Current Faults Current Messages and Fault History Current Fault...

Страница 318: ...g Labels and transparencies can only be loaded into Tray 4 Bypass Before loading paper into the trays fan the edges This procedure separates any sheets of paper that are stuck together and reduces the...

Страница 319: ...ructions on removing the staple cartridge If the Staple Cartridge is not at the front of the device power the device Off and On using the On Off switch at the side of your device Remove any partially...

Страница 320: ...is option to print the Troubleshooting Print Quality Page and the Jet Test Pages The Troubleshooting Print Quality Page provides information about problem solving and the options which can be used to...

Страница 321: ...defect is not on the original Clean the document glass and the Constant Velocity Transport CVT glass Fix the image quality problems Refer to Image Quality Problems on page 320 for instructions Dark o...

Страница 322: ...elect the 2nd side option in the options if printing Side 2 on pre printed paper Fix the image quality problems Refer to Image Quality Problems on page 320 for instructions Light lines and streaks app...

Страница 323: ...ots on copies Reprint the job Make sure the defect is not on the original Clean the document glass and the Constant Velocity Transport CVT glass Marks on the lead edge of paper stack which are in line...

Страница 324: ...displayed on this screen Maintenance Assistant If a problem occurs which requires further investigation from Xerox diagnostic information can be sent directly to Xerox using the Maintenance Assistant...

Страница 325: ...Version 1 0 09 10 Xerox ColorQube 9301 9302 9303 Safety and Regulations...

Страница 326: ...reproduced in any form without permission of Xerox Corporation XEROX XEROX and Design and ColorQube are trademarks of Xerox Corporation in the United States and or other countries Changes are periodic...

Страница 327: ...ation 333 Basic Regulations 334 United States FCC Regulations 334 Canada Regulations 334 European Union 334 Turkey RoHS Regulation 335 Copy Regulations 336 United States 336 Canada 338 Other Countries...

Страница 328: ...ed to meet strict safety requirements These include safety agency evaluation and certification and compliance with electromagnetic regulations and established environmental standards The safety and en...

Страница 329: ...lerts users to an area of the equipment which includes a sharp edge which could cause laceration in the event that extreme force is used on the guard which prevents contact in normal use The edge is c...

Страница 330: ...of the equipment If you are not sure that your electrical supply meets the requirements please consult your local power company or a licensed electrician for advice The electrical supply outlet should...

Страница 331: ...he weight of the machine Always locate the equipment in an area that has adequate ventilation and room for servicing Always unplug this equipment from the electrical outlet before cleaning Note Your X...

Страница 332: ...e power cable from the electrical outlet Maintenance Information WARNING Do not use aerosol cleaners Aerosol cleaners can be explosive or flammable when used on electromechanical equipment Any operato...

Страница 333: ...Certification This product is certified by the following Agency using the Safety standards listed This product has been manufactured under a registered ISO9001 Quality system Agency Standard Canadian...

Страница 334: ...ed by turning the equipment off and on the user is encouraged to try to correct the interference by one or more of the following measures Reorient or relocate the receiver Increase the separation betw...

Страница 335: ...uipment Directive 1999 5 EC This product if used properly in accordance with the user s instructions is neither dangerous for the consumer nor for the environment To ensure compliance with European Un...

Страница 336: ...p this may be done provided the reproduction of the document is performed for lawful purposes Postage Stamps canceled or uncanceled For philatelic purposes Postage Stamps may be photographed provided...

Страница 337: ...ception United States military discharge certificates may be photographed 10 Badges Identification Cards Passes or Insignia carried by military personnel or by members of the various Federal Departmen...

Страница 338: ...tate other than Canada 7 Impressed or adhesive stamps used for the purpose of revenue by the Government of Canada or of a province or by the government of a state other than Canada 8 Documents registe...

Страница 339: ...AAAEQ TXXXX If requested this number must be provided to the Telephone Company A plug and jack used to connect this equipment to the premises wiring and telephone network must comply with the applicab...

Страница 340: ...s causing harm to the telephone network the Telephone Company may request that you disconnect the equipment until the problem is resolved Repairs to the machine should be made only by a Xerox Service...

Страница 341: ...uipment Europe Radio Equipment Telecommunications Terminal Equipment Directive The Facsimile has been approved in accordance with the Council Decision 1999 5 EC for pan European single terminal connec...

Страница 342: ...ions 342 Material Safety Data For Material Safety Data information regarding your printer go to North America www xerox com msds European Union www xerox com environment_europe For the Customer Suppor...

Страница 343: ...2 96 EC Some equipment may be used in both a domestic household and a professional business application Professional Business Environment Application of this symbol on your equipment is confirmation t...

Страница 344: ...handling For more information about collection and recycling of old products and batteries please contact your local municipality your waste disposal service or the point of sale where you purchased t...

Страница 345: ...s trademarks The ENERGY STAR Imaging Equipment Program is a team effort between U S European Union and Japanese governments and the office equipment industry to promote energy efficient copiers printe...

Страница 346: ...information on Environment Health and Safety in relation to this Xerox product and supplies please contact the following customer help lines USA 1 800 828 6571 Canada 1 800 828 6571 Europe 44 1707 35...

Страница 347: ...ion 222 265 Black Impressions 222 265 Book Copying 24 Book Faxing 63 Booklet Creation 27 BPS Bits Per Second 66 Brightness 283 Broadcast Report 294 Build Job 42 73 91 109 162 167 C Calibration 320 Cal...

Страница 348: ...Settings 288 Embedded Web Pages 221 Emptying the Hole Punch Waste Container 313 Emptying the Waste Ink Tray 312 Energy Program Compliance 345 Energy Save 308 Energy Saver Settings 271 ENERGY STAR 345...

Страница 349: ...tus 222 Interrupt Printing Enablement 284 Invert Image 26 J Job Deletion Setting 299 Job List 257 Job Log 168 Job Sheets Setup 295 Job Status 257 Job Submission using Internet Services 228 Jobs 227 Ac...

Страница 350: ...t Electrical Safety 330 Pre Programed Settings 44 45 Print 126 228 Print Confirmation Report 65 Print From USB 212 Print from USB 214 Print From 200 Create New Folder 205 Managing Saved Jobs 205 Modif...

Страница 351: ...y 10 E mail 180 Fax 50 Internet Fax 96 Server Fax 80 Workflow Scanning 148 Services Default 273 Services Home 10 50 80 96 148 180 201 Setting Accounting 297 Audio Tones 274 Automatic Banding Fix 302 C...

Страница 352: ...106 159 Timers Settings 276 Tools Pathway 270 Total Impressions 224 Touch Screen 314 Transmission Defaults 291 Transmission Report 65 116 120 294 Transparency Separators 39 Tray Management Settings 2...

Отзывы: