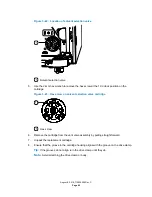
Figure 3–31: Loosening the shell nut
1
2
3
Pump head
Shell nut
i
2
Valve
Notice:
To avoid damaging the
i
2
Valve
actuator assembly when removing it,
• ensure that the PEEK washer, which is normally on the top face of the
i
2
Valve
cartridge, does not remain in the pump head;
• never place the actuator assembly or electrical connector in the drip tray.
7.
Remove the
i
2
Valve
actuator from the bottom of the primary pump head.
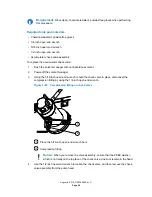
Figure 3–32: Removing actuator from pump head
1
2
Bottom of pump head
i
2
Valve
actuator
August 8, 2016, 715005050 Rev. C
Page 70


