background image

Troubleshooting

     Page  45

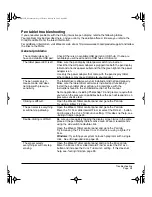
Pen tablet troubleshooting

If you encounter problems with the Cintiq interactive pen display, refer to the following tables.  
Your problem may be described here, and you can try the solution offered.  Be sure you refer to the 
Cintiq Read Me file for the latest information.

For additional information, visit Wacom’s web site at http://www.wacom.com/productsupport and follow 
the links to the FAQs.

General problems

The computer does not 
have an available USB port.

Check if there is an available USB port on a USB hub.  If none are 
available you will need to add a USB hub or USB card.

The tablet power LED is off.

Make sure the pen display tablet power switch is turned on.

Check that the AC power adapter is plugged into both the pen display 
tablet and an active power outlet and that the green light on the power 
adapter is on.

Use only the power adapter that came with the pen display tablet; 
other adapters may cause damage to your product.

The pen works only in 
mouse mode, and does 
not draw with pressure-
sensitivity.

The tablet driver software was not installed or did not load properly.   
Make sure the tablet driver software is installed and functioning. 
Install the pen tablet driver software in accordance with the 
instructions found in the 

Installation

 section of this manual.

Some applications, including Photoshop 7.0 and greater, require that 
you turn on the pressure capabilities before the pen will respond as a 
pressure-sensitive tool.

Clicking is difficult.

Open the Wacom Tablet control panel and go to the P

EN

 tab.  

Try using a lighter T

IP

 F

EEL

.

The pen selects everything 
or will not stop drawing.

Open the Wacom Tablet control panel and go to the P

EN

 tab.  

Move the T

IP

 F

EEL

 slider toward F

IRM

, or select the D

ETAILS

... button 

and increase the C

LICK

 T

HRESHOLD

 setting.  If this does not help, see 

Testing Cintiq

 on page 39.

Double-clicking is difficult.

Be sure you are quickly tapping the display screen twice in the same 
place on the pen display tablet’s active area.  Wacom recommends 
using the side switch to double-click.

Open the Wacom Tablet control panel and go to the P

EN

 tab.  

Try increasing the T

IP

 D

OUBLE

 C

LICK

 D

ISTANCE

 or using a lighter T

IP


F

EEL

.

Windows:

 Try setting your system to launch programs with a single 

click.  See 

Pen operations

 on page 24.

The eraser selects 
everything or will not stop 
erasing.

Open the Wacom Tablet control panel and go to the E

RASER

 tab.  

Move the E

RASER

 F

EEL

 slider toward F

IRM

, or select the D

ETAILS

... 

button and increase the C

LICK

 T

HRESHOLD

 setting.  If this does not 

help, see 

Testing Cintiq

 on page 39.

Cintiq21UX_Manual.fm  Page 45  Friday, January 28, 2005  6:49 PM

Содержание Cintiq 21UX

Страница 1: ...Installation Guide Hardware Manual www wacom com Cintiq21UX_Manual fm Page 1 Friday January 28 2005 6 49 PM...

Страница 2: ...mark of Adobe Systems Incorporated in the United States and or other countries Microsoft and Windows are either registered trademarks or trademarks of Microsoft Corporation in the United States and or...

Страница 3: ...r Cintiq on page 7 before setting up the Cintiq stand or unpacking the Cintiq interactive pen display Please follow all instructions carefully Note that the computer treats the Cintiq interactive pen...

Страница 4: ...ture changes are severe or exceed specifications e g outdoors or inside a vehicle The interactive pen display the Grip Pen and the Cintiq stand are exposed to direct sunlight or heat from an appliance...

Страница 5: ...ion lock screws see page 53 for details the stand will not separate from the display unit and Cintiq can be safely lifted by grasping the display unit with both hands Always follow the instructions on...

Страница 6: ...ven mild detergent to clean the display screen Use of these cleaners can damage the coating on the screen Please note that damage of this kind is not covered by the manufacturer s warranty To clean th...

Страница 7: ...llation 15 System requirements 15 Step 1 LCD monitor installation 16 Step 2 Pen tablet installation 21 Working with your Cintiq 23 Using the pen 23 Working with the tablet controls 25 Setting up your...

Страница 8: ...display configurations 53 Using an alternate mount or stand 54 Uninstalling Cintiq 57 Product specifications 58 Purchasing Parts and Accessories 61 Radio and television interference 62 Warranty 63 Ci...

Страница 9: ...nstructions that came with those CDs Retain the package box for use when storing or shipping Cintiq Next Step Set up the Cintiq stand See page 8 Cintiq 21UX interactive pen display main unit with atta...

Страница 10: ...nted on the stand use these levers to adjust the display incline as described in Adjusting the display incline on page 10 Front feet The front feet have rubber pads to reduce stand slippage on the des...

Страница 11: ...earing hub is located between the V shaped upper edges of the stand s bearing recess See A The V shaped edges of the stand will serve as a guide for positioning the bearing hub With the back of Cintiq...

Страница 12: ...ating the incline adjustment levers Cintiq must be mounted on the stand with the stand feet resting on a stable flat surface The stand is spring loaded and can snap back quickly causing injury or dama...

Страница 13: ...Cintiq use the rotation lock screws to fasten the display to the stand in a horizontal position See Optional display configurations on page 53 for more information Attaching the pen holder The removab...

Страница 14: ...nd lift the unit out of the display stand Important When removing Cintiq from the display stand always lift Cintiq in a direction parallel to the front of the stand You may also need to rotate Cintiq...

Страница 15: ...ntiq e g Your computer is turned off starting up or has entered a power management mode in which video signals are not sent Power switch Turns power to the unit on or off Status LED Lights blue when t...

Страница 16: ...connectors on the integrated cable are for DVI I video USB data and power Bearing hub Fits into the bearing recess on the Cintiq stand Allows rotation of Cintiq and easy mounting and removal from the...

Страница 17: ...wo video cards or a video card with dual output Depending on the capabilities of your video card and operating system you may be able to set up Cintiq as a mirrored extended or independent display Ref...

Страница 18: ...ANALOG DVI VGA switch located on the back of Cintiq for the video connection you are using Move the switch toward the tablet edge for Digital DVI I or DVI D and move it toward the OSD buttons for ANAL...

Страница 19: ...ADC to DVI I adapter Plug the Cintiq video cable into the ADC to DVI I adapter Then plug the ADC adapter end into the ADC connector on your video card If you are connecting to an Apple mini VGA connec...

Страница 20: ...video card has a DVI or VGA connector and that you correctly set the Cintiq Digital Analog DVI VGA switch for the video connector you are using CAUTION Use only the power adapter that came with Cinti...

Страница 21: ...ETTINGS tab Click the IDENTIFY button if you need help in determining which display corresponds to Cintiq If you have more than one display select the display for Cintiq then click the ADVANCED button...

Страница 22: ...is produced under very stringent quality standards Production techniques cannot guarantee an absolutely perfect TFT display and some panels may exhibit a certain number of pixels that show an incorrec...

Страница 23: ...nto a USB hub attached to your computer See E in the connection diagram below Next move on to the pen tablet Software installation on page 22 You must install the Wacom tablet driver software for full...

Страница 24: ...the screen cursor should immediately jump to a corresponding position approximately beneath the pen tip Lift the pen tip and place it on the display screen surface in a different location the screen...

Страница 25: ...the DuoSwitch in either direction to activate the upper or lower button functions You can use the DuoSwitch whenever the pen tip is within 5 mm 0 2 inch of the tablet surface you do not need to touch...

Страница 26: ...the same place with the pen tip Double clicking is easier when the pen is perpendicular to the tablet screen To fine tune the double click area refer to the electronic Software User s Manual Dragging...

Страница 27: ...mizable ExpressKeys to perform frequently used functions or keystrokes By default the keys emulate keyboard modifier keys In Photoshop this provides quick access to the grabber hand and alternate tool...

Страница 28: ...d to decrease and increase your brush size in Photoshop Set a key to a commonly used keyboard shortcut in order to open files or start an application If you prefer not to or cannot use the side switch...

Страница 29: ...o zoom scroll or issue the assigned keystroke function one step at a time By default the Touch Strips enable you to zoom in most graphics applications and to scroll in other applications Each Touch St...

Страница 30: ...etch and relax your muscles Use a gentle grip when working with the pen Alternate tasks throughout the day Minimize awkward postures and repetitive movements that cause discomfort Alternate between di...

Страница 31: ...in a good posture at all times and change your position if you feel any discomfort due to your work position Do not pull the cable out of its computer connections by accidentally moving the pen displa...

Страница 32: ...tiq pen on the pen display tablet Windows Click on the Windows START button and choose ALL PROGRAMS For versions other than Windows XP choose the PROGRAMS group Then select WACOM TABLET PROPERTIES and...

Страница 33: ...able for most control panel items Simply position the screen cursor over an item and let it rest there in a few moments the Tool Tip will pop up Additionally your keyboard tab and arrow keys can be us...

Страница 34: ...when working with the tablet use the pen tip to click on the center of the crosshairs in the upper left corner Then click on the center of the crosshairs that are displayed in the lower right corner T...

Страница 35: ...ablet Control Panel and click on the HELP button To read the Software User s Manual before installing Cintiq first insert the Wacom Pen Tablet Driver CD into your computer s CD ROM drive When the soft...

Страница 36: ...settings at the touch of a button The OSD controls are located on the back of the unit Simply reach over the top of the display unit to locate the buttons with your fingers Note Braille style dots ab...

Страница 37: ...y Enables you to change the horizontal position of the image To automatically adjust use the AUTO ADJUSTMENT option VERTICAL POSITION VGA only Enables you to change the vertical position of the image...

Страница 38: ...color settings will invalidate the Cintiq color profile Options in the OSD CONTROL category are as follows HORIZONTAL POSITION Enables you to adjust the horizontal position of the OSD menu window VERT...

Страница 39: ...NITOR menu Click on the CALIBRATE button to activate the calibration screen Using the OSD controls open the OSD MAIN MENU Select the IMAGE SCREEN and FREQUENCY options then adjust the frequency level...

Страница 40: ...er or video card the display will automatically comply with the below power saving parameters Power saving mode H sync V sync Video Power consumption Power lamp Power ON Yes Yes Active 80 W max Blue S...

Страница 41: ...where to obtain support for your region Testing Cintiq 1 If Cintiq s power LED does not light check the following First verify that the green light on the power adapter is on If the light is not on c...

Страница 42: ...s a USB device and the pen tip is pressed against the display 4 Check the pen If you cannot make a selection on the display screen with the pen Test the pen by pressing the pen tip or the eraser again...

Страница 43: ...the button is pressed In this case you may want to change that button s function before testing Testing the ExpressKeys 1 With the DIAGNOSTICS dialog box open observe the TABLET INFO column as you tes...

Страница 44: ...SURE should change from approximately 0 with no pressure applied to approximately 100 when full pressure is applied For the optional Airbrush move the fingerwheel forward the WHEEL value should decrea...

Страница 45: ...r bent or broken connector pins Then properly connect the video cable and turn on Cintiq and your computer Verify that the DIGITAL ANALOG DVI VGA switch is properly set Restart your computer after cha...

Страница 46: ...menu From the MAIN CONTROL category select the AUTO ADJUSTMENT option Then if necessary manually adjust frequency and tracking Verify that the display adapter or video card matches the specifications...

Страница 47: ...are in accordance with the instructions found in the Installation section of this manual Some applications including Photoshop 7 0 and greater require that you turn on the pressure capabilities before...

Страница 48: ...tool has no effect Make sure that you change the settings for the tool and application that you are using See the electronic Software User s Manual for details on working with multiple tools and with...

Страница 49: ...corrupted preferences file Follow the instructions in the next tip to create a new preferences file You suspect the pen tablet preferences may be corrupted or want to make certain that all settings a...

Страница 50: ...ctly recognized Windows XP After installing Cintiq on a system with multiple users the pen display tablet only works on the primary user desktop Reboot the system after installing the pen display tabl...

Страница 51: ...FERENCES folders Then remove the following preferences com apple ink framework plist com apple ink inkpad plist com apple ink inkpad sketch 3 Go back to SYSTEM PREFERENCES and INK and then enable hand...

Страница 52: ...product is not working properly contact the Wacom support staff for the area where your product was purchased See the Wacom tablet Read Me file located on the Wacom Pen Tablet Driver CD for contact in...

Страница 53: ...le East and Africa Japan Asia Pacific English China Worldwide Web http www wacom com productsupport Software updates Anonymous FTP Site ftp ftp wacom com pub drivers Software updates Worldwide Web htt...

Страница 54: ...t to clean the display screen this may damage the coating on the screen Please note that damage of this kind is not covered by the manufacturer s warranty Replacing the pen tip The pen tip nib will we...

Страница 55: ...crews as shown below To lock Cintiq to the display stand Rotate the interactive pen display to the standard landscape position with the power switch located at the top of the unit Two holes in the sta...

Страница 56: ...it and your computer 2 Remove Cintiq from its stand and place it face down on a flat soft surface such as a cloth spread across a desktop 3 Remove the bearing hub by unscrewing the four bearing hub at...

Страница 57: ...e mounting platform 3 Place the interactive pen display unit face down on a flat soft surface such as a cloth spread across a desktop Remove the bearing cover plate 4 Remove the cable cover plate and...

Страница 58: ...bearing hub sections to the unit making sure to use the correct screws for reattachment The bearing hub screws are longer than the cable cover plate screws Proper positioning shows the hub sections al...

Страница 59: ...Cintiq from your computer Windows 2000 1 Click the Windows START button Then choose SETTINGS and CONTROL PANEL 2 In the CONTROL PANEL window double click on the ADD REMOVE PROGRAMS icon In the dialog...

Страница 60: ...level positive negative H V Composite sync TTL level positive negative Resolution 1600 x 1200 pixels UXGA 1280 x 1024 pixels SXGA 1024 x 768 pixels XGA 800 x 600 pixels SGA 640 x 480 pixels VGA others...

Страница 61: ...n Weight 1 7 kg 3 7 lb Rotation 180 Incline 10 to 65 from horizontal Primary orientation Landscape lockable Input voltage 100 to 240 VAC 50 60 Hz Output voltage 12 VDC 6 67 A Pressure sensitivity 1024...

Страница 62: ...ssure sensitive pen has the same feature set as the Cintiq Grip Pen but with a slimmer profile that does not include a rubberized grip ZP 300E Replacement nibs Standard nibs polyacetal white for Grip...

Страница 63: ...d an email to parts wacom europe com Or visit the Wacom web site at www wacom europe com solutionstore You can also contact your local dealer distributor or Technical Support using the appropriate num...

Страница 64: ...tenna until the interference stops Move the equipment farther away from the television or radio Plug the equipment and computer into an outlet that is on a different circuit from the television or rad...

Страница 65: ...s storage instructions Any descriptions drawings specifications samples models bulletins or similar material used in connection with the sale of the product shall not be construed as an express warran...

Страница 66: ...d contact your local dealer or distributor If an authorized Wacom repair center is not available in your local country you will be responsible for all transportation costs including duties and taxes t...

Страница 67: ...F 1 32 2 Hon Cho Saitama 349 1148 Nakano Ku Tokyo 164 0012 Japan Japan Telephone Telephone General 81 0 480 78 1213 General 81 3 5309 1513 Fax 81 0 480 78 1217 Fax 81 3 5309 1514 WACOM China Corporati...

Страница 68: ...ACOM Co Ltd UE 0308 Watch for the Penabled logo to ensure you are getting the natural feel and superior performance of Wacom s patented cordless and battery free pen technology Cintiq21UX_Manual fm Pa...

Отзывы: