8
test, try many acoustic modes for buzzer (fire alarm, fault and feedback) and illuminate the pixel
matrix on the screen by sequence. The system will log out automatically after self-test completion.
Under self-test state, press SELF-TEST key again to exit the self-test state.
The system will not receive alarm signals temporarily under self-test state.
8) RESET function key
Press
RESET
to eliminate all current alarms and reboot the system. The whole process takes
30-60s. If multiple hosts are networked, press RESET key of host 1 and all hosts in the
network will be reset; press RESET key of other host, this host itself will be reset.
If multiple hosts are networked, host 1 is used as the concentrator
(system host), press
RESET
,
MUTE
,
GENERAL LINKAGE
,
SOUNDER CONTROL
,
MANUAL CONTROL
keys,all regional units (host 2-20) will execute this operation;
when the regional unit operates these keys, the state of itself will only be changed.
When the regional units in the networking system are under set state, press
RESET
key on the concentrator, the regional units will response the restore
command immediately and the files currently set by the regional units will lose
this update, which means the data set since last storage will not be saved
automatically! Therefore, if multiple debuggers operate at the same time, please
disconnect the connecting line of the host being set temporarily before inputting
large data volume!
9) F1 function key
Pressing F1 on the panel will switch to the alarm interface. In cast of no alarm message, it
will hint that there is no alarm message at the moment and stay at the original interface.
10) Selection and query edit of LCD content
There are 9 keys in this section:
▲
,
▼
T
AB
, ENTER, BACK, CANCEL, MENU, COPY,
PASTE. Meaning and purpose of these 9 keys:
▲
- scroll upward
▼
- scroll downward
ENTER -
SELECT THE OPTION CORRESPONDING
TO THE CURSOR
BACK -
DELETE TO THE LEFT
CANCEL -
EXIT CURRENT OPTION
PASTE -
COPY CONTENT OF SELECTED ITEM
COPY
-
PASTE COPIED CONTENT TO CURRENT
POSITION
MENU -
ENTER INTO MENU INTERFACE
T
AB
- skip to different options by the sequence of from left to right and from top to bottom
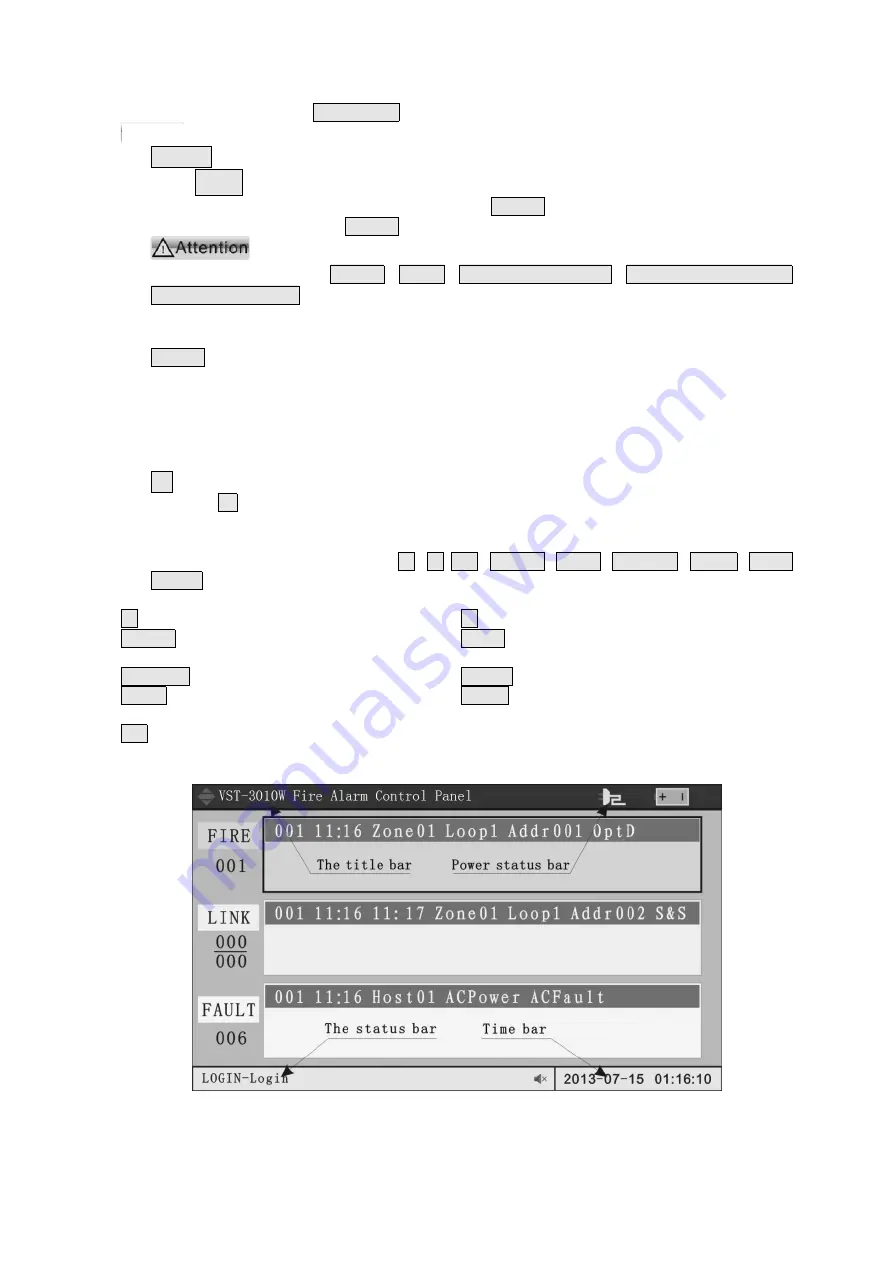
Display interface of the screen:
Figure 3
‑
4 Display interface
The following describes the conventional display bars on the screen, which will be
displayed no matter what state the screen is in. There are 4 conventional display bars
Attention


