UPS OPERATION INTRODUCTION
User Manual 10H52246UM60 - Rev. 1 - 01/2017
49
5.6.2
Procedures for Completely Shutting Down the UPS While Maintaining the Power Supply to the Load
The following procedures should be used when it is necessary to shut down the UPS completely without
interrupting the power supply to the load. Refer to the procedures in
5.3.4 Transfer From Normal Mode To
Maintenance Mode
.
5.7
EPO Procedures
The EPO is designed to switch off the UPS in emergency conditions (i.e., fire, flood, etc.) To perform an EPO
(Emergency Power Off), simply press the EPO button: the system will switch off the rectifier and inverter and
interrupt the power supply to the load immediately (the load is not supplied by the inverter or the bypass), and the
battery will stop charging or discharging.
Following an EPO, if the input mains supply is present, the UPS control circuit will remain active; however, the output
will be turned off. To remove all power from the UPS, first disconnect the external UPS power switch, and then
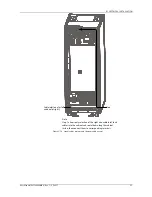
disconnect the battery terminals (see Figure 5-3 for details).
5.8
UPS Reset Procedures following an EPO
After the UPS has been shut down by pressing the EPO button, or as a result an inverter over-temperature, overload,
battery and/or DC bus over-voltage condition, clear the fault as directed by the alarm message displayed on the
LCD screen. Then carry out the following reset procedures in order to restore normal UPS operation.
After confirming that the fault has been cleared and no remote EPO signals are active, carry out the following
procedures:
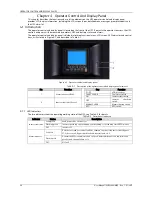
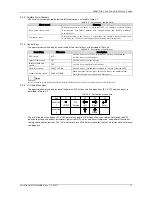
1. Press and hold the FAULT CLEAR key for over two seconds, the system exits the EPO state, and the alarm
indicator (red) starts flashing.
2. Press and hold the ON key for over two seconds, the inverter starts up, and the inverter indicator (green) starts
flashing. Once the inverter is running normally, the UPS transfers from the bypass to inverter, and the inverter
indicator (green) is illuminated (no longer flashing).
Note
1. The rectifier starts and the bypass begins to supply power to the load. The rectifier indicator flashes while the rectifier is
starting up. Once the rectifier is running normally (about 30 seconds later), the rectifier indicator (green) remains on in the
steady state.
2. When the over-temperature fault is cleared, the rectifier starts automatically five minutes after the over-temperature signal
disappears.
3. After pressing the EPO switch, if the main input is disconnected, the UPS shuts down completely. When the main
input returns, the UPS starts up in bypass mode. There will be power at the output terminals of the UPS.
Warning
Whenever the maintenance bypass switch QS3 is closed, and there is an input power supply connected to the UPS, there will
be power present at the UPS output
5.9
Automatic Restart
In the case of a mains failure, the UPS draws power from the battery system to supply the load until the batteries
are depleted. When the UPS reaches its EOD threshold, it shuts down.
The UPS will restart automatically and enable output power only when the following conditions are met:
1. If Auto Recovery after EOD Enabling is enabled.
2. Once the Auto Recovery after EOD Delay Time expires (the default delay is 10 minutes), the UPS restarts the
bypass, followed by the inverter. During the automatic recovery delay interval, the UPS charges its batteries in order
to provide a safety margin for equipment shutdown if the input power fails again.
3. If the Auto Recovery after EOD Enabling feature is disabled, the user may restart the UPS manually by pressing
and holding the FAULT CLEAR key for two seconds, followed by the ON key for two seconds.
Note
During the automatic restart process, manual startup is disabled. Automatic restart must be set by the Vertiv authorized
service engineer using the Vertiv configuration software.
5.10
Selecting the Display Language
The LCD menu and data display are available in 17 languages: simplified Chinese, traditional Chinese, English, Dutch,
French, German, Italian, Japanese, Polish, Portuguese, Russian, Spanish, Swedish, Finnish, Norwegian, Czech and
Turkish.
To select the desired display language, proceed as follows:
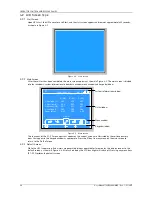
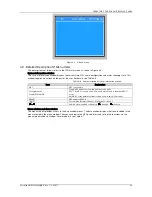
1. Press the F3 (left) or F4 (right) key on the 'OutPut' menu screen to select the 'Language' menu.

