background image

22

User guide

Direct Transfer to Voice Mail:

Direct Transfer to Voice Mail enables you to transfer a call to 

someone else’s Voice Mail.
1.  Press 

 or the 

Transfer

 soft key during an active call.  

This will place the call on hold

2.  Press 

**55

 and then enter the 10-digit phone number or 

extension you want to transfer to

3.  Press the 

Direct

 soft key to complete the transfer

Call History

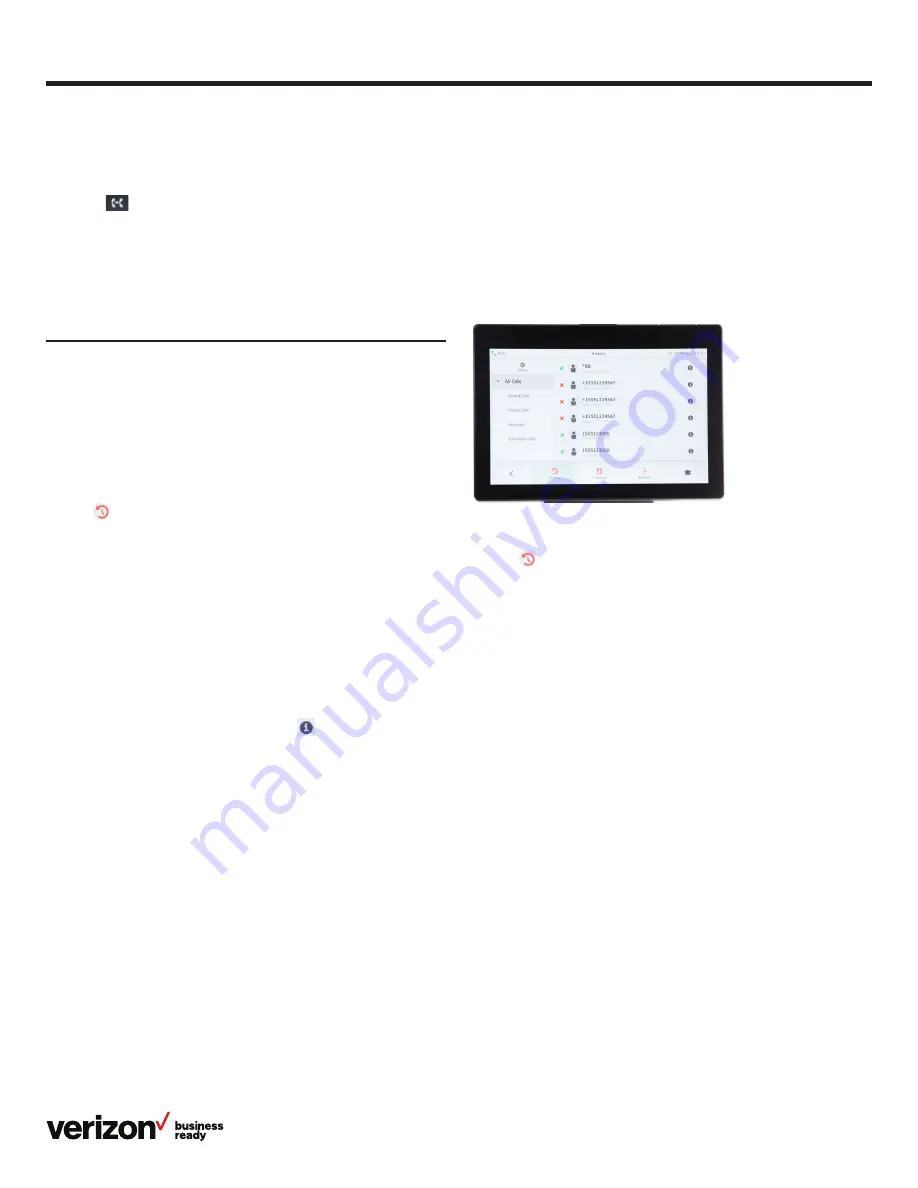
Call History maintains a list of all calls that were missed, 

placed, received and forwarded. You can view and delete call 

records, place a call, blacklist a contact or add a contact to 

your Local Directory from the Call History screen. Call History 

can be accessed from the Idle screen, Menu screen or keypad 

screen for placing calls.

To view the Call History:

1.  Tap   

History

 to open the history screen. The touch 

screen will display All Calls records

2.  Scroll to locate the desired contact. You can also filter your 

view by tapping 

Missed Calls

Placed Calls

Received Calls


or 

Forwarded Calls


To call a contact from the Call History:

To place a call directly from your Call History, follow steps 1 

and 2 above, then tap the desired entry and select 

Video

 or 

Audio

 on the History details screen to initiate the call. 

To view call details:

3.  Follow steps 1 and 2 above, then tap   to the right of the 

desired entry to view call details. From the History Details 

screen, you can add the contact to your directory, blacklist 

the contact or delete the call record

To add a contact to the Local Directory:

4.  Follow steps 1 to 3 above, then tap 

Add

To blacklist the contact:

5.  Follow steps 1 to 3 above, then tap 

Blacklist

 to block  

this contact 

To delete an individual call record:

6.  Follow steps 1 to 3 above, then tap 

Delete

To delete all call records:

1.  Tap   

History

2.  Choose the folder you wish to delete 
3.  Tap 

Settings

4.  Tap 

All

5.  Tap 

Delete

 to delete all records in that folder

Содержание One Talk T49G

Страница 1: ...User guide onetalk com One Talk T49G IP desk phone...

Страница 2: ...ns on touch screen 8 Customize your desk phone 9 Basic settings 9 Language preferences 9 Time and date 9 Display settings 10 Backlight 10 Wallpaper 11 Screen saver mode 11 Sound settings 12 Call volum...

Страница 3: ...t management 23 Local Directory 23 Groups 25 Group settings 26 Voice Mail 27 System status troubleshooting and other settings 28 Check phone status 28 Reboot phone or reset it to factory settings 28 S...

Страница 4: ...33 Important 911 emergency response information 33 Declaration of conformity 33 CE mark warning 33 Part 15 FCC Rules 33 Class B digital device or peripheral 33 Important safety precautions 34 Danger e...

Страница 5: ...One Talk service please verify the following with your system administrator before proceeding 1 You have a One Talk number 2 Your user information has been updated in the One Talk Admin Portal with yo...

Страница 6: ...ch 16 Camera indicator LED 17 Camera lens 18 HDMI port 19 USB 2 0 port 9 8 5 7 6 3 2 11 1 4 10 17 16 15 14 13 12 Getting to know your desk phone Hardware components Item 1 Camera 2 Power indicator LED...

Страница 7: ...ced calls Received calls Forwarded calls Feature settings Call Forward Anonymous Call Rejection Forward to Voicemail Device logs Navigating the touch screen The Idle screen is the primary screen for a...

Страница 8: ...to enable or disable commonly used features or scroll to adjust screen brightness 3 Notification center View missed or forwarded calls and access Voice Mail LED status What it means Solid red The pho...

Страница 9: ...ferences The default language of the phone s user interface is English To change the language of the phone interface 1 From Basic Settings tap Language and select your desired language 2 Tap Save Time...

Страница 10: ...at any time by touching the screen or pressing any key on the phone Backlight There are two options for setting backlight preferences Active Backlight Intensity sets the brightness of the touch scree...

Страница 11: ...2 Tap the Wallpaper field to view options 3 Tap to select desired wallpaper 4 Tap Save Screen saver mode To configure your screen saver 1 Tap Screen Saver Mode on the Display settings screen 2 Tap the...

Страница 12: ...or Off radio button 3 Tap Save to accept the change Call volume To adjust call volume press the Volume Key while on an active call Ringer volume To adjust the ringer volume press the Volume Key when...

Страница 13: ...ideo call including sharpness brightness and contrast The T49G provides three preconfigured scene modes standard warm color and cool color You can also set parameters individually via manual mode Tap...

Страница 14: ...Answer Uplink Bandwidth Sets the maximum uplink bandwidth of a video call For best performance we recommend leaving on the default Auto setting Downlink Bandwidth Sets the maximum downlink bandwidth I...

Страница 15: ...receive calls Voice calls can be made using the handset speakerphone or a connected headset Using the handset To place a call pick up the handset enter the phone number via the keypad and press Send...

Страница 16: ...s to simultaneously hold three separate conversations or conference in up to six participants Receiving incoming calls while the line is in use Press the line key with the flashing red indicator to an...

Страница 17: ...ous Call Rejection ON or OFF to enable or disable this feature Note You can also turn on Anonymous Call Rejection by dialing 77 To turn the feature off dial 87 To blacklist a contact from the Local Di...

Страница 18: ...ll Barge Any bridged line or other device that shares a number with you can use the Call Barge feature to join a call in progress Call Barge is especially useful for admins when it is urgent that a ma...

Страница 19: ...place a call on hold and assign or park an active call to another member s extension or 10 digit telephone number for retrieval within the same group The call can also be retrieved by the person who...

Страница 20: ...fter the second party answers press the Conference soft key All parties are now joined in the conference 4 Repeat steps 1 to 3 to hold up to a 6 way Conference Call Tap the End Call soft key to discon...

Страница 21: ...mote Group Pickup One Talk helps ensure that calls are answered by associating lines with groups Inside Sales for example If your administrator has assigned your line to a specific group Remote Group...

Страница 22: ...ecords 2 Scroll to locate the desired contact You can also filter your view by tapping Missed Calls Placed Calls Received Calls or Forwarded Calls To call a contact from the Call History To place a ca...

Страница 23: ...line you want to use when placing a call to this contact Select Auto to use the default account 6 Tap the Ring field to open ringtone options for this contact 7 Select your desired ringtone and tap OK...

Страница 24: ...e to view the Contact Details screen 3 Tap any field to edit information 4 Tap Save to save all your edited changes To delete a contact 1 Tap Directory 2 Tap the Info icon next to contact you want to...

Страница 25: ...t way to organize large lists of contacts You can even assign each group its own distinctive ringtone You can create and delete groups edit group names add contacts and move contacts to different grou...

Страница 26: ...he group To edit a group name 1 Tap Edit to reveal the onscreen keyboard 2 Type a new name or make necessary changes 3 Tap to save To assign ringtones to groups 1 Tap to open ringtone options 2 Tap to...

Страница 27: ...can Press 1 to replay messages Press 2 to send a message Press 4 for personal options To set up Voice Mail 1 Press the Message button and follow the voice prompts 2 Select your preferred language 3 Cr...

Страница 28: ...ware firmware version and product ID Accounts phone number associated with account Reboot phone or reset it to factory settings Rebooting the phone or returning it to factory settings often resolves i...

Страница 29: ...ries of screens as the phone reboots DO NOT unplug remove power or try to use the phone until it finishes rebooting and the Idle screen returns To reset your phone to factory settings 1 Tap the Reset...

Страница 30: ...sibility 6 way Conference Calling support Bluetooth Bluetooth profiles 4 0 Bluetooth wireless Display and input Illuminated mute headset hands free speakerphone keys Music and audio Speakerphone Pictu...

Страница 31: ...lace only the current standard handset of the phone Visual Message Waiting Indicator MWI An indicator light on the phone indicates that new messages are waiting Icons on the phone screen also indicate...

Страница 32: ...ctions since improper adjustment of other controls may result in damage and will often require extensive work by a qualified technician to restore the product to normal condition WEEE warning To avoid...

Страница 33: ...TD declares that this phone is in conformity with the essential requirements and other relevant provisions of the CE FCC You can find the CE and FCC information from the label on the back of the IP ph...

Страница 34: ...pe of power indicated on the marking label If you are not sure of the type of power available consult your dealer or local power company 6 Do not allow anything to rest on the power cord Do not locate...

Страница 35: ...mber Video Audio Cancel Directory Search Add Settings Local Directory Number Name Group Blacklist History Directory Keypad Home New Contact Group Name Work Number Mobile Number Other Number Account Ri...

Страница 36: ...nsmit Rate Frequency Phone Product Name Hardware Firmware Config Version Product ID MAC Device Cert Time Date General DHCP Time Date Sound Ringtone Key Tone Wi Fi ON OFF Wireless Status Bluetooth ON O...

Отзывы: