Note
: In the event of a power failure during the program the 'purge' gas will flow
continually until the power is restored. When the furnace mains supply is turned off the
gas supply must also be turned off.
When the power is restored the 'Purge' gas timer will run for 5 minutes after which the
system will go into 'standby' mode and the green 'standby' indicator will illuminate. The
program can be restarted at this point.
4.4.2
Carbon Monoxide Sensor
This CAF G5l has a built in carbon monoxide sensor.
In the event of an unsafe level of carbon monoxide being present within the case the
sensor will detect this.
If detected the CAF G5 will begin an automated cycle to bring the level of carbon
monoxide back to a safe level
The automated cycles will run through the following steps:
• Carbon monoxide sensor will sense a high level of carbon monoxide
• Sensor will sound an alarm
• Process gas will be turned off
• Purge gas will begin and should be left on for a minimum of 5 minutes
• User can turn off/on the unit to reset.
If the alarm has been activated the user should check the following on the unit prior to
re staring any testing.
• Gas system for leaks
• Work tube integrity
• Work tube end seals
• Exhaust outlet is not blocked
For further details of what to do if the carbon monoxide sensor is activated please refer
to the maintenance section in the manual
4.5
Loading Samples into the Work Tube
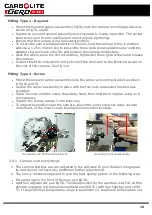
Use the sample carrier and sample tiles provided. Arrange the samples as shown in fig
13a. It may be useful to spot a small drop of water in the position were the sample will
be positioned as this will give the samples slight adhesion to the sample tile in
preparation for loading.
1. When the furnace has reached its start temperature open the furnace door and
swing it clear of the work tube to allow access. See fig 10.
Note
: Do not operate the furnace at temperatures above 815 °C with the door
open. The furnace door must not be left open longer than is necessary to load and
unload samples from the work tube.
2. Once the samples are in position on the sample carrier, and the furnace door is
open, take the sample loading tool and with the loading arm fully extracted place
the forks of the loading tool under the lower branch of the sample carrier, and
gently lift into the opening of the work tube.
Note
: The forks of the loading tool should be in the lower position. See fig 21.
25
Содержание CARBOLITE GERO CAF G5
Страница 63: ...Fig 3 Front Tube Seal Assembly Fig 4 Door Arm Assembly 63 ...
Страница 64: ...Fig 5a Camera Mounting Bracket Fig 5b Lens and Camera Assembly 64 ...
Страница 65: ...Fig 5c Sliding the Camera Mounting Bracket Assembly onto the Door Arm 65 ...
Страница 66: ...Fig 5d Securing the Camera Mounting Bracket Assembly to the Door Arm 66 ...
Страница 67: ...Fig 5e Mounting the Lens and Camera Assembly 67 ...
Страница 68: ...Fig 5f Lens and Camera Assembly in Position 68 ...
Страница 69: ...Fig 6a Rear View of the Standard CAF G5 Furnace Showing Brick Box Assembly 69 ...
Страница 70: ...Fig 6b Rear View of the CAF G5 Biomass Furnace with Rear Illumination Showing Brick Box Assembly 70 ...
Страница 71: ...Fig 7 Front Tube Seal Position 71 ...
Страница 72: ...Fig 8 Tube End Seal Assembly Tightening Sequence Fig 9 Work Tube Front Support 72 ...
Страница 73: ...Fig 10 Fitting the Door Arm Assembly Fig 10a Adjusting the Door Arm Assembly 73 ...
Страница 74: ...Fig 11a Furnace Case and Controls 74 ...
Страница 75: ...Fig 11b Gas Inlet Pipe Fig 12 Positioning the Furnace 75 ...
Страница 76: ...Fig 13a Positioning Samples on the Sample Carrier Fig 13b Loading Samples into the Mouth of the Work Tube 76 ...
Страница 77: ...Fig 13c Loading Samples into the Work Tube 77 ...
Страница 78: ...Fig 16 File Folder 78 ...
Страница 79: ...Fig 17 Door Arm Assembly Exploded View 79 ...
Страница 82: ...SST DT HT FT Fig 18 Report Sheet Page 2 Side View Plan View Fig 19 Formed Wire Sample 82 ...
Страница 83: ...Fig 20 Sample Carrier Sample Tiles and Sample Positions 83 ...
Страница 84: ...Fig 21a Coal and Coke Test Piece Mould Fig 21b Biomass Test Piece Mould and Hand Press 84 ...
Страница 85: ...Fig 22 Sample Loading Tool Fig 23 Camera Ethernet Connection 85 ...
Страница 86: ...Fig 24 LED Driver Connection 86 ...
Страница 87: ...Notes Service Record Engineer Name Date Record of Work ...

