Marquee 8521 Ultra Green (HUD) User's Manual
3-4
Operation
3.1.8 Menus
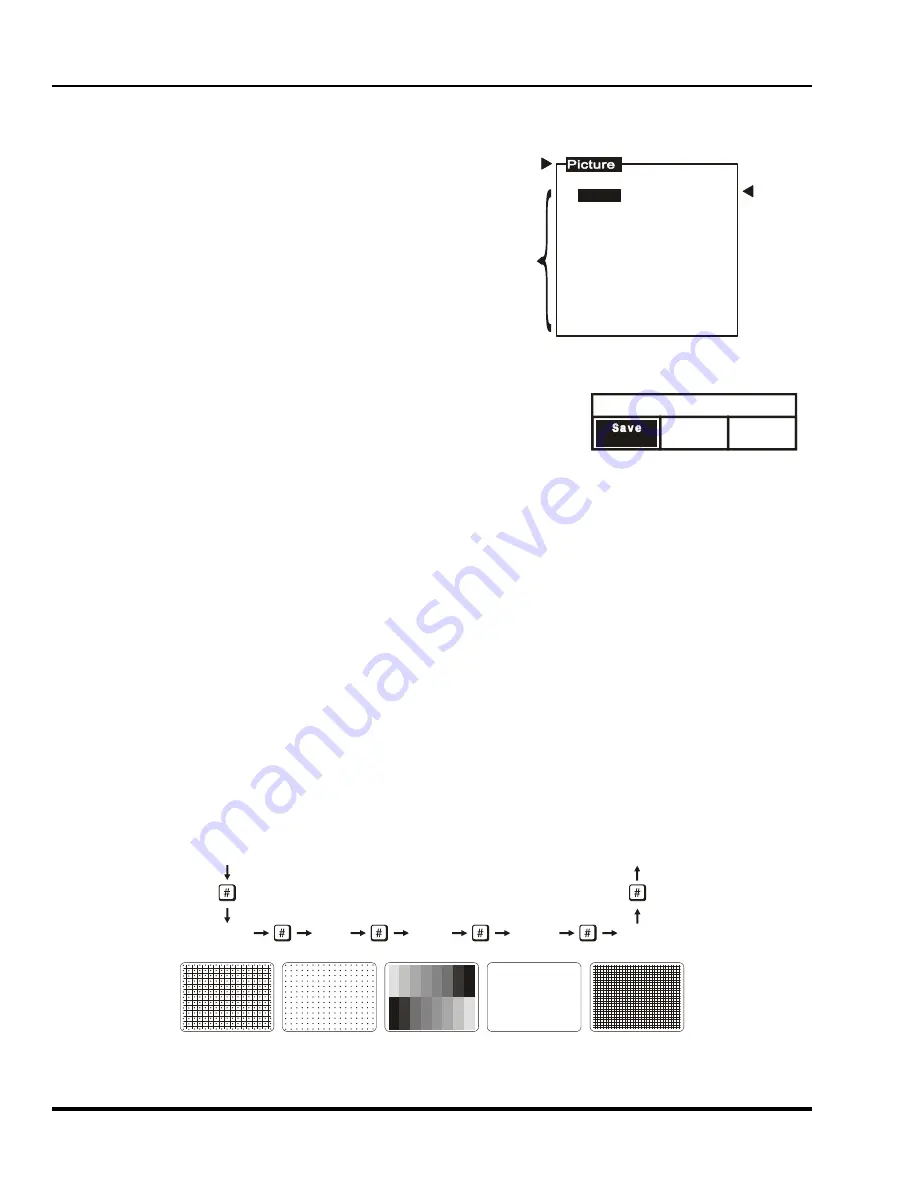
When a menu key is pressed or a menu is selected, a menu with a list of selection items is superimposed on the
projection screen. Each menu consists of a title, selection items, and a cursor bar. Selection items may include
adjustment functions, control settings or other menus.
To make a selection from the menu, either:
1. press the number key corresponding to the item
number, or
2. press
[
▲
] or [
▼
] to move the cursor bar to the
desired item, then press [
ENTER
]
If a menu item includes control options, for example, items
5, 7 and 8 above, the control option setting can be
changed by pressing the number key or by pressing
[
ENTER
] when the item is highlighted.
Note:
Pressing [
RECALL
] while in a sub-menu returns you to the previous menu.
3.1.9 Dialog
Boxes
Dialog boxes are displayed when the projector requires an action to be chosen
by the user.
For example, after a convergence registration is performed, a dialog box is displayed to confirm that the new
convergence settings are to be saved in memory. Press [
◄
] or [
►
] to highlight one of the actions then press
[
ENTER
] or [
EXIT
] to perform the action. If [
ENTER
] is pressed, the previous menu is then displayed. If [
EXIT
] is
pressed, the projector returns to presentation level.
3.1.10 Message Boxes
Message boxes display brief messages on the screen to indicate a status, condition, or error. Messages are
overlaid on the displayed source image and in most cases remain on the screen for about five seconds. To
remove a message box prior to the five second display period, press [
EXIT
].
3.1.11 Help Pages
Help pages provide assistance when you need it. There are various forms of help available, all accessible by
pressing [
HELP
]. For information about using help, refer to the Using Help entry in this section.
To advance one page when using help, press [
HELP
].To go back one help page, press [
RECALL
]. To exit from a
help page, press [
EXIT
].
3.1.12 Test Patterns
The projector has an internal generator which can display several different types of test patterns to assist you
during projector setup. Press [
#
] to display the first test pattern
─
the external source. Each subsequent press
of [
#
] changes the test pattern as shown below. If a test pattern is the only graphic displayed (i.e., no overlaid
text), pressing [
EXIT
] returns the display to the external image.
Presentation
Level
Standard
Crosshatch
Dots
Grey
Scale
White
Screen
Fine
Crosshatch
Presentation
Level
Figure 3-2. Test Patterns and Selection
Note:
Test patterns are normally generated at the scan frequencies of the current input signal.
Exit Convergence
Continue
Adjust
No
Save
1.
2. Size
3. White Balance
4. Focus
5. Sync: Slow
6. Blanking
7. Auto Clamp: Off
8. Retrace: Long
9. Decoder Options
Phase
Title
Cursor
Bar
Selection
Items
Artisan Technology Group - Quality Instrumentation ... Guaranteed | (888) 88-SOURCE | www.artisantg.com


