Chapter 1: Setup and Operation
25
61673621.fm
Counting Leaded Reels
If no further changes to any settings are needed,
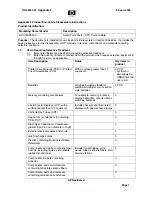
align the first part as shown in Figure 1-39.
If counting the reel from left to right, position the first
part in position B, to the left of the scribe mark on
the tape adjuster. If counting the reel from right to
left, position the first part in position A, to the right of
the scribe mark.
Then press the STOP/GO key to continue to the
Run Screen. This screen will appear as shown in
Figure 1-40.
The counter will now begin counting parts that
pass through the count head, whether the carrier
is moved by hand or by the takeup motors.
The counter will not begin transfering the carrier to the take-up reel until the STOP/GO key is
pressed. If the leader of the reel is too short to attach to the take-up reel with the first part aligned
before the scribe mark, the operator can pull the carrier through by hand and attach it. Once the
carrier tape is attached to the take-up reel, press STOP/GO and the counter will begin transfer-
ring the reel. The speed at which the counter pulls the reel can be set with the speed control
beneath the LCD screen. Alternatively, part or all of the reel can be transferred by hand.
The arrow symbol indicates the direction in which the counter will count the reel. The present
count of parts is also displayed. The direction can be changed while the counter is stopped by
pressing the arrow key of the new count direction that is desired.
STOP/GO=RUN indicates that the counter will begin running when STOP/GO key is pressed.
While the counter is running, pressing the STOP/GO key will stop the counter.
Pressing the ESC key will exit the Run screen and return to the Setup screen. This will reset the
count to zero (0); therefore, this should not be done unless the count is complete or being
restarted.
Stopped Screen
When the counter stops after counting has
begun, the Stopped Screen will be displayed.
This could occur because the stop count has
been reached or the operator has stopped the
counter and the carrier has not moved for more
than three seconds. The screen will appear in
one of two ways, depending on the options
installed as shown in Figure 1-41.
A
B
Figure 1-39
STOP/GO=RUN ESC=Back
COUNT=1 ->
Figure 1-40
5=Send to PRINTER ESC=Back
COUNT=1 ->
Figure 1-41
STOP/GO=RUN ESC=Back
COUNT=1 ->
Содержание Versacount II+
Страница 2: ......
Страница 4: ......
Страница 10: ......
Страница 41: ...Maintenance Instructions Contents Safe Maintenance Steps 32 Safe Maintenance Steps 32 Calibration 33...
Страница 44: ...34 Versacount II User s Guide Calibration 61683512 fm...
Страница 46: ......
Страница 70: ...Service and Parts Contacts 61053915 fm Page 2...
Страница 72: ......
Страница 74: ......
Страница 75: ......
Страница 76: ...751 Summit Avenue Mankato MN 56001 507 387 2039 FAX 507 387 2257 www vtekusa com Email info vtekusa com...