10
7. Attach the four black casters to the cart by threading the casters into the nuts that are welded onto
the bottom of each leg. Tighten each caster in place with the 3/4 inch wrench. There are two
locking and two non-locking casters provided. Make sure when attaching the casters that the
locking casters are installed on the front of the cart. To identify the front of the cart look at the
center panel. The finished side of the center panel should face forward (see figure below).
Assemble cart with
lockable casters in front
Use 10-32 screws and
lock washers
View is from the
back side of the cart
Cart Assembly
8. When the cart is assembled, position it so that the finished side of the center panel is facing
forward.
9. Lift the laser engraving system from the crate and place it on the cart. This will require two people
as the machine weighs approximately 170 lbs.
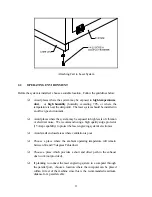
10. Using the larger Allen wrench, attach the system to the cart using the four 1/4-20 Allen head
screws and flat washers. The screws pass through the cart legs and into the bottom of the system
as shown in the drawing below.
Содержание ULS-25
Страница 3: ...3 APPENDIX E SOFTWARE ANOMALIES E...
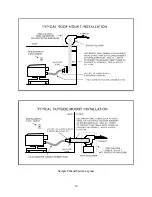
Страница 14: ...14 Sample Exhaust System Layouts...
Страница 62: ...62...
Страница 82: ...A APPENDIX A WARRANTY...

