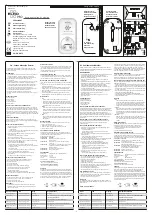
Read the operating manual thoroughly and follow all fitting instructions carefully.
This detector is designed to give early warning of dangerous and lethal accumulations of smoke.
A piercing alarm sounds whenever the device detects the presence of smoke.
Note that the device detects the smoke, and not the flames, produced by a fire.
• DO NOT paint over or apply any other type of coating to the smoke detector.
• Use a small, soft paint brush or slightly-damp cloth, about twice a year, to remove any build-ups
of dirt and dust. Smoke detectors used in dusty conditions should be cleaned monthly. DO NOT
use compressed air for this purpose.
• If the smoke detector is to work reliably, it MUST be fitted with the correct type of battery,
which must be replaced as required (see also point 7).
• Do not attempt to repair a defective smoke detector. Replace it with a new one.
1. Do not recharge non-rechargeable batteries.
2. Do not mix batteries of different types or new and used batteries.
3. Batteries must be installed with the correct polarity.
4. Empty batteries must be removed from the device.
5. Do not short-circuit the connection clamps.
6. Do not throw batteries into fire.
7. Swallowing batteries can be life threatening.
8. In case of leakage of battery acid, avoid contact with skin, eyes, and mucous membranes.
9. Used batteries must be recycled.
• Bedrooms. Install a smoke detector in each individual bedroom (not just in the hall leading to
the rooms).
• Hallways and staircases. A stairway can act as a chimney if fire breaks out, causing flames and
smoke to spread to other floors. Ensure that there is at least one smoke detector on each floor
of the building.
• Living and working areas.
• Basements and attics. When fitting in an attic, install the device at least 19 inches (50 cm) from
the point of the roof .
• Storage areas.
• In rooms containing electrical equipment.
• Fit the smoke detector to the ceiling, in the centre of the room. Smoke rises to the room ceiling
and spreads out horizontally. Install the smoke detector at least 19 inches (50 cm) from the
nearest wall and 2 feet (61 cm) from the corner of the room (see ).
• Do not fit smoke detectors to ceiling beams if they are more than 8 inches (20 cm) thick.
Maintain a minimum clearance 19 inches (50 cm).
• Keep a minimum clearance of 19 inches (50 cm) with respect to lamps and fluorescent tubes
• Bathrooms and places with high levels of air humidity.
• Garages.
• Kitchens. If you do install a smoke detector in a kitchen, ensure that it is at least 13 feet
(4 metres) from the stove or hob.
• Near heaters, heating/cooling shafts and ventilation shafts.
• Near heating stoves and open fireplaces.
• In places with very high levels of dust.
• In places where temperatures drop to below 0°C or rise to over +45°C.
• On the ceilings of caravans or motorhomes. In these cases, you are recommended to fit the
device to an interior wall panel. The sun’s rays heat up the ceiling, causing the air inside the
vehicle to rise. This hot air at ceiling level can prevent smoke from reaching the detector.
This alarm is designed for your safety. However under certain influences the alarm may
not go off or give a false alarm.
1.
Safety
precautions
2.
Battery
information
3.
Places where
smoke detectors
should be
installed
4.
Where to install
smoke detectors
5.
Places where
smoke detectors
should NOT be
installed
6.
Installation and
first use
7.
Function control
8.
Battery
change
9.
Self-test
10.
False alarms
11.
What if there’s a
fire?
12.
Technical
data
•
Turn the device anticlockwise to separate it from its base for installation.
•
Install the base at the desired location, using the screws provided.
•
Attach the battery to the connection clip
and place it flat in its compartment
.
•
Refit the smoke detector to the base, rotating it clockwise to lock it in position. Important: the
safety block
is designed to stop the smoke detector being attached to the base without
first being fitted with a battery. Ensure that the battery is connected and inserted correctly.
The smoke detector emits a very loud alarm signal. Therefore, keep a distance of one arm's
length while activating the test button
Activate the test button for at least 4 seconds until
the LED light
blinks pulsatingly and the alarm sounds (alarm sounds 2-3 x and stops auto-
matically). Release the test button once you hear the alarm. Doing so verifies whether the
electronics, the detector's alarm and the batteries work. It is recommended to test the unit
monthly, after every battery change and after the initial operation.
The necessity to change the batteries is signalized for 30 days by a beep recurring every
30 to 40 seconds. In addition, the LED light blinks
. During this time, the detector is still fully
operational.
According to the type of batteries used, the time of full functional capability
may vary on indication of an empty battery. At the first sign of an empty battery,
the battery should be.
Only carry out a replacement with an identical or equivalent type of battery (see also
Technical Data). Do not use rechargeable batteries or mains adapters. These can cause
false alarms or failure of the detector.
The smoke detector conducts a self test every 30 to 40 seconds. This is recognizable by the
brief blinking of the LED light
.
Strong draughts of air, steam and kitchen fumes, high air humidity, dust etc. can all cause false
alarms. Cigarette smoke does not normally trigger the alarm. If the alarm does sound, check first
to see if there really is a fire. If there is no fire, check to see if the alarm has been triggered for
one of the reasons mentioned above. In order to stop the false alarm, you must disconnect the
battery from the device.
• If you cannot put out the fire yourself with a fire extinguisher or fire blanket, evacuate the buil
ding immediately. Every second counts, so do not waste time getting dressed or collecting up
valuables.
• Telephone the fire brigade after you have left the building.
• Before opening any exit door, place your hands on its surface to check for heat. DO NOT open it
if it is hot to the touch, or if smoke is coming through underneath. Look for an alternative escape
route. If the door surface is cold, place you shoulder against it and open it slightly. Be ready to
slam it shut again immediately if heat and smoke begin to enter from the neighbouring room.
• If there is smoke in the air, get down and crawl on all fours. Breathe through a (preferably wet)
piece of cloth.
• Do not attempt to go back into the building until the fire brigade tells you it is safe to do so.
Power supply:
Battery operation 9V battery
Recommended batteries:
Alkaline battery or lithium battery
(Eveready #522, #1222, #216; Duracell #MN1604;
Gold Peak #1604P, #1604S; Ultralife U9VL-J).
Temperature range:
0°C to +45°C
Alarm signal:
min. 85 dB(A)
GB
A
B
C
A
i
i
46770 BA_EIM203_120713:Lay 13.07.2012 9:55 Uhr Seite 8


