background image

41

6.2 Material handling and storage

When you have multiple spools of material in use, or do not print with a material, it is very important that you store 
them properly. If material is stored incorrectly, it may affect its quality and usability.

To keep your materials in optimal condition it is important that you keep them:
• 

Cool and dry 

• 

Out of direct sunlight

• 

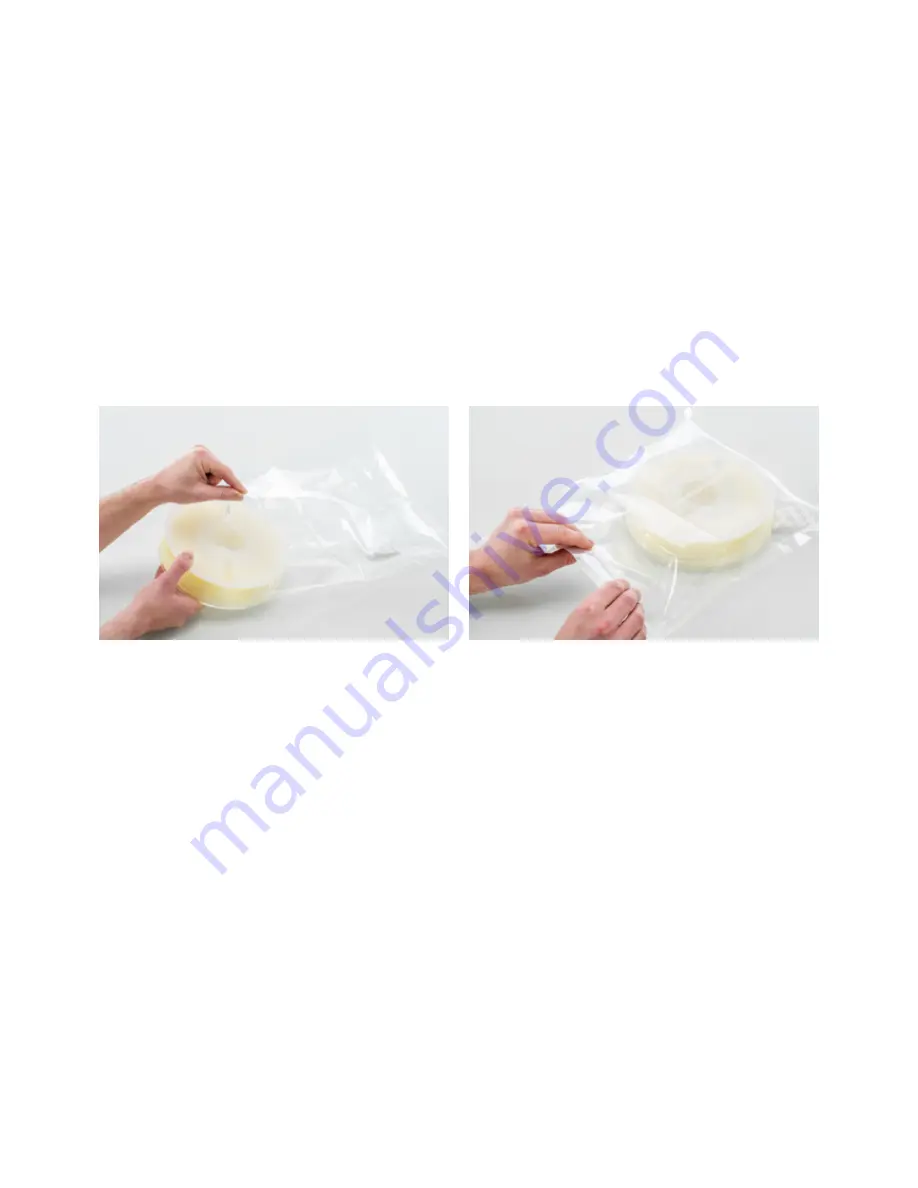
In a resealable bag

The optimal storage temperature for PLA, Tough PLA, Nylon, CPE, CPE+, PC, TPU 95A, PP and Breakaway is between 
-20 to +30° C. For ABS the advised temperature is between 15 and 25° C and for PVA 0 to 30 °C. Furthermore a relative 
humidity of below 50% is recommended for PVA, TPU 95A, PP and Breakaway. If these materials are exposed to a 
higher humidity the quality of the material can be affected.

You can store the material in a resealable bag, including the supplied desiccant (silica gel). For PVA it is advised to store 
the spool in a resealable bag with the supplied desiccant directly after printing to minimize moisture absorption.

Содержание S5 Material Station

Страница 1: ...Ultimaker S5 Installation and user manual Original manual v1 8 2018...

Страница 2: ...printers are designed and built for fused filament fabrication with Ultimaker materials within a commercial business environment The mixture of precision and speed makes Ultimaker 3D printers a perfec...

Страница 3: ...ve the print 32 5 7 Change the printer configuration 35 5 8 Calibration 36 Maintenance 39 6 1 Update the firmware 40 6 2 Material handling and storage 41 6 3 Maintenance schedule 42 6 4 Clean the prin...

Страница 4: ...s that you will obtain great quality prints and that possible accidents and injuries are prevented Make sure that everyone who uses the Ultimaker S5 has access to this manual Every effort has been mad...

Страница 5: ...5 Certifications For the latest version of the CE document go to www ultimaker com...

Страница 6: ...Safety and compliance It is very important to work safely with your Ultimaker S5 This chapter is about safety and hazards Please read all information carefully to prevent possible accidents and injur...

Страница 7: ...the Ultimaker S5 to cool down for 5 minutes before reaching inside Do not change or adjust anything on the Ultimaker S5 unless the change or adjustment is authorized by the manufacturer Do not store i...

Страница 8: ...uched This has been marked with a high voltage symbol on the bottom cover Only trained staff should remove the bottom cover Always unplug the printer before doing maintenance or modifications Mechanic...

Страница 9: ...9 2 Introduction Meet your new Ultimaker S5 and learn what s possible with this 3D printer...

Страница 10: ...n components Ultimaker S5 1 Glass doors 2 Print head 3 Build plate 4 Build plate clamps 5 Touchscreen 6 USB port 7 Feeder 2 8 Bowden tubes 9 Feeder 1 10 Power socket and switch 11 Ethernet port 12 Dou...

Страница 11: ...at up time 2 min Build plate heat up time 4 min from 20 to 60 C Operating sound 50 dBA Power rating 500 W Material recognition Auto recognition with NFC scanner Connectivity Wi Fi LAN USB port Display...

Страница 12: ...12 3 Unboxing Carefully unpack your Ultimaker S5 and set up the hardware according to the instructions in this chapter...

Страница 13: ...le free 4 Remove the cardboard insert with the materials from the top of the printer 5 Place the printer on a flat surface When placing the printer on a shelf or table take proper measures to prevent...

Страница 14: ...num build plate 3 Spool holder with material guide 4 Power cable 5 Ethernet cable 6 USB stick 7 Print core AA 0 4 8 Print core BB 0 4 9 XY calibration sheet glass build plate 10 XY calibration sheet a...

Страница 15: ...mbers on the print head 2 Secure the Bowden tubes with the clamp clips 3 Fit the print head cable clips onto Bowden tube 2 Place and connect the NFC spool holder 1 Insert the spool holder into the bac...

Страница 16: ...clamps at the back For the first use it is recommended to use the materials supplied with the Ultimaker S5 These should be printed on the glass build plate 4 Close the two build plate clamps at the fr...

Страница 17: ...installing the accessories you need to set up the printer for the first use This chapter will explain how to select the build plate install print cores load materials set up a network update the firm...

Страница 18: ...Confirm the glass build plate is installed For the first use it is recommended to print with the materials that were delivered with the printer Tough PLA and PVA This material combination must be prin...

Страница 19: ...knows which print cores are installed and which materials can be used with this print core Install the second print core During the welcome setup the second print core must be installed To do this go...

Страница 20: ...and select Confirm Make sure the end of the material points in a clockwise direction so that the material can enter feeder 2 from the bottom 2 Wait until the Ultimaker S5 detects the material and Conf...

Страница 21: ...uide 3 Place the material guide with material 1 on it onto the spool holder behind material 2 and select Confirm 4 Wait until the Ultimaker S5 detects the material and select Confirm When using a thir...

Страница 22: ...site that is not yet known by your browser 4 Go back to the Ultimaker S5 and wait until the Wi Fi setup is finished Within some network environments the Ultimaker S5 may experience difficulties connec...

Страница 23: ...ments OpenGL 2 compatible graphics card Intel Core 2 or AMD Athlon 64 or newer At least 4GB of RAM 8GB or more is recommended A 64 bit processor Installation After downloading run the installer and ru...

Страница 24: ...ime to start printing with your Ultimaker S5 This chapter provides information about the touchscreen materials Ultimaker Cura starting a print removing the print and support material changing the prin...

Страница 25: ...art a print from USB or view the progress of the print while printing Configuration overview The configuration overview shows the current configuration of the printer Here you can see which print core...

Страница 26: ...al Not supported For an overview of possible dual extrusion material combinations take a look at the table below Tough PLA PLA ABS Nylon CPE CPE PC TPU 95A PP PVA Break away Tough PLA PLA ABS Nylon CP...

Страница 27: ...No ABS Not recommended Yes preferred CPE Yes Yes preferred CPE Not recommended Yes preferred PC Not recommended Yes preferred TPU 95A Yes preferred Yes PP Yes adhesion sheet Yes preferred PVA Yes No B...

Страница 28: ...become visible Here is an overview of the interface 1 Open file 2 Adjustment tools 3 Non printable areas 4 3D model 5 View mode 6 Printer material and print core configuration 7 Print Setup recommend...

Страница 29: ...select the extruder that you want to use to print the support structure This allows you to print your model with PVA support Breakaway support or build material support on your Ultimaker S5 5 To view...

Страница 30: ...he Ultimaker S5 and the other end of the cable to a router or modem 2 Enable Wi Fi or Ethernet in the network menu 3 In Ultimaker Cura go to Settings g Printers g Manage printers 4 Click on the Connec...

Страница 31: ...a Ensure that the material and print core configuration in Ultimaker Cura matches the configuration on your Ultimaker S5 3 Save the print file to the USB stick GCODE GCODE gz or UFP using the Save to...

Страница 32: ...to the build plate in order to avoid scratches on the build plate and apply a small amount of force to remove the print A spatula can also be used to carefully remove remaining parts of the print from...

Страница 33: ...upport with pliers When the print is placed back in the water only the remaining parts of PVA will need to be dissolved 2 Rinse with water After PVA supports are totally dissolved rinse the print with...

Страница 34: ...t structure 2 Pull the Breakaway support from the build material After removing most of the support structure the remaining part s can be pulled from the build material Use cutting pliers to grip the...

Страница 35: ...nu select the print core you want to change and select Change 2 Wait for the print core to heat up unload the material and cool down again 3 Open the glass doors and print head fan bracket and Confirm...

Страница 36: ...plate surface This information is used to compensate for any inaccuracies of the build surface during the first layers of the print It will do this by adjusting the build plate height while printing D...

Страница 37: ...e vertical offset the horizontal distance between the nozzles in the X andY direction also needs to be configured The print cores that are supplied with the Ultimaker S5 are already calibrated but whe...

Страница 38: ...and lowered For successful dual extrusion prints it is important that print core switching functions well The lift switch is already calibrated when the Ultimaker S5 is shipped but calibration can al...

Страница 39: ...n order for your Ultimaker S5 to work smoothly it is important to maintain it correctly In this chapter the most important maintenance steps are described Read this carefully in order to achieve the b...

Страница 40: ...on The Ultimaker S5 will now download the latest firmware from the server and install it This may take several minutes Update using a USB stick Firmware can also be updated without an active network c...

Страница 41: ...temperature for PLA Tough PLA Nylon CPE CPE PC TPU 95A PP and Breakaway is between 20 to 30 C For ABS the advised temperature is between 15 and 25 C and for PVA 0 to 30 C Furthermore a relative humid...

Страница 42: ...s Check for debris in front fan of print head Check quality of nozzle cover Lubricate lead screw Z motor Clean the feeders Clean the print cores Lubricate the feeder gear Replace the Bowden tubes Clea...

Страница 43: ...ean the build plate and reapply glue if applicable Before starting a new print always check the surface of the build plate At least once a month clean the build plate thoroughly by taking the followin...

Страница 44: ...not touch the nozzles and be careful while cleaning them as they will become hot 1 On the Ultimaker S5 navigate to the configuration menu select print core 1 then click on the icon in the top right co...

Страница 45: ...Cut off a small piece of sponge or ball up a piece of tissue 6 Insert this into the feeder end of the Bowden tube and push it all the way through the tube with a length of filament Do this for both B...

Страница 46: ...ps 1 Raise the build plate by navigating to Configuration g Build plate and select Raise 2 Clean the inside of the printer with a microfiber cloth or vacuum cleaner Pay extra attention to the area aro...

Страница 47: ...grease may affect the coating of the axles which can affect the performance of your Ultimaker S5 X and Y axles Apply a small drop of oil to each of the X andY axles as well as both print head shafts M...

Страница 48: ...Place the print head in the back left corner of the printer to keep it out of the way Hold the frame of the Ultimaker S5 with one hand and firmly hold the right X axle with the other Attempt to move t...

Страница 49: ...gainst itself Furthermore the tension of the two belts should be equal To restore the tension perform the following steps 1 Loosen theY motor by using the hex screwdriver to loosen the four bolts that...

Страница 50: ...he fan and prevent it from spinning Especially high temperature materials such as CPE PC and ABS are sensitive to this To check the front fan first gently open the front fan bracket Blow into the fron...

Страница 51: ...come through are still round and the cover still forms a good seal Also gently open the fan bracket to check the other side of the nozzle cover If the nozzle cover looks like it needs to be replaced...

Страница 52: ...to lock the cover in place 6 Close the print head fan bracket and check if the new nozzle cover is correctly placed Slide your finger across the bottom of the print head If the nozzle cover easily det...

Страница 53: ...maintain consistent and accurate movement of the Z stage A tube of grease is included in the accessory box of your Ultimaker S5 1 Make sure that the build plate is positioned at the bottom of the Ulti...

Страница 54: ...he feeder Next remove the tube coupling collet 3 Reduce the tension of the feeder by turning the bolt in the top of the feeder with the hex screwdriver until the indicator is completely at the top 4 U...

Страница 55: ...lean an AA print core Preparation 1 Go to Preferences g Maintenance g Print head g Print core cleaning and select Start to start the cleaning procedure The print head will move to the front right corn...

Страница 56: ...njuries to your hands in case the material breaks 3 Cut off the tip of the filament that you have just pulled out 4 Check the color and the shape of the tip of the filament and compare it with the ima...

Страница 57: ...t until the print core has cooled down 5 Grab the filament with pliers and pull it out with a quick firm pull Confirm to continue 6 Take a look at the tip of the filament and see if it has a clean con...

Страница 58: ...the tube coupling collet and pull the Bowden tube upwards out of the feeder 3 Use the hex screwdriver to loosen the two bolts that hold the feeder to the back panel 4 Carefully move the feeder away f...

Страница 59: ...hich can negatively impact print quality If the Bowden tubes are permanently damaged they need to be replaced To maintain optimal print quality it is recommended to replace the Bowden tubes every year...

Страница 60: ...e feeder by pressing down on the tube coupling collet in the feeder and pushing the Bowden tube all the way in Secure the tube with the clamp clip 3 Insert the Bowden tube into the print head by press...

Страница 61: ...ystem fans are positioned at the back of the printer and need to be cleaned once a year This can be done by blowing into the fans in order to get small filament particles out If necessary an air blowe...

Страница 62: ...the hinges To make sure the glass doors will open and close smoothly the hinges of the glass doors have to be lubricated once a year This can be done by putting a small drop of oil in the top hole of...

Страница 63: ...leshooting There are a few printer specific issues that can occur while using your Ultimaker S5 If you run into one of these issues you can troubleshoot it yourself using the information in the follow...

Страница 64: ...k or the limit switch is broken Go to ultimaker com ER33 There is a communication error with the print head Go to ultimaker com ER34 There is an I2C communication error Go to ultimaker com ER35 There...

Страница 65: ...the most effective way to clean and unclog a print core on the Ultimaker S5 If you don t have the Ultimaker cleaning filament at your disposal you can use PLA Take a look at chapter 6 11 Clean print c...

Страница 66: ...t might not be able to forward the PVA properly anymore If this happens you can dry the PVA Coated Bowden tube The Bowden tube can get coated on the inside due to incorrect printing conditions mainly...

Страница 67: ...plate When your print is warping ensure you have done the following Use the active leveling to level the build plate In case of a glass build plate apply a thin layer of glue Use the correct temperatu...

Страница 68: ......

Отзывы: