Doc No. FM0713 Issue C Page 36
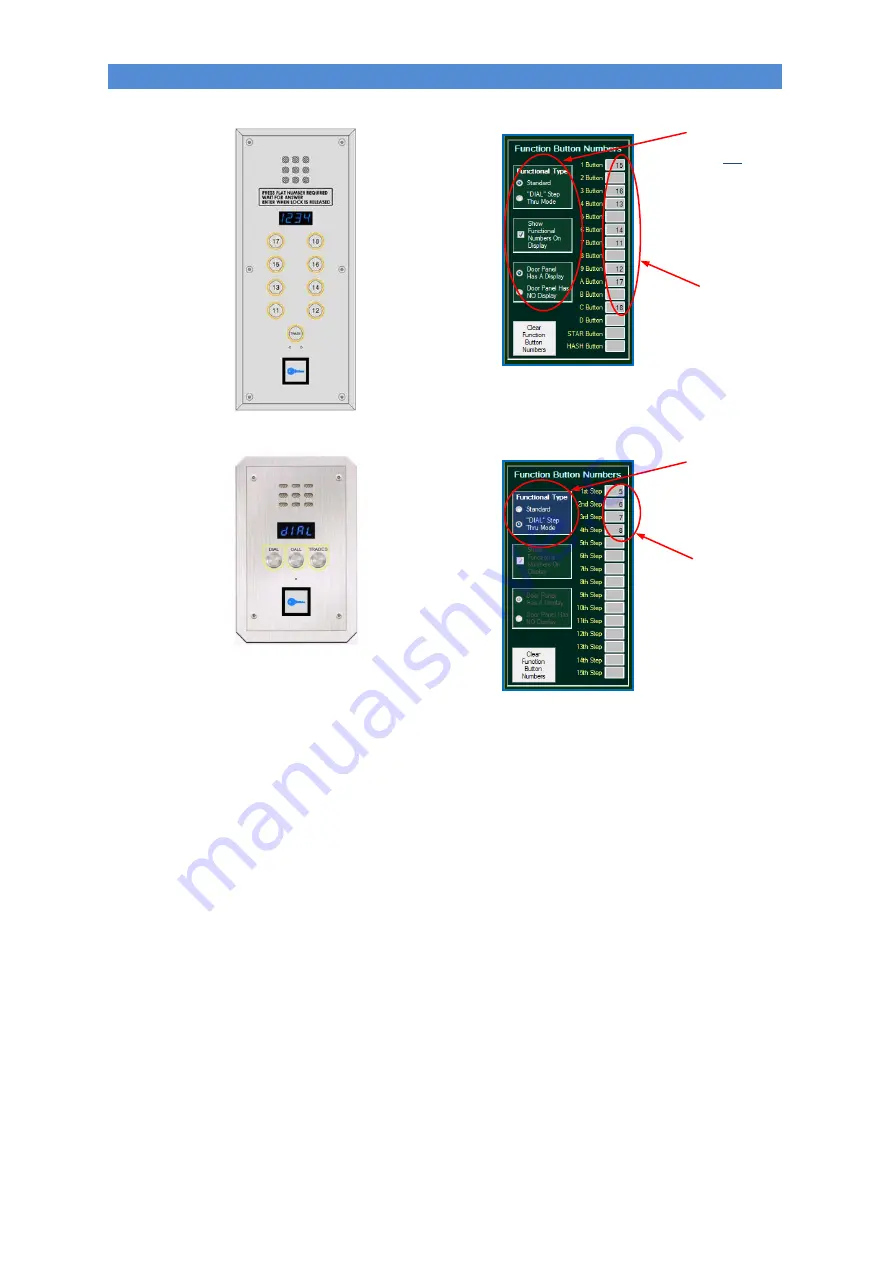
ZSD528
8 way + Trade
+ display
Functional
door panel
with buttons
engraved
11, 12, 13, 14
15, 16, 17, 18
Refer to
Figure 2
3x5 Matrix
and enter the
flat numbers
engraved on
the buttons
in the
relevant
boxes on the
programming
screen
ZSD580
Dial Functional
door panel for
flats numbered
5, 6, 7, 8
Enter the flat
numbers in
sequential
order starting
in the 1
st
Step
box on the
programming
screen
Enter Flat
numbers here
Set “DIAL”
Step Thru
Mode
panel type
Set “Standard”
panel type
and
“Door Panel Has
A Display”
Enter Flat
numbers here
17. SYSTEM PROGRAMMING
EXAMPLE 3:
EXAMPLE 4:
If you have a functional door panel WITH display and you cannot work-out which button is which then another
option is to temporarily “Set Door Panel Type” to
Digital
and click the
“Send Config Data ONLY”
button.
Now press each button in turn on the door panel and make a note of the number that appears on the display
against the actual flat number engraved on the button. You will see numbers “1 to 9”, letters “A-C” and “STAR”
& “HASH”. For example, if you press a button engraved “17” and it shows “A” in the display you now know to
enter 17 in the “A Button” box on the programming screen.
Now “Set Door Panel Type” back to
Functional
and fill-out the button boxes using the list you created.
When complete remember to click the
“Send Config Data ONLY”
button again.


