Doc No. FM0713 Issue C Page 31
17. SYSTEM PROGRAMMING
17.03 RUNNING THE DOOR PANEL GUI SOFTWARE
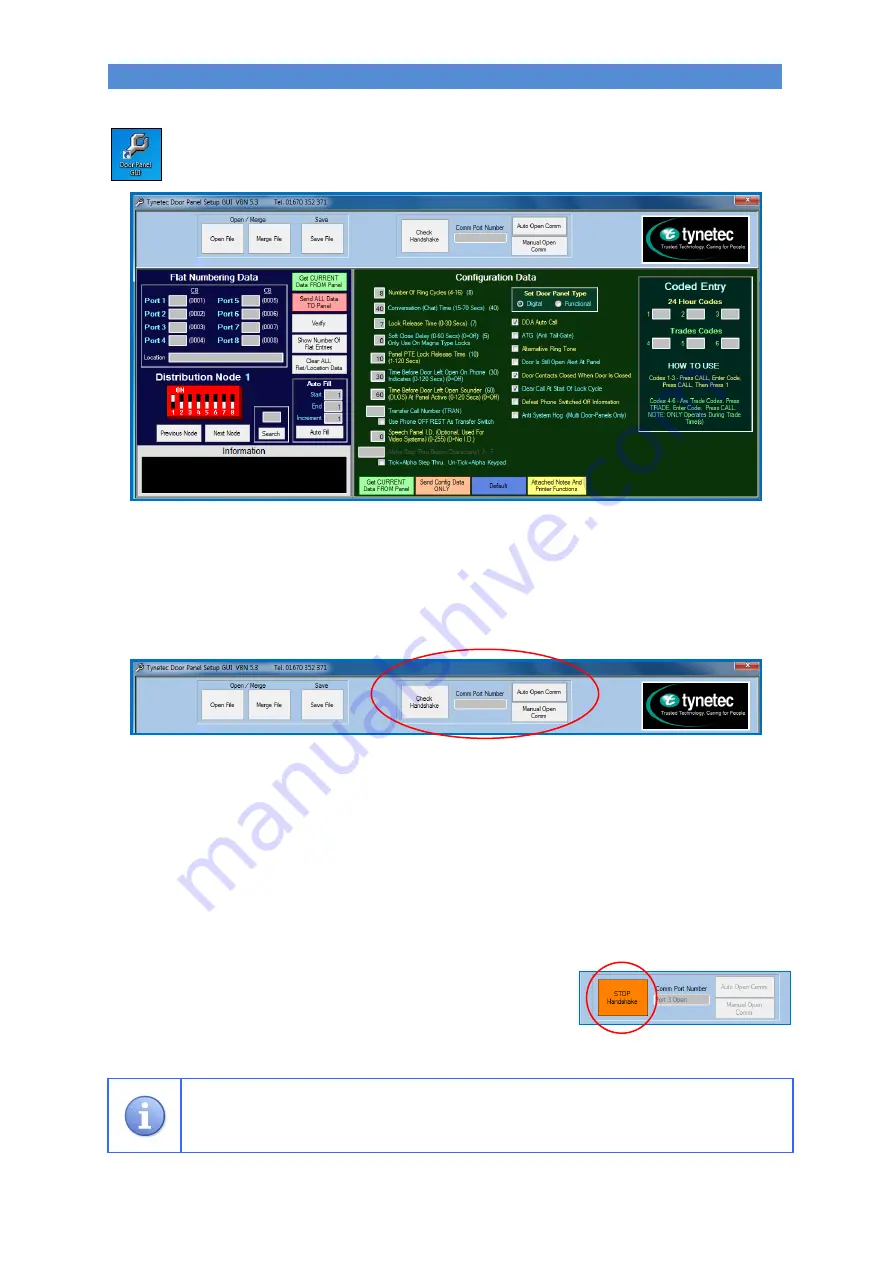
Click on the Door Panel GUI icon on your Desktop to run the software.
After a few moments you should be looking at the main screen which looks like this;
The
light blue
area at the top is for File administration and Comm Port setup.
The
darker blue
area on the left is for programming the Flat Numbering details.
The
green
area on the right is to customize the system features and for setting the door panel type.
17.04 COMM PORT SETUP
The Comm Port Number your Laptop will use to communicate with the door panel needs to be set;
COMM PORT NUMBER/MANUAL OPEN COMM
If you know the Comm Port number enter it in this box then click on the “Manual Open Comm” button.
AUTO OPEN COMM
Click on this button if you don’t know the Comm Port number, the software will find the Comm Port being
used and enter it into the box.
IMPORTANT: before proceeding your Laptop needs to be connected to the door panel as described in Section
14.02 above and also ensure the door panel is powered from a 12V supply.
CHECK HANDSHAKE/STOP HANDSHAKE
Click on the “CHECK Handshake” button and the Information Box at the bottom of the screen should display;
“
Handshake… Waiting For Response
” followed by “
Handshake… Received OK
”
This means the Comm Port is operating correctly
Click on the “STOP Handshake” button to continue programming.
If you don’t get a Handshake; click on the “STOP Handshake” button
Click on the “Auto Open Comm” button again
When the Comm Port Number is steady click on the “Check Handshake” button again.
Depending on how many Comm Ports your Laptop has you may have to repeat the process until
you are able to handshake with the door panel. Make a note of the Comm Port number and you
can manually enter it in the Comm Port Number box next
.


