53
8. Press the STOP key at the Human Interface Module in
the unit control panel to stop the system operation.
9. Repeat steps 1 through 8 for the number 2 refrigeration
circuit.
10. After shutting the system off, check the compressor’s
oil’s appearance. Discoloration of the oil indicates that an
abnormal condition has occurred. If the oil is dark and
smells burnt, it has overheated because of: compressor
is operating at extremely high condensing temperatures;
high superheat; a compressor mechanical failure; or, oc-
currence of a motor burnout.
If the oil is black and contains metal flakes, a mechanical
failure has occurred. This symptom is often accompanied
by a high compressor amperage draw.
If a motor burnout is suspected, use an acid test kit to
check the condition of the oil. Test results will indicate an
acid level exceeding 0.05 mg KOH/g if a burnout oc-
curred.
Compressor Oil
The scroll compressor uses
Trane OIL-42 without substi-
tution
. The appropriate oil charge for a 9 and 10 Ton scroll
compressor is 8.5 pints. For a 14 and 15 Ton scroll com-
pressor, use 13.8 pints.
Table 10
Recommended Refrigerant Capacities
Unit Size
Refrigerant Charge*
C20
40.5
C25
54.0
C30
72.0
C40
38.0
C50
47.0
C60
67.0
*The listed refrigerant charge is for
pounds per circuit.
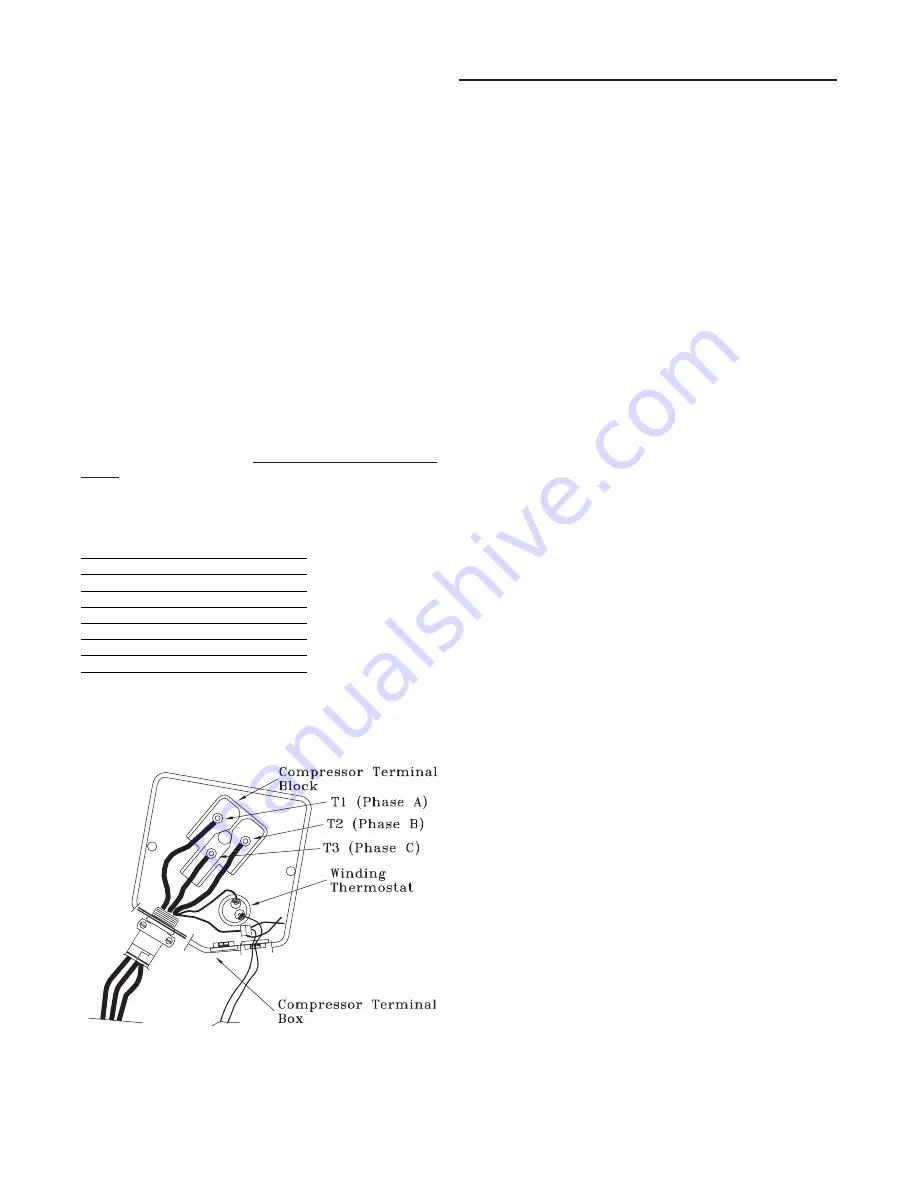
Figure 17
Typical Compressor Terminal Block
Compressor Crankcase Heaters
Each compressor is equipped with a crankcase heater and
is controlled by a 600 volt auxiliary switch on the compres-
sor contactor. The proper operation of the crankcase heater
is important to maintain an elevated compressor oil tem-
perature during the "Off" cycle to reduce oil foaming during
compressor starts.
When the compressor starts, the sudden reduction in crank-
case pressure causes the liquid refrigerant to boil rapidly
causing the oil to foam. This condition could damage com-
pressor bearings dur to reduced lubrication and could
cause compressor mechanical failures.
When power has been "Off" for an extended period, allow
the crankcase heater to operate a minimum of 8 hours be-
fore starting the unit.
Low Ambient Damper Adjustment
(Factory or Field Installed)
When a unit is ordered with the low ambient option (i.e., a
“W” in the miscellaneous digit of the model number), a
damper is factory installed over the lead condenser fan for
each refrigeration circuit. Refer to the appropriate unit illus-
trated in Figure 15 for the damper locations.
For field installation, mount the dampers over the con-
denser fans at the locations shown in Figure 15 and con-
nect the actuator, controller, and sensor for each circuit.
(Refer to the Installation Instructions provided with each low
ambient damper kit.)
The UCM has a factory default setpoint of 90
o
F. This set-
point can be adjusted using the Human Interface program-
ming procedures.
Inspect the damper blades for proper alignment and opera-
tion. Dampers should be in the closed position during the
“Off” cycle. If adjustment is required;
1. At the Human Interface, program the actuator for 0% on
circuit #1 and/or circuit #2. (The output signal will go to
0.0 VDC.)
2. Loosen the damper shaft “Locking” set screws on the ac-
tuator.
3. Firmly hold the damper blades in the closed position.
4. Tighten the “Locking” set screws.
To check damper operation, program the actuator for 100%
on circuit #1 and/or circuit #2. (The output signal will go to
10 VDC and the damper will drive to the full open position.
Final System Setup
After completing all of the checkout and start-up procedures
outlined in the previous sections (i.e., operating the unit in
each of its Modes through all available stages of cooling),
perform these final checks before leaving the unit:
[ ] Close the disconnect switch or circuit protector switch
that provides the supply power to the unit’s terminal
block 1TB1 or the unit mounted disconnect switch 1S14.
System Start-Up
Содержание IntelliPak CG-SVX02B-EN
Страница 10: ...10 General Information Module Mounting Locations Screw Hole...
Страница 12: ...12 Figure 1 Typical Installation Clearances for Single Multiple or Pit Applications...
Страница 13: ...13 Figure 2 C20 Ton Unit Dimensional Data Recommended Clearances...
Страница 14: ...14 Figure 2 C25 Ton Unit Dimensional Data Recommended Clearances...
Страница 15: ...15 Figure 2 C30 Ton Unit Dimensional Data Recommended Clearances...
Страница 16: ...16 Figure 2 C40 Ton Unit Dimensional Data Recommended Clearances...
Страница 17: ...17 Figure 2 C50 Ton Unit Dimensional Data Recommended Clearances...
Страница 18: ...18 Figure 2 C60 Ton Unit Dimensional Data Recommended Clearances...
Страница 35: ...35...
Страница 36: ...36 Figure 12B Typical GBAS 0 5 Volt Connections Diagram...
Страница 37: ...37...
Страница 38: ...38...
Страница 63: ...63...
Страница 64: ......


