161
Chapter 6
Configure the Router in Access Point Mode
6. 4. Wireless
In this section, we will take the settings for the 2.4GHz wireless network for example.
6. 4. 1. Wireless Settings
1. Visit
http://tplinkwifi.net
, and log in with the username and password you set for
the router.
2. Go to
Setting
>
Wireless 2.4GHz
>
Wireless Settings
.
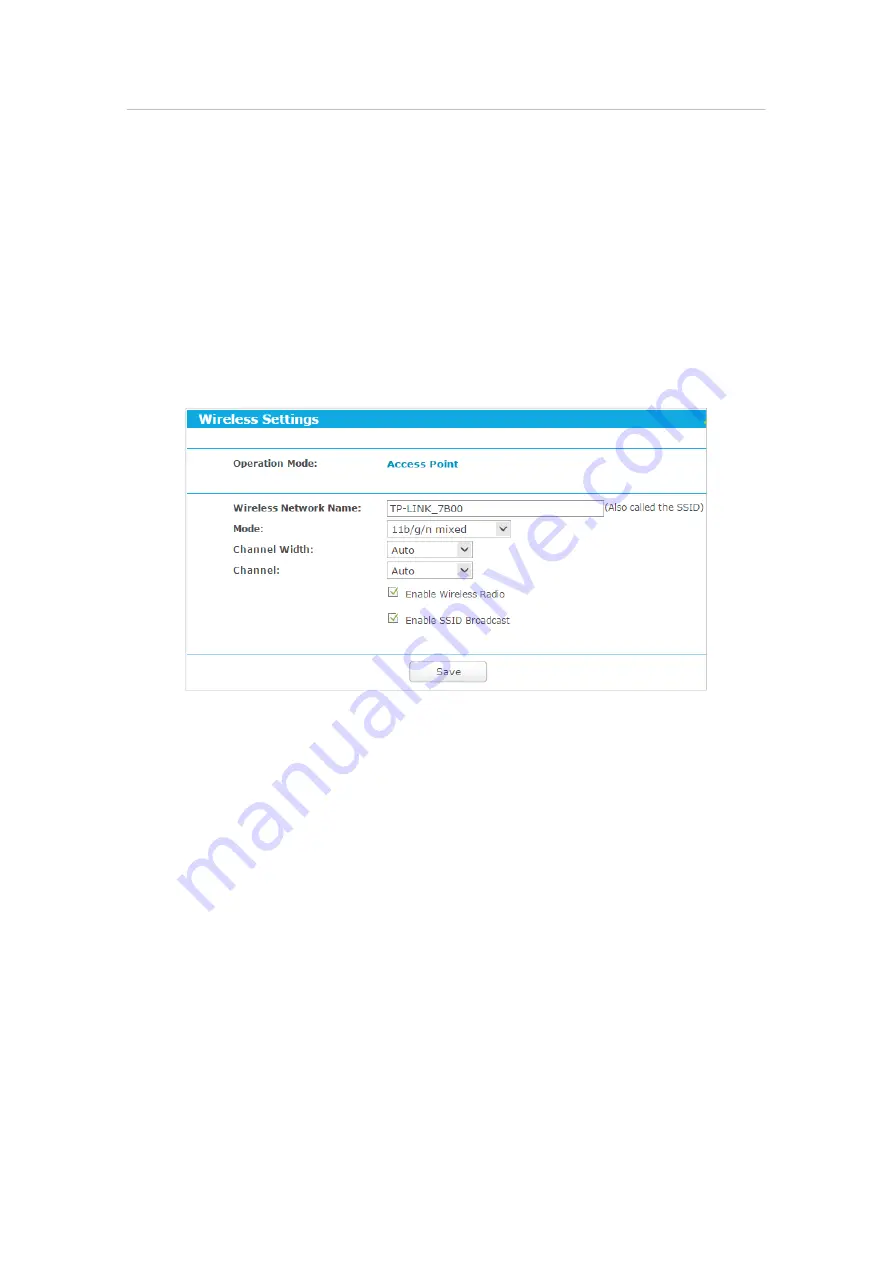
3. Configure the basic settings for the wireless network and click
Save
.
•
Operation Mode
- This field displays the current operation mode of the router.
•
Wireless Network Name
- Enter a string of up to 32 characters. The default SSID is
TP-LINK_XXXX (XXXX indicates the last unique four numbers of each router’s MAC
address). It is strongly recommended that you change your network name (SSID). This
value is case-sensitive. For example, TEST is NOT the same as test.
•
Mode
- Select the desired mode. It is strongly recommended that you keep the
default setting
11bgn mixed
, so that all 802.11b/g/n wireless devices can connect to
the router.
•
Channel Width
- Select any channel width from the drop-down list. The default setting
is
Auto
, which can automatically adjust the channel width for your clients.
•
Channel
- This field determines which operating frequency will be used. The default
channel is set to
Auto
. It is not necessary to change the wireless channel unless you
notice interference problems with another nearby access point.
•
Enable Wireless Router Radio
- The wireless radio of the router can be enabled or
disabled to allow or deny wireless access. If enabled, the wireless clients will be able
to access the router.


