background image

5.EQUIPMENT SETTINGS

Default Settings    127

5 EQUIPMENT SETTINGS

4

Press the   or   button to select “ORIGINAL MODE”.

5

Press the [SETTING/OK] button.

6

Press the  ,  ,  , or   button to select “TEXT/PHOTO”, “TEXT”, “PHOTO”, or 
“BACKGROUND ERASE”.

For the details about the setting and operation, see the pages below.


 P.58 “Changing the original mode to copy”


 P.69 “Adjusting the original mode to the copy”

7

Press the [SETTING/OK] button to exit from the menu.

You are finished with the operation in the “MENU” mode. The selected setting becomes active as the default.

„

Setting the finishing default

Set the default setting for the “FINISHING” copy function as follows.

1

Press the [MENU] button to enter the “MENU” mode.

2

Press the   or   button to select “DEFAULT SETTINGS”.

3

Press the [SETTING/OK] button to enter the “DEFAULT SETTINGS” menu.

4

Press the   or   button to select “FINISHING”.

5

Press the [SETTING/OK] button.

6

Press the   or   button to select “NONSORT”, “SORT”, or “ROTATE SORT”.

For the details about the setting and operation, see the page below.


 P.70 “Sorting pages in the same order as the original”

7

Press the [SETTING/OK] button to exit from the menu.

You are finished with the operation in the “MENU” mode. The selected setting becomes active as the default.

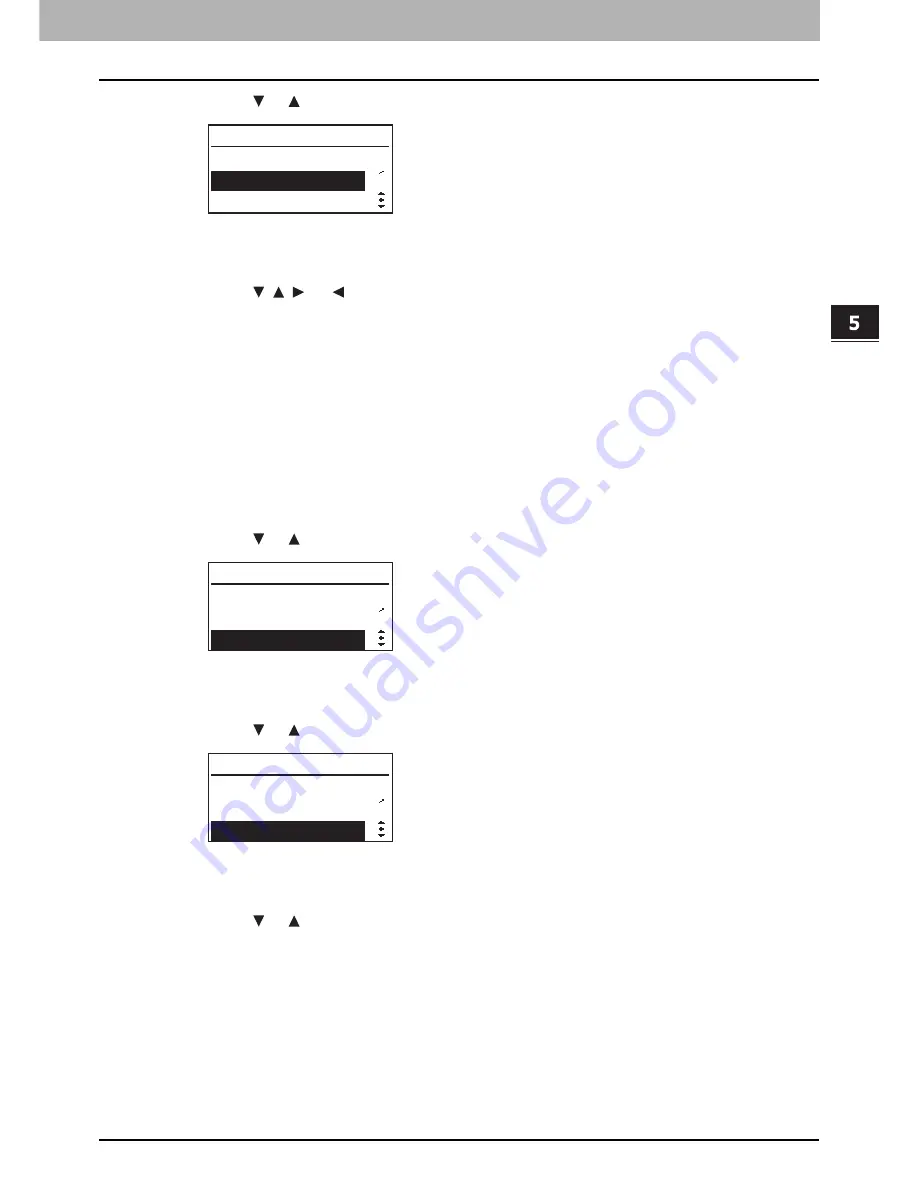
DEFAULT SETTINGS

1

5

ORIGINAL MODE

FINISHING

DENSITY

MENU

1

3

PAPER SETTINGS

DEFAULT SETTINGS

ADVANCED FUNCTION

DEFAULT SETTINGS

1

5

ORIGINAL MODE

FINISHING

DENSITY

Содержание E-studio18

Страница 1: ...MULTIFUNCTIONAL DIGITAL SYSTEMS User s Guide ...

Страница 2: ... All rights reserved Under the copyright laws this manual cannot be reproduced in any form without prior written permission of TTEC No patent liability is assumed however with respect to the use of the information contained herein ...

Страница 3: ...r direction Paper or originals of A4 or B5 LT size can be placed either in a portrait direction or in a landscape direction In this manual R is added to this paper size when this size of paper or original is placed in a landscape direction e g A4 LT size original on the original glass Paper or originals of A3 or B4 LD or LG size can only be placed in a landscape direction therefore R is not added ...

Страница 4: ...and read the manual best suited to your needs This manual is the User s Guide Safety Information Printouts This manual describes the necessary precautions for use For your added security be sure to read this manual first User s Guide PDF file This Manual This manual describes the preparation for using the e STUDIO18 and how to use the functions such as copying printing and scanning It also describ...

Страница 5: ...s or parts other than those recommended by TOSHIBA TEC CORPORATION 4 Subject to paragraph 1 TOSHIBA TEC CORPORATION shall not be liable to Customer for a loss of profits loss of sales or turnover loss of or damage to reputation loss of production loss of anticipated savings loss of goodwill or business opportunities loss of customers loss of or loss of use of any software or data loss under or in ...

Страница 6: ...ware is not licensed to you You will be held legally responsible for any copyright infringement unauthorized transfer reproduction or use of the Software or its documentation Term This license is effective until terminated by TTEC or upon your failure to comply with any term of this Agreement Upon termination you agree to destroy all copies of the Software and its documentation You may terminate t...

Страница 7: ...cerned with a dispute arising from or relating to this Agreement the laws of the Country designated from time to time by the relevant Supplier of TTEC If any provision or portion of this Agreement shall be found to be illegal invalid or unenforceable the remaining provisions or portions shall remain in full force and effect YOU ACKNOWLEDGE THAT YOU HAVE READ THIS LICENSE AGREEMENT AND THAT YOU UND...

Страница 8: ...laser beam light emitted inside the multifunctional digital systems The laser beam cannot escape from the machine during any phase of user operation Regulations implemented on August 2 1976 by the Bureau of Radiological Health BRH of the U S Food and Drug Administration apply to laser products manufactured from August 1 1976 Laser products marketed in the United States must comply with these regul...

Страница 9: ...ccessories the Radio Equipment and Telecommunications Terminal Equipment Directive 1999 5 EC for the telecommunication accessories CE marking is the responsibility of TOSHIBA TEC GERMANY IMAGING SYSTEMS GmbH Carl Schurz Str 7 41460 Neuss Germany phone 49 0 2131 1245 0 For a copy of the related CE Declaration of Conformity please contact your dealer or TOSHIBA TEC Warning This is a Class A product ...

Страница 10: ......

Страница 11: ...aper loaded in the drawer 38 Registering the size and type of paper loaded on the bypass tray 39 Preparation 4 Installing Printer and Scanner Drivers 41 System requirements 41 Connecting the equipment and the computer 41 Installing the drivers 41 Chapter 2 COPY FUNCTIONS Basic Copy Procedure 52 Acceptable originals 52 Making one or more copies 53 Stopping and resuming the copy operation 54 Selecti...

Страница 12: ...e print status and reporting print errors 88 Status monitor messages 88 How to Set Print Options 90 Setting print options 90 Using print profiles 91 Print Options 93 Basic tab 95 Finishing tab 96 Paper Handling tab 98 Image Quality tab 99 Effect tab 100 Others tab 102 Configuration tab 103 How to Use Useful Print Functions 104 Sorting pages to print 104 Enlarging or reducing print pages 105 Printi...

Страница 13: ...ions 135 Restoring the defaults 135 Entering the sleep mode 135 Displaying the total counter 136 Displaying the ROM version 136 Chapter 6 TROUBLESHOOTING When This Message Appears 140 Paper Jams 141 Checking position of paper jams 141 When paper jams occur frequently 141 When releasing jammed paper 141 Paper jams on bypass tray 142 Paper jam behind transfer unit 142 Paper jams within fuser unit 14...

Страница 14: ...12 CONTENTS Packing List 164 Copying Function Combination Matrix 165 Combination Matrix 165 INDEX 167 ...

Страница 15: ...tridge detecting function This function checks if the toner cartridge is correctly installed and notifies you if it is not Toner remaining check function This function notifies you when there is little toner remaining in the cartridge as well as notifying it to your authorized service representative automatically by the remote service Image quality optimization function This function controls imag...

Страница 16: ...wear is due to TOSHIBA s intimate knowledge of the equipment s characteristics ensuring the highest standard of care Perfectly Suited Supplies From the beginning TOSHIBA supplies and machines were made for each other Whenever TOSHIBA designs a new machine it also designs a new toner that is made just for that machine By using genuine TOSHIBA supplies with TOSHIBA equipment you are guaranteed optim...

Страница 17: ...king it hot Situating it near radiators or other heat sources This could cause a fire or give you an electric shock If the power cable is damaged contact your service representative y Do not install the equipment by yourself or try to move it once it has been installed This could result in an injury or damage to the device Contact your service representative if the equipment needs to be installed ...

Страница 18: ... representative if the equipment needs to be installed or moved When using the equipment Warning y Do not take off the cover of the equipment otherwise you could be injured or get an electric shock y Do not remove or connect the plug with wet hands as this could give you an electric shock y Do not place any container with liquid flower vases coffee cups etc on or near the equipment This could caus...

Страница 19: ...er exiting are hot y Do not place anything other than paper on the receiving tray This could disturb a normal operation and cause malfunctions y Do not touch the photoconductive drum surface or the transfer charger This could cause image problems y Do not open close the covers and the bypass tray or pull out the drawers during printing Identification label Explanatory label Warning label Warning f...

Страница 20: ... an explosion Do not dispose of used toner cartridges Contact your service representative Other points y Read this manual carefully to replace the toner cartridge using the correct procedure An improper procedure could cause toner leakage or scattering y Do not open the toner cartridge forcibly This could cause toner leakage or scattering y Keep the toner cartridge out of the reach of children y I...

Страница 21: ...ay not be included To distinguish whether or not the product meets the ENERGY STAR Program requirements check if the corresponding logo is on the product If you have any questions contact your service representative Energy saving features Energy saving features are provided in this product in order to reduce power consumption when it is not being used Low power mode The equipment automatically ent...

Страница 22: ......

Страница 23: ...ng Power ON 27 Turning power ON 27 Saving energy when not in use Energy saving mode 27 Preparation 2 Loading Paper 29 Acceptable media types 29 Recommended paper 30 Loading paper in the drawer 31 Loading paper on the bypass tray 33 Loading an envelope on the bypass tray 35 Preparation 3 Registering Loaded Paper 38 Registering the size of paper loaded in the drawer 38 Registering the size and type ...

Страница 24: ...eep the manual in this pocket 3 Side cover 4 Bypass tray Use this to copy or print on special media types such as thick paper overhead transparencies or tracing paper P 33 Loading paper on the bypass tray P 35 Loading an envelope on the bypass tray 5 Drawer Maximum 250 sheets of plain paper can be loaded in one go P 31 Loading paper in the drawer 6 Front cover Open this cover when you replace the ...

Страница 25: ...y 5 Power switch Turn the power of the equipment ON or OFF with this P 27 Preparation 1 Turning Power ON 6 AC IN terminal Use this to connect the co packed power cable and the equipment 7 USB terminal 4 pin With this terminal the equipment can be connected to your PC using a commercially available USB cable y Use a USB2 0 Hi Speed certified cable USB cable supporting the USB2 0 Hi Speed mode 480 M...

Страница 26: ...ce representative for the details Control panel The function and indication of the button vary from region to region Unless otherwise specified this manual uses an illustration of the control panel for the regions other than Europe For the regions other than Europe Desk MH 1640 Operator s Manual Pocket Back side KK 1660 Main body 4 5 1 3 8 9 10 2 6 7 ...

Страница 27: ...the menu screens other than the basic screen to make the selected item active 5 CLEAR STOP button Press this button once on the basic screen to stop copying or return the number of copies to 1 Keep pressing it for a second to cancel the setting Press it on the menu screens other than the basic screen to return to the basic screen without saving the settings 6 START button Press this button to star...

Страница 28: ...area displays the current status of this equipment or error messages 2 Copy quantity This area displays the number of copies 3 Set the number of copies This icon shows that you can press the or button to increase or decrease the number of copies 4 Reproduction ratio This area displays the reproduction or zoom ratio to copy 5 Cursor icon This icon displays the and buttons that you can press on the ...

Страница 29: ...tically enters into the energy saving mode when a specified period of time has passed since its last use You can also switch the equipment into this mode manually Types of energy saving mode There are two types of the energy saving mode as follows Low power mode SAVING ENERGY appears on the LCD screen Sleep mode The LCD screen disappears and only the Alert lamp is lit The timers for AUTO LOW POWER...

Страница 30: ...1 PREPARATION 28 Preparation 1 Turning Power ON Low power mode Sleep mode y When any of the buttons on the control panel is pressed y When printing is performed from a PC connected with this equipment ...

Страница 31: ...izes in one drawer y LT format is the standard size for only use in North America y K format is a Chinese standard size Abbreviations for LT format sizes LT Letter LD Ledger LG Legal ST Statement COMP Computer Feeder Media type Paper size Maximum sheet capacity 1 Drawer of the equipment Plain paper 64 80 g m2 17 20 lb Bond A B format A3 A4 A4 R B4 B5 B5 R FOLIO LT format LD LG LT LT R COMP 13 LG 4...

Страница 32: ...y treated y Paper once printed with other copiers or printers Storing paper Observe the following cautions when storing copy paper y Wrap copy paper in its wrapping paper to prevent it from gathering dust y Do not expose copy paper to direct sunlight y Store copy paper in a damp free place y Store copy paper on a flat surface to prevent it from being creased or bent Media type Product name Plain p...

Страница 33: ... load paper in the drawer For the acceptable paper see the following page P 29 Acceptable media types 1 Turn the power of the equipment ON 2 Pull out the drawer carefully Pull out the drawer until it comes to a stop 3 Press down the paper plate Press it down until you hear a click sound and it is no longer lifted up ...

Страница 34: ... media types y Fan the paper well before loading it in the drawer otherwise multiple feeding could occur Be careful that the paper does not cut your fingers y Load the paper face up You may tell its face by the note on its wrapping paper 5 Move the end guide to the trailing edge of the paper while pushing its lower part in the direction of the arrows Widen the gap with both hands 6 While holding t...

Страница 35: ... could cause a paper jam For the registration see the following page P 38 Registering the size of paper loaded in the drawer Be sure to register the paper size when you have changed it in the drawer as well as when you load paper in the drawer for the first time The DRAWER SET POP UP function is useful when you often replace paper in the drawer The registration menu for the paper size can be displ...

Страница 36: ...r forcibly into the entrance of the bypass feeder This could cause a paper misfeed When you use paper longer than the bypass tray size pull out the paper holder from the tray Register the paper size and type into the equipment When you load paper on the bypass tray register the size and type of the paper into the equipment Be sure register them correctly or they could cause a paper jam For the reg...

Страница 37: ...e to the equipment 1 Badly curled wrinkled or folded envelopes 2 Extremely thick or thin envelopes 3 Wet or damp envelopes 4 Torn envelopes 5 Envelopes which include the contents 6 Non standard size envelopes ones with a special shape 7 Envelopes with eyelets or windows 8 Envelopes sealed with adhesive paste or tape 9 Partly opened or perforated envelopes 10 Envelopes with special coating on the s...

Страница 38: ... air from the inside Press it well to prevent the flap from rolling upward Correct bent corners of the envelope 2 Open the bypass tray 3 Load the envelope face down on the bypass tray Place the envelope with its flap side at the front as shown below Do not copy or print on the back of envelopes This may cause a paper jam or soil them or the inside of the equipment ...

Страница 39: ...ter the size and type of the paper into the equipment Be sure register them correctly or they could cause a paper jam For the registration see the following page P 39 Registering the size and type of paper loaded on the bypass tray Be sure to register the paper size and type when you have changed the paper size and type on the bypass tray as well as when you load paper on the bypass tray for the f...

Страница 40: ...you to change the paper size every time you change paper in the drawer This feature is useful when you often change paper in the drawer P 130 Setting the pop up message for changing paper in the drawer Follow the steps below to register the paper size for example A4 for the drawer 1 Press the MENU button to enter the MENU mode 2 Press the or button to select PAPER SETTINGS 3 Press the SETTING OK b...

Страница 41: ...aper loaded on the bypass tray Follow the steps below to register the paper size and type for example A3 and thick paper 81 105 g m2 21 28 lb Bond for the bypass tray 1 Press the MENU button to enter the MENU mode 2 Press the or button to select PAPER SETTINGS 3 Press the SETTING OK button 4 Make sure that PAPER SIZE is selected If necessary press the or button to select it 5 Press the SETTING OK ...

Страница 42: ...s that A3 is selected 9 Press the SETTING OK button 10 Press the or button to select the type of paper you loaded on the bypass tray The LCD screen below illustrates that PLAIN is selected 11 Press the SETTING OK button to exit from the menu You are ready to use the selected paper size and type PAPER SIZE DRAWER CANCEL BYPASS 1 4 BYPASS A5 R FOLIO 8K B4 B5 B5 R A3 A4 A4 R 1 2 BYPASS PAPER TYPE TRA...

Страница 43: ...ice Packs Connecting the equipment and the computer Before you start to install the printer and scanner drivers make sure that a USB cable is connected to the equipment and the computer The figure below illustrates the connection to the equipment Do not turn the power ON at this stage The installer prompts you to turn it on during the installation be sure to follow the instruction message Installi...

Страница 44: ...the scanner driver first and then the printer driver Wait until the next message appears 5 Make sure of the connection between the equipment and the computer turn on the equipment and then click Finish y When you use Windows 7 Windows Vista Windows Server 2008 or Windows Server 2008 R2 skip to step 10 y When you use Windows XP Windows Server 2003 or Windows Server 2003 R2 continue to the next step...

Страница 45: ...ed and click Next Windows automatically detects the equipment and starts the wizard for the succeeding installation 7 Make sure that Install the software automatically Recommended is selected and click Next Wait while the wizard is searching and installing the software 8 Click Finish 9 Repeat steps 6 to 8 to complete the wizard ...

Страница 46: ...allation of the scanner driver and then the printer driver Using Plug and Play is an easy way to install the drivers Still an additional printer wizard can also be used to install the printer driver To use the additional printer wizard select the USB port to be connected using Choose a Printer Port Installing the drivers in Windows Vista Server 2008 1 Connect this equipment to the computer using a...

Страница 47: ...r software recommended The dialog box requesting the disk CD ROM appears If the User Account Control dialog box appears click Allow or Continue 4 Click I don t have the disc show me other options 5 Insert the driver CD ROM into the CD ROM drive of the computer 6 Select Browse my computer for driver software advanced ...

Страница 48: ...nd New Hardware dialog box appears again and the installation of the printer driver begins 10 Repeat steps 4 through 9 to install the printer driver 11 After finishing the installation make sure that the icon of the installed printer is located in the Printers window 12 Remove the CD ROM from the CD ROM drive You are finished with the installation of the scanner driver and printer driver Installin...

Страница 49: ...pear turn this equipment off and then on again In this case turn off this equipment and then wait approximately 10 seconds before turning it on again If you turn this equipment on immediately after turning it off it may not function correctly y If a dialog box with a message saying Windows Update appears select No 4 Click No not this time and click Next 5 Click Install from a list or specific loca...

Страница 50: ... in the CD ROM where the drivers are located and click OK Select a folder according to the language and operating system to use e g When you use the 32 bit English OS specify Driver English i386 8 Click Next and wait while searching and installing the driver 9 Click Finish This completes the scanner driver installation The Found New Hardware Wizard dialog box appears again and the installation of ...

Страница 51: ...eps 4 through 9 to install the printer driver 11 After finishing the installation make sure that the icon of the installed printer is located in the Printers and Faxes window 12 Remove the CD ROM from the CD ROM drive You are finished with the installation of the scanner driver and printer driver ...

Страница 52: ......

Страница 53: ...the ID CARD or DENSITY function quickly 63 Selecting ORIGINAL MODE quickly 64 Using the F1 or F2 function quickly 65 Advanced Copy Functions 66 Selecting the copy functions on the ADVANCED FUNCTION menu 66 Adjusting the density to the copy 68 Adjusting the original mode to the copy 69 Sorting pages in the same order as the original 70 Zooming in or out to the copy 72 Copying two or four pages on e...

Страница 54: ...detect the original size automatically Make sure that the size of the paper to copy is the same as the original size You do not set the original size manually except for the 2IN1 4IN1 copy function When you use the 2IN1 4IN1 function you need to set the original size so that the copied pages are automatically reduced to the current paper size setting Do not place heavy objects 4 kg 9 lb or over on...

Страница 55: ...aking the glass could injure you When you use the transparent original such as overhead transparencies and tracing paper place a blank plain sheet of paper the same size or a larger sheet over the original When you make one copy skip the next step 2 Press the or button to increase or decrease the number of copies Pressing the button once changes the number of copies by one Holding down the button ...

Страница 56: ...rawer runs out of paper the error message appears on the LCD screen and copying stops Load paper on the drawer so that the equipment automatically resumes copying The receiving tray can hold up to 250 sheets If the excessive paper error occurs the lamp blinks and the error message appears on the LCD screen Remove the paper from the tray and press the START button to resume copying Stopping and res...

Страница 57: ...s from the drawer to the bypass tray The LCD screen automatically changes so that you can easily set the paper size and type for the bypass tray 1 Press the or button to select the size of paper you loaded on the bypass tray The LCD screen below illustrates NONSIZE is selected 2 Press the SETTING OK button 3 Press the or button to select the type of paper you loaded on the bypass tray The LCD scre...

Страница 58: ...ected If necessary press the or button to select it The choice may be BYPASS xx if it is set as the default The variable xx indicates the paper size set as the default 3 Press the SETTING OK button 4 Press the or button to select DRAWER xx or BYPASS xx The variable xx indicates the paper size set as the default 5 Press the SETTING OK button to return to the highest layer of the menu if you press t...

Страница 59: ...ss the SETTING OK button to enter the basic setting menu 2 Press the or button to select AUTO The choice may be the density scale if it is set as the default 3 Press the SETTING OK button 4 Press the or button to select AUTO or the density scale If you have selected AUTO at this step skip the next steps 5 and 6 5 If you have selected the density scale at the previous step press the or button to in...

Страница 60: ... P 69 Adjusting the original mode to the copy 1 Place the original 2 Select the original mode to copy You can change the original mode on the basic setting menu 1 Press the SETTING OK button to enter the basic setting menu 2 Press the or button to select TEXT PHOTO The choice may be TEXT PHOTO or BACKGROUND ERASE if it is set as the default 3 Press the SETTING OK 4 Press the or button to select th...

Страница 61: ...oom ratio Follow the steps below 1 Place the original 2 Select the zoom ratio to copy You can change the zoom ratio on the basic setting menu 1 Press the SETTING OK button to enter the basic setting menu 2 Press the or button to select the zoom ratio The zoom ratio is usually set to 100 unless it has been changed 3 Press the SETTING OK button 4 Press the or button to increase or decrease the zoom ...

Страница 62: ...oom ratio The zoom ratio is usually set to 100 unless it has been changed 3 Press the SETTING OK button 4 Press the or button to select FIXED ZOOM 5 Press the SETTING OK button 6 Press the or button to select the fixed zoom ratio 7 Press the SETTING OK button to return to the highest layer of the menu if you press the START button instead the equipment starts copying immediately When you want to e...

Страница 63: ... toner is nearly empty Blink CAN NOT USE THIS SIZE This message is displayed when the current paper size cannot be used for the selected function Blink y Other than North America COPY SIZE A4 A4 R B5 B5 R LT LT R 16K 16K R y North America COPY SIZE LT LT R A4 A4 R B5 B5 R 16K 16K R This message is displayed when the ROTATE SORT function is used The appearance order of available paper sizes vary fr...

Страница 64: ...FINISHING setting is displayed P 70 Sorting pages in the same order as the original 2IN1 4IN1 2IN1 4IN1 The current 2IN1 4IN1 setting is displayed P 73 Copying two or four pages on each sheet IMAGE SHIFT LEFT MARGIN RIGHT MARGIN The current IMAGE SHIFT setting is displayed P 79 Shifting the pages to the right or left EDGE ERASE EDGE ERASE This message is displayed when the EDGE ERASE function is o...

Страница 65: ...rk as the ID CARD button for the regions other than Europe or the DENSITY button for Europe Just press the button to access the ID CARD or DENSITY function quickly so that you can copy the front and back of a card on a sheet of paper or you can change the copy density P 75 Copying both sides of a card on a sheet P 68 Adjusting the density to the copy For the regions other than Europe For Europe Th...

Страница 66: ...the button to access the ORIGINAL MODE function quickly so that you can change the original mode to copy The accessible function is common to all regions P 69 Adjusting the original mode to the copy For the regions other than Europe For Europe The button can also work as the F2 one to activate FUNCTION2 P 65 Using the F1 or F2 function quickly ...

Страница 67: ... 133 Setting the FUNCTION1 2 default For the regions other than Europe For Europe F1 button Keep pressing the button for a second so that you can make use of FUNCTION1 or the following default function y For the regions other than Europe DENSITY P 68 Adjusting the density to the copy y For Europe ID CARD P 75 Copying both sides of a card on a sheet F2 button Keep pressing the button for a second s...

Страница 68: ...dicates that you have changed the setting from the default For the defaults see the pages below P 122 Functions available in the MENU mode P 126 Default Settings When you want to exit from the menu select CANCEL if it is available on the menu and press the SETTING OK button You can also exit from the menu layers with the CLEAR STOP button if it is active Functions Settings Reference Pages DENSITY ...

Страница 69: ...re to place the original in advance 7 Press the SETTING OK button y If the selected setting has no more options or values to set the SETTING OK button allows you to exit from the menu You are finished with the operation at this step y If the selected setting has more options or values to set the SETTING OK button allows you set them Continue to the next step 8 Set the options or values as required...

Страница 70: ... to copy 1 Press the MENU button to enter the MENU mode 2 Make sure that the first ADVANCED FUNCTION is selected You can scroll through the menu with the or button 3 Press the SETTING OK button to enter the ADVANCED FUNCTION menu 4 Make sure that DENSITY is selected If necessary press the or button to select it 5 Press the SETTING OK button 6 Press the or button to select AUTO or the density scale...

Страница 71: ...c setting menu P 58 Changing the original mode to copy 1 Press the MENU button to enter the MENU mode 2 Make sure that the first ADVANCED FUNCTION is selected You can scroll through the menu with the or button 3 Press the SETTING OK button to enter the ADVANCED FUNCTION menu 4 Press the or button to select ORIGINAL MODE 5 Press the SETTING OK button 6 Press the or button to select TEXT PHOTO TEXT ...

Страница 72: ... original and eject every set of copies crisscross so that you can easily distinguish each set You need two paper sources the drawer and the bypass tray and you have the same size and type of paper loaded in the different portrait and landscape orientations in each paper source When you use this function with the 2IN1 4IN1 function you need at least three original pages for 2IN1 and five original ...

Страница 73: ...38 Preparation 3 Registering Loaded Paper 1 Make sure that SORT or ROTATE SORT has been set 2 Set the number of copies to 2 or more P 53 Making one or more copies 3 Place the first page of the original face down on the original glass 1 Open the platen cover 2 Place the first page face down on the original glass 3 Align the original against the left rear corner of the original glass as illustrated ...

Страница 74: ... also set the zoom ratio on the basic setting menu P 59 Enlarging or reducing copies 1 Press the MENU button to enter the MENU mode 2 Make sure that the first ADVANCED FUNCTION is selected You can scroll through the menu with the or button 3 Press the SETTING OK button to enter the ADVANCED FUNCTION menu 4 Press the or button to select ZOOM 5 Press the SETTING OK button 6 Press the or button to se...

Страница 75: ...Select this setting to make this function inactive y This function is not available for some paper sizes If you have set the prohibited sizes the LCD screen shows the error message and you cannot make use of this function Interrupt the operation and change the paper and size in advance P 29 Preparation 2 Loading Paper P 38 Preparation 3 Registering Loaded Paper y You cannot make use of this functi...

Страница 76: ... button to select the size of the original to copy 11 Press the SETTING OK button The LCD screen shows SET ORIGINAL and illustrates how to place the original on the original glass 12 Place the first original face down on the original glass 1 Open the platen cover 2 Place the original face down on the original glass 3 Align the original against the left rear corner of the original glass as illustra...

Страница 77: ...uring the scanning of the copy job scanning stops and MEMORY IS FULL PRESS ANY KEY appears on the LCD screen Press any button on the control panel The scanned pages are cancelled 18 Press the or button to select NO on the NEXT ORIGINAL menu 19 Press the SETTING OK or START button The equipment automatically starts printing two or four original pages on each sheet of paper The copied pages are redu...

Страница 78: ...strates how to place the card on the original glass Continue the following steps y If you have selected OFF at the previous step you return to the top layer of the menu You are finished with the setting operation here 8 Place the front of a card face down on the original glass 1 Open the platen cover 2 Place the front surface of the card face down on the original glass 3 Align the long edge of the...

Страница 79: ...ientation as illustrated below 11 Press the START button The equipment starts scanning the back image of the card and then it automatically starts printing the scanned images on a sheet of paper Erasing the shadow on edges You can set EDGE ERASE to erase the shadow on the edges of copies When you copy thick books you can erase the surrounding shadow with this function The area to erase can be chan...

Страница 80: ...ook separately When you copy a book as it is spread on the original glass you can copy the right and left pages on two different sheets of paper at a time You do not need to move the book right and left every time you copy pages The area between two pages or the margin not to copy can be changed from 8 mm to 30 mm 0 3 to 1 2 in increments of 1 mm 0 04 y This function is not available for some pape...

Страница 81: ...OFF at the previous step you return to the top layer of the menu You are finished with the setting operation here 8 Press the or button to increase or decrease the value for the book margin not to copy 9 Press the SETTING OK button to exit from the menu You are ready to start copying with the selected function Shifting the pages to the right or left You can set IMAGE SHIFT to shift pages to the ri...

Страница 82: ...n immediately start copying with the default or current setting Before you start copying be sure to place the original in advance 7 Press the SETTING OK button y If you have selected LEFT MARGIN or RIGHT MARGIN at the previous step the LCD screen shows the value for the margin Continue the following steps y If you have selected OFF at the previous step you return to the top layer of the menu You a...

Страница 83: ...elect JOB MEMORY 6 Press the SETTING OK button Functions Settings 1 Reference Page Quantity the number of copies 1 99 copies P 53 Making one or more copies PAPER TYPE 2 PLAIN THICK1 THICK2 ENVELOPE TRANSPARENCY P 39 Registering the size and type of paper loaded on the bypass tray DENSITY AUTO Manual 9 steps P 57 Changing the density to copy P 68 Adjusting the density to the copy ORIGINAL MODE TEXT...

Страница 84: ...ollow the steps below 1 Press the MENU button to enter the MENU mode 2 Make sure that the first ADVANCED FUNCTION is selected You can scroll through the menu with the or button 3 Press the SETTING OK button to enter the ADVANCED FUNCTION menu 4 Press the or button to select JOB MEMORY 5 Press the SETTING OK button 6 Press the or button to select RECALL 7 Press the SETTING OK button 8 Press the or ...

Страница 85: ...Options 90 Setting print options 90 Using print profiles 91 Print Options 93 Basic tab 95 Finishing tab 96 Paper Handling tab 98 Image Quality tab 99 Effect tab 100 Others tab 102 Configuration tab 103 How to Use Useful Print Functions 104 Sorting pages to print 104 Enlarging or reducing print pages 105 Printing on both sides of paper 105 Printing front and back covers 106 Printing several reduced...

Страница 86: ... allows you to install or uninstall client software e g administrator privilege When you use Windows 7 Windows Vista Windows Server 2008 or Windows Server 2008 R2 you can temporarily change your user account to the one noted above with its User Account Control function Ask your administrator for the details 1 Open the Devices and Printers folder Printers and Faxes folder or Printers folder The fol...

Страница 87: ...command from within your application You can print with the various functions by setting print options on the printer driver The operation and command names you use vary from application to application The following procedure explains how you print from Adobe Reader as an example For other applications see the corresponding manuals Consideration to the application and print driver settings Some op...

Страница 88: ...erences The printer properties dialog box appears 3 Set the print options on each tab y Setting the print options varies depending on how you want to print a document P 93 Print Options y You can also set the print options using setting profiles P 91 Using print profiles 4 Click OK to save the settings ...

Страница 89: ...ng starts the status monitor which is the utility software installed with the printer driver becomes active so that you can monitor the current print job P 88 Status Monitor Cancelling print jobs After you have started printing from your application you can cancel print jobs in two ways From the Windows print queue You can clear the print jobs which are waiting to be printed from Windows print que...

Страница 90: ...ubleshooting action soon If any error occurs the LCD screen also shows the error message You can double click the icon or right click it and select Start to open the status monitor dialog and see the detailed information If you right click the Status Notify icon and select Exit the status monitor terminates the operation Status monitor messages The status monitor shows the following messages Statu...

Страница 91: ...Recognized Please Check Toner Paper Empty in Drawer Please Add Paper Standard Output Tray Paper Full Please Remove Paper Main Motor Error Please Contact Service Technician Polygonal Motor Error Please Contact Service Technician Fuser Error Please Contact Service Technician Fatal Error Please Contact Service Technician Paper Type Error Please Press Start Key Or Cancel Job Memory full Please Press A...

Страница 92: ...the details see the Windows help How to set print options in Windows 7 1 Click Start and then click Devices and Printers 2 Right click your printer and then select Printing preferences or Printer properties 3 Set the print options and then click the OK button to close the dialog box P 93 Print Options How to set print options in Windows Vista Server 2008 1 Click Start Control Panel Hardware and So...

Страница 93: ...iles you should create profiles first P 91 Saving profiles Once you save profiles you can load the settings for a particular job to print P 92 Loading profiles You can also delete the profiles that you no longer need P 92 Deleting profiles Saving profiles You can save up to 20 profiles 1 Set the print options on each tab Set the print options referring to the pages below P 93 Print Options 2 Click...

Страница 94: ...not restore the print options to the initial settings If you want to restore the profile select one and click Restore Defaults 2 Click OK Deleting profiles 1 Select the profile that you want to delete from the Profile list and click Delete The Confirm Profile Delete dialog box appears 2 Click Yes to delete the selected profile ...

Страница 95: ...er Handling tab contains the options to print front and back covers P 98 Paper Handling tab Image Quality tab The Image Quality tab allows you to control how images are printed You can easily select the appropriate image quality for each type of print job P 99 Image Quality tab Effect tab The Effect tab allows you to use watermarks overlay images and other print effects P 100 Effect tab Others Tab...

Страница 96: ...t settings of the printer driver Click Graphics to show the settings graphically or Text to express them in words 5 Profile You can save the print options for frequent use Click Save Profile to save them so that you can easily load a set of print options by selecting the name from the menu P 91 Using print profiles 6 Restore Defaults Click this button to restore the print options to the factory de...

Страница 97: ...orts Plain paper type only 5 Paper Type This option sets the media type of the paper When you select Thick 1 Thick 2 or Transparency Paper Source is automatically set to Bypass Tray Plain Select this when printing on plain paper 64 80 g m2 17 20 lb Bond Thick 1 Select this when printing on thick paper 81 105 g m2 21 28 lb Bond Thick 2 Select this when printing on thick paper 106 163 g m2 29 lb Bon...

Страница 98: ...e printed documents when numerous copies are made for printing Sort Copies Select this for sort printing 1 2 3 1 2 3 Group Copies Select this for group printing 1 1 1 2 2 2 3 3 3 Rotated Sort Copies Select this for rotate sort printing y You need to set more than two copies in the Number of Copies box to use Group Copies and Rotated Sort Copies y You need to select A4 B5 Letter or 16K at the Print...

Страница 99: ...nnot use Thick 2 and Transparency 3 Number of pages per Sheet This option enables you to print multiple pages on one sheet The pages are reduced to the selected paper size automatically and printed 2 pages Select this to print 2 pages on one sheet 4 pages Select this to print 4 pages on one sheet 6 pages Select this to print 6 pages on one sheet 8 pages Select this to print 8 pages on one sheet 9 ...

Страница 100: ...hem in the application Paper Handling tab The Paper Handling tab contains the options to print front and back covers You can also use these options to insert a different type of paper between print jobs such as documents and chapters 1 Use Front Cover This option prints the front cover loading paper from a paper source other than the one set at the Paper Source option on the Basic tab Select the c...

Страница 101: ...ge Select this to insert a blank back cover pages Print one side of the page Select this to print the first page on a back cover If Manual 2 Side Printing and Print on one side of page are selected the first page is printed on the back cover and the second one is blank Image Quality tab The Image Quality Tab allows you to select how images are printed You can easily select the appropriate image qu...

Страница 102: ...rom the Watermark list and click this button to delete it y Once you delete the predefined watermarks you cannot restore them y None cannot be deleted Print on First Page Only Select this check box to print a watermark on the first page only This setting is available when you select any watermark from the Watermark list 2 Overlay Image This option adds an overlay image to documents in contrast the...

Страница 103: ...er up to 63 alphanumeric characters When you are editing a watermark the selected watermark text is displayed in the field 7 Font Name Select the font to use for the watermark text 8 Style Select the font style for the watermark text Regular Select this to set the regular style to the text Bold Select this to set the bold style to the text Italic Select this to set the italic style to the text Bol...

Страница 104: ...en the toner save mode is enabled printing may become light 3 Do not Print Blank Pages Select this check box to ignore blank pages for printing y If the watermark option is enabled all pages are printed even when the content is blank y If the blank pages have a header or footer they are printed 4 Version Information Click this button to show the version of the printer driver 5 Restore All Defaults...

Страница 105: ...s To change the properties click the icon If the properties cannot be changed ask your system administrator 1 Drawer Setting Click this button to open the dialog box so that you can set the paper size and paper type for the drawer and bypass tray Paper Size Select the size of paper loaded in drawer The paper size for the bypass tray is fixed to Auto Paper Type Select the type of paper loaded on th...

Страница 106: ... you print more than one copy of a document you can print all copies of the first page and then all copies of subsequent pages You can print copies by grouping them by the page number 1 Open the Basic tab and enter the number of copies in the Number of Copies box 2 Open the Finishing tab and select the middle Group Copies icon at Copy Handling 3 Set other necessary print options and click OK 4 Cli...

Страница 107: ... size 3 Set other necessary print options and click OK 4 Click OK or Print to start the print job The enlarged or reduced image is printed to fit specified paper size Specifying the percentage manually to enlarge or reduce the print image 1 Open the Basic tab and select the document size in the Original Paper Size list 2 Select the Manual Scale check box and then enter the percentage The percentag...

Страница 108: ...not print on page Select this to insert a blank cover Print on one side of the page Select this to print the first page on a front cover y When Auto is selected the paper source is automatically selected according to the document size y If Manual 2 Side Printing and Print on one side of page are selected the first page is printed on the front cover and the second page is blank 3 Select the Use Bac...

Страница 109: ...pages from top to bottom and then from left to right on one sheet Right to Left by column Select this to arrange four or more pages from top to bottom and then from right to left on one sheet 4 If you want to draw lines around each page select the Draw Borders Around Pages check box 5 Set other necessary print options and click OK 6 Click OK or Print to start the print job Multiple pages are print...

Страница 110: ... default ones 2 Enter the watermark text in the Caption box You can enter up to 63 characters for the watermark text 3 Select a font for the watermark text from the Font Name list 4 Select a font style for the watermark text from the Style list 5 Enter the font size in the Font Size box You can enter any integer between 6 to 300 points in increments of 1 point 6 To rotate the watermark enter the v...

Страница 111: ... appears 3 Click OK to delete the selected watermark Click Cancel to cancel the operation Printing overlays The printer driver allows you to print a document with an overlay image Creating an overlay file Before you use the overlay print feature you need to create an overlay image file You can create up to 20 overlay image files 1 Make an overlay image file with your application Create an image th...

Страница 112: ...created at the same size and orientation Image overlays are independent documents that are merged into other documents during printing and thereby increase the time to print To superimpose just text on your document watermark printing may be faster than overlay image printing 1 Open the Effect tab and select the overlay image name from the Overlay Image list 2 Set other necessary print options and...

Страница 113: ...ler does not start automatically double click Setup exe in the CD ROM 2 Click Install Printer Driver and click Install When you click Install Printer Driver you can uninstall the printer driver only When you click Install All Drivers you can uninstall the printer and scanner drivers in the sequential process If the driver has been installed the uninstallation process starts Wait until the uninstal...

Страница 114: ...to quit the operation If you want to continue installing a new driver select the option to install the driver and click Install to continue the operation For the detailed installation process see the page below P 41 Preparation 4 Installing Printer and Scanner Drivers ...

Страница 115: ...TIONS This chapter describes the scan functions Basic Scan Procedure 114 Scanning images 114 How to Set Scan Options 116 Setting scan options 116 Using the Easy Set feature 118 Uninstalling the Scanner Driver 119 ...

Страница 116: ...the steps below to scan the original 1 Place the original face down 1 Open the platen cover 2 Place the original face down on the original glass 3 Align the original against the left rear corner of the original glass Do not place heavy objects 4 kg 9 lb or over on the original glass and do not force it down Breaking the glass could injure you When you use a transparent original such as overhead tr...

Страница 117: ...ns 4 Click Scan to scan the original While scanning you can quit the operation with the Cancel button When you have finished with scanning the preview window closes and the scanned image opens in your application window 5 Save the scanned image in your application The saving command varies from application to application You usually execute the Save or Save as command on the File menu If necessary...

Страница 118: ... the Easy Set feature 2 Click this icon to clear the preview image 3 Preview screen The pre scanned image appears in the preview screen area The dotted boundary shows the scanning area or the original size The image information appears under the preview screen 4 Click this icon to show the version information of the scanner driver 5 Click this icon to show the Help information about this scanner d...

Страница 119: ... LD LG LT LT R ST R COMP 13 LG 8K 16K or 16K R 4 Rotation The image can be rotated clockwise by 90 degrees counterclockwise by 90 degrees or by 180 degrees This option takes effect on the image to scan but not on the preview image OFF Right 90 Left 90 or 180 5 Negative Positive The negative or position image can be selected Select the check box to turn on this function or clear the box to turn it ...

Страница 120: ...y When the Open dialog box appears select the folder select the target Easy Set file and then click Open 4 Click Pre Scan to preview the original If you have already pre scanned the preview image before selecting the Easy Set file click Pre scan again to update the preview image 5 Click Scan to scan the original If you are satisfied with the preview image click Scan to start scanning the image If ...

Страница 121: ...ler does not start automatically double click Setup exe in the CD ROM 2 Click Install Scanner Driver and click Install When you click Install Scanner Driver you can uninstall the scanner driver only When you click Install All Drivers you can uninstall the printer and scanner drivers in the sequential process If the driver has been installed the uninstallation process starts Wait until the uninstal...

Страница 122: ...to quit the operation If you want to continue installing a new driver select the option to install the driver and click Install to continue the operation For the detailed installation process see the page below P 41 Preparation 4 Installing Printer and Scanner Drivers ...

Страница 123: ...inishing default 127 Setting the 2in1 4in1 default 128 Setting the dual page default 128 Setting the language 129 Setting the timers for auto clearance and energy saving 130 Setting the pop up message for changing paper in the drawer 130 Setting the jam recovery function 132 Setting the LCD contrast 132 Setting the FUNCTION1 2 default 133 Other Equipment Functions 135 Restoring the defaults 135 En...

Страница 124: ... for the copy function P 73 Copying two or four pages on each sheet ID CARD ON OFF The ID CARD function is set for the copy function P 75 Copying both sides of a card on a sheet EDGE ERASE ON 4 mm 15 mm 0 2 0 6 OFF The edge erase function is set for the copy function P 77 Erasing the shadow on edges DUAL PAGE LEFT BINDING 8 mm 30 mm 0 3 1 2 RIGHT BINDING 8 mm 30 mm 0 3 1 2 OFF The dual page functi...

Страница 125: ...0 70 80 90 100 110 120 150 180 210 240 min The default time is set for the auto lower power function P 130 Setting the timers for auto clearance and energy saving AUTO SLEEP 1 3 5 10 15 20 25 30 35 40 45 50 55 60 70 80 90 100 110 120 150 180 210 240 min The default time is set for the auto sleep function P 130 Setting the timers for auto clearance and energy saving DRAWER SET POP UP ON OFF The def...

Страница 126: ...enu and press the SETTING OK button You can also exit from the menu layers with the CLEAR STOP button if it is active 1 Press the MENU button to enter the MENU mode 2 Press the or button to scroll through the menu until you reach the item you want to set Now select DEFAULT SETTINGS 3 Press the SETTING OK button to enter the DEFAULT SETTINGS menu 4 Press the or button to scroll through the menu unt...

Страница 127: ... allows you to exit from the menu You are finished with the operation at this step y If the selected setting has more options or values to set the SETTING OK button allows you to do so Continue to the next step 8 Select the options or values as required with the or button The options or values vary from setting to setting For the details see the page that describes each default setting 9 Press the...

Страница 128: ... the setting and operation see the pages below P 57 Changing the density to copy P 68 Adjusting the density to the copy 7 If you have selected the density scale at the previous step press the or button to increase or decrease the density level 8 Press the SETTING OK button to exit from the menu You are finished with the operation in the MENU mode The selected setting becomes active as the default ...

Страница 129: ... for the FINISHING copy function as follows 1 Press the MENU button to enter the MENU mode 2 Press the or button to select DEFAULT SETTINGS 3 Press the SETTING OK button to enter the DEFAULT SETTINGS menu 4 Press the or button to select FINISHING 5 Press the SETTING OK button 6 Press the or button to select NONSORT SORT or ROTATE SORT For the details about the setting and operation see the page be...

Страница 130: ...our options are available respectively for 2IN1 or 4IN1 For the details about the setting and operation see the pages below P 73 Copying two or four pages on each sheet 9 Press the SETTING OK button to exit from the menu You are finished with the operation in the MENU mode The selected setting becomes active as the default Setting the dual page default Set the default setting for the DUAL PAGE cop...

Страница 131: ...ecomes active as the default Setting the language Set the default setting for LANGUAGE as follows 1 Press the MENU button to enter the MENU mode 2 Press the or button to select DEFAULT SETTINGS 3 Press the SETTING OK button to enter the DEFAULT SETTINGS menu 4 Press the or button to select LANGUAGE 5 Press the SETTING OK button 6 Press the or button to select your language 7 Press the SETTING OK b...

Страница 132: ...utton to select TIMERS 5 Press the SETTING OK button 6 Press the or button to select AUTO CLEAR AUTO LOW POWER or AUTO SLEEP 7 Press the SETTING OK button 8 Press the or button to set the time value P 122 Functions available in the MENU mode 9 Press the SETTING OK button to exit from the menu You are finished with the operation in the MENU mode The selected setting becomes active as the default Se...

Страница 133: ...elow P 31 Loading paper in the drawer 1 Open the drawer 2 Change paper in the drawer 3 Close the drawer y If this function is tuned on the DID YOU CHANGE SIZE message pops up on the LCD screen Continue to the next step y If this function is turned off the message does not pop up on the LCD screen You are finished with the operation at this step Make sure of the paper size If necessary change it ac...

Страница 134: ...e paper jam After you clear the paper jam press the START button to resume printing the subsequent pages after the jammed one y When you select AUTO the equipment automatically recovers from the error after you clear the paper jam After you clear the paper jam the equipment automatically resumes printing the jammed and subsequent pages 7 Press the SETTING OK button to exit from the menu You are fi...

Страница 135: ...ee the page below P 65 Using the F1 or F2 function quickly 1 Press the MENU button to enter the MENU mode 2 Press the or button to select DEFAULT SETTINGS 3 Press the SETTING OK button to enter the DEFAULT SETTINGS menu 4 Press the or button to select FUNCTION1 or FUNCTION2 5 Press the SETTING OK button 6 Press the or button to select the function that you want to assign to FUNCTION1 or FUNCTION2 ...

Страница 136: ...5 EQUIPMENT SETTINGS 134 Default Settings 7 Press the SETTING OK button to exit from the menu You are finished with the operation in the MENU mode The selected setting becomes active as the default ...

Страница 137: ...sary press the or button to select YES 5 Press the SETTING OK button to exit from the menu You are finished with the operation in the MENU mode All the functions and settings are restored to the defaults Entering the sleep mode Execute ENTER SLEEP MODE to make the equipment sleep as follows 1 Press the MENU button to enter the MENU mode 2 Press the or button to select ENTER SLEEP MODE 3 Press the ...

Страница 138: ...n you can immediately exit from the menu You are finished with the operation at this step y If you press the SETTING OK button you return to the MENU layer Go to the next step The LCD screen below shows an example 5 Press the or button to select CANCEL and then press the SETTING OK button to exit from the menu You are finished with the operation in the MENU mode Displaying the ROM version Execute ...

Страница 139: ...ly exit from the menu You are finished with the operation at this step y If you press the SETTING OK button you return to the MENU layer Go to the next step The LCD screen below shows an example 5 Press the or button to select CANCEL and then press the SETTING OK button to exit from the menu You are finished with the operation in the MENU mode ROM VERSION 3 3 ENGINE T180MWW CLOSE SYSTEM T180SYWW ...

Страница 140: ......

Страница 141: ...ng position of paper jams 141 When paper jams occur frequently 141 When releasing jammed paper 141 Paper jams on bypass tray 142 Paper jam behind transfer unit 142 Paper jams within fuser unit 144 Replacing Toner Cartridge 146 Installation and Removal of the Exit Support Tray 152 Before Calling Service Technician 153 General operation 153 Toner related items 153 Original Copy paper related items 1...

Страница 142: ...ge Do not replace the toner cartridge until TONER EMPTY appears on the LCD screen y The message may not appear because the toner remaining in the cartridge does not lie evenly y When the message appears it is advisable to purchase a new TOSHIBA recommended cartridge to prepare for its replacement TONER NOT RECOGNIZED The toner cartridge is not installed correctly Install the toner cartridge correc...

Страница 143: ...es of paper loaded in the drawer or on the bypass tray are not registered into the equipment properly P 38 Preparation 3 Registering Loaded Paper y More jammed paper is still remaining after the release of a paper jam y There is no gap between the side guides and the paper in the drawer or the gap is too wide y The stack height of the paper is exceeding the indicators in the drawer When releasing ...

Страница 144: ...e copy images Paper jams on bypass tray 1 Pull out the paper jammed on the bypass tray 2 Check beneath the transport guide in the paper feeding area Check if any paper is jammed under the transport guide behind the transfer unit P 142 Paper jam behind transfer unit Paper jam behind transfer unit Be careful not to catch your fingers between the equipment and the side cover This could injure you 1 O...

Страница 145: ...ver 3 Release the jammed paper Be sure not to touch the photoconductive drum when releasing the jammed paper 4 Open the transport guide of the paper feeding area and check if any paper is jammed under this guide Clear the paper if there is any 5 If you cannot see the jammed paper or it is difficult to remove open the drawer and remove it 2 1 ...

Страница 146: ... could injure you y Do not touch the fuser unit or the metal part around the unit If you touch the inside of the equipment this could cause burns or any injury to your hands 1 Open the side cover and then lay down the transfer unit Then press down the two fuser pressure release levers green until they come to a stop Press down the levers fully until they stop 2 Open the transport guide while holdi...

Страница 147: ... the jammed paper up or down as shown below depending on its position Be sure not to touch the photoconductive drum when releasing the jammed paper 4 Return the transport guide to its original position and then close the transfer unit and the side cover Pulling it up Pulling it down ...

Страница 148: ... the procedure to replace the toner cartridge appears on the LCD screen Press the and buttons to scroll up and down the procedure Never attempt to incinerate toner cartridges This could cause an explosion y Before inserting a new toner cartridge check its product name If you can see T 1800 it is usable y Do not dispose of used toner cartridges Contact your service representative y Do not touch the...

Страница 149: ...timization function This function controls image quality according to the characteristics of the toner to be used and enables you to print images of an optimal quality If you are using a toner cartridge other than the one we recommend the equipment may not be able to detect whether it is installed or not Therefore even if the toner cartridge is correctly installed the error message Toner not recog...

Страница 150: ...ont cover 2 Hold down the green lever The toner cartridge is slightly pushed out 3 Pull out the toner cartridge Never attempt to incinerate toner cartridges This could cause an explosion Do not dispose of used toner cartridges Contact your service representative ...

Страница 151: ...OOTING 4 Shake the new toner cartridge strongly with the label surface down to loosen the toner inside 5 Pull out the seal in the direction of the arrow 6 Insert the toner cartridge along the rail Insert the toner cartridge until you hear a click sound 10 10 10 ...

Страница 152: ...dure two or three times Check if the cleaning knob is fully inserted after cleaning After the toner cartridge has been replaced be sure to clean the transfer charger wire following the procedure below in order to prevent uneven image density 8 Open the side cover 9 Pull the transfer unit toward you carefully to lay it down while holding up the green lever 10 Remove the transfer charger cleaner fro...

Страница 153: ...o the front wall and then check if the cleaner pad has contacted with the transfer charger wire 3 Clean the wire from its front end to the other end in two reciprocating motions 4 Remove the cleaner from the front end of the transfer charger after cleaning 12 Return the transfer charger cleaner into the cleaner pocket and then close the transfer unit 13 Close the side cover 14 Close the front cove...

Страница 154: ...ly with each other install the exit support tray which comes with this equipment Installing the exit support tray Install the exit support tray to the receiving tray by fitting the protrusions on the back of the exit support tray into the holes on the receiving tray Removing the exit support tray Lift up the exit support tray and remove it from the receiving tray ...

Страница 155: ...m overflowing from the tray Remove the paper from the receiving tray and then press the START button Copying or printing resumes Press the CLEAR STOP button to end the copy or print job CANCEL JOB appears on the LCD screen Select YES and then press the SETTING OK button Copy functions cannot be set Some copy functions that cannot be set simultaneously with others have been set Some copy functions ...

Страница 156: ...has run out Replace the toner cartridge if the message appears P 146 Replacing Toner Cartridge The copy density is set lighter Make the density darker if you use the manual copy density mode Or use the automatic copy density mode The transfer charger wire is dirty Clean the transfer charger wire P 159 Cleaning transfer charger The density of the copy image is dark The copy density is set darker Ma...

Страница 157: ...oduction ratio suitable to the copy paper size The margin for binding is too wide Adjust the image shift value again P 79 Shifting the pages to the right or left The copy image has black streaks in a horizontal direction The charger is dirty Clean the charger P 158 Cleaning charger The copy image has white streaks in a horizontal direction The transfer charger wire is dirty Clean the transfer char...

Страница 158: ......

Страница 159: ...7 MAINTENANCE AND INSPECTION This chapter describes how to clean this equipment to ensure you the best possible performance Regular Cleaning 158 Cleaning charger 158 Cleaning transfer charger 159 ...

Страница 160: ...dry cloth If there are still stains remaining wipe it clean with a piece of soft cloth which has been moistened with water and then squeezed well Do not use liquids other than water such as alcohol organic solvents or neutral detergent 2 Platen sheet Clean the surface as follows depending on the staining Clean it with a soft cloth Clean it with a soft cloth lightly moistened with water Clean it wi...

Страница 161: ... knob is fully inserted after cleaning 3 Close the front cover Cleaning transfer charger When the transfer charger wire is dirty white steaks or unevenness of the density may appear on copied images or the density of the whole image may be lowered Clean the transfer charger wire as follows Be careful not to let your fingers be caught between the equipment and the side cover This could injure you 1...

Страница 162: ...nto the front end of the transfer charger 2 Push the cleaner onto the front wall and then check if the cleaner pad has contacted with the transfer charger wire 3 Clean the wire from its front end to the other end in two reciprocating motions 4 Remove the cleaner from the front end of the transfer charger after cleaning 5 Return the transfer charger cleaner into the cleaner pocket and then close th...

Страница 163: ...8 SPECIFICATIONS e STUDIO18 Specifications 162 Continuous copying speed 163 Packing List 164 Copying Function Combination Matrix 165 Combination Matrix 165 ...

Страница 164: ...nds First copy time A4 or LT portrait LT Approx 7 4 seconds A4 Approx 7 3 seconds Continuous copy speed See P 163 Continuous copying speed Multiple copying Up to 99 copies Excluded image width Copy Leading edge 3 0 2 0 mm 0 12 0 08 Trailing edge 2 0 2 0 mm 0 08 0 08 Both edges 2 0 2 0 mm 0 08 0 08 Printer Leading edge 3 0 2 0 mm 0 12 0 08 Trailing edge 2 0 2 0 mm 0 08 0 08 Both edges 2 0 2 0 mm 0 ...

Страница 165: ...ss 100 and nonsort multiple copies are made y TOSHIBA recommended paper is used for the values of the specifications above y The bypass copying speed is as listed above when specifying the paper size y This specification varies depending on the copying conditions and the environment Paper size Feeder Copying speed A4 B5 LT Drawer 18 Bypass tray 16 A4 R B5 R LT R Drawer 15 5 Bypass tray 15 5 A5 R S...

Страница 166: ...8 SPECIFICATIONS 164 Packing List Packing List Packing list Safety Information Quick Guide Power cable Set up report CD ROM Exit support tray ...

Страница 167: ...Yes Yes Yes Yes Yes Yes Yes Yes Yes No No Yes Yes Yes Yes Yes Yes Yes Yes Yes Yes Yes Yes Yes Yes Yes Yes Yes Yes Yes Yes Yes Yes Yes Yes Yes Yes No Yes Yes No No Yes Yes Yes Yes Yes No Yes Yes No No Yes No Yes Yes Yes Yes Yes Yes No No Yes No Yes Yes Yes Yes Yes Yes Yes Yes Yes Yes Yes Yes Yes Yes Yes Yes Yes No No Yes Zoom Finishing ID Card Job memory Image shift Edge erase Dual page 2in1 4in1 F...

Страница 168: ......

Страница 169: ... 123 135 Envelope 29 35 Exit support tray 23 152 F F1 button 63 65 F2 button 64 65 FINISHING 66 70 81 122 123 127 Finishing tab 93 Fixed zoom ratio 60 Font Name 101 108 Font Size 101 108 Front cover 22 FUNCTION1 65 123 133 FUNCTION2 65 123 133 H Help 94 I ID CARD 63 66 75 81 122 ID CARD button 63 Image quality optimization function 13 Image Quality tab 93 IMAGE SHIFT 66 79 81 122 Information icon ...

Страница 170: ...N 124 136 Rotate 180 Degrees 100 Rotation 117 S Scan 115 Scan option 116 Scanner driver 41 Setting icon 26 62 SETTING OK button 25 Side cover 22 Sleep mode 19 27 Smoothing 99 Solid 101 108 Specifications 162 START button 25 Sticker labels 29 Stopping 54 Storing paper 30 Style 101 System requirements 41 T THICK PAPER 29 TIMERS 123 Toner cartridge 23 146 147 TONER EMPTY 146 Toner remaining check fun...

Страница 171: ...DP 1800 OME11004800 ...

Страница 172: ...2 17 2 HIGASHIGOTANDA SHINAGAWA KU TOKYO 141 8664 JAPAN MULTIFUNCTIONAL DIGITAL SYSTEMS User s Guide 2011 TOSHIBA TEC CORPORATION All rights reserved R110520J8600 TTEC 2011 07 ...

Отзывы: