17
MAINTENANCE
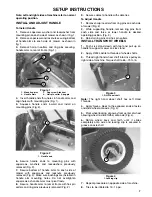
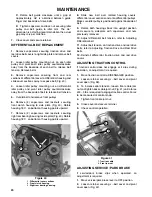
Figure 29
1. Foam element 2. Paper element
1
2
A.
WASH foam element in a solution of liquid
soap and warm water. Squeeze to remove dirt,
but do not twist because foam may tear.
B.
DRY by wrapping in a clean rag. Squeeze
rag and foam element to dry.
C.
SATURATE element with clean engine oil.
Squeeze element to remove excess oil and to
distribute oil thoroughly. An oil damp element is
desirable.
4.
When servicing foam element, check condition of
paper element. Clean or replace as required.
5.
Reinstall foam element, paper element and air
cleaner cover.
IMPORTANT: Do not operate engine without air
cleaner element because extreme engine wear and
damage will likely result.
REPLACING SPARK PLUG
Use an
NGK BPR 5ES
spark plug or equivalent.
Correct air gap is 0.028" - 0.032". Remove plug after
every 100 operating hours and check its condition.
1.
Pull wire off spark plug.
2.
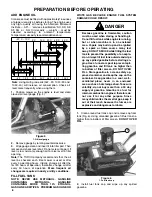
Clean around spark plug and remove plug from
cylinder head (Fig. 30)
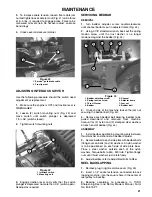
Figure 30
1. Spark plug
1
IMPORTANT: Replace a cracked, fouled, or dirty
spark plug. Do not sand blast, scrape, or clean
electrodes because engine damage could result
from grit entering cylinder.
3.
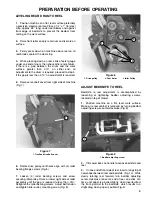
Set air gap at 0.028"- 0.032" (Fig. 31). Install
correctly gapped spark plug and tighten firmly to
17 ft-lb.
Figure 31
0.028" - 0.032"
CLEANING FUEL FILTER
Initially, clean fuel filter after the first 20 hours of
operation; thereafter clean after every 50 hours
operation.
1.
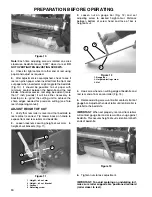
Close fuel shut off valve and unscrew bowl from
filter body (Fig. 32).
Figure 32
1. Shut off valve
2. Bowl
2
1
2.
Clean bowl and filter in clean gasoline and reinstall.
ADJUSTING BELTS
Make sure belts are properly tensioned to assure
proper operation of the machine and unnecessary
wear. Check belts frequently.
Reel Drive belt (Fig. 34)
1.
Check tension by depressing belt at mid span of
pulleys with 4
±
1 lbs. of force. Belt should deflect 1/4 in.
If deflection is incorrect, proceed to next step. If
correct, continue operation.
2.
To adjust belt tension:
A.
Remove belt cover mounting screws and belt
cover to expose belt (Fig. 33).

