User manual TBK-NVR5004 TBK-VISION PLUS
56
www.tbkvision.com
input user name and password received from your ISP. Next, click “Apply”. The NVR
will connect to the server and would give a confirmation message.
②
When accessing the remote interface of the NVR, user can input WAN IP to access
directly (user can go to Main Menu
Information
Network interface to check IP
address). The browser will download Active X control.
③
The following setting steps are as the same as
④
and
⑤
in Point 1.
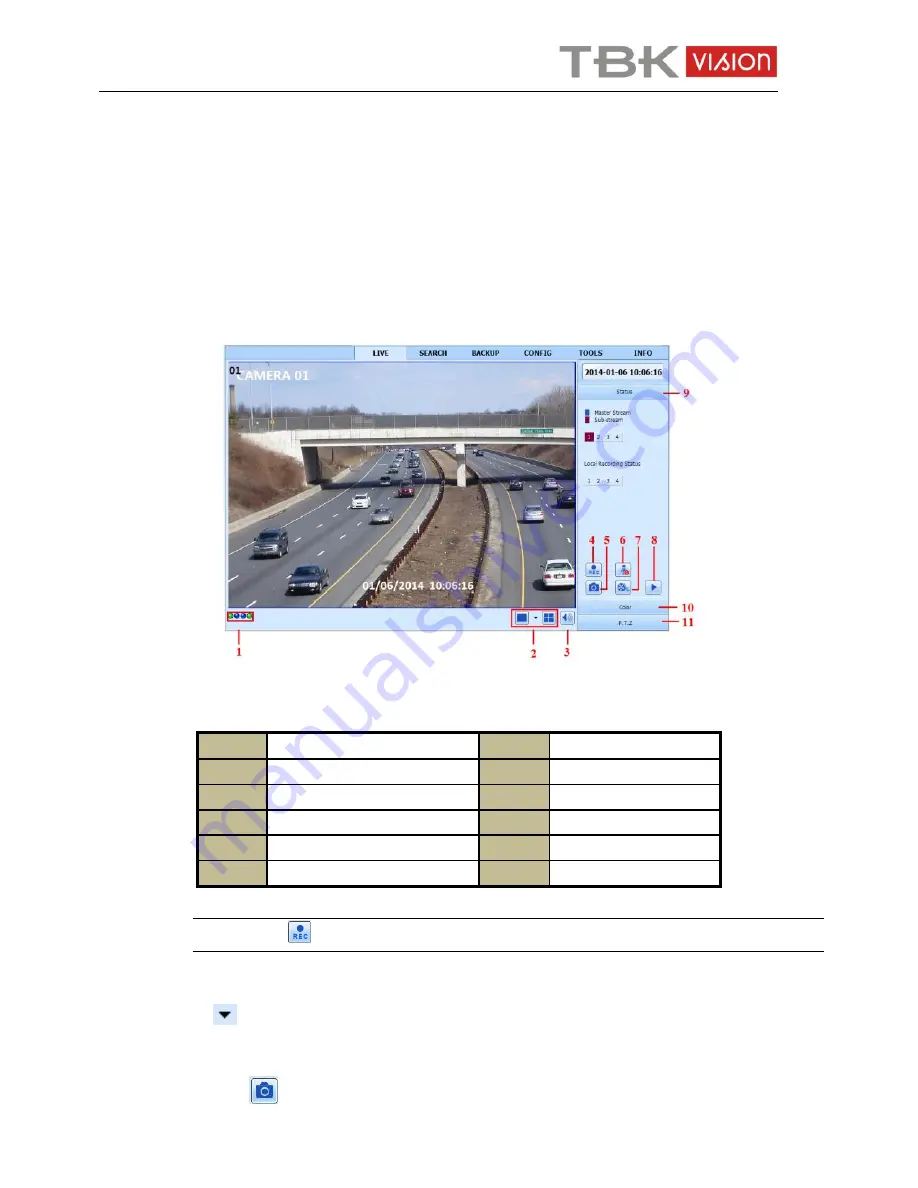
14.2 Remote Live View
Symbol and function definitions:
1
Channel indicator
2
Screen display mode
3
Volume
4
Start recording
5
Snapping picture
6
Start talking
7
Start IE recording
8
Playback
9
Master/sub stream status
10
Color
11
PTZ control
Note: Click
button to start recording. The record file will be saved in user’s PC.
Screen display mode:
Click the
icon beside the screen display mode to select channels.
Snap pictures:
Click “Snap”
icon to automatically capture pictures and save those pictures in the


