


Maintenance, Service, and Repair
Tires and Wheels
Page 5
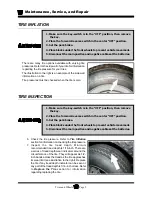
Explosion Hazard. Fully deflate the tire before attempting to remove
the tire from the wheel. Do not over inflate the tire when seating the
bead. Failure to deflate the tire or over inflating the tire to seat the
bead may cause explosive failure of the tire resulting in severe bodily
injury or death.
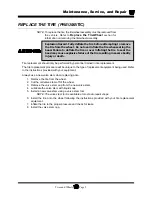
REPLACE THE TIRE (PNEUMATIC)
NOTE; To replace the tire, the tire/wheel assembly must be removed from
the vehicle. Refer to
Replace the Tire/Wheel
section for
information on removing the tire/wheel assembly.
Tire replacement should only be performed by personnel trained in tire replacement.
The tire replacement procedure will be unique to the type of replacement equipment being used. Refer
to the instructions provided with your equipment.
Always use a new valve stem when replacing a tire.
1. Remove the tire from the wheel.
2. Cut the old valve stem off of the wheel.
3. Remove the valve stem cap from the new valve stem.
4. Lubricate the valve stem with liquid soap.
5. Install a new valve stem using a valve stem tool.
NOTE: The valve stem tool is available at most auto repair shops.
6. Install the tire onto the wheel following the instructions provided with your tire replacement
equipment.
7. Inflate the tire to the proper pressure and check for leaks.
8. Install the valve stem cap.
Содержание B0-T48-48 Taylor Truck T48
Страница 2: ......
Страница 14: ...TAYLOR DUNN...
Страница 30: ...TAYLOR DUNN...
Страница 31: ...TABLE OF CONTENTS General Maintenance Maintenance Guidelines 2 Troubleshooting Guide 3 Lubrication Chart 4...
Страница 68: ...Maintenance Service and Repair Steering Page 22 Exploded View of Steering Gear...
Страница 86: ...TAYLOR DUNN...
Страница 106: ...Maintenance Service and Repair Transmission Page 20 NOTE Values shown are for reference only C D...
Страница 112: ...TAYLOR DUNN...
Страница 118: ...TAYLOR DUNN...
Страница 130: ...TAYLOR DUNN...
Страница 140: ...TAYLOR DUNN...
Страница 152: ...Illustrated Parts Parts Page 2 Front Axle...
Страница 154: ...Illustrated Parts Parts Page 4 Steering Knuckle...
Страница 156: ...Illustrated Parts Parts Page 6 Steering Linkage...
Страница 162: ...Illustrated Parts Parts Page 12 Rear Suspension View from rear...
Страница 164: ...Illustrated Parts Parts Page 14 Transmission Gear Case...
Страница 168: ...Illustrated Parts Parts Page 18 Rear Brakes Front Brakes...
Страница 170: ...Illustrated Parts Parts Page 20 Brake Lines and Master Cylinder...
Страница 172: ...Illustrated Parts Parts Page 22 Motor...
Страница 174: ...Illustrated Parts Parts Page 24 Motor Mount Apply 94 421 34 grease to inside of motor coupler...
Страница 180: ...Illustrated Parts Parts Page 30 Speed Control Panel Illustration not available at time of printing...
Страница 186: ...Illustrated Parts Parts Page 36 Batteries FRONT OF VEHICLE...
Страница 188: ...TAYLOR DUNN...


