


V.2.1_170712
6
7/12/2017
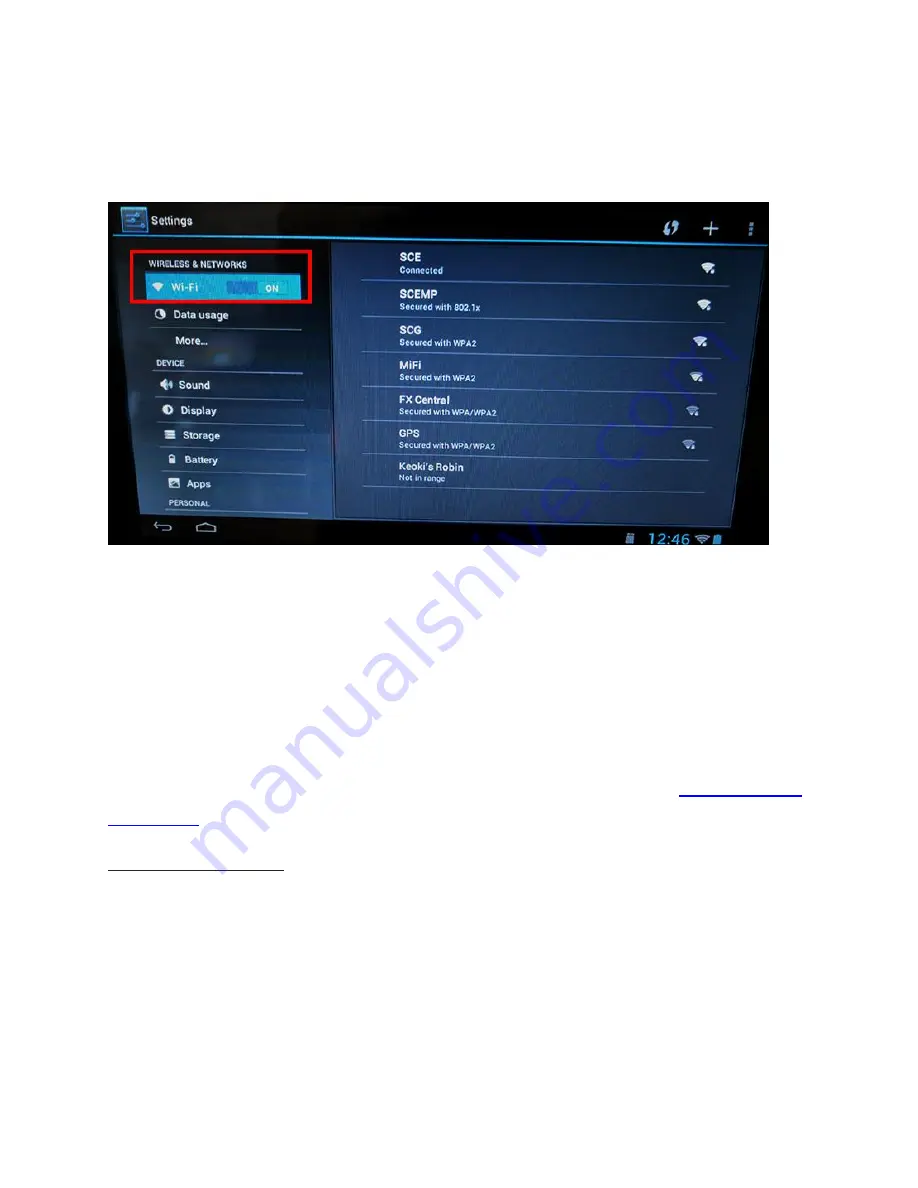
3.
The device will scan for available Wi-Fi signals and display all available
networks. Select your network by tapping the name and when prompted, enter
the password.
Reference Section 1 for your Wi-Fi ID and password.
Figure 2. The device settings screen is where you enable and configure the Wi-Fi for TimeWorksTouch.
Wi-Fi Signal Strength
Wi-Fi networks are more susceptible to signal interruptions. An Ethernet connection is
generally more reliable than Wi-Fi. At the lower right of the clock is a signal strength
indicator. When it is two bars or less, we recommend you boost your Wi-Fi signal or use
an Ethernet connection.
Once you are successfully connected to your Wi-Fi network, proceed to
Section 4, Time
Zone Setup
.
Ethernet Setup
Usually TimeWorksTouch does not require additional setup for an Ethernet network.
This is because the most common Ethernet configurations use
DHCP
and
TimeWorksTouch should come out of the box set to DHCP
. However, it is
recommended to verify the device is set to DHCP. Instead of DHCP, some networks
require a
static IP
. These instructions address both verifying DHCP mode and setting a
static IP:
Содержание TimeWorksTouch
Страница 1: ......