


V.2.1_170712
11
7/12/2017
4.
Use the
Assign Clock
dropdown to select your timekeeping account by name.
You may need to select from a list of multiple accounts. There is no need to
enter the serial number of the clock. It will be filled in automatically by the
device.
The on-screen keyboard can be used to search for a specific account by typing in
the account name.
5.
Clock name
(optional) lets you label the clock. This is helpful when you have
multiple clocks.
6.
Clock location
(optional) is used in conjunction with the Location Stamp feature
of the timekeeping system. The name you enter here will be recorded with each
punch and populate a clock prompt. Using this feature requires additional
configuration in the timekeeping system. Contact your timekeeping provider for
assistance with clock prompts and the location stamps.
7.
Note
(optional)
is for any additional data you want to keep track of on the clock,
like “Date in service”.
8.
Press
Register Clock.
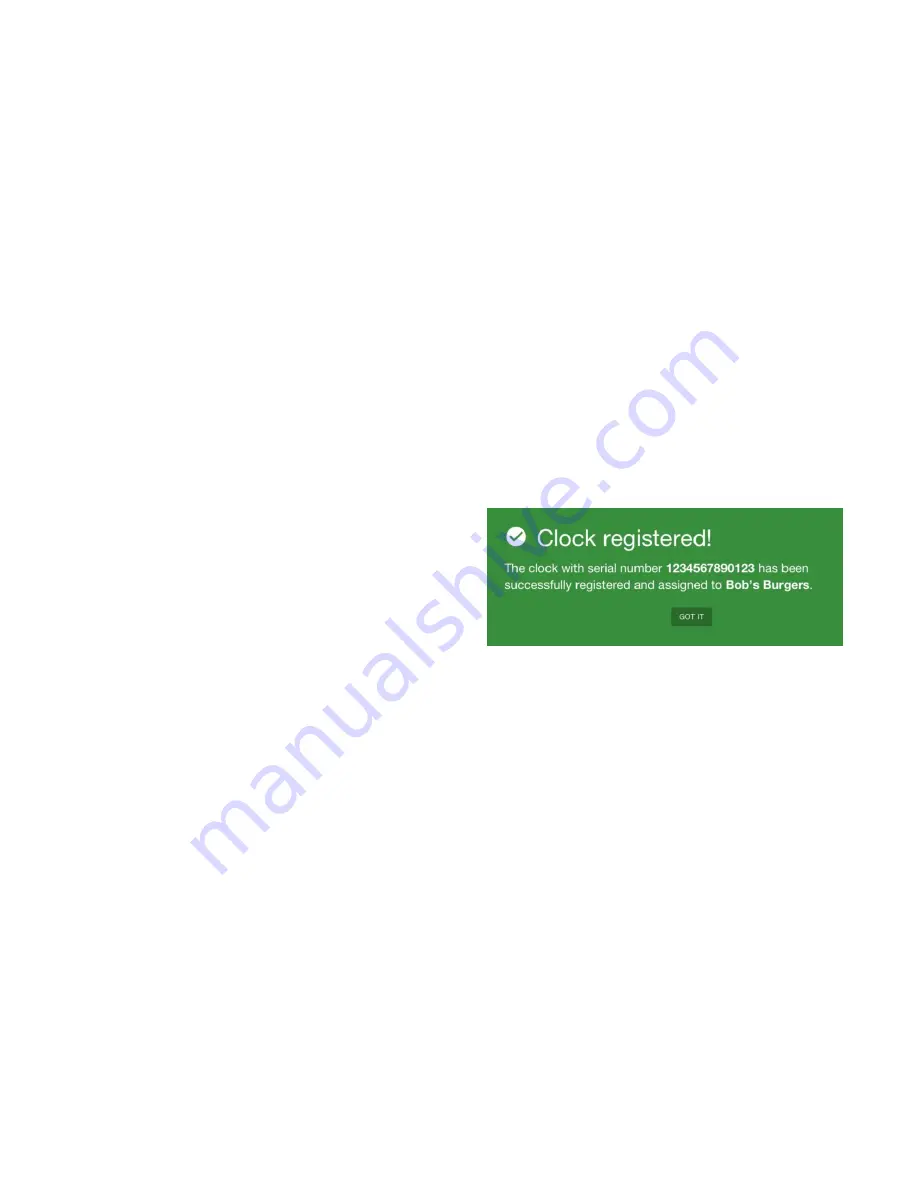
The clock will confirm registration with a
green confirmation screen
(see Figure 7)
. You
can either press
Got It
or wait for the clock to
advance on its own.
After a period of inactivity, the clock will
check for any available software updates.
This process may take a few moments and during that time, you may see a blank
screen. Once the clock has finished updating, you will see the clock entry screen on
which an employee will clock in and out
(see Figures 14 and 15)
.
7.
Software Updating
TimeWorksTouch is designed to check for software updates nightly, but when you
register the clock, it will also check for an update after 2 minutes of inactivity. The
update process is brief and only happens if there is an update available. A blue install
screen indicates that the update has initiated and once completed, TimeWorksTouch
will display the clock entry screen.
Figure 7. Registration of clock has been successful.
Содержание TimeWorksTouch
Страница 1: ......