H.264 Hybrid DVR
36
4.3.3.
Auto
Display
Mode
(=Sequence
Display
Mode)
If
you
activate
Auto
Display
Mode
(Sequence
Display
Mode)
,
live
channels
(cameras)
will
be
displayed
on
the
monitor
screen
in
accordance
with
your
sequence
setup.
To
change
the
camera
(channel),
viewing
time
and
sequence,
please
go
to
MENU
‐
>
DISPLAY
‐
>
SEQUENCE
setup
(see
page
22.
sequence
set
up
).
When
Auto
Display
Mode
is
activated,
an
auto
mode
icon will
be
shown
on
the
upper
left
corner
of
the
screen
until
you
stop
this
mode.
To
activate
this
mode,
press
“AUTO”
button
on
the
remote
controller
or
press
SEQUENCE
key
on
DVR
front
panel
.
To
exit
from
this
mode,
press
the
same
button
again.
4.3.4.
Pan/
Tilt/
Zoom/
Focus
Camera
Control
Controlling
an
external
PTZ
camera
connected
to
DVR.
1.
To
use
this
feature,
press
P/T/Z/F
button
on
the
front
panel
or
remote
control
unit
.
If
you
are
using
a
mouse
,
please
click
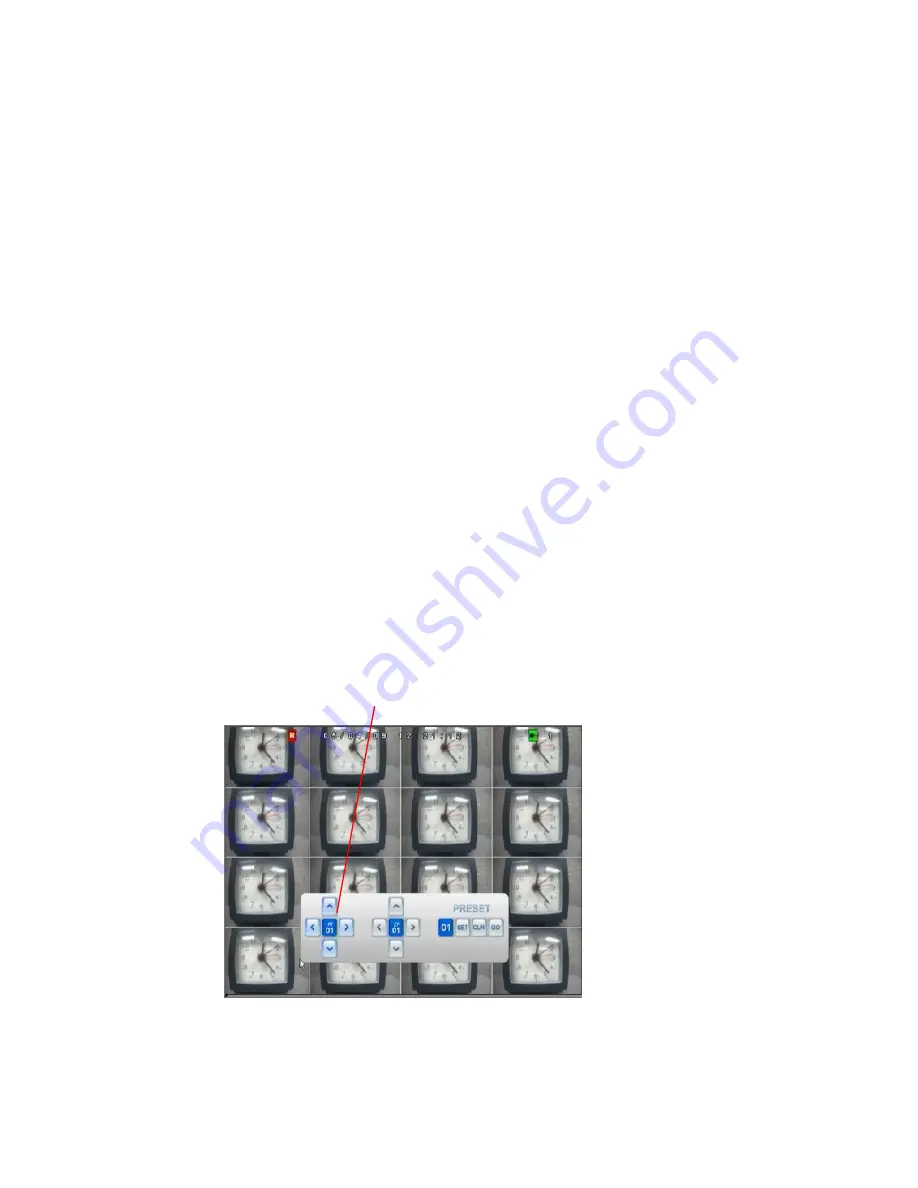
PTZF
icon
from
the
main
menu
window.
2.
Press
ENTER
to
select
the
sub
mode,
PT
control,
ZF
control
or
PRESET
for
your
PTZ
camera
control.
Or
just
click
the
sub
mode
icon
with
your
mouse.
3.
The
number
shown
on
the
center
of
PT
and
ZF
icon
is
the
channel
number
of
PTZ
camera
you
set
in
the
PTZ
setup
menu.
Please
check
MENU
‐
>
DEVICE
‐
>
PTZ
menu
.
(see
PTZ
setup
on
page
33.)
4.
You
can
save
your
favorite
PT
and
ZF
parameters
using
PRESET
feature.
You
can
store
up
to
10
presets
per
PTZ
camera.
Select
the
Preset
number
and
press
SET
button
using
ENTER
button
and
direction
keys,
or
use
the
mouse
and
click
on
the
preferred
setup
icon.
6.
You
can
clear
preset
parameters
by
pressing
CLR
button.
7.
You
can
go
to
preset
value
by
pressing
GO
button.
4.3.4.1.
Pan
/
Tilt
control
1.
Select
your
desired
channel
by
pressing
the
number
from
remote
control
unit
or
click
PT
icon
on
the
screen
using
left
button
on
the
mouse.
2.
Control
the
camera
with
the
arrow
buttons
(Up/
Down/
Right/
Left)
of
remote
control unit
or
arrow
icon
on
the
screen
using
left
button
of
mouse.
pan/tilt
control
key


