H.264 Hybrid DVR
13
2.2.3.
Router
Configuration
If
your
DVR
is
connected
to
the
network
through
a
router,
you
should
configure
router
properly.
There
are
3
steps
as
follows.
1.
WAN
Setting
2.
DHCP
Setting
3.
Virtual
Server Setting
2.2.3.1.
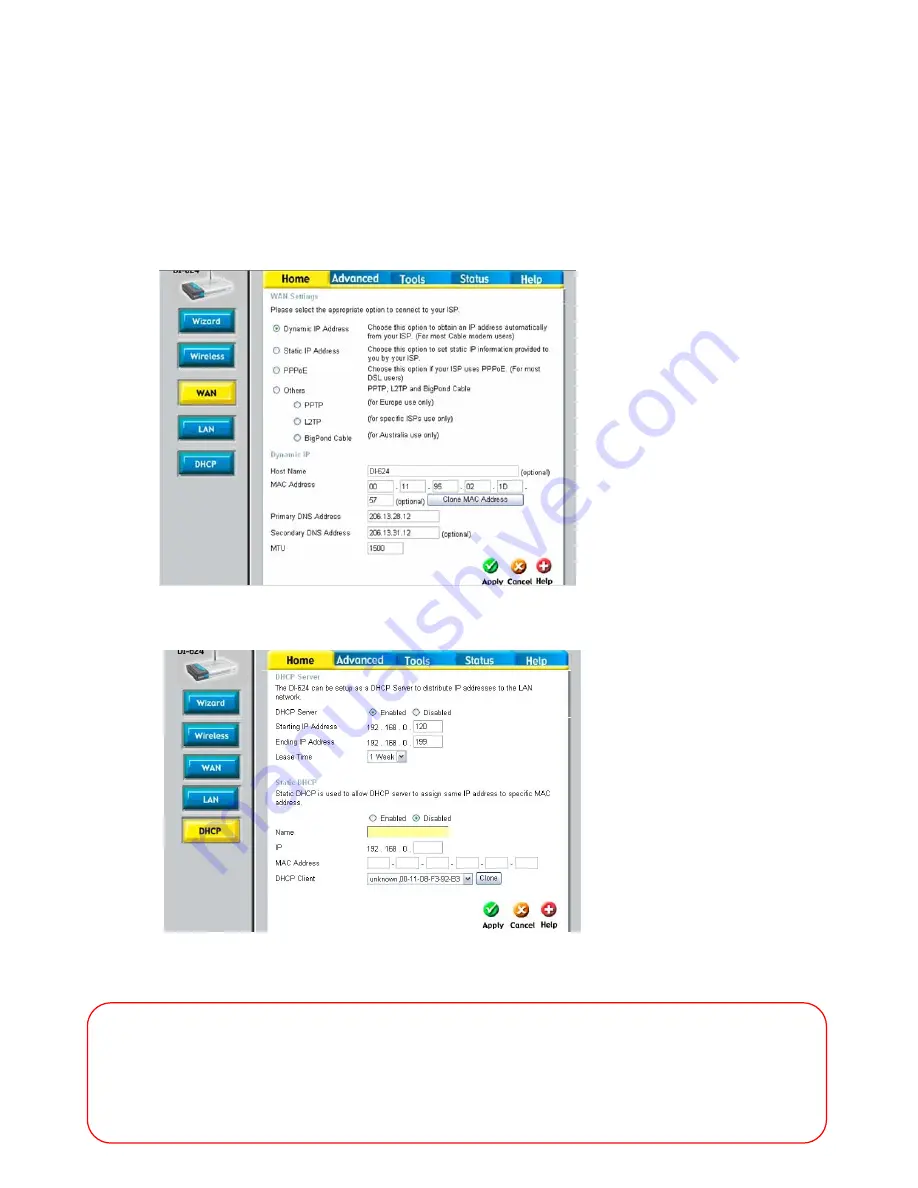
WAN
Setting
When
you
connect
to
your
Router,
you
can
find
menu
for
WAN
setting.
Please
confirm
the
WAN
setting.
If
you
are
using
DSL
service,
you
should
select
PPPoE,
and
you
will
be
directed
to
a
sub
‐
menu
to
type
in
DSL
user
name
and
password.
2.2.3.2.
DHCP
&
IP
Address
Setting
To
assign
an
unique
private
IP
address
to
DVR
in
your
intranet
environment
automatically,
you
can
enable
DHCP
option
in
the
Network
Setup
menu
of
your
DVR
and
your
Router.
In
this
case,
you
can
skip
the
procedures
described
on
this
page.
We
recommend
assigning
IP
address
to
DVR
manually
to
prevent
unexpected
change
of
IP
address.
If
you
have
any
problem
with
DHCP
function
or
want
to
assign
the private
IP
address,
please
disable
DHCP
option
in
the
Network
Setup
menu
of
your
DVR
and
check
the
starting
and
ending
IP
used
by
DHCP
server
of
the
Router.
You
can
assign
any
private
IP
address
to
your
DVR
even
if
it
is
out
of
the
DHCP
range,
but
the
IP
address
should
match
with
the
one
entered
in
the
Network
Setup
menu
of
your
DVR.
*A
router
from
D
‐
Link
is
quoted
as
an
example
in
this
manual.
The
images
of
setup
menu
above
may
not
always
match
another
router’s
setup
menu.


