


(April, 2013)
DRH Series GEN1 Ultrasonic Humidifi er Installation, Operation & Maintenance Manual
4-4
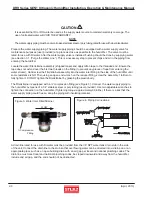
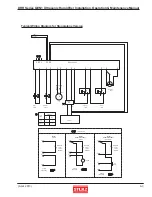
6) Remove the terminal connectors (3 Ea.) from the sides of the
level
control
board.
Photo
6
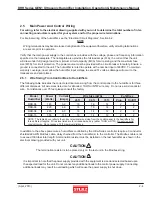
7) Slide the board out and ensure there is no discoloration,
deformation or deterioration of the printed circuit.
Photo 7
If any defects are found with the electrical parts, take
necessary steps referring to Sect. 4.4 “Common Repairs/Parts
Replacement”.
4.2.4 Float Switches
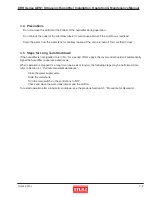
1) Loosen and remove the fl oat panel mounting screws (2 Pcs.)
Photo
8
Note
Don’t let the screws drop into the tank.
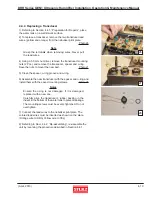
2) Lift the fl oat panel out and turn it over.
Photo 9
3) Check for contamination. Manually operate the two fl oat
switches ensuring they raise and lower smoothly. Clean any
build-up from the two fl oat switches with a small brush.
Photo
10
Note
Be careful not to remove the fl oat portion from the stem.
4) If no defects are found through the above inspection, re-
assemble by reversing the above procedure.
Note
When assembling, be careful not to pinch the wires between
the sheet metal.
9
8
7
6
10