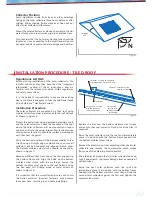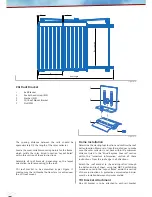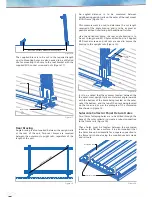
Upright rail
Tilt bracket
Second framing rail
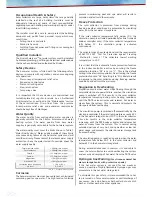
Figure 15
Rail channel
M10 socket
screw & rail nut
combination
Figure 14
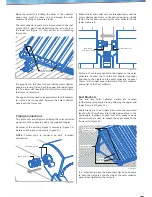
Loosen and adjust
screw heights to
determine ‘tilt’ angle
Figure 13
Rail bracket
Tilt bracket
Two M10 socket
screws & nuts
Figure 12
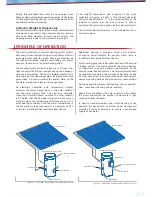
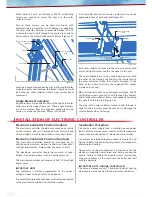
Side Bracing
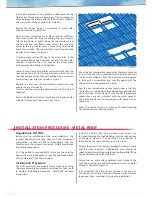
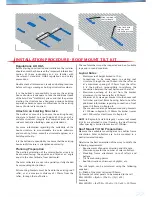
Angle braces are to be attached to the roof bracket,
spanning between the front and rear roof brackets at
either end of the roof mount tilt kit unit for increased
stability.
The horizontal distance between the mounting holes on
the roof brackets is to be measured to gauge the length
required for the brace (Figure 16).
This process is to be replicated for each roof bracket,
with positioning reproduced accurately.
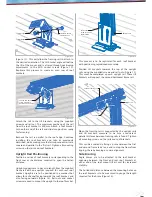
Position tilt brackets towards the top of the upright
rails using the supplied screws and rail nuts (Figure 15).
This must be completed on each upright rail. These tilt
brackets will support the second horizontal frame rail.
When the framing rail is supported by the upright rails
and tilt brackets, measure to be sure a consistent,
parallel distance between framing rails is found. Tighten
all mounting screws on the rails and roof brackets.
This can be assisted by fixing a brace between the first
and second frame rail at one end to stop the frame from
tipping, thereby keeping a square alignment.
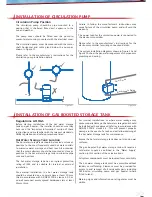
Upright Rail Positioning
Position a series of roof brackets corresponding to the
front row at the distance required to span the batten
distance.
Upright supports are to be cut to length from the supplied
frame rail with one upright required for each rear roof
bracket. Uprights are to be positioned in a manner that
allows for a channel facing towards the roof bracket, and
also facing outwards (Figure 14). Rail nuts and socket
screws are used to mount the upright to the roof bracket.
(Figure 12). This will allow the framing rail to attach in
the desired orientation. The tilt bracket angle will define
the tilt of the mount and is altered through positioning
adjustments to the M10 socket screws (Figure 13).
Replicate this process to create an even row of roof
brackets.
Attach the rail to the tilt brackets, using the supplied
screws and rail nut. The maximum overhang of the rail
from the roof bracket is 400mm. Attach a roof bracket
to the other end of the rail and slide into position, ready
for fastening.
Recheck the rail is parallel to the roof edge. Continue
installing the roof brackets and rails, as previously
described, while making sure that all subsequent rails are
square and parallel to the first rail. Tighten all mounting
screws on the rails and roof brackets.


