CP390i and CPF390i
Page 73
7.4
GOTO CURSOR, ROUTE AND MARK
The CP390i and CPF390i can easily be set to start navigating to the Cursor on the chart
page, a saved Mark or a Route that was created.
GOTO CURSOR
1. Move the ShuttlePoint knob to the exact position you want to navigate to.
2. Press
[GOTO]
and a GOTO popup window will be shown.
WAAS 3D
Figure 7.4 - GOTO menu (1)
3. Move the ShuttlePoint knob to highlight
CURSOR
and press
[ENT]
.
WAAS 3D
Figure 7.4a - GOTO menu (2)
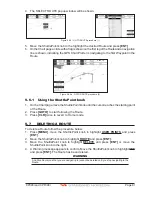
4. The GPS Chart Plotter is now navigating from your current position to the location
selected at step 1. A bearing line between the vessels location and the destination point
is shown. A popup window shows the Distance (DST) and Bearing (BRG) from the
vessels location to the destination point. Soft Keys are also shown that allow you to
quickly switch to the Highway page, to Route Check or to stop navigation.
5. Moving the ShuttlePoint knob, the popup window disappears.
WAAS 3D
Figure 7.4b - GOTO menu (3)
Содержание CP390i
Страница 1: ......
Страница 5: ...Page 6 CP390i and CPF390i ...
Страница 15: ...Page 16 CP390i and CPF390i ...
Страница 29: ...Page 30 CP390i and CPF390i ...
Страница 43: ...Page 44 CP390i and CPF390i ...
Страница 53: ...Page 54 CP390i and CPF390i ...
Страница 67: ...Page 68 CP390i and CPF390i ...
Страница 75: ...Page 76 CP390i and CPF390i ...
Страница 83: ...Page 84 CP390i and CPF390i ...
Страница 87: ...Page 88 CP390i and CPF390i ...
Страница 109: ...Page 110 CP390i and CPF390i ...
Страница 145: ...Page 146 CP390i and CPF390i Figure 17 16 C Card Restore settings ...
Страница 147: ...Page 148 CP390i and CPF390i ...
Страница 153: ...Page 154 CP390i and CPF390i ...
Страница 157: ...Page 158 CP390i and CPF390i ...
Страница 168: ......

