


Chapter 3 — Configuring Network Attached Storage
Create a Share
September 2017
User Guide
—
Spectra Verde Array
61
2.
Select
Action > New
.
The
New
NFS
Share
dialog
box
displays.
3.
Use
the
drop
‐
down
menu
to
select
the
Volume
you
want
to
share.
4.
The
network
address
displayed
for
Volume Mount Point
is
the
address
of
the
share
you
are
currently
configuring.
Note:
Before
mounting
an
NFS
share,
make
sure
the
client
supports
the
NFSv3
protocol
and
properly
handles
file
locking.
5.
If
desired,
enter
a
comment
in
the
Comment
field.
This
comment
only
displays
on
the
Verde
user
interface.
6.
In
the
Host Access Control
pane,
enter
the
IP
address
and
permission
level
of
all
hosts
that
you
want
to
access
the
volume.
Hosts
not
listed
are
not
able
to
access
the
volume.
In
addition
to
the
host
IP
address,
you
must
include
one
of
the
following
permission
parameters
for
each
host
you
add
to
the
Verde
array.
For
example,
entering
“
192.168.32.25 rootsquash”
allows
the
specified
host
to
access
the
share
with
standard
access.
If
you
want
to
allow
all
hosts
to
access
the
share,
type
*
and
include
the
permission
parameter.
For
example,
entering
“
* norootsquash”
allows
all
hosts
to
access
the
share
with
root
access.
7.
Click
Create
.
The
newly
created
share
is
listed
on
the
NFS
Shares
screen.
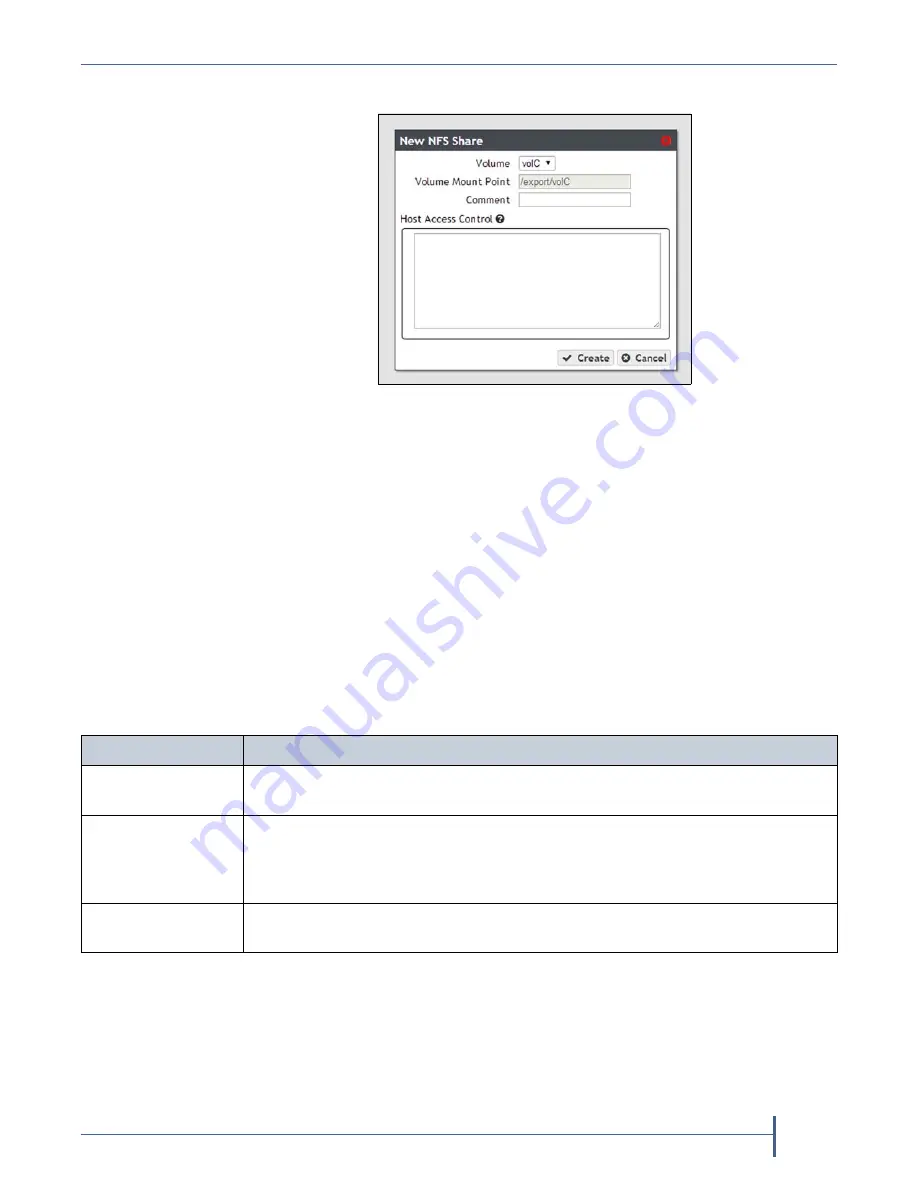
Figure 31
The New NFS Share dialog box.
Parameter
Description
norootsquash
Root
Access
—The
host
can
access
the
NFS
share
with
root
access
to
the
share.
This
host
is
used
to
set
permissions
for
rootsquash
users.
rootsquash
Standard
Access
—The
host
can
access
the
NFS
share,
but
does
not
have
root
access.
Standard
access
allows
write
permission
to
the
share,
but
does
not
allow
the
user
to
delete,
modify,
or
rename
files
for
which
they
do
not
have
write
permission.
ro
Read
Only
—The
host
can
access
the
NFS
share,
but
cannot
write
data
to
the
shared
volume.


