C
h
an
gi
ng
th
e
S
e
tt
in
gs
Settings
38
Note
This button is available in sales clerk mode.
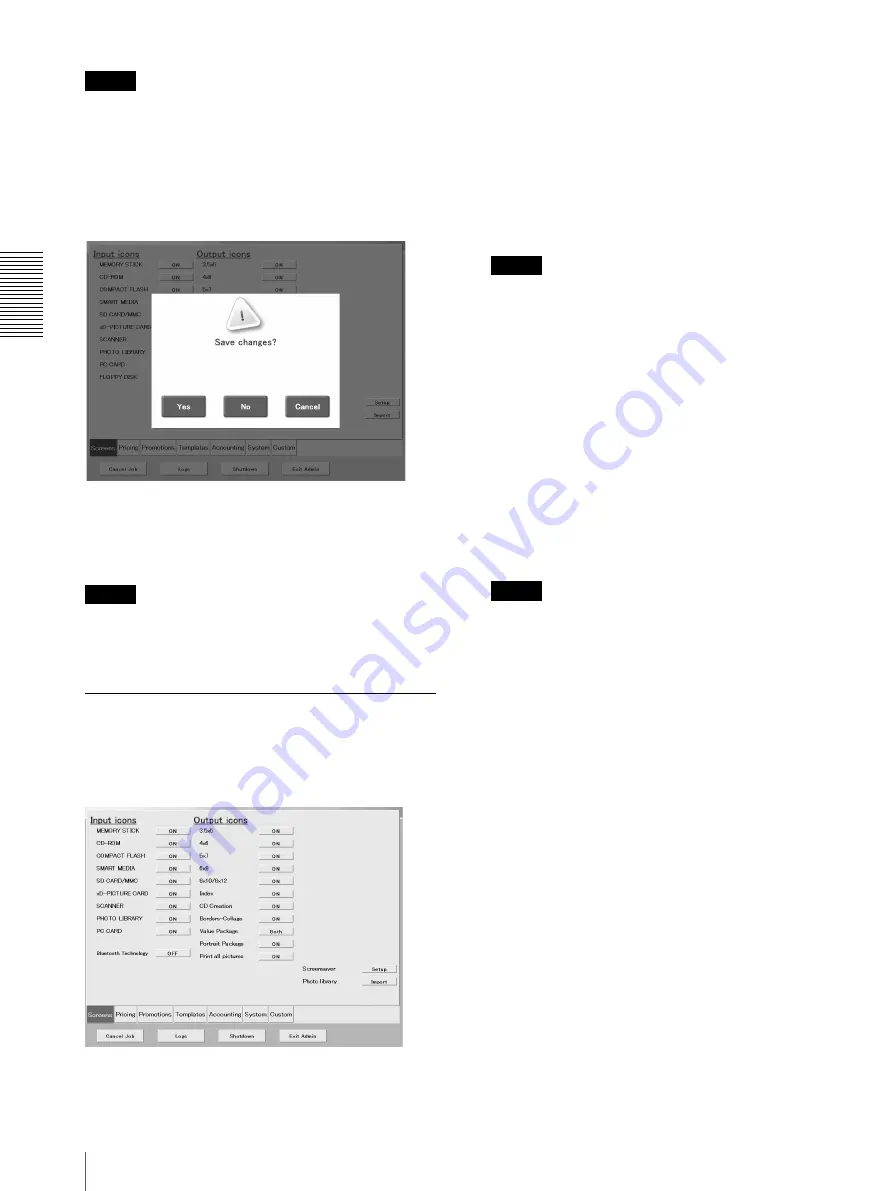
[Exit Admin] Button
Touch this button to save settings and exit the
Administration screen. When you touch the button a
message prompts you to confirm whether you want to
save the settings.
Touch the [Yes] button to save the changes and exit the
Administration screen.Touch the [No] button to ignore
changes and exit the Administration screen. Touch the
[Cancel] button to return to the Administration screen.
Note
This button is available is sales clerk mode, but the
“Save changes?” message does not appear when you
touch the button.
[Screens] Tab
On this tab, you can enable/disable input devices such as
the scanner, to enable/disable output services such as
CD creation, set up the screensaver, and import pictures
to the Photo Library.
Input Icons
• [MEMORY STICK], [CD-ROM], [COMPACT FLASH],
[SMART MEDIA], [SD CARD/MMC], [FLOPPY
DISK], [SCANNER], [PHOTO LIBRARY], [PC
CARD], [xD-PICTURE CARD], [Bluetooth Technology]
Use these settings to enable or disable the slots or drives
of the unit. When a button is [ON], the corresponding
media is available in the input media selection screen.
Touch the setting buttons to enable ([ON]) or disable
([OFF]) the input devices.
Note
When set to [ON], pictures can be received from a
mobile phone that features Bluetooth Technology.
Touch the [Bluetooth Technology] icon on the Input
Media screen, and proceed according to the
instructions on the Notice screen.
This function may not work with some mobile phone
models, even those that feature Bluetooth Technology.
Output Icons
• [3.5 × 5], [4 × 6], [5 × 7], [6 × 8], [8 × 10/8 × 12],
[Index], [CD Creation], [Borders - Collage], [Value
Package], [Portrait Package], [Print all pictures] With
these settings [ON], the output services above can be
selected after selecting the input device. Touch the
setting buttons to enable ([ON]) or disable ([OFF]) the
output services, or set them to [Other Size].
Note
If you enable ([ON]) more than 11 output services,
make sure that you set some paper sizes to [Other
Size]. Output services set to [Other Size] can be
selected by touching [Other Size] in the Output
Service selection screen.
• [Value Package]
You can set whether users can use the Value Package
services. Touch this button to set [Set A], [Set B],
[Both], or [OFF] (setting disabled).
For details, see “[Promotions] Tab” (page 40).
• [Portrait Package]
With this setting [ON], users can select Portrait
Package with this output service. You can make
package content settings on the [Promotions] tab.
For details, see “[Promotions] Tab” (page 40).
• [Print all pictures]
You can enable ([ON]) or disable ([OFF]) the print all
pictures output service. The default print size is set with
the [“Print all pictures” Size] option on the [Custom] tab.
• [Screensaver]
Touch the [Setup] button to configure the screensavers
of the system. When you touch the button, the
[Screensaver Setup] screen appears over the
Administration screen. When you are done making
settings in this screen, touch the [OK] button.


