Op
erat
io
n
Editing Pictures
20
3
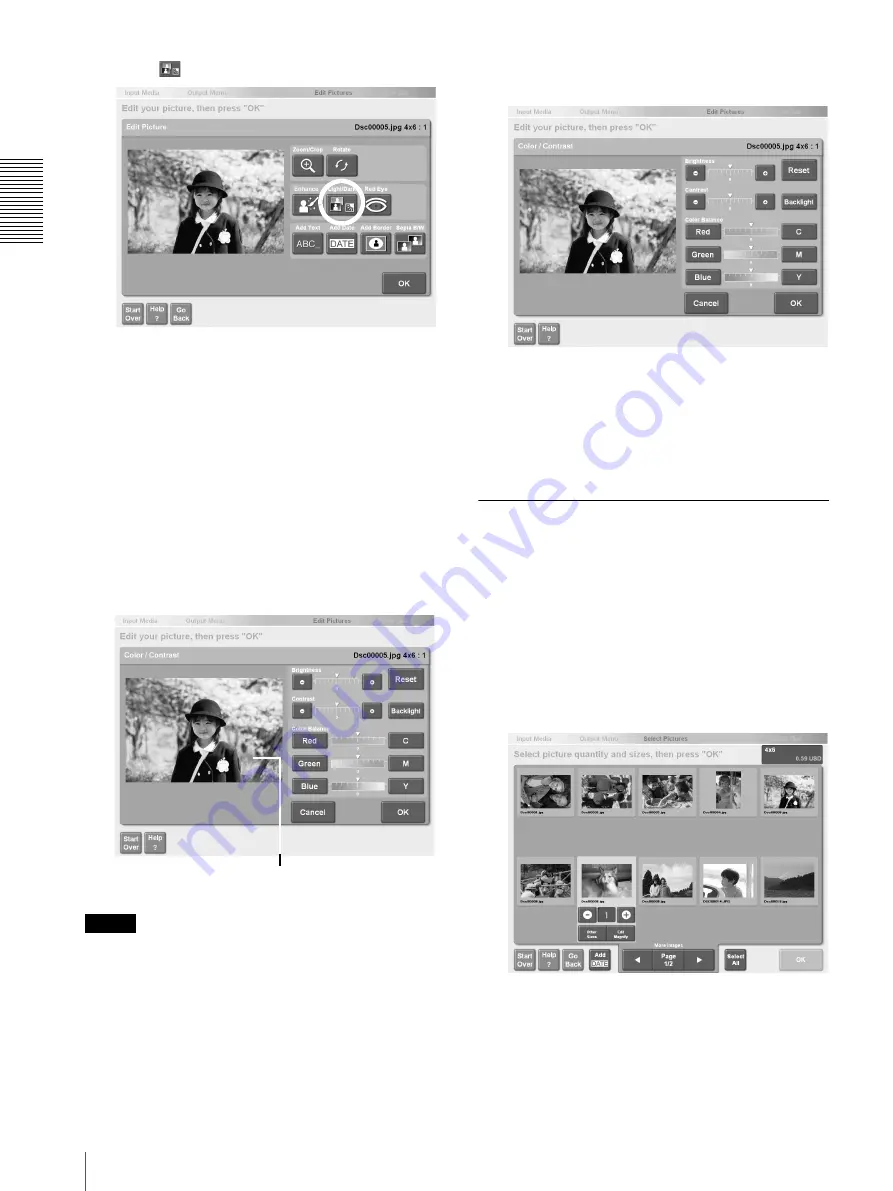
Touch
The [Light/Dark] screen appears.
4
Touch the [+] or [-] button for each item to adjust
the setting.
• [Brightness]. Touch [+] for a brighter picture or
[-] for a darker picture.
• [Contrast]. Touch [+] for higher contrast or [-] for
lower contrast.
• [Enhance Picture]. Touch the various [+] or [-] to
adjust colors.
• Touch the [Backlight] button to compensate for
excessive lighting behind the subject.
If you want to cancel the color correction settings,
touch the [Cancel] button.
Note
If [RGB Display] is set to [OFF] on the [Custom] Tab,
the RGB adjustment buttons are not displayed.
5
When you are finished with color correction, touch
the [OK] button.
The display returns to the screen at step 3.
6
Touch the [OK] button.
The display returns to the screen at step 1. You can
continue editing other pictures or return to the
output operation.
Selecting Sepia or Black and White
Sepia or black and white can be selected as the picture
color.
1
To select a picture for sepia or black and white
printing, touch the picture in the screen used to
specify the number of copies.
For details, see “Selecting the Pictures and
Specifying the Number of Copies to Print”
(page 6), step 2, or “Specifying the Number of
Copies to Print” (page 11), step 1.
2
Touch the [Edit/Magnify] button.
The picture editing screen appears.
Preview
(reflects color correction settings)


