2.
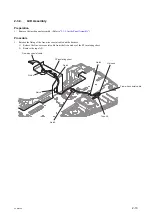
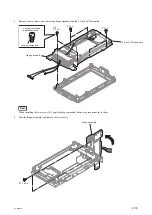
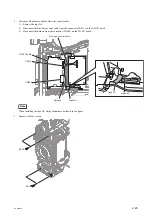
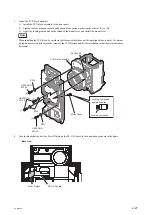
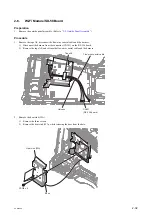
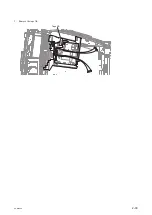
Remove the hinge covers.
1) Remove the screw.
2) Release the three claws and remove the hinge cover (rear), the hinge cover (front) and the LCD hinge harness
protector.
3) Remove the hinge harness protection sheet.
Hinge assembly
Hinge cover (front)
Hinge cover (rear)
Hinge harness protection sheet
Claw
LCD hinge harness protector
P1.7 x 2.5
Claws
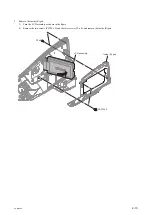
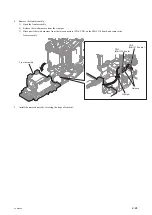
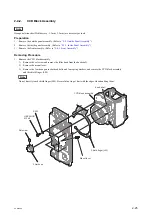
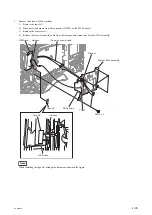
Note
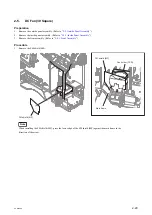
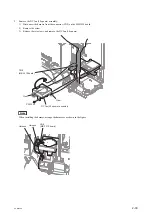
When installing the hinge harness protection sheet, install it to inside between the switch (DET-50 board) and LCD
hinge harness protector.
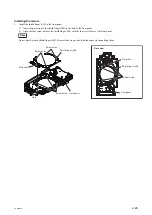
Rotating shaft of the
hinge assembly
Rotating part of the
hinge assembly
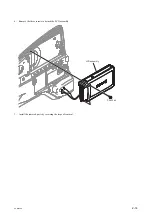
Switch (DET-50 board)
Hinge harness protection sheet
LCD hinge harness protector
PXW-X500
2-20
Содержание PXW-X500
Страница 1: ...SOLID STATE MEMORY CAMCORDER PXW X500 SERVICE MANUAL 1st Edition ...
Страница 4: ......
Страница 8: ......
Страница 10: ......
Страница 39: ...4 Set the date and time of the internal clock Refer to the operating instructions PXW X500 1 29 ...
Страница 54: ......
Страница 87: ...3 Remove the tape AS Tape AS PXW X500 2 33 ...
Страница 107: ...2 Remove the two screws and draw the duct box assembly PSW2 x 5 PSW2 x 5 Duct box assembly PXW X500 2 53 ...
Страница 109: ...4 Install the removed parts by reversing the steps of removal PXW X500 2 55 ...
Страница 158: ......
Страница 183: ......
Страница 184: ...PXW X500 SY PXW X500 CN J E 9 878 582 01 Sony Corporation Printed in Japan 2014 11 08 2014 ...


