1-15. Periodic Maintenance and Inspection
1-15-1. Periodic Check/Replacement Parts List
This table does not describe the guarantee period of each part.
The replacement period of each part is changed according to the environment and condition.
Part to Be Replaced
Part No.
Check/Replacement Period
Lithium battery (CR2032)
1-528-174-72
When the warning message is displayed on
LCD monitor/viewfinder screen.
DC fan (30 square)
1-855-292-11
About 5 years
Tip
The total operating time is displayed
with the Hours Meter in the System
menu. For details, refer to the operating
instructions.
Battery terminal (battery adapter)
1-820-459-21
About 5 years
Tip
The total operating time is displayed
with the Hours Meter in the System
menu. For details, refer to the operating
instructions.
1-15-2. Notes on Replacement of the Battery Terminal
The battery connector in this unit is consumable parts. Replace every about 5 years.
If the terminal of connector is deformed or bends due to vibrations or shock, or if the surface of the terminal corrodes
due to long-term outside use or other similar use, the unit may malfunction.
Replace the battery terminal immediately if the terminal is deformed or bends, or if the surface color changes.
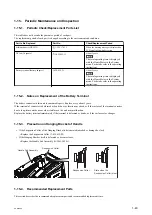
1-15-3. Precaution on Hanging Bracket of Handle
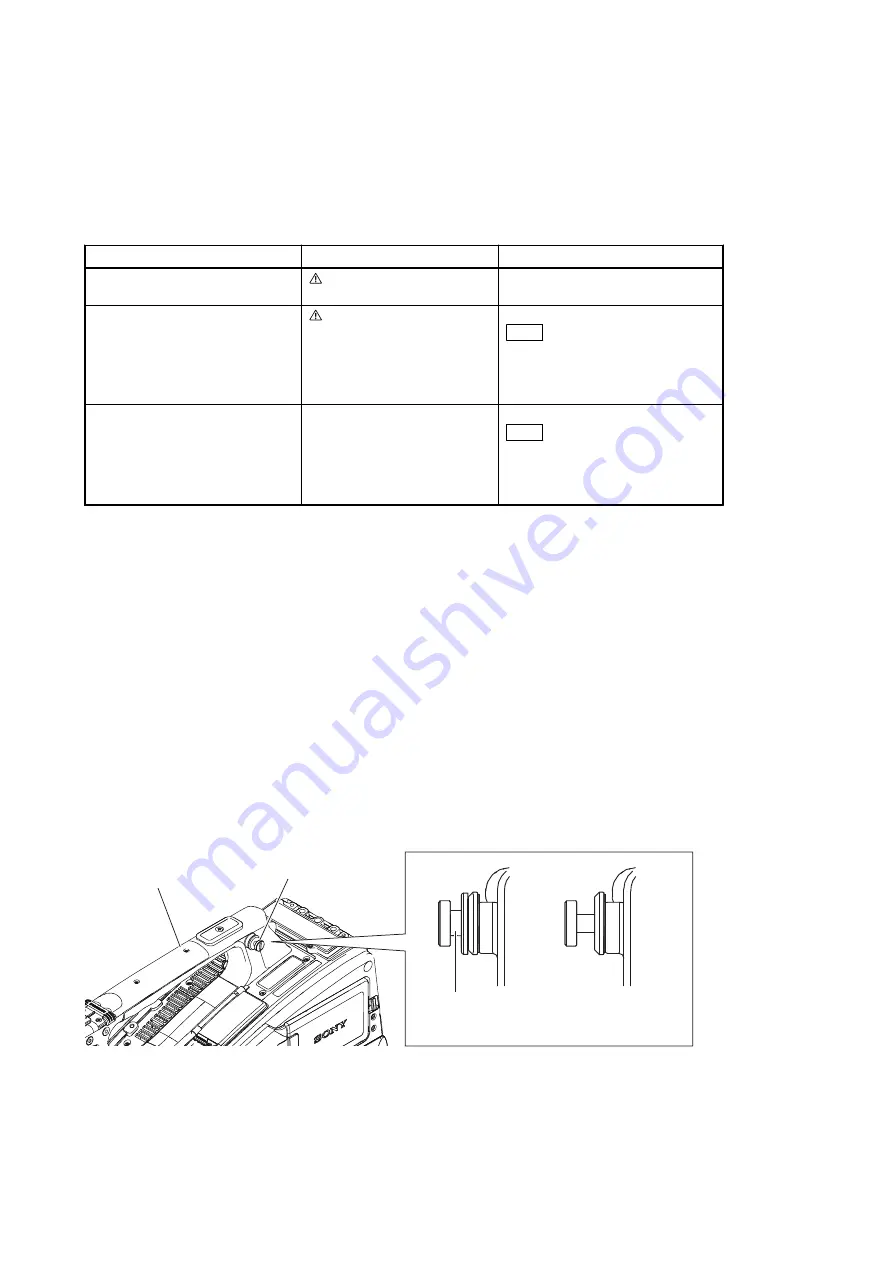
• If the Suspension Collar of the Hanging Bracket is deteriorated (abraded or damaged or lost);
→Replace the Suspension Collar (3-654-615-02).
• If the Hanging Bracket itself is deformed or becomes loose;
→Replace the Handle Sub Assembly (A-2061-149-A).
Suspension Collar
Suspension Collar
State when the
Suspension Collar is lost
Handle Sub Assembly
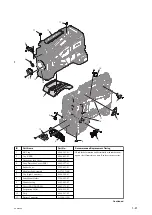
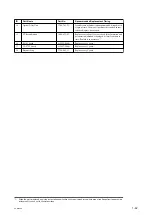
1-15-4. Recommended Replacement Parts
This section describes the recommended replacement parts and recommended replacement time.
PXW-X500
1-40
Содержание PXW-X500
Страница 1: ...SOLID STATE MEMORY CAMCORDER PXW X500 SERVICE MANUAL 1st Edition ...
Страница 4: ......
Страница 8: ......
Страница 10: ......
Страница 39: ...4 Set the date and time of the internal clock Refer to the operating instructions PXW X500 1 29 ...
Страница 54: ......
Страница 87: ...3 Remove the tape AS Tape AS PXW X500 2 33 ...
Страница 107: ...2 Remove the two screws and draw the duct box assembly PSW2 x 5 PSW2 x 5 Duct box assembly PXW X500 2 53 ...
Страница 109: ...4 Install the removed parts by reversing the steps of removal PXW X500 2 55 ...
Страница 158: ......
Страница 183: ......
Страница 184: ...PXW X500 SY PXW X500 CN J E 9 878 582 01 Sony Corporation Printed in Japan 2014 11 08 2014 ...


