000
7. Menu Display and Settings
80
Displaying the Setup Menu
Set the MENU ON/OFF switch to ON, or press the
MENU button.
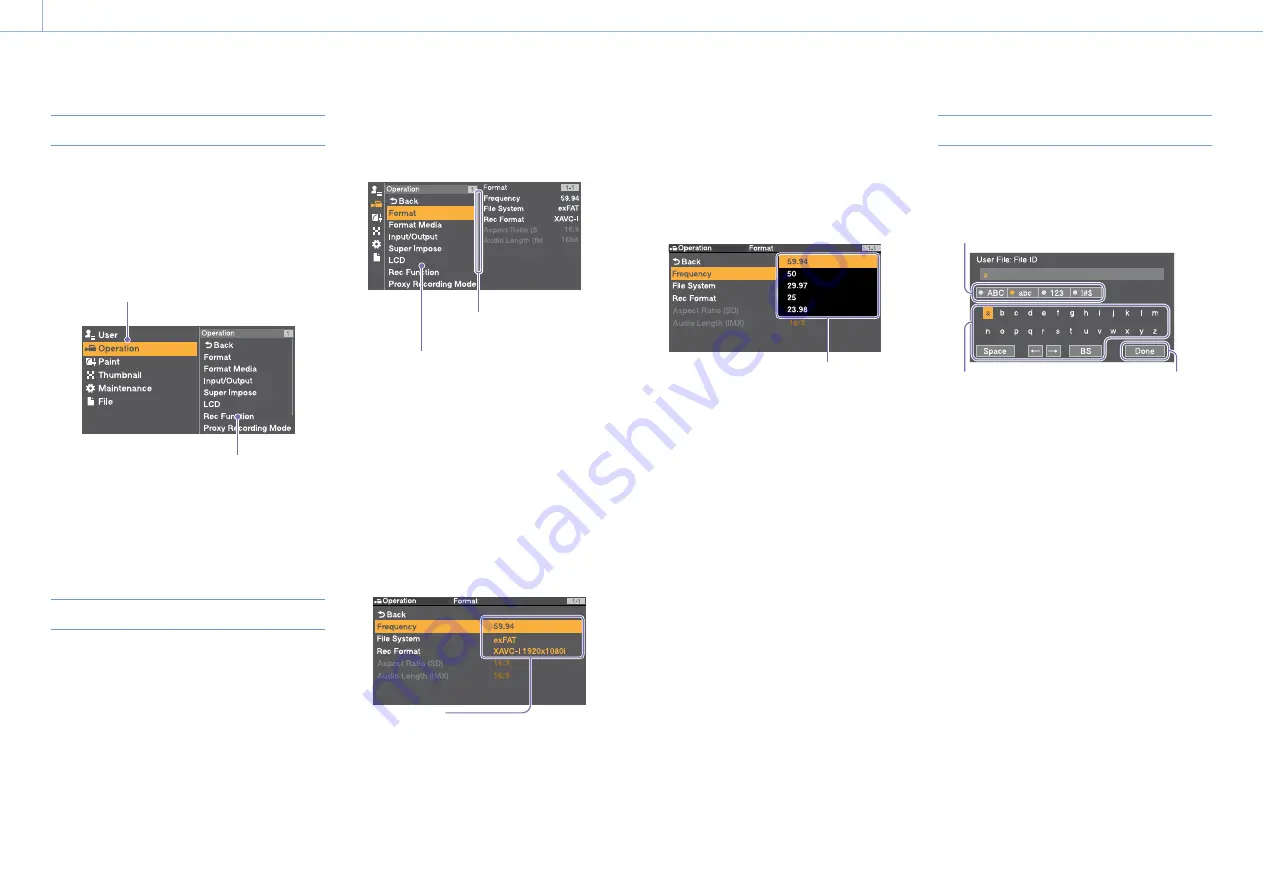
The camcorder enters menu mode and the menu
list appears on the screen.
The following example shows the cursor
positioned at the Operation menu
Menu list
Menu item selection area
[Note]
The setup menu cannot be used when the camcorder is in
focus magnification mode. Exit focus magnification mode
by pressing the assignable switch to which the Focus Mag
function has been assigned.
Making Menu Settings
1
Turn the MENU knob, or press the
or
button, to move the cursor to the desired
menu.
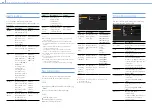
A list of selectable menu items appears in the
menu item selection area to the right of the
menu list.
2
Press the MENU knob or the SET button.
The menu item selection screen appears.
You can also display the menu item selection
screen by pressing the
button.
ˎ
ˎ
The menu item selection area displays a
maximum of seven lines. You can scroll
through menus with more than seven lines
by moving the cursor up and down.
Menu item selection area
ˎ
ˎ
If the selected item has sub-items,
they appear on the right.
ˎ
ˎ
If there are no sub-items, the current
setting appears on the right.
ˎ
ˎ
Select [Back] to return to the previous
level.
Displayed when there are further
menu items below.
3
Turn the MENU knob, or press the
or
button, to move the cursor to the menu item
that you want to set, and then confirm by
pressing the MENU knob or the SET button.
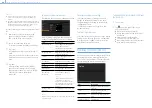
The sub-items area appears to the right of the
menu item selection area, and the cursor
moves to the first sub-item.
Settings area
ˎ
ˎ
Displays sub-items and their current settings
ˎ
ˎ
To return to the previous level, select [Back],
press the
button, or push the MENU
CANCEL/PRST/ESCAPE switch down to the
ESCAPE position.
4
Turn the MENU knob, or press the
or
button, to move the cursor to the sub-item
that you want to set, and then confirm by
pressing the MENU knob or the SET button.
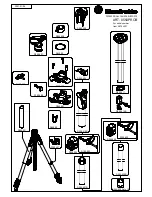
The settings of the selected sub-item appear,
and the cursor moves to the currently selected
value.
Settings area
ˎ
ˎ
The settings area displays a maximum of
nine lines. You can scroll through menus
with more than nine sub-items by moving
the cursor up and down.
ˎ
ˎ
For sub-items with a large settings range (for
example, –99 to +99), the settings area is not
displayed. The current setting is highlighted
to indicate that the value can be changed.
5
Turn the MENU knob, or press the
or
button, to select the value to set, and then
confirm by pressing the MENU knob or the SET
button.
The setting is changed, and the display is
updated to show the new setting.
If you select [Execute] for an executable item,
the corresponding function is executed.
If an item requires confirmation before execution,
selecting the item in step
3
hides the menu and
a confirmation message appears. Follow the
instructions in the message to execute or cancel
the operation.
Entering Text
When you select an item, such as a file name,
which requires character entry, the character entry
screen appears.
1
2
3
1
Press the MENU knob to select the type of
character to enter, then press the MENU knob
or SET button.
ABC: Uppercase alphabetic characters
abc: Lowercase alphabetic characters
123: Numeric characters
!#$: Special characters
2
Select a character from the selected character
type, then press the knob.
The cursor moves to the next field.
Space: Enters a space character at the cursor
position.
/
: Moves the position of the cursor.
BS: Deletes the character on the left of the
cursor (backspace).
3
When finished, select [Done] and press the
dial.
The character string is confirmed and the
character entry screen disappears.
Basic Setup Menu Operations


