000
5. Network Configuration
67
The web menu of the camcorder appears when
the camcorder is accessed from a browser
on a device connected using a wireless LAN
connection. Using the web menu, you can
configure settings related to wireless functions,
transfer files, and perform other actions.
Displaying the Web Menu
1
Connect the camcorder to the Internet using
the procedures in “Connecting Devices using
Wireless LAN” (page 56) and “Connecting to
the Internet” (page 59).
2
Launch a browser on the device and enter
“http://192.168.1.1:8080/index.html” in the URL
bar.
The user name and password entry screen
appears.
3
Enter a user name and password, then select
[OK].
For the user name and password for access
authentication, see Maintenance >Basic
Authentication (page 101) in the setup menu.
Setup Menu
Launch a browser on the device and enter
“http://<IP_address>/rm.html” in the URL
bar, where “<IP_address>” is the IP address
(Maintenance >Network >IP Address in the setup
menu) of the camcorder, to display the Media Info
>SD Card screen of the camcorder
Tapping in the top left of the web menu screen
will display the configuration menus. Tap the item
you want to configure.
The menu has the following items: Settings, Media
Info, Job List, and Cam Remote Control.
Settings
Used to configure the camcorder. This screen has
the following items.
Item
Description
See
Wireless
Module
>Streaming
Format
Streaming
format
settings
Streaming Format
Settings(page 67)
Wireless
Module
>Proxy
Format
Proxy format
settings
Proxy Format
Settings(page 68)
Wireless LAN
>Station
Settings
Wireless LAN
settings
Wireless LAN Station
Settings(page 68)
Wireless LAN
>Status
Wireless LAN
settings status
Checking wireless
LAN
settings(page 69)
Wired LAN
>Wired LAN
Settings
Wired LAN
settings
Wired LAN
>Status
Wired LAN
settings status
Checking wired LAN
settings(page 69)
Upload
Settings
Transfer
settings
Transfer (Upload)
Settings(page 69)
Media Info
Displays media information and is used to select
files to transfer from media.
ˎ
ˎ
SD Card: Media inserted into the PROXY SD card
slot of the camcorder
Double-clicking a file will start playback of the
selected file.
[Note]
Playback may not be supported, depending on the
operating system of the terminal device used and the
browser version. If this occurs, use “Content Browser
Mobile.”
ˎ
ˎ
Slot A: Media inserted into card slot A of the
camcorder
ˎ
ˎ
Slot B: Media inserted into card slot B of the
camcorder
Job List
Displays the Job List screen for managing file
transfers (page 70).
Cam Remote Control
Displays the Wi-Fi remote control screen
(page 65).
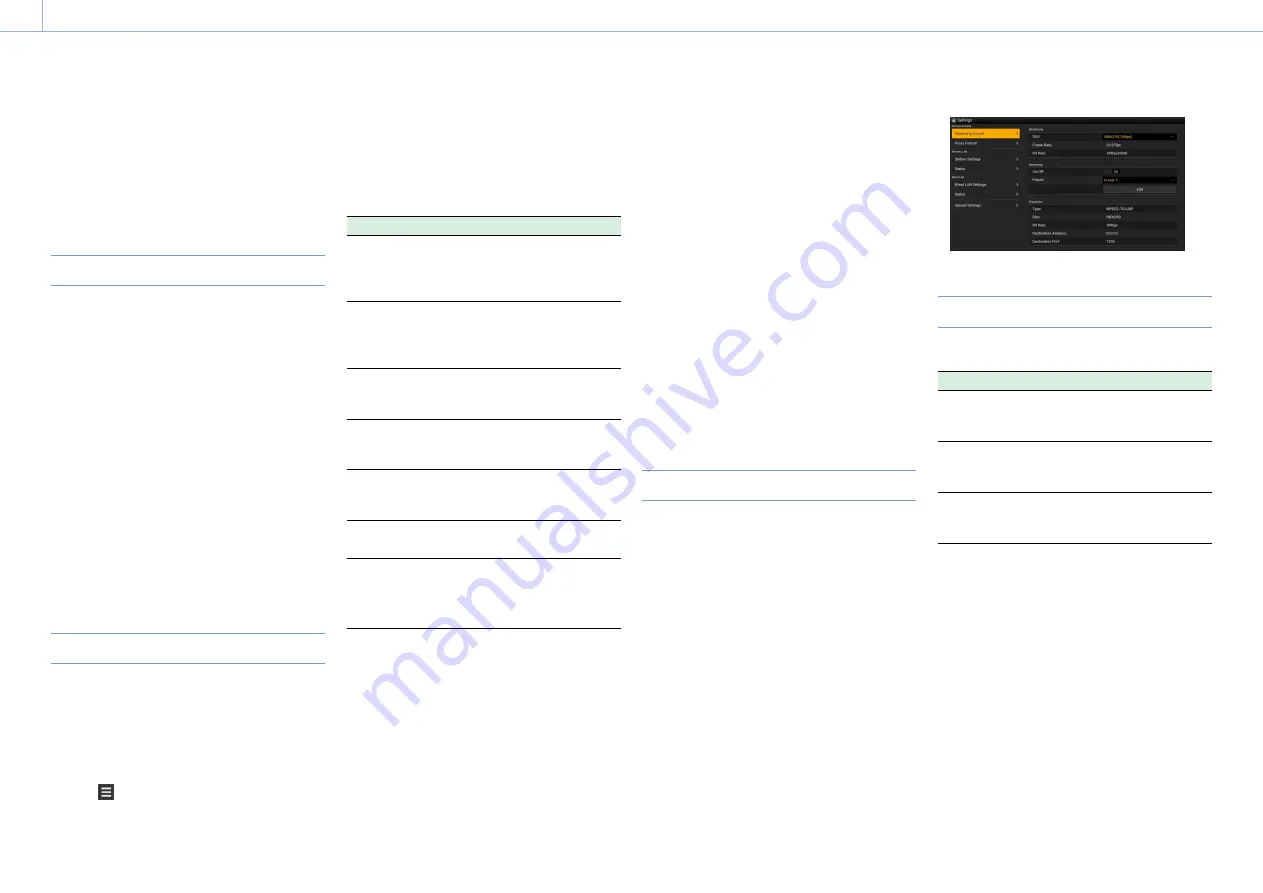
Streaming Format Settings
You can configure the stream for monitoring
by devices, and set the format and transmission
destination of the stream for streaming via the
Internet or local network.
Video
ˎ
ˎ
AVC/H.264 Main Profile, 4:2:0 Long GOP
ˎ
ˎ
Size is selected in the following settings.
Audio
ˎ
ˎ
AAC-LC compression
ˎ
ˎ
Sampling frequency: 48 kHz
ˎ
ˎ
Bit rate: 128 kbps for stereo
Monitoring Settings
You can set the format for monitoring by devices.
Item
Description
Setting
Monitoring
Size
Sets the video size
and bit rate for
monitoring.
480×270(1Mbps)/
480×270(0.5Mbps)
Monitoring
Frame Rate
Displays the video
frame rate for
monitoring.
23.98fps/25fps/
29.97fps/50fps/
59.94fps
Monitoring
Bit Rate
Displays the video
bit rate for
monitoring.
1Mbps(VBR)/
0.5Mbps(VBR)
[Notes]
ˎ
ˎ
The bit rate is an average value, so this value may be
exceeded at times.
ˎ
ˎ
A video frame rate of 24 fps is not supported.
ˎ
ˎ
640×360 (3Mbps (VBR)) is not supported for Monitoring
Size.
Configuring from the Web Menu


