


1-39
DCR-TRV240/TRV340
158
For Macintosh users
Recommended Macintosh environment
Mac OS 8.5.1/8.6/9.0/9.1/9.2 or Mac OS X (v10.0/v10.1) standard installation is
required.
However, note that the update to Mac OS 9.0/9.1 should be used for the following
models.
•iMac with the Mac OS 8.6 standard installation and a slot loading type CD-ROM drive
•iBook or Power Mac G4 with the Mac OS 8.6 standard installation
The USB connector must be provided as standard.
Installing the USB driver
Before connecting your camcorder to your computer, install the USB driver on the
computer. The USB driver is packaged together with application software for viewing
images on the CD-ROM supplied with your camcorder. Do not connect the USB cable to
your computer before installation of the USB driver is completed.
For Mac OS 9.1/9.2/Mac OS X (v10.0/v10.1)
The USB driver need not be installed. Your Mac is automatically recognized as a driver
just by connecting your Mac using the USB cable.
For Mac OS 8.5.1/8.6/9.0 users
(
1
)
Turn on your computer and allow the Mac OS to load.
(
2
)
Insert the supplied CD-ROM into the CD-ROM drive of your computer.
The application software screen appears.
Viewing images recorded on “Memory Stick”s on your computer
159
“
Memory Stick
”
operations
(
3
)
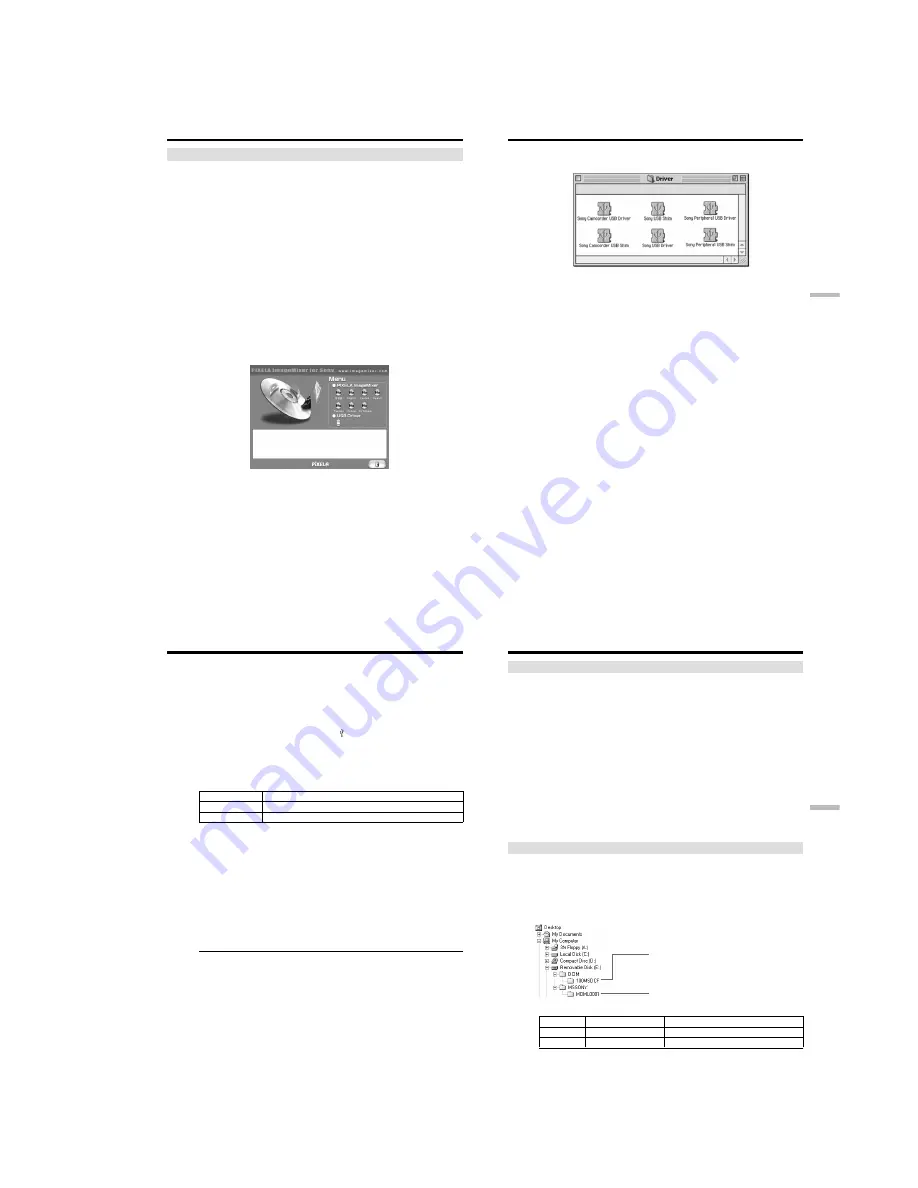
Click “USB Driver” to open the folder containing the six files related to
“Driver”.
(
4
)
Select all six files, and drag and drop them into the System Folder.
(
5
)
When the message appears, click “OK.”
(
6
)
Restart your computer.
Viewing images recorded on “Memory Stick”s on your computer
160
Viewing images on Macintosh
QuickTime 3.0 or newer must be installed to play back moving pictures in Macintosh
environment.
(
1
)
Turn on your computer and allow Mac OS to load.
(
2
)
Insert a “Memory Stick” into your camcorder, and connect the AC power
adaptor to your camcorder and then to a wall outlet.
(
3
)
Set the POWER switch to MEMORY.
(
4
)
Connect one end of the USB cable to the (USB) jack on the camcorder and the
other end to the USB connector on your computer.
USB MODE appears on the screen of your camcorder.
(
5
)
Double click the newly recognized icon on the desktop.
The folders inside the “Memory Stick” are displayed.
(
6
)
Select and double-click the desired image file from the folder.
Desired file type
Double-click in this order
Still image
“Dcim” folder
t
“100msdcf” folder
t
Image file
Moving picture*
“Mssony” folder
t
“Moml0001” folder
t
Image file*
* Copying a file to the hard disk of your computer before viewing it is recommended. If
you play back the file directly from the “Memory Stick,” the image and sound may
break off.
Unplug the USB cable or eject the “Memory Stick”
To unplug the USB cable or eject the “Memory Stick”, follow the procedure below.
(
1
)
Close all running applications.
Make sure that the access lamp of the hard disk is not lit.
(
2
)
Drag and drop the “Memory Stick” icon to the Trash or select Eject under the
Special menu.
(
3
)
Unplug the USB cable or eject the “Memory Stick.” Set the POWER switch of
your camcorder to OFF(CHG).
For Mac OS X (v10.0) users
Shutting down your computer, then unplug the USB cable or eject the “Memory Stick”.
Viewing images recorded on “Memory Stick”s on your computer
161
“
Memory Stick
”
operations
Notes on using your computer
“Memory Stick”
•“Memory Stick” operations on your camcorder cannot be assured if a “Memory Stick”
formatted on your computer is used on your camcorder, or if the “Memory Stick” in
your camcorder was formatted from your computer when the USB cable was
connected.
•Do not compress the data on the “Memory Stick.” Compressed files cannot be played
back on your camcorder.
Software
•Depending on your application software, the file size may increase when you open a
still image file.
•When you load an image modified using retouching software from your computer to
your camcorder or when you directly modify the image on your camcorder, the image
format will differ so a file error indicator may appear and you may be unable to open
the file.
Communications with your computer
Communications between your camcorder and your computer may not recover after
recovering from Suspend, Resume, or Sleep.
Image file storage destinations and image files
Image files recorded with your camcorder are grouped in folders by recording mode.
The meanings of the file names are as follows.
ssss
stands for any number within
the range from 0001 to 9999.
For Windows Me users
(The drive recognizing your camcorder is [E:].)
Folder
File
Meaning
100MSDCF
DSC0
ssss
.JPG
Still image file
MOML0001
MOV0
ssss
.MPG
Moving picture file
Viewing images recorded on “Memory Stick”s on your computer
Folder containing moving picture data
Folder containing still image data
Содержание DCR-TRV240
Страница 102: ...5 1 DCR TRV240 TRV340 SECTION 5 ADJUSTMENTS ...
Страница 177: ... Take a copy of OPTICAL AXIS FRAME with a clear sheet for use 206 OPTICAL AXIS FRAME DCR TRV240 TRV340 ...
Страница 179: ...DCR TRV240 TRV340 208 Sony EMCS Co 2002A1600 1 2002 1 Published by DI Customer Center 9 929 932 31 ...
Страница 180: ...Revision History Ver 1 0 Date 2002 01 History Official Release Contents S M Rev issued 992993231 pdf Reverse ...


