background image

Operating Instructions 

Memory Card Camera-Recorder

Model No. 

AU-V35LT1G

ENGLISH

Please carefully read this manual, and save this manual for future use.

ENGLISH

Before using this product, be sure to read “Read this first!” (pages 3 to 6).

For more information, please visit the Panasonic website 

(http://pro-av.panasonic.

net/en/manual/index.html)

, and refer to the Operating Guide for VariCam LT.

DEUTSCH

Bitte lesen Sie sorgfältig die „Bitte lesen Sie zuerst diesen Hinweis!“ vor der 

Nutzung dieses Produkts. (Seiten 7 bis 8).

FRANÇAIS

Avant d’utiliser cet appareil, assurez-vous de lire la section « Lire ces 

informations en premier ! » (pages 9 à 10).

ITALIANO

Prima di utilizzare il prodotto, assicurarsi di leggere “Leggere prima quanto 

segue!” (pagine 11 a 12).

ESPAÑOL

Antes de usar este producto, asegúrese de leer “Lea esto primero” (páginas 13 

a 14).

Содержание AU-V35LT1G

Страница 1: ... net en manual index html and refer to the Operating Guide for VariCam LT DEUTSCH Bitte lesen Sie sorgfältig die Bitte lesen Sie zuerst diesen Hinweis vor der Nutzung dieses Produkts Seiten 7 bis 8 FRANÇAIS Avant d utiliser cet appareil assurez vous de lire la section Lire ces informations en premier pages 9 à 10 ITALIANO Prima di utilizzare il prodotto assicurarsi di leggere Leggere prima quanto ...

Страница 2: ...bezpečnostní informace a důležité poznámky k tomuto produktu Посетете следния уебсайт относно информация за безопасността и важни уведомления за продукта Toodet puudutava ohutusteabe ja oluliste märkuste saamiseks külastage järgmist veebilehte Za sigurnosne informacije i važne obavijesti o proizvodu posjetite sljedeću internetsku stranicu Lai iegūtu informāciju par drošību un skatītu svarīgus pazi...

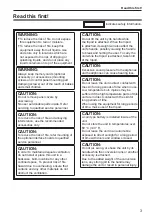
Страница 3: ...ire hazard due to overheating ensure that curtains and any other materials do not obstruct the ventilation CAUTION Do not lift the unit by its handle while the tripod is attached When the tripod is attached its weight will also affect the unit s handle possibly causing the handle to break and hurting the user To carry the unit while the tripod is attached take hold of the tripod CAUTION Excessive ...

Страница 4: ...in accordance with the instruction manual may cause harmful interference to radio communications Operation of this equipment in a residential area is likely to cause harmful interference in which case the user will be required to correct the interference at his own expense FCC Warning To assure continued FCC emission limit compliance follow the attached installation instructions and the user must ...

Страница 5: ...ess of pursuant to EU rules Panasonic Marketing Europe GmbH Panasonic Testing Centre Winsbergring 11 22525 Hamburg Germany TO REMOVE BATTERY Main Power Battery Ni Cd Ni MH Li ion Battery f fTo detach the battery please proceed in the reverse order of the installation method described in this manual f fIf a battery made by any other manufacturer is to be used check the Operating Instructions accomp...

Страница 6: ...мдефенілові ефіри PBDE не перевищує 0 1 ваги речовини або в концентрації до 1000 частин на мільйон EU Disposal of Old Equipment and Batteries Only for European Union and countries with recycling systems These symbols on the products packaging and or accompanying documents mean that used electrical and electronic products and batteries must not be mixed with general household waste For proper treat...

Страница 7: ...ren engen Platz aufstellen Stellen Sie sicher dass die Ventilationsöffnungen im Gehäuse nicht durch Vorhänge oder andere Materialien blockiert werden anderenfalls besteht die Gefahr von Bränden aufgrund von Überhitzung VORSICHT Heben Sie die Kamera nicht am Handgriff an während sie am Stativ befestigt ist Das zusätzliche Gewicht des Stativs kann dazu führen dass der Handgriff abbricht was eine Ver...

Страница 8: ...ackung und oder den Begleitdokumenten bedeutet dass gebrauchte elektrische und elektronische Produkte sowie Batterien nicht in den allgemeinen Hausmüll gegeben werden dürfen Bitte führen Sie alte Produkte und verbrauchte Batterien zur Behandlung Aufarbeitung bzw zum Recycling gemäß den gesetzlichen Bestimmungen den zuständigen Sammelpunkten zu Indem Sie diese Produkte und Batterien ordnungsgemäß e...

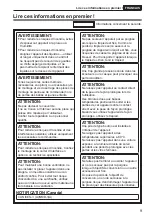
Страница 9: ...isque d incendie dû à une surchauffe vérifiez qu aucun rideau ni aucun autre matériau ne fait obstacle à la ventilation ATTENTION Ne pas soulever l appareil par sa poignée alors que le trépied est fixé Comme le poids du trépied s exerce aussi sur la poignée de l appareil lorsqu il est fixé vous risqueriez de casser la poignée et de vous blesser Pour transporter l appareil lorsque le trépied est fi...

Страница 10: ...ystèmes de recyclage Apposé sur le produit lui même sur son emballage ou figurant dans la documentation qui l accompagne ce pictogramme indique que les piles appareils électriques et électroniques usagés doivent être séparées des ordures ménagères Afin de permettre le traitement la valorisation et le recyclage adéquats des piles et des appareils usagés veuillez les porter à l un des points de coll...

Страница 11: ...i un surriscaldamento accertarsi che tende o altri materiali non ostacolino la ventilazione PRECAUZIONE Non sollevare l unità per il suo manico mentre il treppiede è attaccato Quando il treppiede è attaccato il suo peso ha effetto anche sul manico dell unità con pericolo che possa rompersi e causare un incidente all utente Per il trasporto dell unità con il treppiede attaccato prenderla per il tre...

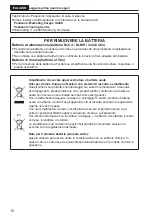
Страница 12: ...accolta e smaltimento Questi simboli sui prodotti sull imballaggio e o sulle documentazioni o manuali accompagnanti i prodotti indicano che i prodotti elettrici elettronici e le batterie usate non devono essere buttati nei rifiuti domestici generici Per un trattamento adeguato recupero e riciclaggio di vecchi prodotti e batterie usate vi invitiamo a portarli negli appositi punti di raccolta second...

Страница 13: ...cido Para evitar el riesgo de incendio debido al recalentamiento asegúrese de que las cortinas y otros materiales no obstruyan la ventilación PRECAUCIÓN No levante la unidad por el asa cuando está instalado el trípode Si el trípode se encuentra instalado su peso afectará también al asa de la unidad lo que podría provocar la rotura del asa y ocasionar lesiones al usuario Para transportar la unidad ...

Страница 14: ... con sistemas de reciclado Estos símbolos en los productos su embalaje o en los documentos que los acompañen significan que los productos eléctricos y electrónicos y pilas y baterías usadas no deben mezclarse con los residuos domésticos Para el adecuado tratamiento recuperación y reciclaje de los productos viejos y pilas y baterías usadas llévelos a los puntos de recogida de acuerdo con su legisla...

Страница 15: ...odec module is used under license from Atomos f f Atomos is a trademark or registered trademark of Atomos Global Pty Ltd How to read this document r r Illustrations f f Illustrations may differ from the actual product r r Conventions used in this manual f f Words and phrases in brackets indicate details and content displayed in the viewfinder or control panel f f Words and phrases in brackets indi...

Страница 16: ...imero 13 Accessories 18 Description of Parts 19 Left side 19 Right side 21 Front 22 Rear 23 Top 24 Bottom 25 Mounting the module 26 Mounting the control panel 26 Power supply 27 Using the external DC power supply 27 Updating the camera firmware 29 Updating the firmware 29 Storing 30 Cautions when storing the camera recorder 30 Specifications 31 General 31 ...

Страница 17: ...y notified that they have rights to obtain re engineer and redistribute the source code of these software 2 This product includes software licensed under MIT License 3 This product includes software developed by the OpenSSL Project for use in the OpenSSL Toolkit http www openssl org 4 This product includes software licensed under OpenBSD License 5 This product includes PHP freely available from ht...

Страница 18: ...lready attached to the camera module f f Control panel f f Control panel mounting part f f Glass for IR recording f f Control panel mounting part clamping screw 4 pcs NOTE t t After unpacking the product dispose of the packing material properly ...

Страница 19: ...rms the assigned function This will have the same operation as the PLAY INFO EXIT buttons with orange text when the system check screen or the menu screen is displayed In such case this will not operate as USER buttons 6 SYSTEM CHK button Displays the system check screen in the VF SDI terminal output 7 REC button Press this button to start recording Press this button again to stop recording The bu...

Страница 20: ... this in the position to prevent incorrect operation when moving the camera etc 14 Card slot access LED Displays the access status of recording and playback of the card inserted in the main slot and the sub slot Top Main slot Bottom Sub slot The access status of the file operation is also displayed for the sub slot 15 PHONES terminal Connecting terminal of headphones for audio monitor Stereo mini ...

Страница 21: ...e input signal is 3G HD SDI For the cable to connect to this terminal prepare a double shielded cable equivalent to 5C FB 6 TC IN OUT terminal Connects to the time code input terminal of the external device when locking the time code of the external device to the time code on the camera Inputs the standard time code when locking with the time code of the external device For the cable to connect to...

Страница 22: ...he viewfinder or the double shielded cable equivalent to 5C FB when connecting a cable to this terminal 14 DC OUT terminal An output terminal to supply viewfinder power supply DC 12 V Maximum of 1 0 A current can be provided Use the DC cable supplied with the viewfinder when connecting a cable to this terminal 15 Fan inlet Fan inlet for dissipating heat Do not block this when the camera is in use ...

Страница 23: ...der For mounting Anton Bauer batteries 2 Battery release lever Pull this battery release lever down to release the battery 3 Battery contact terminals Contact terminals for the battery 4 INPUT 1 2 terminal Terminal for connecting a microphone 5 INPUT 3 INPUT 4 terminal Connect the audio equipment or the microphone 6 DC OUT RS terminal Terminal for DC 12 V output and REC trigger input The DC output...

Страница 24: ...ing hole size 1 4 20 UNC 3 8 16 UNC 3 GPS module position This part has a built in GPS module Do not cover this part with metallic objects when the GPS is in use 4 Microphone holder mounting position 5 Mounting hole for control panel mounting part 6 Accessory mounting holes For attaching accessories f f Mounting hole size 1 4 20 UNC screw length 5 5 mm or shorter ...

Страница 25: ...ts 25 Bottom 1 1 Shoulder mount module tripod mounting holes For attaching the shoulder mount module or a tripod f f Mounting hole size 1 4 20 UNC screw length 5 5 mm or shorter 3 8 16 UNC screw length 5 5 mm or shorter ...

Страница 26: ...s turned on Set the power switch to when mounting or removing the control panel It can be mounted to the rear of the camera using the supplied dedicated mounting part Fig 1 Fig 3 Fig 4 Fig 2 CONTROL PANEL terminal 1 Mount the control panel mounting part using the four supplied screws Fig 1 2 Mount the control panel onto the control panel mounting part Fig 2 3 Push down the lock lever to the right ...

Страница 27: ...connected devices can be calculated with the following formula Total power consumption Voltage When the power of the camera is turned on inrush current is generated Insufficient power supply when turning on the power may cause a malfunction We recommend that you use an external DC power supply that can assure double the capacity of the total power consumption of the camera and connected devices th...

Страница 28: ...se the external DC power supply output voltage rises too slowly t t When switching the power supply from an external DC power supply to the battery carefully remove the DC cable from the DC IN terminal Removing the cable quickly may temporarily stop the camera s operation t t When power is supplied from the DC IN terminal the light circuit does not function The light circuit can be used only when ...

Страница 29: ...ton 8 When UPDATE appears select UPDATE OK This starts the firmware update Do not turn the power off until the update is completed NOTE t t The time required for update is approximately 30 minutes It is necessary to supply power without interruption during the update Use the external DC power supply instead of battery t t Do not remove the SD memory card during the update while the card access LED...

Страница 30: ...and it may lead to heat generation Touching on a heated part may cause severe burns f f Store the battery with electrically discharged When storing the camera for a long period of time it is recommended to charge it once a year use up the full capacity of the battery using the camera and then store it again r r P2 card f f If you remove it from the camera recorder be sure to attach the dedicated c...

Страница 31: ...tes safety information Ambient operating temperature 0 C 40 C 32 F 104 F Ambient operating humidity 10 85 no condensation Storage temperature 20 C 60 C 4 F 140 F Weight Approx 2 7 k 6 0 lbs excluding handle and accessories Approx 3 0 k 6 6 lbs including handle excluding accessories Dimensions W H D 184 0 mm 230 5 mm 247 0 mm 7 1 4 inches 9 3 32 inches 9 3 4 inches excluding protrusions and accesso...

Страница 32: ...Web Site http www panasonic com Panasonic Corporation 2016 ...

Отзывы: