background image

12

7

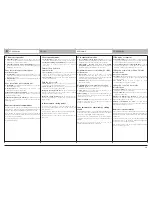
Mémorisation des télécommandes

Memorising remote control

Zenders toewijzen

Memorización del emisor

Avant la mise en route des réglages, vérifier que les voyants 

ON/OFF

et 

PROG

sont allumés et le voyant

Danger est 

éteint.

2 modes de fonctionnement :

Ouverture totale seule

Ouverture totale systématique des 2 vantaux par appui bref ou long sur la télécommande.

Ouverture piétonne ou totale

Ouverture d’un seul vantail pour l’accès aux piétons par appui bref sur la télécommande.

Ouverture totale des 2 vantaux par appui long sur la télécommande.

Mémorisation des télécommandes en ouverture totale seule :

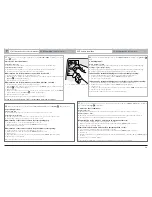
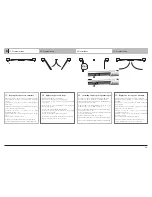
1. Positionner la télécommande sur la cible gravée sur le capot.
2. Maintenir la touche à mémoriser enfoncée jusqu'à voir le voyant PROG clignoter lentement.(le voyant

DANGER 

s’éclaire pendant l’appui).

3. Relâcher la touche, elle est mémorisée.

Mémorisation des télécommandes en ouverture piétonne ou totale :

1. Positionner la télécommande sur la cible gravée sur le capot.
2. Maintenir la touche à mémoriser enfoncée jusqu'à voir le voyant 

PROG

clignoter lentement.(le voyant

DANGER

s’éclaire pendant l’appui).

3. Relâcher la touche.
4. Appuyez à nouveau (avant 10 secondes) sur la touche à mémoriser jusqu'à voir le voyant 

PROG

clignoter lentement.(le voyant DANGER 

s’éclaire pendant l’appui).

5. Relâcher la touche, elle est mémorisée.

Suivre la même procédure pour toutes les télécommandes à programmer.

A la fin du cycle de mémorisation, seuls les voyants PROG et ON/OFF sont allumés.

Before starting adjustment, check that indicators 

ON/OFF

and 

STOP

are lit and 

Warning

indicator switch off.

2 operating modes: 

Total opening only

Systematic total opening of the gate by a short or long press on the remote control.

Pedestrian or total opening

Opening of one gate only to allow access for pedestrians by a short press on the remote control.

Total opening of both gates by a long press on the remote control.

Memorisation of the remote controls for total opening only: 

1. Position the remote control on the target engraved on the cover.
2. Hold down the key to be memorised until the '

PROG

' LED flashes slowly.

3. Release the key, it is memorised.

Memorisation of the remote controls for pedestrian or total opening: 

1. Position the remote control on the target engraved on the cover.
2. Hold down the key to be memorised until the '

PROG

' LED flashes slowly.

3. Release the key.
4. Press again (before 10 seconds) on the key to be memorised until the '

PROG

' LED flashes slowly.

5. Release the key, it is memorised.

Repeat this procedure for all the remote controls to be programmed.

Controleer voordat u de instellingen uitvoert of de 

ON/OFF

en 

PROG

leds branden en de 

gevaar

led 

uit is.

2 werkingsmodi:

Alleen volledige opening

Systematisch volledige opening van het hek bij kort of lang indrukken van de afstandsbediening.

Volledige of gedeeltelijke opening

Opening van slechts één hekdeel voor voetgangers bij kort indrukken van de afstandsbediening.

Volledige opening van beide hekdelen bij lang indrukken van de afstandsbediening.

Inlezen van de afstandsbedieningen voor alleen volledige opening:

1. Richt de afstandsbediening op het doelwit dat op de beschermkap gegraveerd is.
2. Houd de in te lezen toets ingedrukt totdat de 

PROG

led langzaam knippert.

3. Laat de toets los, hij is nu ingelezen.

Inlezen van de afstandsbedieningen voor volledige of gedeeltelijke opening:

1. Richt de afstandsbediening op het doelwit dat op de beschermkap gegraveerd is.
2. Houd de in te lezen toets ingedrukt totdat de 

PROG

led langzaam knippert.

3. Laat de toets los.
4. Houd de in te lezen toets nog een keer ingedrukt (10 seconden) totdat de 

PROG

led langzaam knippert.

5. Laat de toets los, hij is nu ingelezen.

Herhaal dezelfde stappen voor alle in te lezen afstandsbedieningen.

Antes de poner en funcionamiento los ajustes, comprobar que los indicadores luminosos 

ON/OFF

PROG

estén encendidos y

que el indicador de 

Peligro

esté apagado.

2 modos de funcionamiento:

Apertura total sola

Apertura total sistemática de los dos batientes mediante pulsación corta o larga en el mando a distancia.

Apertura peatón o total

Apertura de solo 1 batiente para el acceso a los peatones mediante una pulsación corta en el mando a distancia.

Apertura total de los dos batientes mediante pulsación larga en el mando a distancia.

Memorización de los mandos a distancia en apertura total sola:

1. Colocar el mando a distancia sobre el objetivo grabado en la tapa.
2. Mantener apretada la tecla de memorización hasta que el indicador luminoso 

PROG

parpadee despacio.

3. Soltar la tecla y ya estará memorizada.

Memorización de mandos a distancia en apertura peatón o total:

1. Colocar el mando a distancia sobre el objetivo grabado en la tapa.
2. Mantener apretada la tecla de memorización hasta que el indicador luminoso 

PROG

parpadee despacio.

3. Soltar la tecla.
4. Pulsar de nuevo (antes de 10 segundos) la tecla que haya que memorizar hasta que el indicador luminoso 

PROG

parpadee

despacio.

5. Soltar la tecla y ya estará memorizada.

Seguir el mismo procedimiento con cualquiera de los mandos a distancia que haya que programar.

Содержание Axovia 170 SNS

Страница 1: ...170 SNS 1 216 125 V1 Notice d installation Installation guide Montagehandleiding Guia de instalacion...

Страница 2: ...nt en sluit Zorg ervoor dat de gevaarlijke zones omverwerpen afknijpen klemzetten tussen het aangedreven deel en de vaste aangrenzende onderdelen veroorzaakt door het openen van het aangedreven deel v...

Страница 3: ...en los dispositivos de mando y seguridad poner los telemandos fuera de su alcance 4 Porter des lunettes lors des phases de per age 4 Wear safety goggles when drilling 4 Draag een veiligheidsbril tijde...

Страница 4: ...1 Electronic box x 1 12 Cable connection x 1 1 het kniestuk x 2 2 bevestigingsplaat cilinder x 2 3 Schroeven ringen en moeren x 4 4 Cilinder x 2 5 Bevestigingsassen x 2 6 Schroef ontgrendelingselement...

Страница 5: ...500 W en 230 V 17 18 Netvoedingskabel 230V 1 2 Antenna 3 4 Input for Photocell contacts 3 5 Control for total opening 3 6 Control for pedestrian opening 3 7 Output powering the accessories 24Vdc 12Va...

Страница 6: ...cm et 4mm d paisseur pour la fixation des querres If one of the attachment holes of the pillar anchors lies in space or near the corner of a wall then the SOMFY support plate provided as an option mus...

Страница 7: ...ale opening van de hekvleugels maat B voor het bepalen van de verticale as voor het plaatsen van de knieplaat 1 op de pilaren de montage E of e van de plaat waarop de vijzel gemonteerd wordt Schrijf d...

Страница 8: ...l cilindro en el orificio m s cercano del gozne Mark the AM axis on the pillar while complying with the B size chosen Mark an AH horizontal axis in the middle of the reinforcement perpendicular to the...

Страница 9: ...af vleugel op de aanslagnok op de grond vijzel op de inwendige aanslagknok Boor de gaten en bevestig de knieplaat op twee plaatsen Het gat voor het derde bevestigingspunt wordt pas geboord wanneer de...

Страница 10: ...bornes 11 et 12 Le v rin M2 est toujours connect aux bornes 13 et 14 The M1 motor is installed on the gate pillar which opens first and closes last The cylinder M1 is always connected between termina...

Страница 11: ...tussen de contacten van minimaal 3 mm El operador debe contar con un sistema que permita su desconexion Es posible realizarlo a trav s de 2 sistemas norma cf EN 60335 1 Un cable con enchufe IP54 minim...

Страница 12: ...flashes slowly 5 Release the key it is memorised Repeat this procedure for all the remote controls to be programmed Controleer voordat u de instellingen uitvoert of de ON OFF en PROG leds branden en...

Страница 13: ...te herhalen De laatste inlezing wist de daarvoor ingelezen bedrijfsmodus Om een afstandsbediening om te zetten van volledige of gedeeltelijke opening naar alleen volledige opening hoeft u alleen maar...

Страница 14: ...ven per aanslag Draai de sleutel na het contact nog 3 slagen Plaats het tweede hekdeel en bevestig de tweede aanslag Sluit het hek volledig met behulp van de afstandsbediening Adjust the gate end stop...

Страница 15: ...it het hek Gedurende de opening of sluiting bij een druk op een toets van de afstandsbediening stopt het hek met openen of sluiten Door opnieuw te drukken gaat het hek in de tegengestelde richting Mem...

Страница 16: ...rica durante 5 segundos 4 Encender de nuevo la alimentaci n el ctrica 5 Efectuar una pulsaci n mantenido sobre la tecla Las hojas DEBEN salir en sentido de abertura Si lo hacen en sentido de cierre re...

Страница 17: ...s OFF Set a remote control at the target location Do a long press on the key to enable full opening for more than 5 seconds then release indicator AUTO blinks Initiate opening at a normal distance usi...

Страница 18: ...de afstandsbediening lang indrukken Nogmaals kort of lang indrukken stuurt een sluitcommando naar de vleugel Gedeeltelijke opening van het hek indien geprogrammeerd door kort indrukken van de toets v...

Страница 19: ...re Before connecting the cells remove the bridge located between terminals 3 and 4 Proper operation of the photocells must be checked every 6 months To do this hide a cell behind one of your hands whi...

Страница 20: ...V T1 C1 R1 V R3 T2 C2 R2 T3 C3 H P2 M P1 H E V 10 Accessoires Accessories Accessoires Accessorios Digicode Digicode Digicode Digicode Interphone Intercom Parlofoon Portero electr nico Contact cl Key...

Страница 21: ...amelpunt Let op in geval van een stroomonderbreking indien de noodaccu niet is opgeladen kunt u uw hek niet openen Bij spanningsuitval zonder batterij kan het hek niet van buitenaf geopend worden Aan...

Страница 22: ...s para 90 Detecci n autom tica del obst culo Conforme a la norma EN 12 453 Anexo A Temperatura de funcionamiento 15 C a 55 C Protecci n t rmica Si ndice de protecci n IP 55 para la electr nica IP 44 p...

Страница 23: ...ar la alimentaci n Verificar la alimentaci n del sector Verificar el cable de alimentaci n Verificar el fusible se queda encendido permanen temente Esta se al indica un defecto de las c lulas fotoel c...

Страница 24: ...tes modifications que nous jugerons utiles SOMFY SOMFY SAS capital 20 000 000 Euros RCS Bonneville 303 970 230 Wijzigingen voorbehouden SOMFY SOMFY SAS capital 20 000 000 Euros RCS Bonneville 303 970...

Отзывы: