background image

16

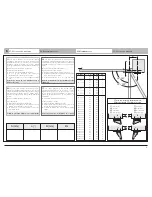
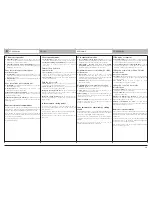
Vérification du fonctionnement

Checking the operation

Controleren of de programmering goed werkt

Comprobación del funcionamiento

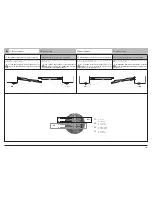
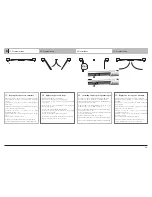
1. Effectuer un appui long sur la télécmmande.
2 Appuyer une deuxième fois sur la touche pour que les

2 vantaux s'arrêtent en milieu de course.

3. Couper l'alimentation du secteur 5 secondes.
4. Remettre l'alimentation du secteur.
5. Effectuer un appui long sur la télécommande.

Les vantaux DOIVENT partir dans le sens ouverture.

(Si les vantaux partent dans le sens fermeture, se référer au
câblage page 10).

1. Do a long press on the key
2. Push a second time on the button so that both leaves stop

at mid opening.

3. Cut off the mains supply 5 seconds.
4. Turn back on the mains supply.
5. Do a long press on the key

The leaves MUST start up in the opening direction.

(If the leaves start in the closing direction, refer to the wiring
page 10).

1. Druk de toets lang in.
2. Druk een tweede keer op de toets zodat de twee hekdeuren

midden in hun loop stoppen.

3. Sluit de voeding van het lichtnet 5 seconden af.
4. De voeding van het lichtnet weer aanzetten.
5. Druk de toets lang in.

De deuren MOETEN vertrekken in de openingsrichting

(Als de deuren in de sluitingsrichting vertrekken, zie bekabeling
blz. 10).

1. Efectuar una pulsación mantenido sobre la tecla
2. Pulsar de nuevo en la tecla para que las 2 hojas se

detengan en medio de su recorrido.

3. Cortar la alimentación eléctrica durante 5 segundos.
4. Encender de nuevo la alimentación eléctrica.
5. Efectuar una pulsación mantenido sobre la tecla

Las hojas DEBEN salir en sentido de abertura.

(Si lo hacen en sentido de cierre, referirse al cableado de la
página 10). 

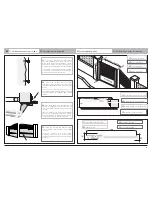
Validation du réglage

Validating your settings

Valideren van de instelling

Validación del ajuste

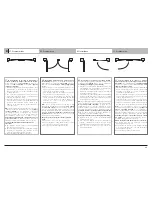
Après avoir réalisé un cycle complet sans encombre, sécuriser
le réglage mécanique en bloquant la patte vantail à l’aide du
3ème trou :

Tracer le point central et percez les vantaux au Ø 8.

Fixez l’équerre. 

Ré-installez le vérin.

Vérifier qu’à la fermeture, le portail ne se 
ré-ouvre pas.

After having carried out a complete cycle with no mishap,
securize the mechanical setting by blocking the leaf lug using
the 3rd hole :

Draw the central point. Drill the leaves to Ø 8.

Attach the angle plate. 

Re-install the cylinder.

Check that at closing the gate does not open
again.

Wanneer een volledige cyclus zonder problemen voltooid is,
moeten de mechanische instellingen vergrendeld worden door
de vleugelklauw te blokkeren met behulp van het derde gat:

Teken het middenpunt af en boor gaten van Ø 8 de vleugels.

Zet de knieplaat vast.

Installeer de vijzel opnieuw.

Controleer of het toegangshek na het sluiten niet
opengaat.

Tras haber realizado un ciclo completo sin problema, asegurar
el ajuste mecanico bloqueando la placa del batiente con la
ayuda del tercer agujero:

Trazar un punto central y perforar los batientes al diam. 8.

Fijar el soporte.

Re-instalar el motor.

Verificar que al cerrarse, el portón no se abra de
nuevo.

8

Programmation

Programming

Instellingen

Programación

Содержание Axovia 170 SNS

Страница 1: ...170 SNS 1 216 125 V1 Notice d installation Installation guide Montagehandleiding Guia de instalacion...

Страница 2: ...nt en sluit Zorg ervoor dat de gevaarlijke zones omverwerpen afknijpen klemzetten tussen het aangedreven deel en de vaste aangrenzende onderdelen veroorzaakt door het openen van het aangedreven deel v...

Страница 3: ...en los dispositivos de mando y seguridad poner los telemandos fuera de su alcance 4 Porter des lunettes lors des phases de per age 4 Wear safety goggles when drilling 4 Draag een veiligheidsbril tijde...

Страница 4: ...1 Electronic box x 1 12 Cable connection x 1 1 het kniestuk x 2 2 bevestigingsplaat cilinder x 2 3 Schroeven ringen en moeren x 4 4 Cilinder x 2 5 Bevestigingsassen x 2 6 Schroef ontgrendelingselement...

Страница 5: ...500 W en 230 V 17 18 Netvoedingskabel 230V 1 2 Antenna 3 4 Input for Photocell contacts 3 5 Control for total opening 3 6 Control for pedestrian opening 3 7 Output powering the accessories 24Vdc 12Va...

Страница 6: ...cm et 4mm d paisseur pour la fixation des querres If one of the attachment holes of the pillar anchors lies in space or near the corner of a wall then the SOMFY support plate provided as an option mus...

Страница 7: ...ale opening van de hekvleugels maat B voor het bepalen van de verticale as voor het plaatsen van de knieplaat 1 op de pilaren de montage E of e van de plaat waarop de vijzel gemonteerd wordt Schrijf d...

Страница 8: ...l cilindro en el orificio m s cercano del gozne Mark the AM axis on the pillar while complying with the B size chosen Mark an AH horizontal axis in the middle of the reinforcement perpendicular to the...

Страница 9: ...af vleugel op de aanslagnok op de grond vijzel op de inwendige aanslagknok Boor de gaten en bevestig de knieplaat op twee plaatsen Het gat voor het derde bevestigingspunt wordt pas geboord wanneer de...

Страница 10: ...bornes 11 et 12 Le v rin M2 est toujours connect aux bornes 13 et 14 The M1 motor is installed on the gate pillar which opens first and closes last The cylinder M1 is always connected between termina...

Страница 11: ...tussen de contacten van minimaal 3 mm El operador debe contar con un sistema que permita su desconexion Es posible realizarlo a trav s de 2 sistemas norma cf EN 60335 1 Un cable con enchufe IP54 minim...

Страница 12: ...flashes slowly 5 Release the key it is memorised Repeat this procedure for all the remote controls to be programmed Controleer voordat u de instellingen uitvoert of de ON OFF en PROG leds branden en...

Страница 13: ...te herhalen De laatste inlezing wist de daarvoor ingelezen bedrijfsmodus Om een afstandsbediening om te zetten van volledige of gedeeltelijke opening naar alleen volledige opening hoeft u alleen maar...

Страница 14: ...ven per aanslag Draai de sleutel na het contact nog 3 slagen Plaats het tweede hekdeel en bevestig de tweede aanslag Sluit het hek volledig met behulp van de afstandsbediening Adjust the gate end stop...

Страница 15: ...it het hek Gedurende de opening of sluiting bij een druk op een toets van de afstandsbediening stopt het hek met openen of sluiten Door opnieuw te drukken gaat het hek in de tegengestelde richting Mem...

Страница 16: ...rica durante 5 segundos 4 Encender de nuevo la alimentaci n el ctrica 5 Efectuar una pulsaci n mantenido sobre la tecla Las hojas DEBEN salir en sentido de abertura Si lo hacen en sentido de cierre re...

Страница 17: ...s OFF Set a remote control at the target location Do a long press on the key to enable full opening for more than 5 seconds then release indicator AUTO blinks Initiate opening at a normal distance usi...

Страница 18: ...de afstandsbediening lang indrukken Nogmaals kort of lang indrukken stuurt een sluitcommando naar de vleugel Gedeeltelijke opening van het hek indien geprogrammeerd door kort indrukken van de toets v...

Страница 19: ...re Before connecting the cells remove the bridge located between terminals 3 and 4 Proper operation of the photocells must be checked every 6 months To do this hide a cell behind one of your hands whi...

Страница 20: ...V T1 C1 R1 V R3 T2 C2 R2 T3 C3 H P2 M P1 H E V 10 Accessoires Accessories Accessoires Accessorios Digicode Digicode Digicode Digicode Interphone Intercom Parlofoon Portero electr nico Contact cl Key...

Страница 21: ...amelpunt Let op in geval van een stroomonderbreking indien de noodaccu niet is opgeladen kunt u uw hek niet openen Bij spanningsuitval zonder batterij kan het hek niet van buitenaf geopend worden Aan...

Страница 22: ...s para 90 Detecci n autom tica del obst culo Conforme a la norma EN 12 453 Anexo A Temperatura de funcionamiento 15 C a 55 C Protecci n t rmica Si ndice de protecci n IP 55 para la electr nica IP 44 p...

Страница 23: ...ar la alimentaci n Verificar la alimentaci n del sector Verificar el cable de alimentaci n Verificar el fusible se queda encendido permanen temente Esta se al indica un defecto de las c lulas fotoel c...

Страница 24: ...tes modifications que nous jugerons utiles SOMFY SOMFY SAS capital 20 000 000 Euros RCS Bonneville 303 970 230 Wijzigingen voorbehouden SOMFY SOMFY SAS capital 20 000 000 Euros RCS Bonneville 303 970...

Отзывы: