background image

WIRING DIAGRAMS 


47 


Manual del Operador Grupos Electrógenos Marinos 
Revisión 2. 10/2017 


Section 9 – Tightening Torques   


Important nuts and screws.


TIGHTENING VALUES 

85 GT/GTC – 100 GTA/GTAC – 115 GT/GTC – 120 GTA/GTAC 

N · m (kgf  · m) 

Cylinder head 

127.5 (13.0) 

Crankshaft pulley 

39.0 to 49.0 (4.0 to 5.0) 

Main bearing caps 

 49.0 (5.0) 

Connecting rod caps 

 29.5 (3.0) 

Flywheel:  

30-45 mm Bolts 
50-85 mm Bolts 


19.5 to 29.5 (2.0 to 3.0) 
29.5 to 39.0 (3.0 to 4.0) 

Oil pan drain plug 

49.0 (5.0) 

Oil filter 

14.7 (1.5) 

Heat exchanger drain 

plug 

22.5 (2.3) 

Nut for B + Terminal of 

starter 

10.8 (1.1) 

General tightening 

torque 

M6 
M8 

M10 
M12 

9.8 (1.0) 

24.5 (2.5) 
58.8 (6.0) 

98.0 (10.0) 

Содержание 100 GTA

Страница 1: ...U_GNBL_EN Rev 2 ...

Страница 2: ...INTRODUCCION 2 Operator s Manual Marine Diesel Gensets Revision 2 10 2017 ...

Страница 3: ...tions The images text and information contained in this manual are based on the product s features at the time of publication Solé Diesel reserves the right to modify this document without prior notice Abbreviations BTDC Before Top Dead Center ATDC After Top Dead Center BBDC Before Bottom Dead Center ABDC After Bottom Dead Center API American Petroleum Institute ACEA European Automobile Manufactur...

Страница 4: ...2 4 Storage of Packed and Unpacked Genset 18 Section 3 Installation 19 3 1 Angle of Installation 19 3 2 Genset installation 19 Section 4 Operation 20 4 1 Prestart Checklist 20 4 2 Genset Operation at Low Temperatures 20 4 3 Winterzation and Preservation 21 4 4 Maintenance during the storage 22 4 5 Restoration of Operational Conditions 22 Section 5 Systems and Scheduled Maintenance 23 5 1 Operating...

Страница 5: ... 34 MAINTENANCE TASK EXHAUST GAS NOISE AND VIBRATIONS INSPECTION 34 5 8 Electrical System 35 BATTERY 35 CIRCUIT PROTECTION 35 MAINTENANCE TASK STARTER MOTOR INSPECTION 35 MAINTENANCE TASK ALTERNATOR BELT TENSION INSPECTION 36 MAINTENANCE TASK BATTERY LEVEL 36 5 9 Alternator 36 MAINTENANCE TASK CONTROL OF WINDINGS AND ELECTRICAL INSULATION 36 MAINTENANCE TASK CONTROL OF BEARINGS 36 MAINTENANCE TASK...

Страница 6: ... installation operation and maintenance information that is safety related but not hazard related Servicing the fuel system and combustible materials A flash fire can cause severe injury or death Do not smoke or permit flames or sparks near the fuel injection system fuel line fuel filter fuel pump or other potential sources of spilled fuels or fuel vapours Never add fuel to the tank while the gens...

Страница 7: ...tigue inability to concentrate or speak clearly blurred vision Stomachache vomiting nausea Keep the area around the battery well ventilated While the genset is running or the battery is charging hydrogen gas is produced which can be easily ignited Never allow battery fluid battery contains sulfuric acid to come in contact with clothing skin or eyes Always wear safety gloves and protective clothing...

Страница 8: ... operator of the genset has to wear personal protective equipment such as gloves work shoes eye and hearing protection as required by the task 3 The area in which the operator is working has to be kept tidy and free of oil and other liquid spillages and solid waste metal chips etc Genset labels If the genset does not turn after several attempts to crank may cause water entering the genset In this ...

Страница 9: ... screens and covers before operating the genset Heavy material Genset is a heavy element use the right tools for transportation and handling Do not use the motor as a step Use it as a step can cause genset damage plus cause undesired operation Connection point of the battery cables to the genset Red cable positive and black cable negative Identification on the genset of the coolant fill cap See se...

Страница 10: ... firs end purchaser or user of the engine or generator ser In the event that the product is not immediately delivered to the end customer the warranty shall enter into force 6 months after the date of sale Any limited warranty period that has not elapsed can be transferred to the following purchaser s Unless authorised otherwise by Solé Diesel the warranty periods are applied according to the time...

Страница 11: ...ered to properly In case of implemented warranty supporting document of the revisions and maintenance service should be exhibited proving the requirements outlined in the manuals have been followed c Deterioration resulting from time of storage exceeding 6 months and or storage conditions that do not comply with the procedures described in the User and Maintenance Manuals d Deterioration resulting...

Страница 12: ...uring said services shall be at the expense of the purchaser The maintenance operations described in this manual shall be performed during the Warranty Contract Periods Limited and Extended Coverage by an AUTHORISED SOLÉ DIESEL DEALER Non compliance with this condition shall void the warranty in all its terms In such an event the materials oil filters etc and labour involved shall be at the expens...

Страница 13: ... or installation performed by a service not included in the Solé Diesel distribution network as well as the services performed Service Assistance For an updated list of our distribution network visit Dealers section in our web page www solediesel com Or request this information by contacting Solé Diesel at e mail info solediesel com Phone 34 93 775 14 00 ...

Страница 14: ...above the rocker cover The characteristics plate of genset it s located above the alternator case The characteristics plate of canopy genset it s located outside as shown in the following picture GENSET SERIAL NUMBER In addition all gensets are marked with the serial number on the block on the fuel injection pump The standard genset can operate at temperatures between 18 C and 45 C ...

Страница 15: ...5 GT GTC and 120 GTA GTAC 13 Admission manifold 14 Exhaust manifold 15 Turbocharger 16 Air filter only standard version 17 Se water pump 18 Coolant water pump 19 Heat exchanger 20 Expansion tank 21 Anode anti corrosion protection 22 Coolant drain plug engine 23 Coolant drain plug expansion tank 24 Coolant drain plug heat exchanger 25 Coolant filler cap 26 Starter motor 27 Alternator 24V 28 Alterna...

Страница 16: ...S MONTHS HOURS LIMITED WARRANTY COVERAGE PERIODS 12 2000 24 1000 EXTENDED COVERAGE PERIODS 24 1000 Extended coverage only recreational gensets is applied to the following components Genset block Cylinder head Crankshaft Camshaft Flywheel housing Timing gear housing Timing gear Connecting rod RESTRICTIONS Coverage a The warranty covers any failure of the product under normal operating conditions ca...

Страница 17: ...ely and forward photographic evidence of the damage After inspecting the goods if you notice damage write a reservation on the delivery note Have the carrier countersign the note and advise SOLÉ S A preferably by mail info solediesel com 2 2 Transporting and Handling the Packed Genset When lifting and transporting the genset use EXCLUSIVELY a forklift or bridge crane of appropriate load capacity w...

Страница 18: ...ged periods the client must check the possible conditions of conservation in relation to the place of storage If the genset is unused for prolonged periods and stored observe all the relative technical specifications The treatment of the genset for storage is guaranteed for 6 months after the time of delivery as specified in Section 1 3 or in the Warranty Manual If the user decides to start the ge...

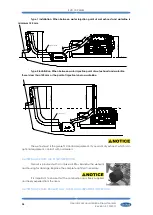
Страница 19: ... OUTLET 3 CONNECT SIPHON BREAKER if installed See 10 4 Genset Dimensions 4 CONNECT SEAWATER INLET See 10 4 Genset Dimensions 5 CONNECT FUEL INLET See 10 4 Genset Dimensions 6 CONNECT LEAK COOLANT OUTLET See 10 4 Genset Dimensions 7 FILL WITH OIL See 5 4 Lubrication System 8 FILL WITH COOLANT See 5 6 Cooling System 9 CHECK EACH PIPE CONNECTION for oil or coolant leaks 10 CONNECT TO EARTH See 5 5 Fu...

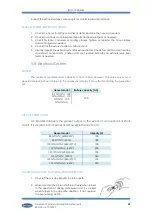
Страница 20: ...TING AREA Check for obstructions that could block the flow of admission air SEAWATER PUMP PRIMING Prime the seawater pump before initial startup To prime the pump Close the seacock Remove the hose from the seawater filter outlet Fill the hose and seawater pump with clean water Reconnect the hose to the water filter outlet Open the seacock Confirm seawater pump operation on startup as indicated by ...

Страница 21: ... boat is not going to be used for a long period of time or during the winter certain tasks must be carried out to keep it in perfect operating condition If there is no care the inside parts can oxidize and cause damage on the genset When the genset is stored steps indicated below have to been follow 1 Clean the outer surface of the genset 2 Bleed the seawater circuit by filling it with fresh water...

Страница 22: ...rk during 5 or 10 minutes without load as maintenance operation 4 5 Restoration of Operational Conditions When starting up the genset again after winter lay up certain operations must be performed Follow these steps 1 Fill the fuel tank with clean diesel The mixture of diesel oil and anti corrosion additive in tank for winter lay up can be used to operate the genset 2 Get the genset work during 5 ...

Страница 23: ...vent and dry them Use only the correct tools and instruments Use only good quality lubricating oils and greases Be sure to apply a coat of oil grease or sealant to parts as specified Use a torque wrench to tighten parts when specified tightening torques is required Replace all gaskets and packing Apply appropriate amount of adhesive or liquid gasket when required Increase the frequency of maintena...

Страница 24: ... I Compression pressure I Lubrication system Genset oil I C C C C Oil filter C C Fuel system Fuel level I Fuel tank CL E CL I Fuel filter C Water separator filter if applicable E C Injection pump I Injector I Intake system Air filter I C C I Turbocharger I Cooling system Coolant I C C Salt water circuit I CL Anode I C Water filter I CL CL Sea water cock I Salt water pump impeller I C I I CL Electr...

Страница 25: ...t 1 3 Tighten or loosen adjusting screw 2 to adjust valve clearance by checking thickness with thickness gauge 3 4 When you have adjusted the thickness tighten the rocker nut and recheck the thickness With piston nº 1 in the top dead centre of the compression cycle adjust the play of the intake and exhaust valves of cylinder nº 1 Proceed similarly as with the other cylinders The position of the BT...

Страница 26: ...stop solenoid connector the fuel supply shut off and crank the genset by means of the starter and read the compression pressure gauge indication when the genset is running at specified speed 4 If the compression pressure is lower than repair limit check the genset parts affected It is not a good practice to measure the compression pressure on only few cylinders and presume the compression on the r...

Страница 27: ...dversely affect the lubricating properties of the genset oil MAINTENANCE TASK OIL FILTER CHANGE The oil filter is located under inlet manifold of the genset Remove oil filter with a belt wrench When fitting a fresh oil filter smear a small quantity of oil into the annular seal and firmly tighten it with the hand When this operation is finished start the genset and check oil is not leaking PIECE EL...

Страница 28: ... of the quantity of oil used 3 With the engine inclined fill the oil circuit with the maximum oil quantity according to the previous amount Then extract the difference between the maximum and minimum quantity and mark the new minimum Do not operate the genset if the oil level is below the Min mark or above the Max mark MAINTENANCE TASK OIL FILL CHANGE Oil must be changed with hot genset so as to b...

Страница 29: ... if fuel pump sucks air when the fuel level is lower than pump suction it could break Whenever possible keep the fuel tank full The temperature changes may cause condensation of the damp air present in the tank and this water accumulates at the bottom It can cause an increase of corrosion or an impossibility of starting the genset if this water is aspired by the fuel pump MAINTENANCE TASK FUEL TAN...

Страница 30: ...ce a new fuel filter 5 Reconnect fuel pipes from the fuel filter 6 Open the fuel supply valve 7 Once finished with this operation start the genset and check for oil leaks Wash hands after any contact with diesel fuel MAINTENANCE TASK INJECTION PUMP INSPECTION The injection pump is adjusted at factory and should never be adjusted carelessly Such adjustment whenever is required shall be made by a SO...

Страница 31: ...water with an anti freezing agent is also suitable The anti freezing agent concentration according to operating conditions is specified in anti freezing agent package labels It is advisable select the anti freezing agent concentration based on a temperature approx 5ºC under the actual atmospheric temperature Other genset coolants may affect warranty coverage cause an internal build up of rust and ...

Страница 32: ...important to install a seawater filter supplied as accessory between seawater cock and the seawater pump to avoid that any impurity might clog the seawater circuit or seawater pump To clean this filter 1 Loose the cover top turning it 2 Remove the filtering component and clean it 3 Fit it again taking care that the cover is well seated on the o ring 4 Start the genset to check seawater leakages MA...

Страница 33: ...sh to remove the loose corrosion on the anticorrosion zinc anode 4 Clean the threaded hole of the heat exchanger and coat the threads of anticorrosion zinc anode Install the anticorrosion zinc anode into the heat exchanger 5 Close the coolant drain plug and open the seacock Refill the coolant circuit 6 Start the genset and check for leaks at the anticorrosion zinc anode location The pump is operat...

Страница 34: ...uipment If you want dry exhaust which is an optional equipment contact with our dealers MAINTENANCE TASK AIR FILTER INSPECTION Genset is provided with an intake air filter Examine the element and housing for damage Replace the complete air filter if necessary It is important to ensure that the combustion air is freely supplied and freely expelled from the area MAINTENANCE TASK EXHAUST GAS NOISE AN...

Страница 35: ...commended capacity is from 100Ah However this value serves as a general reference since it relates to the maximum intensity it can offer for starting the generator set CIRCUIT PROTECTION AC Breaker interrupts the genset output in the event of an overload or short circuit It is located in front panel as is showed in the section 10 MAINTENANCE TASK STARTER MOTOR INSPECTION 1 Check if there is any im...

Страница 36: ...ld therefore be carried out solely by qualified electrical and mechanical specialists Before any maintenance and cleaning work make sure that there are no live parts that the generator housing has cooled to ambient temperature that the genset cannot be accidentally started up and that all procedures are strictly observed MAINTENANCE TASK CONTROL OF WINDINGS AND ELECTRICAL INSULATION The condition ...

Страница 37: ...bad alignment of the components in the genset put the bearing under stresses that will reduce its lifespan MAINTENANCE TASK CLEANING AND LUBRICATION Any kind of cleaning work must be carried out with the genset shutdown and the mains power shut off for the risk of severe hazard for persons and objects Moreover prior to approaching or touching the alternator ensure that it is at room temperature Ma...

Страница 38: ...et proceed as follows Within the period of warranty Contact to Sole Diesel Official Service See Section 1 1 3 Genset Limited Warranty Outside the period of warranty Contact to Sole Diesel Official Service See Section 1 1 3 Genset Limited Warranty Stop the genset determine the cause and repair it before continuing driving the motor ...

Страница 39: ...at they have voltage Electronic board Check that goes voltage electronic board to micro relay ELECTRICAL SYSTEM GENSET Blown fuse Replace the controller fuse If the fuse blows again troubleshoot the controller 6 8 Battery discharged or dead Recharge or replace the battery 6 8 Battery connections loose corroded or incorrect Verify that the battery connections are correct clean and tight 6 8 Faulty ...

Страница 40: ...lty or clogged Check inlet of fuel pump 6 5 Fuel filter clogged Replace fuel filter 6 5 Air in fuel system Bleed fuel system 6 5 Injection pump incorrectly set Contact with our dealer Fuel outlet cock closed Open fuel outlet cock 6 5 COOLING SYSTEM Coolant level low Restore the coolant to normal operating level 6 6 PANEL SVT Key switch Check the pin connections Above all the pins that give signal ...

Страница 41: ...C Calibrate the voltage 5 9 Check the rpm s 5 9 Check the windings 5 9 NO LOAD VOLTAGE TOO HIGH ALTERNATOR AC Calibrate the voltage 5 9 Change the regulator 5 9 UNDER LOAD VOLTAGE BELOW NOMINAL ALTERNATOR AC Calibrate the voltage 5 9 Current too high cosφ very low speed below 4 of nominal 5 9 Change the regulator 5 9 Check the diodes unhooking the cables 5 9 UNDER LOAD VOLTAGE ABOVE NOMINAL ALTERN...

Страница 42: ...njection pump LUBRICATION SYSTEM Faulty oil pump Contact with our dealer Oil viscosity too high Check oil specifications oil used must be chosen according to Technical Specifications 6 4 Oil level too low Restore the oil level Inspect the genset for oil leaks 6 4 COOLING SYSTEM Faulty coolant pump Check coolant pump impeller pump sealing 6 6 Seawater cock clogged or restricted Clean the cock check...

Страница 43: ...ncorrect Adjust the valves 6 3 OIL PRESSURE TOO HIGH LUBRICATION SYSTEM Oil pressure relief valve sticking Contact with our dealer 6 4 Faulty oil pressure valve Contact with our dealer LOW POWER GENERAL Valve clearance incorrect Contact with our dealer 6 3 FUEL SYSTEM Fuel filter clogged Contact with our dealer 6 5 Fuel injectors dirty or faulty Contact with our dealer 6 5 Water in fuel system Con...

Страница 44: ... Thermostat blocked at open position Replace thermostat and check the coolant state BATTERY CHARGE DEFECTIVE ELECTRICAL SYSTEM DC Battery discharged or dead Recharge or replace the battery 6 8 Battery connections loose corroded or incorrect Verify that the battery connections are correct clean and tight 6 8 Governor inoperative Contact with our dealer Alternator belt tension Check belt tension and...

Страница 45: ... GTAC Starting system Electric starter Lubrication System System description Forced lubrication by gear pump Oil specifications Use oil with 15W40 viscosity and no less than ACEA E5 E3 or API CH 4 SJ quality Oil pump Gear type Oil circuit capacity l 11 Min oil pressure hot genset MPa 0 27 2 75 kgf cm2 Maximum permissible oil temperature ºC 130 Oil consumption as of fuel consumption 0 3 Fuel System...

Страница 46: ...tion Active stand by power kW 68 85 GT GTC 77 9 100 GTA GTAC 90 115 GT GTC 96 120 GTA GTAC Apparent stand by power kVA 85 85 GT GTC 97 3 100 GTA GTAC 112 4 115 GT GTC 120 120 GTA GTAC Voltage V 400 230 or 230 85 GT GTC 115 GT GTC 480 277 or 240 100 GTA GTAC 120 GTA GTAC Frequency Hz 50 85 GT GTC 115 GT GTC 60 100 GTA GTAC 120 GTA GTAC Current Υ Δ A 123 213 4 85 GT GTC 118 202 9 100 GTA GTAC 163 28...

Страница 47: ...gf m Cylinder head 127 5 13 0 Crankshaft pulley 39 0 to 49 0 4 0 to 5 0 Main bearing caps 49 0 5 0 Connecting rod caps 29 5 3 0 Flywheel 30 45 mm Bolts 50 85 mm Bolts 19 5 to 29 5 2 0 to 3 0 29 5 to 39 0 3 0 to 4 0 Oil pan drain plug 49 0 5 0 Oil filter 14 7 1 5 Heat exchanger drain plug 22 5 2 3 Nut for B Terminal of starter 10 8 1 1 General tightening torque M6 M8 M10 M12 9 8 1 0 24 5 2 5 58 8 6...

Страница 48: ...TIGHTENING TORQUES 48 Manual del Operador Grupos Electrógenos Marinos Revisión 2 10 2017 Section 10 Technical Appendices ...

Страница 49: ...ELECTRICAL DIAGRAMS 49 Manual del Operador Grupos Electrógenos Marinos Revisión 2 10 2017 10 1 Wiring diagrams ...

Страница 50: ...speed Input 24 VDC Pink 8 ECU power signal Power supply signal It has to be always active Input 24 VDC Yellow 9 5Vref Speed governor Engine speed control Regulation used to correct the genset speed in order to mantain 1500 rpm 50 Hz or 1800 rpm 60Hz Uin 0 5 4 5 VDC fg 7 Hz Ri 220 kΩ Uref 5 VDC 25 mV Imax 25 mA Input 5 0 VDC Blue 10 Voltage speed governor signal Input 0 5 4 5 VDC Brown 11 GND Speed...

Страница 51: ...of 24 VDC to PIN 7 of the ECU cabinet connector cranking signal This signal has to be maintained until the genset achieves 25 of nominal speed On top of that it has not exceeded 8 seconds of relay energizing If the genset does not start after 3 crank attempts take into account that over cranking can cause water ingestion So do not try to restart the genset and identify the crank fault cause STOP T...

Страница 52: ... 0 2 5V AVR común Pantalla Pantalla Pantalla Señal paro de emergencia U Batería Conexión control y monitorización Conector CPC Conexión herramienta diagnóstico Conector X22 Cranking relay Relé de arranque ECU power relay Relé alimentación ECU 5Vref Speed governor Voltage speed governor signal 0 5 4 5V GND Speed governor Screen Battery ISO K line ISO L line Battery GND CAN low CAN high reserve rese...

Страница 53: ...lampara de fallo Fault indicator lamp Lampara indicadora de fallo ECU CONNECTION EQUIPMENT PLUG CONECTOR EQUIPOS A ECU 25 23 14 10 2 12 8 6 20 18 16 5 3 24 22 11 1 13 9 7 21 19 17 15 4 FUSE 16 Amps 2 3 4 5 6 7 FUSE 10 Amps 1 White Blanco 10 11 12 reserva reserva Señal arranque Señal alimentación ECU GND Regulador velocidad Señal voltaje regulador velocidad 0 5 4 5V 5Vref Reguldor velocidad Batería...

Страница 54: ...en Pantalla 1 9 Purple Morado 20 Spare Libre 21 Spare Libre 22 Spare Libre 23 Spare Libre 24 Spare Libre COLOR N Ó I C P I R C S E D N O I T P I R C S E D m u N D Green Verde reserve reserva E Green White reserve reserva H Brown Marrón CAN high G w o l N A C l u z A e u l B L e n i l L O S I s i r G y e r G K White Blanco ISO K line A Red Rojo U Battery U Batería D N G o r g e N k c a l B B COLOR ...

Страница 55: ...TECHNICAL APPENDICES 55 Manual del Operador Grupos Electrógenos Marinos Revisión 2 10 2017 10 2 Alternator connections ...

Страница 56: ......

Страница 57: ...TECHNICAL APPENDICES 57 Manual del Operador Grupos Electrógenos Marinos Revisión 2 10 2017 10 3 Regulator connections ...

Страница 58: ......

Страница 59: ...TECHNICAL APPENDICES 59 Manual del Operador Grupos Electrógenos Marinos Revisión 2 10 2017 10 4 Overall dimensions ...

Страница 60: ... PRESENTACIÓN ACABADO Basto 0 2 0 5 0 8 SOLÉ S A 1 2 Medio 0 1 0 2 0 3 0 5 Fino 0 05 0 1 0 15 0 2 Grado de Precisión DIN 7168 0 a 6 6 a 30 30 a 100 100 a 300 Medidas Nominales mm 85 GT 100 GTA 115 GT 120 GTA XAVIER S UBACH MEDIO 29 05 2014 957 5 1750 1774 5 865 360 5 105 655 105 147 5 225 327 5 290 480 10x Ø17 mounting holes 280 851 5 B VIEW A Detail A Fuel Inlet Detail B Fuel Outlet Detail C Sea ...

Страница 61: ...USTOMER PANEL CONNECTION CUSTOMER LOAD LEAD ACCESS EQUIPMENT GROUND CONNECTION SEA WATER INLET Ø42 GENERATOR AIR INLET AC BREAKER Ø16 x10 MOUNTING HOLES FUEL OUTLET Ø12 1890 42 181 217 5 225 327 5 290 480 350 WET EXHAUST OUTLET Ø90 SIPHON BREAK CONNECTIONS AIR VENT SYSTEM OPTIONAL KIT SEA WATER OUTLET Ø42 ONLY DRY EXHAUST LEAKS COOLANT OUTLET Ø8 DRY EXHAUST ACCESS DRY EXHAUST OPTIONAL KIT 143 865 ...

Страница 62: ...ture sensor Measuring range 40ºC to 130ºC Warning 112ºC Shutdown 115ºC delay of 15 sec Alarm disappears when temperature decreases less than 108ºC Oil pressure sensor Measuring range 0 to 10 bar Shutdown 1 9 0 3 bar 1500 rpm 2 3 0 2 bar 1800 rpm Alarm disappears when the pressure increase 10 of the rated value for this rpm ...

Страница 63: ...reduced mode limp home whereby the fault indicator lamp is continuously lit or the engine is switched off whereby the fault indicator lamp flashes A lit fault indicator lamp indicates an error in the wiring short circuit cable break or a defect in the displays of the corresponding sensors A further source of faults could be falling below or exceeding the measuring value limits Faults in the electr...

Страница 64: ...ult indicator lamp are situated in the ECU cabinet Reading out a current fault memory blink codes The fault indicator lamp shows a fault e g it flashes or lights continuously The Diagnostic button is depressed for a time period of 1 s to 3 s The regulator recognizes the request for a read out and starts to display the faults The read out of the blink code is only possible after extinguishing of fa...

Страница 65: ...lt example fault number 01 speed sensor 1 After 2 s 1 long After 2 s 1 short After fault code output 5 s pause then display of flashing or continuous light Steps for reading out the next fault a The fault indicator lamp indicates a fault e g it flashes of lights continuously Press diagnostics buttons 1 to 3 the flashing or continuous light of the fault indicator lamp is extinguished b After 2 s re...

Страница 66: ......

Страница 67: ......

Страница 68: ......

Страница 69: ......

Страница 70: ......

Страница 71: ...en you decide to replace the genset please contact SOLÉ S A will provide relevant instructions regarding the laws in force at the time When disposing of the whole or parts of this genset meets LAWS IN FORCE IN THE COUNTRY OF INSTALLATION For more information about the materials they are made of the individual components of the generator contact SOLÉ S A ...

Страница 72: ...he engine boat moored º Has an exhaust collector been installed Has an air trap been installed Int Diameter of sea water intake to the pump mm Exhaus Cooling and Fuel Line Information Shaft diameter Shaft length mm Electrical installation connections Engine oil level Gearbox oil level Coolant level and concentration Control lever operation Transmissions belts and belt tension Verifications Prior t...

Страница 73: ...MAINTENANCE LOG 73 Manual del Operador Grupos Electrógenos Marinos Revisión 2 10 2017 Maintenance Log DATE HOURS DESCRIPTION SERVICE NAME ...

Страница 74: ...MAINTENANCE LOG 74 Manual del Operador Grupos Electrógenos Marinos Revisión 2 10 2017 Maintenance Log DATE HOURS DESCRIPTION SERVICE NAME ...

Страница 75: ......

Страница 76: ...MAINTENANCE LOG 75 Manual del Operador Grupos Electrógenos Marinos Revisión 2 10 2017 U_GNBL_EN Rev 2 ...

Отзывы: