background image

22

Instruction Manual / Betriebsanleitung / Livret d'Instructions / Manuale Istruzioni / Manual de instrucciones

FUTURA SERIES

3.

POWER SUPPLY INPUT

NETZANSCHLUß

LACAGE A'  RESEAU 

Before connecting the system to the net, check that the input  voltage (V) and work frequen-
cy (Hz) correspond to the values that are printed on the machine serial number sticker and
make sure that the main switch is on the “0” position.The electrical connection to the net can
be operated trough the equipped cable as follows:
- yellow-green cable to earth;
- Remaining 3 cables to the 3 phases.
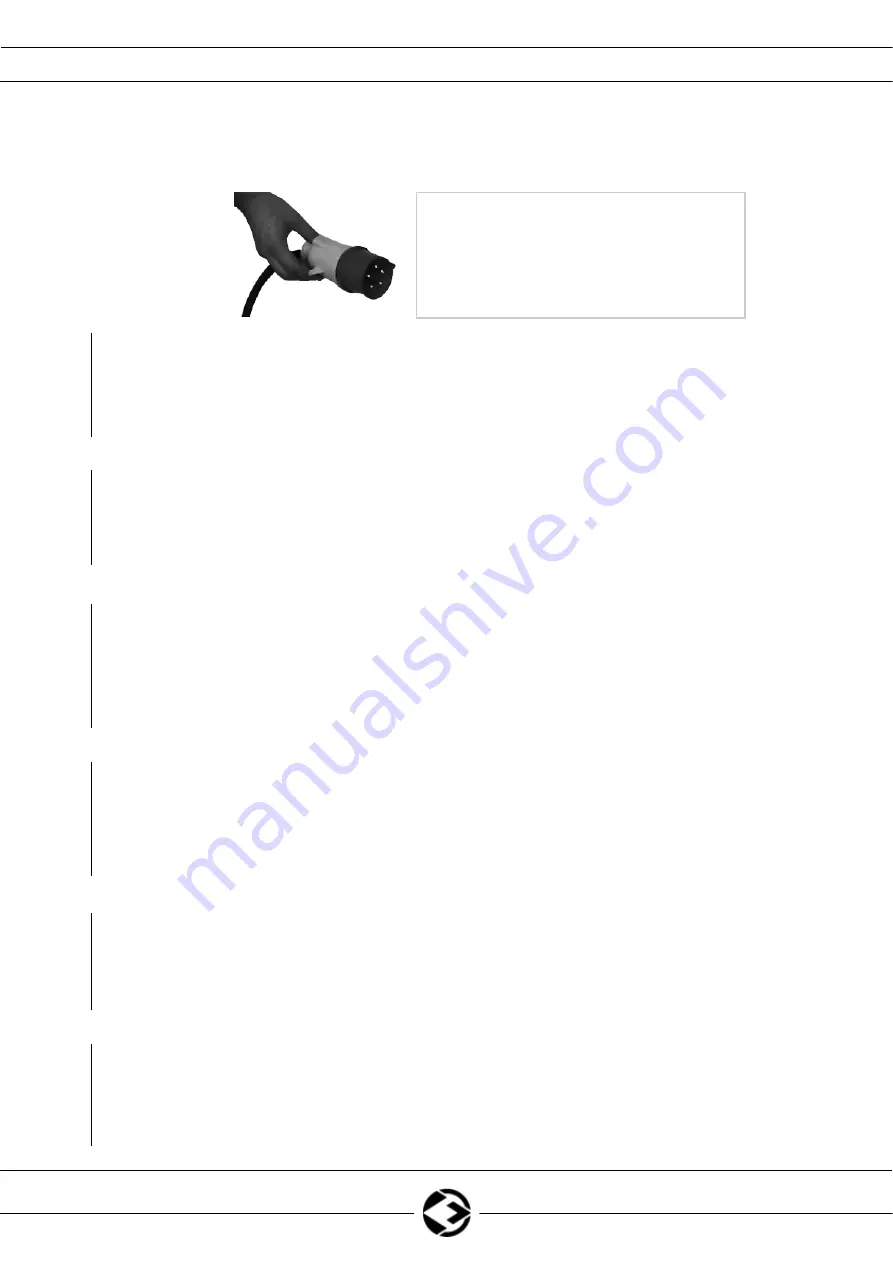
Connect to the input cable a certified plug with the correct capacity, predispose a net socket
with safety fuses or with an automatic safety switch OFF. Make sure that the earth cable is
securely connected to the earth conductor (YELLOW-GREEN) of the input net line.

Note:

if input cable extensions are needed, make sure to use the correct size, which does not

have to be smaller then the one that the machine is equipped with.

Stellen Sie vor dem Anschluss der Anlage an die Stromversorgung sicher, dass die  Netzspannung und
die Frequenz mit den Angaben auf dem Leistungsschild der Anlage übereinstimmen, und der
Hauptschalter auf der Position „0“ steht.
Der Netzanschluss kann mit beiliegenden Kabel erfolgen, indem:
- der gelb-grüne Leiter an die Erdanlage und die
- die restlichen Leiter mit dem Netz verbunden werden.
Verbinden Sie das Versorgungskabel mit einem genormten Stecker von entsprechender Leistung und
bereiten Sie eine Netzsteckdose vor, die mit Sicherheitsdrähten oder einem automatischem
Hauptschalter versehen ist.Vergewissern Sie sich, dass der Masseanschluss mit dem Masseleiter (GELB-
GRÜN) der Versorgungsleitung verbunden ist.

Hinweis:

eventuelle Verlängerungen des Versorgungskabels müssen einen angemessenen

Leiterquerschnitt aufweisen, keinesfalls darf der Leiterquerschnitt kleiner sein als der des 
beiliegenden Kabels.

Avant de relier l'installation à la ligne d'usage contrôler que la tension et la fréquence de réseau
correspondent  à celles reportées sur la plaque des donnés de l' installation et que l'inter-
rupteur soit sur la position "0". Le branchement au réseau peut être exécuté au moyen du câble
en dotation à l’installation en reliant:
- le conducteur jaune- vert à l’installation de terre;
- les restants conducteurs au réseau.
Relier au câble d'alimentation une épine normalisée de portée adéquate et prevoir une prise
de réseau douée de fusibles ou interrupteur automatique. S'assurer que le terminal de terre
soit relié au conducteur de terre (JAUNE-VERT) de la ligne d'alimentation.

Note:

eventuels prolonges du câble d'alimentation doivent être de section adaptée, dans aucun

cas inférieur à celle du câble en dotation.

GB

D

F

NOTE:

Only specialized electricians should make

this kind of operation.

ANMERKUNG:

Diese Arbeit muß von einem

Elektriker ausgeführt werden.

NOTE:

Faire realiser l'operation par un electri-

cien specialise'.

Содержание FUTURA 3500 C

Страница 1: ...g The present manual must be integrated by Operating ad service manual CE Diese Bedienungsanleitung muß durch die CE Betriebs und Wartungsanleitung ergänzt werden Ce livret doit être completé avec le Manuel d usage et entretien CE Il presente manuale deve essere integrato dal Manuale d uso e manutenzione CE El presente manual debe ser acompañado por el Manual de uso y mantenimiento CE Printed in d...

Страница 2: ...it in Wasserkühler verwenden Attention Pour le groupe réfrigérant utiliser exclusivement du liquide réfrigérant fourni par Sol Welding Attenzione Per il gruppo refrigerante utilizzare esclusiva mente liquido refrigerante fornito da Sol Welding Atencion En los grupos de refigeración utilize unicamente el refrigerante proveido por Sol Welding D F I E Wa r n i n g ...

Страница 3: ...NSTALACIóN MIG SPEED WIRE ADJUSTMENTS DRAHTVORSCHUBREGELUNG pag 29 RÉGULATION VITESSE DU FIL REGOLAZIONE DELLA VELOCITA FILO REGULACIÓN VELOCIDAD DEL HILO 2 4 TIMES TIMER SELECTION AUSWAHL 2 4 TAKT TIMER Betrieb pag 30 SÉLECTION 2 4 TEMPS TIMER SELEZIONE 2 4 TEMPI TIMER SELECCION 2 4 TIEMPOS TIMER TIMER ADJUSTMENTS TIMER EINSTELLUNG RÉGULATION TIMER pag 31 REGOLAZIONE TIMER REGULACIÓN TIMER BBT AD...

Страница 4: ...TURA 5500 S W ist geeignet für die Schweißverfahren MIG MAG bis 350 550 Amp Um in jeder Situation eine ausreichende Wasserkühlung zu gewährleisten sollte das Zwischenschlauchpaket nicht länger als 7 Meter sein Es sollte kein anderes Zubehör als das in dieser Betriebsanleitung envähnte eingesetzt wer den Sollten Sie Ihr SolWelding Schweißgerät unter den oben geschilderten Umständen betrieben wollen...

Страница 5: ...n es de 7 mt Toda aplicación diversa de las enumeradas puede comprometer la seguri dad del trabajo y la confiabilidad de la máquina Concecuentemente las mismas no estan permitidas E 1 USO CONSENTITO I generatori tipo FUTURA 3500 C FUTURA 4500 C FUTURA 3500 S FUTURA 4500 S W e FUTURA 5500 S W sono sviluppati per applicazioni Mig Mag con gamma 350 550 A Il fascio cavi di collegamento può esere lungo...

Страница 6: ...elt Vor jedem Wartungseingriff die Strozuführung von der Anlage trennen Den Generator regelmäßig prüfen Den Generator innen mit Druckluft mit niederem Druck und mit weichen Pinseln reinigen Elektrische Verbindungen und Anschlußkabel prüfen Für die Instandhaltung und den Gebrauch der Druckreduzierer die entsprechenden Anleitungen zu Hilfe nehmen D GB ENTRETIEN NORMAL Eviter q on accumule de la poud...

Страница 7: ...conexiones eléctricas de todos los cables Para realizar mantenimineto de reductores de presión consultar el manual del fabricante E MANUTENZIONE ORDINARIA Evitare che si accumuli polvere metallica all interno dell impianto Togliere alimentazione all impianto prima di ogni intervento Controlli periodici al generatore Efettuare la pulizia interna utilizzando l aria compressa a bassa pressione e penn...

Страница 8: ... Istruzioni Manual de instrucciones FUTURA SERIES 2 ADJUSTMENT DESCRIPTION EINSTELLEN DER SCHWEISSPARAMETER DESCRIPTION COMMANDES DESCRIZIONE COMANDI DESCRIPCIóN DE COMANDOS FUTURA C SERIES compact series 7 1 2 3 4 5 6 Fig 1 8 9 10 11 12 14 13 19 18 17 15 16 See page 16 ...

Страница 9: ...ual de instrucciones FUTURA SERIES 2 ADJUSTMENT DESCRIPTION EINSTELLEN DER SCHWEISSPARAMETER DESCRIPTION COMMANDES DESCRIZIONE COMANDI DESCRIPCIóN DE COMANDOS FUTURA S SERIES separated series 7 3 4 5 6 2 20 optional 9 12 21 13 23 14 Fig 2 22 20 optional on FUTURA 3500 S 8 See page 16 ...

Страница 10: ...ctions Manuale Istruzioni Manual de instrucciones FUTURA SERIES 2 ADJUSTMENT DESCRIPTION EINSTELLEN DER SCHWEISSPARAMETER DESCRIPTION COMMANDES DESCRIZIONE COMANDI DESCRIPCIóN DE COMANDOS TRAINO TR 21 Wire feeder 26 25 24 10 20 15 16 19 18 17 Fig 3 optional ...

Страница 11: ...regulation and 5 the fine voltage regulation POS 7 Front panel control board See page 16 POS 8 Protection motor fuse POS 9 Power Source Main Switch ON OFF POS 10 In let GAS connector POS 11 Power supply cooler unit connection plate POS 12 Power input cable POS 13 GAS tank position slot POS 14 Gas tank securing chain POS 15 Wire spool support POS 16 Wire guiding fitting POS 17 Wire feeding rolls PO...

Страница 12: ...g POS 9 Hauptschalter Schweißmaschine Ein Aus POS 10 Anschluss für den Gaseingang POS 11 Tür für Wasserkühlungsanschlüß POS 12 Versorgungskabel POS 13 Stellvorrichtung GASFLASCHE POS 14 Befestigungskette der Gasflasche POS 15 Drahtspulenhalterung POS 16 Drahteinlaufrohr POS 17 Vorschubrollen POS 18 Rollendruckhebel POS 19 Spanndrehknopf zur Regulierung des Anpressdrucks der Andruckrollen auf den D...

Страница 13: ...u de contrôle Voir Page 16 POS 8 Fusible de protection du moteur POS 9 Interrupteur principal générateur ALLUMÉ ÉTEINT POS 10 Raccord pour entrtrée GAZ POS 11 Portière pour la jonction de l unité de refroidissement POS 12 Câble d alimentation POS 13 Niche pour logement bouteille GAZ POS 14 Chaîne pour fixation bouteille POS 15 Niche porte bobine POS 16 Petit tuyau guide fil POS 17 Rouleaux d entra...

Страница 14: ...lo vedi pag 16 POS 8 Fusibile di protezione motore POS 9 Interruttore principale generatore ACCESO SPENTO POS 10 Raccordo per ingresso gas POS 11 Sportello per collegamento unità di raffreddamento POS 12 Cavo di alimentazione POS 13 Vano per alloggiamento bombola GAS POS 14 Catena per fissaggio bombola POS 15 Supporto porta bobina POS 16 Tubetto guidafilo POS 17 Rulli di trascinamento POS 18 Leve ...

Страница 15: ...a precedentemente POS 7 Panel de control Vea Pag 16 POS 8 Fusible de protección del motor POS 9 Interruptor principal generador ON OFF POS 10 Enlace para el ingreso de GAS POS 11 Portezuela por la conexión de la unidad de enfriamiento POS 12 Cable de alimentación POS 13 Espacio para la ubicación del tubo de GAS POS 14 Cadena para la instalación del tubo POS 15 Espacio porta bobina POS 16 Tubo guia...

Страница 16: ...oni Manual de instrucciones FUTURA SERIES 2 ADJUSTMENT DESCRIPTION EINSTELLEN DER SCHWEISSPARAMETER DESCRIPTION COMMANDES DESCRIZIONE COMANDI DESCRIPCIóN DE COMANDOS FRONT PANEL V SEC BBT SOFT START A m min 2T 4T CYCLE INCH TEST 27 28 29 30 33 31 32 34 35 36 37 38 39 40 41 Fig 4 ...

Страница 17: ... 34 POS 33 Push button to select BBT SOFT START TIMER POS 34 Push button for regulation BBT SOFT START TIMER POS 35 LED TIMER on POS 36 LED 4 times on POS 37 LED 2 time on POS 38 Test gas push button POS 39 Inch wire push button POS 40 Push button for selection 2T 4T TIMER cycle POS 41 WIRE SPEED regulation knob Alarms Machine is capable to reconise 2 different kind of alarms Over heating alarm wi...

Страница 18: ...ng Preset der TIMER Regelung bei Blinken der Leuchtdiode über den Tastern e 34 POS 33 Auswahltaster für BBT SOFT START TIMER POS 34 Taster für die Einstellung BBT SOFT START TIMER POS 35 LED Anzeige für TIMER eingeschaltet POS 36 LED Anzeige für 4 TAKTKREISLAUF eingeschaltet POS 37 LED Anzeige 2 TAKTKREISLAUF eingeschaltet POS 38 Gas Test Drucktaste POS 39 DRUCKTASTE zum Drahtvorschub POS 40 Auswa...

Страница 19: ... régler avec les boutons et 34 POS 33 Bouton pour sélection BBT SOFT START TIMER POS 34 Bouton pour régulation BBT SOFT START TIMER POS 35 VOYANT Indication de TIMER inséré POS 36 VOYANT indication CYCLE 4 TEMPS inséré POS 37 VOYANT indication CYCLE 2 TEMPS inséré POS 38 Bouton test gas POS 39 Bouton d avancement du fil POS 40 Bouton pour sélection cycle 2T 4T TIMER POS 41 Poignée de réglage VITES...

Страница 20: ...eggia regolare con pulsanti e 34 POS 33 Pulsante di selezione BBT SOFT START TIMER POS 34 Pulsanti di regolazione BBT SOFT START TIMER POS 35 LED TIMER inserito POS 36 LED ciclo 4 tempi inserito POS 37 LED ciclo 2 tempi inserito POS 38 Pulsante test gas POS 39 Pulsante avanzamento filo POS 40 Pulsante di selezione ciclo 2T 4T TIMER POS 41 Manopola regolazione VELOCITA FILO Allarmi La macchina è in...

Страница 21: ... 34 POS 33 Pulsador para seleccionar BBT SOFT START TIMER POS 34 Pulsador de regulación BBT SOFT START TIMER POS 35 LED Indicación de TIMER activo POS 36 LED Indicación CICLO 4 TIEMPOS activo POS 37 LED Indicación CICLO 2 TIEMPOS activo POS 38 Pulsador test gas POS 39 Pulsador avanze del hilo POS 40 Pulsador para seleccionar ciclo 2T 4T TIMER POS 41 Potencimetro de regulación VELOCIDAD del HILO Al...

Страница 22: ...erbunden werden Verbinden Sie das Versorgungskabel mit einem genormten Stecker von entsprechender Leistung und bereiten Sie eine Netzsteckdose vor die mit Sicherheitsdrähten oder einem automatischem Hauptschalter versehen ist Vergewissern Sie sich dass der Masseanschluss mit dem Masseleiter GELB GRÜN der Versorgungsleitung verbunden ist Hinweis eventuelle Verlängerungen des Versorgungskabels müsse...

Страница 23: ... eventuali prolunghe del cavo di alimentazione devono essere di sezione adeguata in nessun caso inferiore a quella del cavo in dotazione Antes de conectar la instalación a la linea de uso controlar que la tensión y la frecuencia de red correspondan a las reportadas en la patente de datos de la instalación y que el interruptor este en la posición 0 La conexión a la red puede ser ejecutada mediante ...

Страница 24: ...conexión F I D GB E Connect the workpiece to the machine Choose the inductance socket A or B on base of the welding to make Respectively Low currents or High currents Das Massekabel wird am Werkstück und an der Stromquelle angeschlossen Drossel A oder B nach Bedarf einstellen Jeweils niedriger oder hoher Strom Relier la piece a souder a la prise de puissance negative du generateur Choisir la prise...

Страница 25: ...tor general Connect the torch to the wire feeder With water cooled torch connect the tubes as in the picture Das MAG Schlauchpaket wird am Zentraladapter angeschlossen Mit Wassergekühltem brenner die Rohre wie in der abbildung angeben einführen Relier le chalumeau au dispositif d entraine ment du fil Avec torche refroid à eau jandre les tubes comme en figure Collegare la torcia al trainafilo Nel c...

Страница 26: ...dano al diametro del filo Inserire il filo nel tubetto Abbassare i rulli superiori fissarli creando la pressione necessaria Controlar que los rodillos sean adaptos para el diáme tro de hilo utilizado Introducir el hilo en el tubo Cerrar los rodillos superiores dandoles la presión ade cuada Feed the wire in the Gun through the inch wire push button Die INCH WIRE Taste drucken und den Draht für die ...

Страница 27: ...bombola al tubo gas ed aprire il regolatore Conectra el tubo de gas a la garrafa Abrir el regulador de gas Adjust the gas flow to the apropriate value 10 14 lt min Der Gasdurchfluß wird auf ca 10 14 Liter Minute eingestellt Regler le debit de gaz a la valeur appropriee 10 14 lt min Regolare il flusso di gas al valore appro priato 10 14 lt min Regular el caudal de gas 10 14 lt min F I D GB F I D GB...

Страница 28: ...enza di salda tura Mediante el conmutador seleccionar la potencia de la soldadura Fine adjustment of the welding power using this selector Mit dem Schalter die Feineinstellung der Schweißleistung vornehmen Avec le commutateur regler en fine facon la puissance du soudage Con il commutatore regolare in modo fine la potenza di saldatura Mediante el conmutador regular la potencia de la soldadura en mo...

Страница 29: ...20 m min 41 2 8 GB D F I E SPEED WIRE ADJUSTMENTS DRAHTVORSCHUBREGELUNG RÉGULATION VITESSE DU FIL REGOLAZIONE DELLA VELOCITA FILO REGULACIÓN VELOCIDAD DEL HILO V SEC BBT SOFT START A m min 2T 4T CYCLE INCH TEST During welding the display 27 and 29 show the real current and real voltage respectively These values are maintained also after the welding After 30 sec the digit instrument 27 will be back...

Страница 30: ...ennertasterkreislauf ausgewählt werden 2 TAKTBETRIEB LED Anzeige 37 eingeschaltet 4 TAKTBETRIEB LED Anzeige 36 eingeschaltet TIMER LED Anzeige 35 eingeschaltet Siehe Seite 31 A l aide du bouton poussoir 40 il est possible de choisir le cycle Bouton poussoir Torche 2 TEMPS VOYANT 37 allumé 4 TEMPS VOYANT 36 allumé TIMER VOYANT 35 allumé Voir page 31 Tramite il pulsante 40 è possibile scegliere il c...

Страница 31: ...e TIMER with the push buttons and 34 Die TIMER Zeit mit und Tasten 34 einstellen Régler le temps de TIMER avec les boutons et 34 Regolare il tempo di TIMER con i pulsanti e 34 Regular el tiempo de TIMER con los pulsadores y 34 34 3 2 GB D F I E TIMER ADJUSTMENTS TIMER EINSTELLUNG RÉGULATION TIMER REGOLAZIONE TIMER REGULACIÓN TIMER By setting the machine in timer mode it is possible to set a time o...

Страница 32: ...ck Time If the burning value is increased there is a burning impulse more energetic On the other hand if it is decreased the impulse is softer If at the end of the welding a drop is seen in the wire tip the BBT should be increased It s adjustable from 10 msec to 2 5 sec BBT ist der Brennwert Drahtrückbrandzeit Für den Tropfenabschuss muss dieser Wert durch einen starken Punktschweißimpuls erhöht w...

Страница 33: ...valore di SOFT START con i pulsanti e 34 Regular la valor de SOFT START con los pulsadores y 34 34 GB D F I E SOFT START ADJUSTMENTS SOFT START EINSTELLUNG RÉGULATION SOFT START REGOLAZIONE SOFT START REGULACIÓN SOFT START The SOFT START value is a pre set wire speed percent It allows to begin the welding with a lower wire speed and improves the arc striking It s adjustable from 5 to 100 of the wi...

Страница 34: ...al Thermal Thermal Thermal Thermal Regulation field Einstellbereich Range de régul Range di regolazione 35 350 35 450 35 350 35 450 35 550 Adjustment position Voltage Steps Schaltstufen Spannungsstufen Adjustment position Numero scatti 21 28 21 28 28 Steel welding wire diameter Stahl Schweißdraht Durchmesser Diamétre fil d acier Diametro filo continuo per mig ø 0 6 1 2 0 8 1 6 0 6 1 2 0 8 1 6 0 8 ...

Страница 35: ...5 S3 1 K221CO Commutator 7 pos 32A for Commutatore 7 pos 32A per FUTURA 4500 C 1 FUTURA 4500 C 1 6 S2 1 K198CO Commutator 3 pos 25A for Commutatore 3 pos 25A per FUTURA 3500 C 1 FUTURA 3500 C 1 6 S2 1 K220CO Commutator 4 pos 32A for Commutatore 4 pos 32A per FUTURA 4500 C 1 FUTURA 4500 C 1 7 1 D396MA Black knob D29 Manopola nera D29 7 1 D218CA Blue cap D29 Cappuccio blu D29 7 1 E654P 10K ohm poten...

Страница 36: ...Cooler unit opt plate Piastra per coll unità raffredd 14 X1 1 W054 Power supply cable Cavo alimentazione FUTURA 3500 C FUTURA 3500 C 14 X1 1 W212 Power supply cable Cavo alimentazione FUTURA 4500 C FUTURA 4500 C 15 1 C1260PL10S Blue panel of left Pannello blu sinistro 16 1 C1283BA01 Black base Basamento nero 17 1 C1263PL10S Blue right side lower panel Pannello blu inferiore destro 18 2 B043CE Plas...

Страница 37: ...TURA 4500 C 26 T1 1 M323TP Main transformer FUTURA 3500 C Trasf potenza FUTURA 3500 C 26 T1 1 M324TP Main transformer FUTURA 4500 C Trasf potenza FUTURA 4500 C 27 B1 1 K173PR Bridge rectifier FUTURA 3500 C Ponte raddr FUTURA 3500 C 27 B1 1 K199PR Bridge rectifier FUTURA 4500 C Ponte raddr FUTURA 4500 C 28 SHUNT 1 P244 Shunt assembly Assemblato shunt 29 2 D035RU D125 rotating wheel Ruota D125 girev...

Страница 38: ... CODE DESCRIPTION DESCRIZIONE 34 1 D057AS Spool holder dx Aspo portabobina dx 35 XL1 1 M196XL Power inductor Induttanza di potenza FUTURA 3500 C FUTURA 3500 C 35 XL1 1 M208XL Power inductor Induttanza di potenza FUTURA 4500 C FUTURA 4500 C 36 MOTOR 1 K330MT Drive motor complete assembly Assemblato motoriduttore See page 45 completo Vedi pag 45 Suggested spare parts Ricambi consigliati ...

Страница 39: ...309PR Dix Socket 70 mmq Presa Dix 70 mmq 3 1 C1282PF01 Black front panel Pannello frontale nero 4 S3 1 K197CO Commutator 7 pos 25A for Commutatore 7 pos 25A per FUTURA 3500 S 1 FUTURA 3500 S 1 4 S3 1 K221CO Commutator 7 pos 32A for Commutatore 7 pos 32A per FUTURA 4500 S W FUTURA 4500 S W FUTURA 5500 S W 1 FUTURA 5500 S W 1 5 S2 1 K198CO Commutator 3 pos 25A for Commutatore 3 pos 25A per FUTURA 35...

Страница 40: ...URA 4500 S W 5500 S W FUTURA 4500 S W 5500 S W 10 1 B166AT Blue water pressure socket Raccordo rapido femmina blu Only on 4500 S W 5500 S W Solo su 4500 S W 5500 S W 10 1 B165AT Red water pressure socket Raccordo rapido fem rosso Only on 4500 S W 5500 S W Solo su 4500 S W 5500 S W 11 1 C1260PL10S Blue panel of left Pannello blu sinistro 12 1 C1283BA01 Black base Basamento nero 13 1 C1285PP01 Black...

Страница 41: ...sf FUTURA 4500 S W Trasf pot FUTURA 4500 S W 22 T1 1 M327TP Main transf FUTURA 5500 S W Trasf pot FUTURA 5500 S W 23 B1 1 K173PR Bridge rectifier FUTURA 3500 S Ponte raddr FUTURA 3500 S 23 B1 1 K199PR Bridge rectifier FUTURA 4500 S W Ponte raddr FUTURA 4500 S W 23 B1 1 K015PR Bridge rectifier FUTURA 5500 S W Ponte raddr FUTURA 5500 S W 24 2 D035RU D125 rotating wheel Ruota D125 girevole 25 2 D255R...

Страница 42: ...za FUTURA 3500 S FUTURA 3500 S 28 XL1 1 M208XL Power inductor Induttanza di potenza FUTURA 4500 S W 5500 S W FUTURA 4500 S W 5500 S W Cooler Unit part optional on FUTURA 3500 S built in on FUTURA 4500 S W and FUTURA 5500 S W 29 1 P248 Radiator assembly Assemblato radiatore 30 1 D245SE Water tank Serbatoio plastica 31 WSH 1 K275FL Inhibit water switch Flussostato mancanza acqua 32 PUMP 1 K274EP Pum...

Страница 43: ... 1 D396MA Black knob D29 Manopola nera D29 8 1 D218CA Blue cap D29 Cappuccio blu D29 8 1 E654P 10K ohm potentiometer Potenziometro 10K ohm 9 P1 1 P240 Front panel assembly Premontato pannello frontale 9 PCB 1 1 S347 PCB Front panel PCB Scheda pannello frontale Mounted on P240 assembly Montata su premontato P240 9 6 K332PR Plastic extension H14mm for Prolunga in plastica H14 per push button Mounted...

Страница 44: ...K223EV Gas valve DC 24V Elettrovalvola DC 24V 14 1 C751ST Interconnecting cable holding Staffa fissaggio fascio cavi bracket 15 X9 1 R006PR Dix Socket 70 mmq Presa Dix 70 mmq 16 X10 1 J267SP 14 poles male receptacle Spina 14 poli da pannello 17 1 D057AS Spool holder dx Aspo portabobina dx 18 1 C1211BA01 Black base wire feeder Basamento nero trainafilo 19 MOTOR 1 K330MT Drive motor complete assembl...

Страница 45: ... WIRE FILO ANIMATO Groove type Tipo Gola D ameter Diametro 0 6 mm 0 8 mm 1 0 mm 1 2 mm 1 6 mm 0 8 mm 1 0 mm 1 2 mm 1 6 mm 1 0 mm 1 2 mm 1 4 mm 1 6 mm i Qty Qt 2 2 2 2 2 2 2 2 2 Code Codice V13911RU V13910RU V13912RU V13920RU V13930RU V13931RU V13940RU V13960RU V13970RU Description Descrizione STEEL ROLL 0 6 0 8 STEEL ROLL 0 8 1 0 STEEL ROLL 1 0 1 2 STEEL ROLL 1 2 1 6 ALUMINUM ROLL 0 8 1 0 ALUMINUM...

Страница 46: ...2 1 6 mm Rullo 1 2 1 6 mm 12 V14702VO 2 Fixing screw M4 Volantino M4 per fissaggio rulli 13 V14703RO 2 Shim ring Rondella di spessore 14 V14704AN 2 Snap ring Anello seger 15 V14705CH 2 Woodruff Key Chiavetta 16 V14706IN 2 Main gear No 4 Nylon Ingranaggio princ No 4 Nylon 17 V14707IN 1 Main gear No 3 Nylon Ingranaggio princ No 3 Nylon 18 V14708IN 1 Main gear No 2 Nylon Ingranaggio princ No 2 Nylon ...

Страница 47: ...URA 3500 C BINZEL RECEPTACLE X10 X11 TORCH SWITCH X12 9 13 17 SL2 TL3 21 23 28 25 27 MAX POS 6 POS 7 FUSES SOCKET FS2 X1 PE POWER SUPPLY COOLER OUTPUT UNIT 0V 230V 400V INHIBIT SWITCH F4 F3 F2 X15 WATER S1 MAIN SWITCH POS A POS B U2 14 16 18 13 15 17 TL3 MIN S2 2 8 10 12 7 9 11 SL2 S2 4 6 1 3 5 RL1 MT1MAIN CONTACTOR X5 FASTON T2 FAN 1 FRONT PANEL P1 ASSEMBLY CODE P240 PCB 1 1 MOTOR S347 PCB FRONT ...

Страница 48: ... BINZEL RECEPTACLE X10 X11 TORCH SWITCH X12 5 7 9 13 17 SL2 TL3 21 23 28 25 27 MAX POS 5 POS 6 POS 7 FUSES SOCKET FS2 X1 PE POWER SUPPLY COOLER OUTPUT UNIT 0V 230V 400V INHIBIT WATER SWITCH F4 F3 F2 X15 S1 MAIN SWITCH POS A POS B U2 TL3 MIN S2 18 20 22 24 17 19 21 23 SL2 S2 2 4 10 12 14 16 9 11 13 15 RL1 6 8 1 3 5 7 MT1MAIN CONTACTOR X5 FASTON T2 FAN 1 FRONT PANEL P1 ASSEMBLY CODE P240 PCB 1 1 MOT...

Страница 49: ... B A K G F E F D C N M L X11 H X12 X10 TO WIRE FEEDER 9 13 17 SL2 TL3 21 23 28 25 27 MAX POS 6 POS 7 FUTURA 3500 S ELECTRIC SCHEME X1 PE POWER SUPPLY KIT COOLER UNIT CODE V14410KI COOLER UNIT FAN 2 0V 230V 0V 400V PUMP FASTON X14 4 5 1 2 3 4 5 6 INHIBIT WATER SWITCH WSH S1 MAIN SWITCH 6 CODE V14550GE POS A POS B U2 14 16 18 13 15 17 TL3 MIN S2 2 8 10 12 7 9 11 SL2 S2 4 6 1 3 5 RL1 MT1MAIN CONTACTO...

Страница 50: ... F D C N M L X11 H G X12 X10 TO WIRE FEEDER 5 7 9 13 17 SL2 TL3 21 23 28 25 27 MAX POS 5 POS 6 POS 7 ELECTRIC SCHEME FUTURA 4500 S W X1 PE POWER SUPPLY KIT COOLER UNIT CODE V14410KI COOLER UNIT FAN 2 0V 230V 0V 400V PUMP FASTON X14 4 5 1 2 3 4 5 6 INHIBIT WATER SWITCH WSH S1 MAIN SWITCH 6 CODE V14570GE POS A POS B U2 TL3 MIN S2 18 20 22 24 17 19 21 23 SL2 S2 2 4 10 12 14 16 9 11 13 15 RL1 6 8 1 3 ...

Страница 51: ... F D C N M L X11 H G X12 X10 TO WIRE FEEDER 5 7 9 13 17 SL2 TL3 21 23 28 25 27 MAX POS 5 POS 6 POS 7 ELECTRIC SCHEME FUTURA 5500 S W X1 PE POWER SUPPLY KIT COOLER UNIT CODE V14410KI COOLER UNIT FAN 2 0V 230V 0V 400V PUMP FASTON X14 4 5 1 2 3 4 5 6 INHIBIT WATER SWITCH WSH S1 MAIN SWITCH 6 CODE V14580GE POS A POS B U2 TL3 MIN S2 18 20 22 24 17 19 21 23 SL2 S2 2 4 10 12 14 16 9 11 13 15 RL1 6 8 1 3 ...

Страница 52: ... P240 J1 X10 G H I J K N A B C D L E INTERCONNECTING CABLE RECEPTACLE X10 A B C D E F F F M 1 X4 J2 1 MOTOR 2 MOTOR 3 EVA 4 EVA 5 TORCH 6 TORCH 7 INPUT I REAL 8 GROUND J3 JP1 3 26VAC 4 0VAC MOT 5 42VAC MOT 1 N C 2 N C 3 N C 4 N C 5 COMAND 6 THERMAL 7 WATER 8 POWER 9 42VAC MOT 10 0VAC MOT 1 X6 X7 1 DOWN LOADING PROGRAMS CONNECTOR X5 TO MACHINE G H I J L K M N A MOTOR TEST MOTOR EVA GAS VALVE DC 24V...

Страница 53: ...NOTE ...

Страница 54: ...NOTE ...

Страница 55: ......

Страница 56: ...elding S r l Via Meucci 26 36030 Costabissara Tel 39 0444 290411 Vicenza Italy Fax 39 0444 557460 p i 02195260241 solwelding solwelding com www solwelding com Part code T1365M Printed in date 21 04 08 Rev 00 ...

Отзывы: