38
|
Quick Start Guide
|
39
3D Printing
3.3.1 Prepare the G-code File
1. Install the Software and Complete the Initial Setup
Download our software Snapmaker Luban at
https://snapmaker.com
and install it. Then connect to a Wi-Fi
network: Enter the Workspace
-> Connection -> Select
Wi-Fi
-> Click
-> Select your machine -> Click
Open
-> Tap
Yes
on the touchscreen.
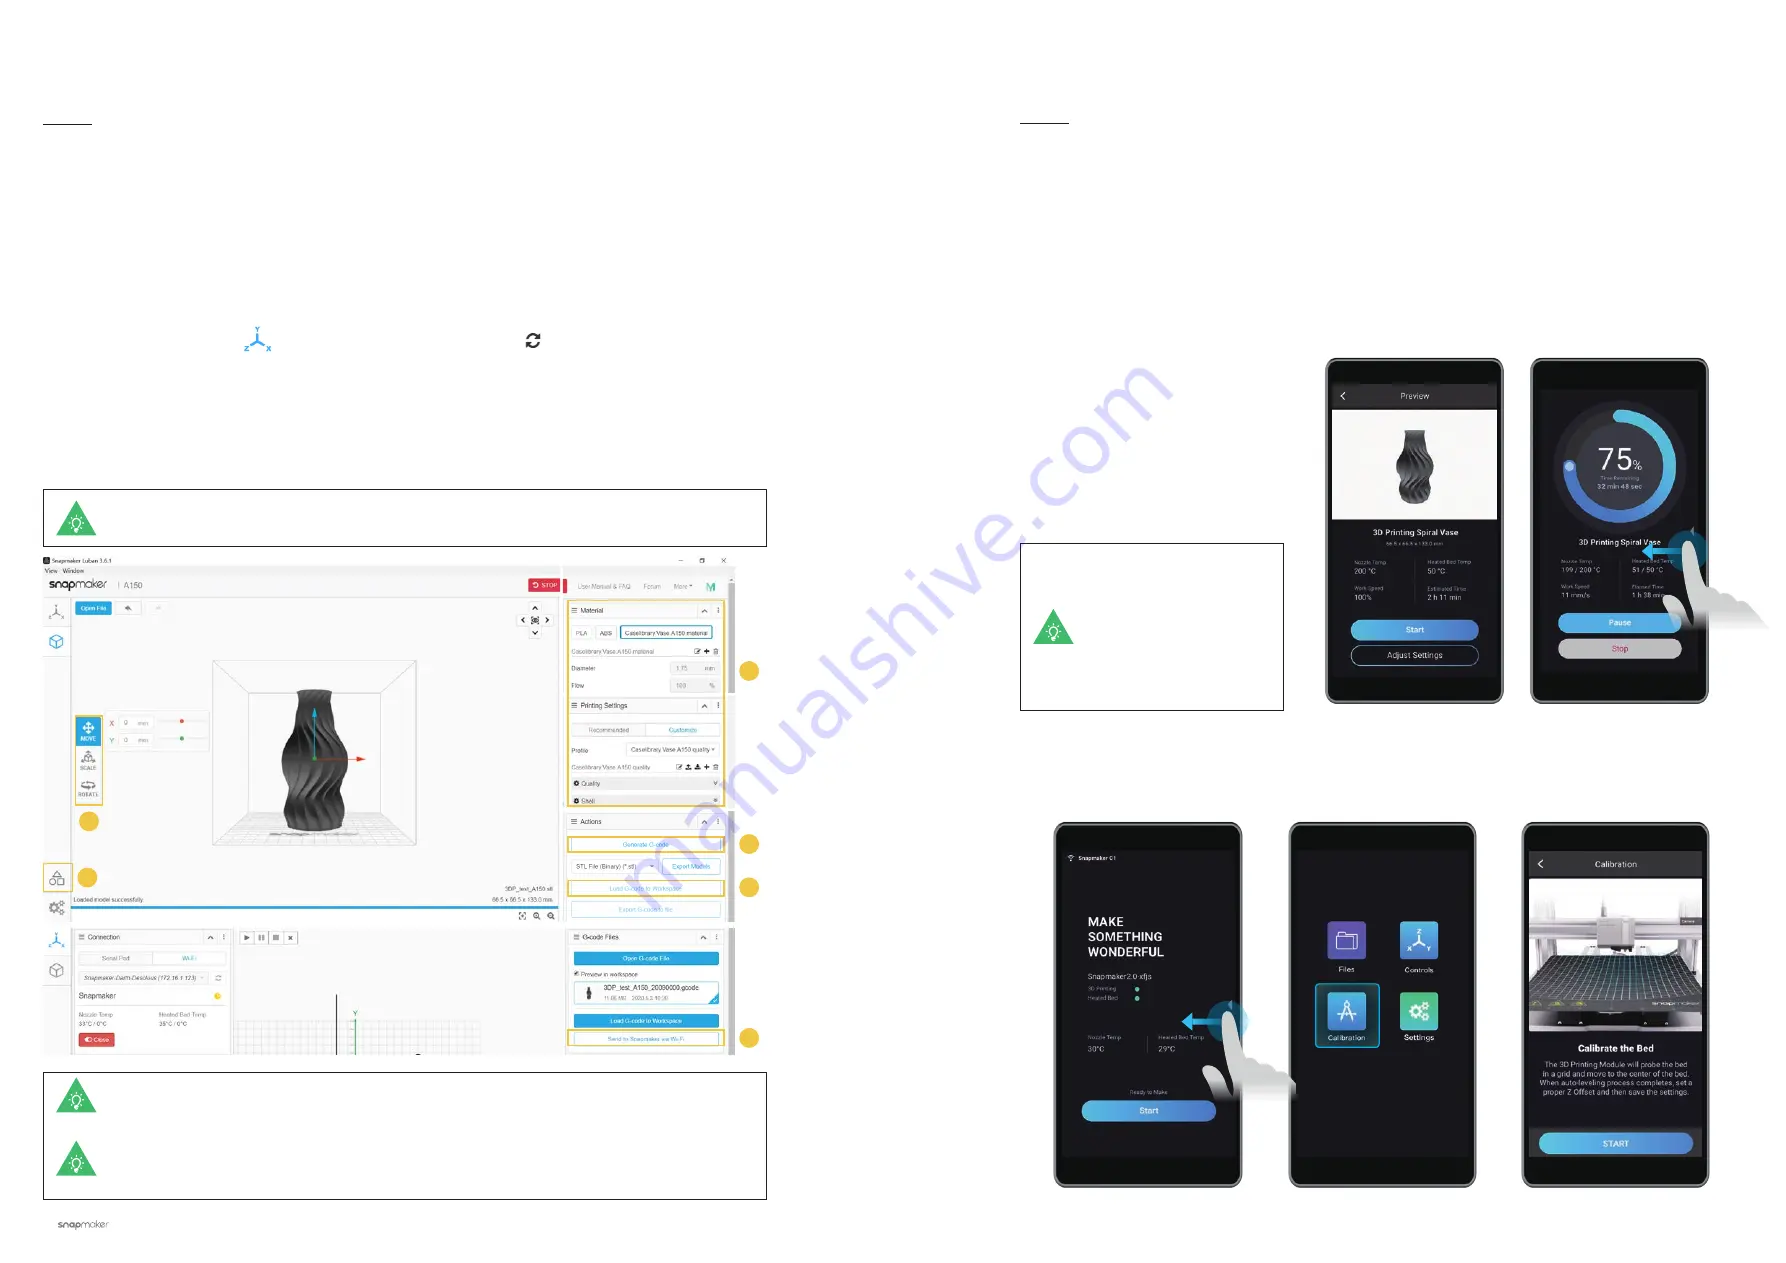
2. Generate the G-code File and Send It to the Machine
① Load the test file -> ② Use the default settings specifically configured for the test file -> ③ Generate the
G-code file -> ④ Load G-code to Workspace -> ⑤ Send G-code to the machine via Wi-Fi.
Guides & Pictures
/ Snapmaker
Files sent by Wi-Fi can be found on the touchscreen:
Files
>
Local
.
You can also send the G-code files to the machine via the USB disk. Click
Export G-code to file
in Snapmaker Luban and save it to the USB disk, then insert the USB disk into the controller and
select
Files
>
USB
on the touchscreen.
After receiving the G-code file, tap
Yes
and
Start
on the touchscreen to start
printing.
If you run into the issue of poor adhesion, swipe left on the printing progress screen and you can try adjusting
the Z Offset. Or you can try leveling the heated bed again by selecting
Calibration
. Make sure the tip of the
nozzle is clean before you calibrate the bed.
If you need to adjust
settings, you can either
tap
Adjust Settings
prior to printing or swipe
left on the printing
progress screen.
3.3.2 Start Your First Print
Guides & Pictures
/ Snapmaker
You can also upload your own files by clicking
Open File
and configure the file settings. For
more instructions, please refer to our online user manual.
2
2
3
4
5
1
Содержание A150
Страница 1: ......
Страница 10: ...12 Quick Start Guide 13 Machine Assembly MACHINE ASSEMBLY ...


