4-12
SMA America
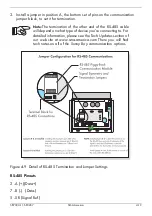
SB700U-11:SE3207
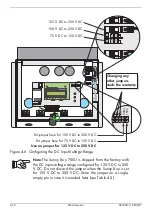
Figure 4-6 Configuring the DC Input-Voltage Range
Note:
The Sunny Boy 700U is shipped from the factory with
the DC input-voltage range configured for 125 V DC to 250
V DC. Do not discard the jumper when the Sunny Boy is set
for 125 V DC to 250 V DC. Store the jumper on a single,
empty pin in case it is needed later (see Table 4-2).
DC–
PE PE
L
N
2 3 5 7
DC+
S9 S7 S5 200V 150V
A
S2
A
B
B
S1
ı ˇ
ˇ
A
S2
A
B
B
S1
ENS1 ENS2 S15 S13 S11 S9 S7 S5 200V 150
V
125 V DC to 250 V DC
100 V DC to 200 V DC
75 V DC to 150 V DC
Put jumper here for 100 V DC to 200 V DC
Put jumper here for 75 V DC to 150 V DC
Use no jumper for 125 V DC to 250 V DC
Changing any
other jumpers
voids the warranty.
Содержание Sunny Boy SB 700U
Страница 1: ...Sunny Boy SB 700U Installation Guide Version 1 1 SB700U 11 SE3207 TBE SB07U...
Страница 2: ...ii SMA America SB700U 11 SE3207...
Страница 14: ...1 6 SMA America SB700U 11 SE3207...
Страница 16: ...2 2 SMA AmericaSB700U 11 SE3207...
Страница 21: ...SB700U 11 SE3207 SMA America 3 5 Wall Mounting Bracket Figure 3 3 Dimensions of the wall mounting bracket...
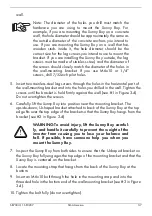
Страница 24: ...3 8 SMA America SB700U 11 SE3207 11 Verify that the Sunny Boy 700U is firmly mounted in place...
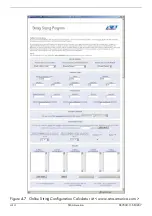
Страница 38: ...4 14 SMA America SB700U 11 SE3207 Figure 4 7 Online String Configuration Calculator at www sma america com...
Страница 46: ...4 22 SMA America SB700U 11 SE3207...
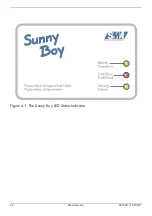
Страница 50: ...6 2 SMA America SB700U 11 SE3207 Figure 6 1 The Sunny Boy LED Status Indicator...
Страница 84: ...8 6 SMA America SB700U 11 SE3207...
Страница 85: ......


