24
TUTORBIT
COSMOGAS
4 - INSTALLATION
4.19 – Room sensor QMX3 model
The QMX3 room control is connected to TutorBit via the KNX
bus, which requires respect for polarity in the connections.
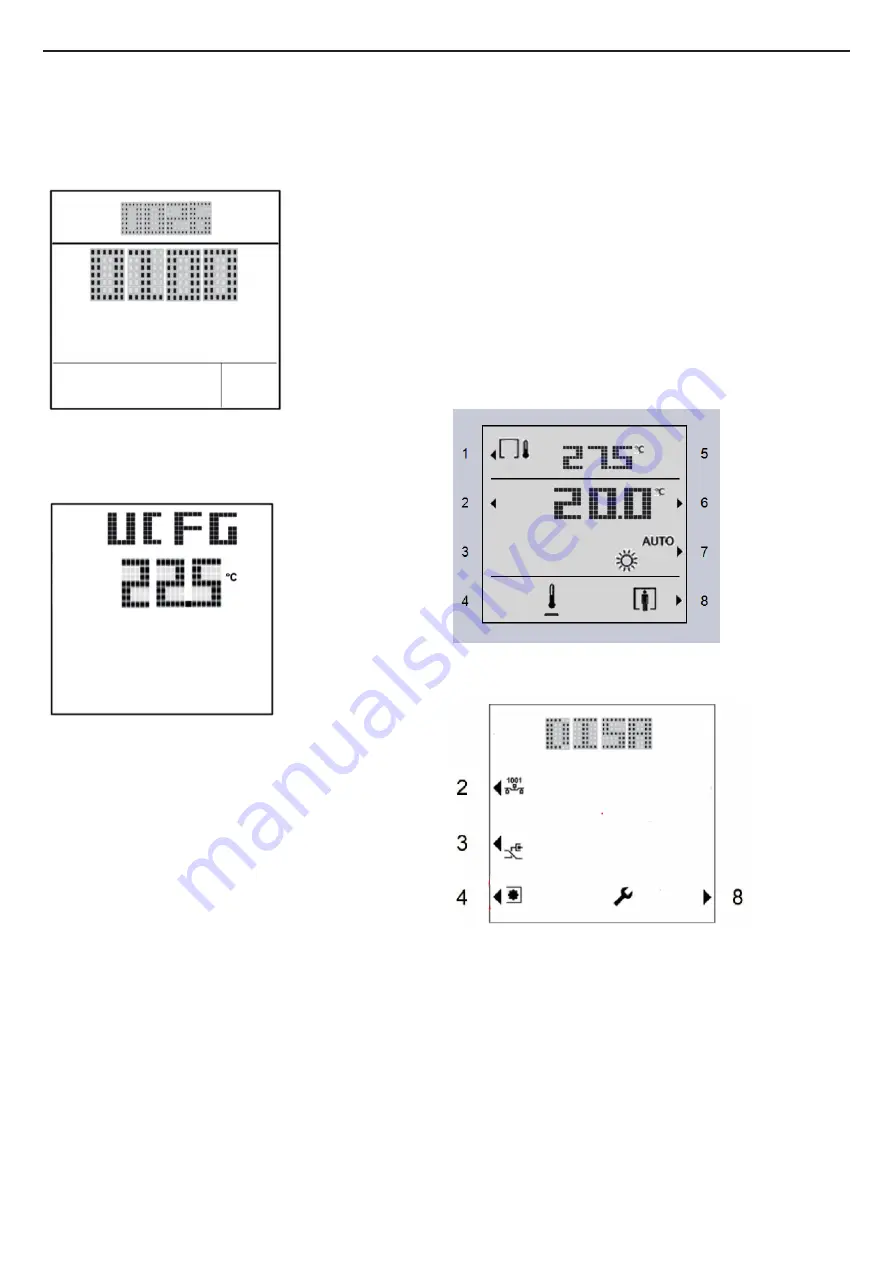
When QMX3 turns on, the build number and version number
of the device are displayed for 3 seconds:
UCFG” is then displayed for 102 seconds, which means that
the device has not yet been configured (Section 4.19.1).
4.19.1 - Programming QMX3
Connect QMX3 to TutorBit to terminals CE + and CE- and
choose which zone you want to combine in
Configuration ->
Zones -> Zone Mode
:
FixSp-RS
or
Outd Reset-RS
(mode
with room sensor).
Save the configuration with the command
Save & Reset
present in the menu
Zones
.
It will appear in the main TutorBit menu
Room Unit
Programming N
which will be used to program these units.
Proceed as follow:
1.- Set
Room Unit Programming -> Prog room unit n ->
Start programming = Yes
;
2.- Wait until
Room Unit State = Ok
;
3.- Repeat the procedure for how many room units there are;
4.- Go to
Configuration -> Zones ->SN Zone N
and write
the ID number of the QMX3 that you want to combine with
that heating zone (the ID number is shown on the front of
the QMX3).
Attention! These operations must be performed directly
with the Tutorbit and not via a pc.
Attention! When entering the QMX3 ID, the upper / lower
case letters are not recognized and at the end of the ID
always write with “h” and “#”.
5.- Once the ID is set, go to
Configuration -> Zones ->
Associate SN Circuit N = Yes
for how many zones are
there;
6.- Close with
Save/Reset.
If the configuration was successful, in
Configuration ->
Zones -> Room Unit N Association
will change from
Not
Performed
to
Performed
.
4.19.2 - How to disassociate QMX3 from a
zone:
To disassociate a room sensor , simply go to the menu
Configuration -> Zones -> Zone Mode
and choose a solution
that does not include the RS (Room Sensor).
4.19.3 - Restore the factory settings of
QMX3
From the QMX3 home page, press the top left (1) and bottom
right (8) keys simultaneously for at least 5 seconds.
The display will show the following screen:
Press the 4 key.
Содержание POL955
Страница 31: ...31 TUTORBIT COSMOGAS Figure 4 14 Electrical connection 4 INSTALLATION ...
Страница 33: ...33 TUTORBIT COSMOGAS Figure 4 16 Electrical connections 4 INSTALLATION ...
Страница 35: ...35 TUTORBIT COSMOGAS Figure 4 18 Electrical connections 4 INSTALLATION ...
Страница 37: ...37 TUTORBIT COSMOGAS Figure 4 20 Electrical connection 4 INSTALLATION ...
Страница 39: ...39 TUTORBIT COSMOGAS Figure 4 22 Electrical connection 4 INSTALLATION ...
Страница 41: ...41 TUTORBIT COSMOGAS Figure 4 24 Electrical connection 4 INSTALLATION ...
Страница 43: ...43 TUTORBIT COSMOGAS Figure 4 26 Electrical connection 4 INSTALLATION ...
Страница 45: ...45 TUTORBIT COSMOGAS Figure 4 28 Electrical connection 4 INSTALLATION ...
Страница 47: ...47 TUTORBIT COSMOGAS Figure 4 30 Electrical connection 4 INSTALLATION ...
Страница 49: ...49 TUTORBIT COSMOGAS Figure 4 32 Electrical connection 4 INSTALLATION ...
Страница 51: ...51 TUTORBIT COSMOGAS 4 INSTALLATION Figure 4 34 Electrical connection ...
Страница 53: ...53 TUTORBIT COSMOGAS 4 INSTALLATION Figure 4 36 Electrical connection ...
Страница 54: ...54 TUTORBIT COSMOGAS 4 INSTALLATION ...
Страница 57: ...57 TUTORBIT COSMOGAS Figure 4 38 Electrical connection 4 INSTALLATION ...
Страница 59: ...59 TUTORBIT COSMOGAS Figure 4 40 Electrical connection 4 INSTALLATION ...
Страница 61: ...61 TUTORBIT COSMOGAS Figure 4 42 Electrical connection 4 INSTALLATION ...
Страница 96: ...COSMOGAS s r l Via L da Vinci 16 47014 MELDOLA FC ITALY info cosmogas com www cosmogas com ...


