Operating Manual of FC18 Controller
Page: 37/70
19.
HOW TO SET WALK-TEST TIME
Function:
Controller being tested will restore to normal status automatically after
the preset walk-test time. Value range: 1-60 min.
Steps:
1.
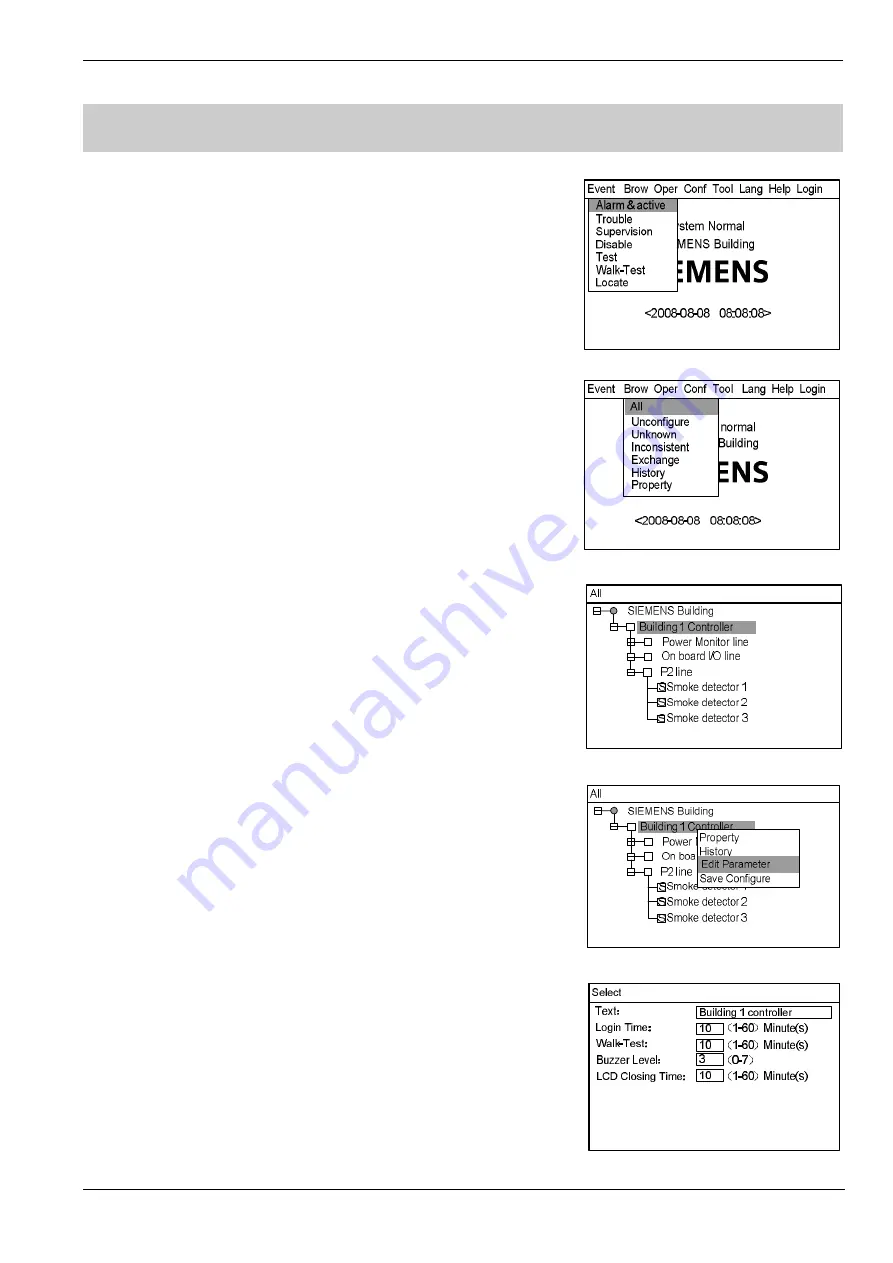
Press “Menu” to browse the main menu (Fig. 18-1).
Main menu displayed.
2.
Press “
→
” to select “Brow” submenu (Fig. 18-2). Select "All" and then press
“OK”. Now the tree diagram will be displayed in the window (Fig.18-3).
3.
Use "
↓
" / "
↑
" to select the controller you are looking for.
4.
Press “
→
” to pop out the shortcut menu (Fig.18-4). Use “
↓
” to select “Edit
Parameter” and press “OK” to enter the parameter editing interface
(Fig.18-5).
5.
Press "
↓
" to select "Walk-Test" window. Press "
←
" to delete the previous
number and enter a new one.
6.
After the change, press "Menu" and press "
↓
" to select "Confirm", then
press "OK" to save the change and quit. A dialog box will pop out to remind
you to save the change (Fig. 22-3). Press "OK" to save the change
permanently or press "C" to save the change temporarily. (The change will
be lost if the system is restarted.)
Select "Cancel" and press “OK” if you don't want to save the change.
Note: The saved change takes effect immediately.
The change can only be applied to the selected controller.
Fig.18-1
Fig.18-2
Fig.18-3
Fig.18-4
Fig.18-5


