D-3
© 2017 SeaStar Solutions
i7700 Installation Supplement, Rev. B
D.2 Updating Actuators and Control Head
Procedure
1.
Navigate to www.optimusdealers.com and download the latest
file updater package to the notebook computer’s Desktop.
2.
Double click on the updater to install the files on the computer.
3.
Navigate to the readme file at [Desktop\Optimus Firmware] and
check the readme file for any special instructions.
4.
Connect the notebook computer to the system and open Datalink
as outlined in section C.2.
5.
Double click on the component to be updated to enter the
configuration pages for that particular component.
Component
Update File
Actuators
SW0263Rev[ ].s19
Control Head
SW0262Rev[ ].s19
Table D-1. Update File Names.
6.
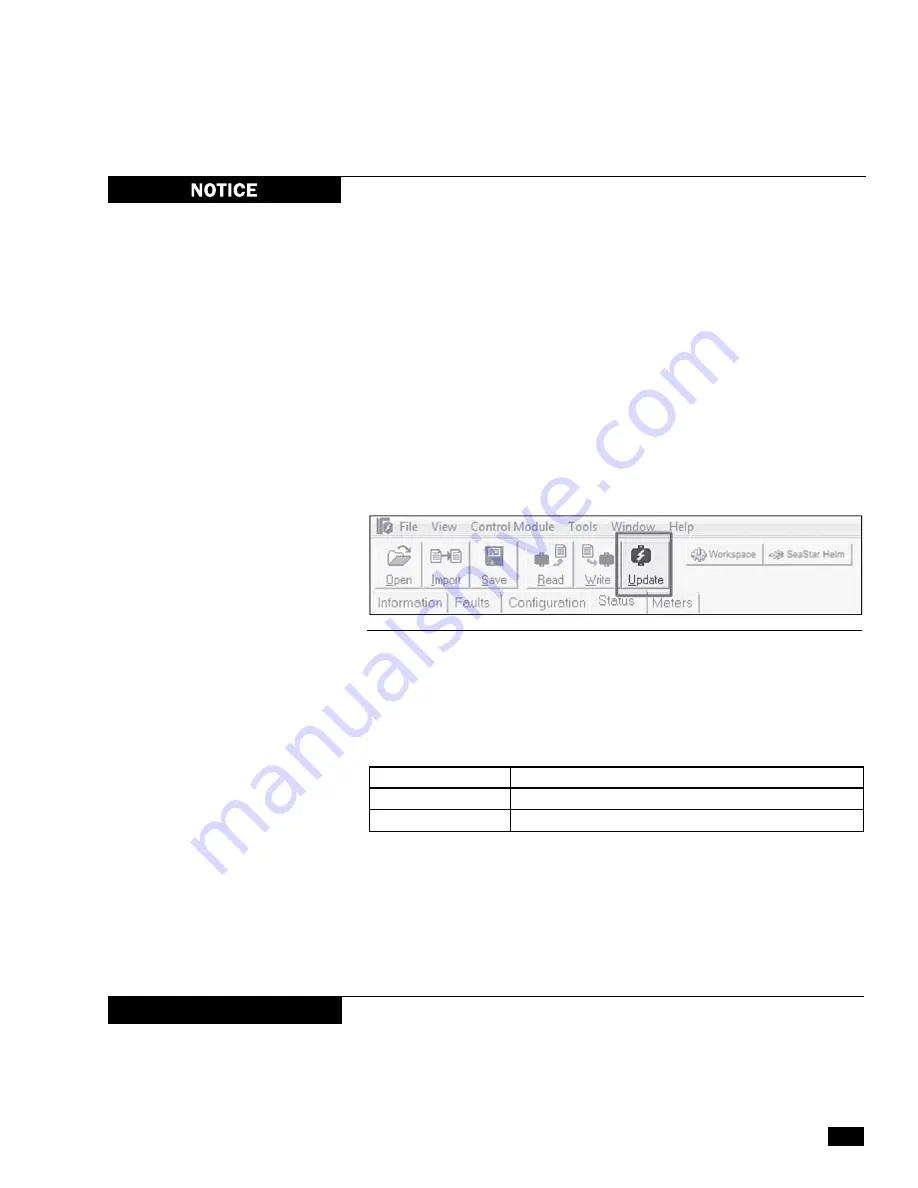
Select ‘Update’ on the top toolbar. Click box ‘select update file’
& navigate to the appropriate update file in [Desktop\Optimus
Firmware\Update Files]. Each update file will be located in a
folder with the component names (see figure D-1). See table D-1
for component and file name cross reference.
Figure D-3. Top Toolbar.
7.
Click ‘Open’ to begin the update process. A window will pop up
asking if you are sure that you want to update. Click ‘Yes’.
8.
Once the update is complete, a popup box states that the new
application was successfully loaded and to reset power to complete
operation. Click ‘OK’ to close the control module update box and
close Datalink.
NOTICE
Failure to close Datalink may result in some components not
updating properly. Always close all components and the Datalink
program after an update.
9.
Key off all ignition switches for 2 to 4 seconds to power down
the system.
Please contact SeaStar Solutions Technical Support before attempting
to update your system firmware. Not all new software releases will be
compatible with your system. These instructions are provided for your
information only, and assumes that you are updating your firmware
under guidance.
Содержание i7700
Страница 4: ...ii 2017 SeaStar Solutions i7700 Installation Supplement Rev B This page left intentionally blank...
Страница 10: ...1 4 2017 SeaStar Solutions i7700 Installation Supplement Rev B This page left intentionally blank...
Страница 32: ...6 2 2017 SeaStar Solutions i7700 Installation Supplement Rev B This page left intentionally blank...
Страница 34: ...7 2 2017 SeaStar Solutions i7700 Installation Supplement Rev B This page left intentionally blank...
Страница 38: ...A 4 2017 SeaStar Solutions i7700 Installation Supplement Rev B This page left intentionally blank...


