background image

Legal deposit :

National Library of Quebec

4

th

 trimester 1995

National Library of Canada

All rights reserved. No parts of this manual may be repro-
duced in any form without the prior written permission of
Bombardier Inc.

©

Bombardier Inc. 1995

Printed in Canada

®

*Registered trademarks of Bombardier Inc.

Loctite

®

 is a trademark of Corporation.

Snap-on

®

 is a trademark of Snap-on Tools Corporation.

Gelcote

®

 is a trademark of Gelcote International Limited.

Содержание Challenger 5896

Страница 1: ......

Страница 2: ......

Страница 3: ...219 100 044 0 0 0 1996 Shop Manual 0 R ...

Страница 4: ...this manual may be repro duced in any form without the prior written permission of Bombardier Inc Bombardier Inc 1995 Printed in Canada Registered trademarks of Bombardier Inc Loctite is a trademark of Corporation Snap on is a trademark of Snap on Tools Corporation Gelcote is a trademark of Gelcote International Limited ...

Страница 5: ...3 1 04 Bottom End 04 04 1 05 Rotary Valve 04 05 1 05 COOLING SYSTEM 00 Table of contents 05 00 1 01 Components 05 01 1 02 Circuit 05 02 1 06 FUEL SYSTEM 00 Table of contents 06 00 1 01 Fuel Circuit 06 01 1 02 Air Intake 06 02 1 03 Carburetors 06 03 1 07 LUBRIFICATION SYSTEM 00 Table of contents 07 00 1 01 Oil Injection Reservoir 07 01 1 02 Oil Injection Pump 07 02 1 08 ELECTRICAL 00 Table of conte...

Страница 6: ... 1 02 Reverse System 09 02 1 03 Variable Trim System VTS 09 03 1 10 STEERING SYSTEM 00 Table of contents 10 00 1 01 Steering System 10 01 1 02 Alignment 10 02 1 03 Throttle Shifter VTS Controller 10 03 1 11 HULL DECK 00 Table of contents 11 00 1 01 Components 11 01 1 02 Repair 11 02 1 03 Painting 11 03 1 12 TECHNICAL DATA 01 All Models 12 01 1 ...

Страница 7: ...g devices ex locking disk lock nut must be installed or replaced with new ones where specified If the efficiency of a locking device is impaired it must be renewed This manual emphasizes particular information denoted by the wording and symbols WARNING Identifies an instruction which if not followed could cause serious personal injury including possibility of death CAUTION Denotes an instruction w...

Страница 8: ...ull Identification Number H I N is located at right hand rear side of hull TYPICAL 1 Hull Identification H I N The 5 digits after ZZN are the boat serial number MODEL MODEL NUMBER SPORTSTER 5895 SPEEDSTER 5894 CHALLENGER 5896 Bombardier 1 min x 1000 0 2 1 3 4 5 6 7 8 Bombardier 1 min x 1000 0 2 1 3 4 5 6 7 8 60 45 15 0 30 Bombardier MPH km h Bombardier ON OFF WARNING XXXX MADE IN CANADA BOMBARDIER...

Страница 9: ...L The manual is divided into 12 major sections 01 SERVICE TOOLS AND PRODUCTS 02 MAINTENANCE 03 TROUBLESHOOTING 04 ENGINE 05 COOLING SYSTEM 06 FUEL SYSTEM 07 LUBRICATION SYSTEM 08 ELECTRICAL 09 PROPULSION AND DRIVE SYSTEMS 10 STEERING SYSTEM 11 HULL DECK 12 TECHNICAL DATA Each section is divided in various sub sections and again each sub section has one or more divi sion A table of contents is incl...

Страница 10: ...ated positions TYPICAL PAGE F04A04S Illustration number for publishing process CAUTION Pay attention to torque specifications Some of these are in lbf in instead of lbf ft Use appropriate torque wrench Sub section title indicates beginning of the sub section Dotted box contains parts of a particular model in this case the Sporster model or an exploded view Page numbering system 08 ELECTRICAL SYSTE...

Страница 11: ...ated positions TYPICAL PAGE F04A04S Illustration number for publishing process CAUTION Pay attention to torque specifications Some of these are in lbf in instead of lbf ft Use appropriate torque wrench Sub section title indicates beginning of the sub section Dotted box contains parts of a particular model in this case the Sporster model or an exploded view Page numbering system 08 ELECTRICAL SYSTE...

Страница 12: ...s refer to the specif ic model Parts Catalogs ILLUSTRATIONS AND PROCEDURES The illustrations show the typical construction of the different assemblies and in all cases may not reproduce the full detail or exact shape of the parts shown however they represent parts which have the same or a similar function CAUTION These boats are designed with parts dimensioned in both the metric and the imperial s...

Страница 13: ...egree wheel 1 P N 295 000 007 360 350 340 330 320 3 1 0 3 0 0 2 9 0 2 8 0 2 7 0 2 6 0 2 5 0 2 4 0 2 3 0 2 2 0 2 1 0 2 0 0 1 9 0 1 8 0 1 7 0 1 6 0 1 5 0 1 4 0 1 3 0 1 2 0 1 1 0 1 0 0 9 0 8 0 7 0 6 0 50 40 30 20 10 10 20 30 40 5 0 6 0 7 0 8 0 9 0 1 0 0 1 1 0 1 2 0 1 3 0 1 4 0 1 5 0 1 6 0 1 7 0 1 8 0 1 9 0 2 0 0 2 1 0 2 2 0 2 3 0 2 4 0 2 5 0 2 6 0 2 7 0 2 8 0 2 9 0 3 0 0 3 1 0 320 330 340 350 360 A00...

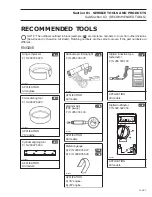
Страница 14: ...r P N 295 000 001 F01J0T4 APPLICATION All models ONOTE This tool is also used for the impeller Puller 562 P N 290 876 488 F01B0I4 APPLICATION All models A Alignment tool support P N 295 000 090 563 B Alignment shaft P N 295 000 093 571 F01L2R4 APPLICATION All models Piston pin puller 566 P N 295 000 092 1 2 3 Replacement parts 1 Locating sleeve P N 290 877 181 772 2 Expansion sleeve P N 290 877 04...

Страница 15: ...SERVICE TOOLS AND PRODUCTS Sub Section 01 MANDATORY TOOLS 01 01 3 Ring gear blocking tool 568 P N 295 000 134 F01B264 APPLICATION 787 engine Ring gear puller tool 569 P N 420 976 235 F01B294 APPLICATION 787 engine ...

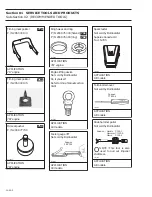
Страница 16: ...EMS Hose pincher 2 P N 295 000 076 A01B2I4 APPLICATION All models Gear holder 235 P N 290 277 905 A00C164 APPLICATION 717 engine Pliers 601 P N 295 000 070 F01D174 APPLICATION All models Pliers 606 P N 295 000 054 F01B1T4 APPLICATION All models ONOTE This tool is also used for the propulsion system ...

Страница 17: ...for the PTO flywheel Pliers 602 P N 295 000 069 F01D184 APPLICATION All models Impeller shaft holder 603 P N 295 000 082 F01B0W4 APPLICATION All models Bearing seal installer 604 P N 295 000 107 F01J4K4 APPLICATION All models Impeller shaft guide 605 P N 295 000 002 F01J1O4 APPLICATION All models Pliers 606 P N 295 000 054 F01B1T4 APPLICATION All models ONOTE This tool is also used for the fuel sy...

Страница 18: ...0 876 922 A01B1V4 APPLICATION 717 engine Cylinder aligning tool 220 P N 290 876 904 A00B084 APPLICATION All models Stroboscopic timing light 225 P N 295 000 078 A01B2K4 APPLICATION All models Dial indicator 230 TDC gauge P N 295 000 143 A00B2E4 APPLICATION All models Distance gauge A P N 290 876 827 561 B P N 290 876 828 760 F01B0H4 APPLICATION A 717 engine B 787 engine Digital induction type 237 ...

Страница 19: ...minal remover Not sold by Bombardier Snap on TT 600 4 F01B1J4 APPLICATION All models Slide hammer puller Not sold by Bombardier Snap on Handle CJ93 1 Hammer CJ125 6 Claws CJ93 4 ONOTE This tool is also used to pull out impeller shaft seal F01J0Z4 APPLICATION All models Ring halves and ring P N 290 876 330 halves 761 P N 290 876 480 ring 0 762 F01B2D4 APPLICATION 787 engine Engine lifting device No...

Страница 20: ...Four pin magneto 763 harness P N 295 000 131 B Six pin magneto 755 harness P N 295 000 136 F01B284 APPLICATION A 717 engine B 787 engine Exhaust outlet tool 831 P N 295 000 132 F01B2A4 APPLICATION Sportster and Speedster Gear bearing puller 765 P N 290 877 665 F04B034 APPLICATION 787 engine Rotary valve shaft 757 pusher P N 290 876 609 F01B2B4 APPLICATION 787 engine Handle 758 P N 290 877 650 A00C...

Страница 21: ... 50 40 30 20 10 F01B0X4 APPLICATION All models Pump gauge tester 827 fuel oil reservoirs P N 295 000 085 F01B0Y4 APPLICATION All models Screwdriver Not sold by Bombardier Snap on SDD 143 F01B1P4 APPLICATION All models Lighted adjustable mirror Not sold by Bombardier Snap on 50101 F01B1I4 APPLICATION All models Hose pincher 773 P N 529 030 400 F01B234 APPLICATION All engines ...

Страница 22: ... APPLICATION All models Bearing remover Not sold by Bombardier Do it yourself Refer to Shop Manual section 09 01 F01J114 APPLICATION All models Flexible spout oil 834 P N 414 8373 00 APPLICATION All models Fitting 828 P N 295 000 086 F01B0Z4 APPLICATION All models Slide hammer puller Not sold by Bombardier Snap on Handle CJ93 1 Hammer CJ125 6 Claws CJ93 4 ONOTE This tool is also used to remove rot...

Страница 23: ...to coil screws Impeller housing cover screws except for plastic pumps Venturi impeller housing screws Intake grate screws Engine support screws Impeller housing hull nuts Steering nozzle screws Reverse gate screws High strength 155 threadlocker P N 293 800 005 Loctite 271 red 10 mL LOCTITE LOCTITE LOCTITE 271 Adhesive Sealant A00B2U4 APPLICATION Impeller shaft thread High temperature 359 threadloc...

Страница 24: ...NG RTV Sealant 736 Heat Resistant Sealant A00B3U4 APPLICATION Tuned pipe Dielectric grease 350 P N 293 550 004 Dow Corning F01B164 APPLICATION Battery posts and cable con nectors Thermosensor switch Grease 924 P N 293 550 005 400 g A00B2L4 APPLICATION PTO flywheel Gasket stripper 935 N P 295 500 110 AVERTISSEMENT EXTRÊMEMENT INFLAMMABLE VAPEUR NOCIVE POISON DÉCAPANT À JOINT D ÉTANCHÉITÉ 295 000 11...

Страница 25: ...G341M or Esso Beacon 325 A00B1T4 APPLICATION Sliding surface of starter arma ture shaft splines Anti seize lubricant 362 P N 293 800 023 Loctite anti seize lubricant 12 oz 454 g F01B174 APPLICATION Crankshaft thread PTO flywheel Crankshaft bearing seat Spark plug threads Ignition housing cover screws Penetrating lubricant 913 P N 293 600 016 Bombardier Lube REMPLACE SEA DOO LUBE BOMBARDIER LUBE ou...

Страница 26: ...LES À LA PRESSION LORSQU UNE MEILLEURE ADHÉRENCE EST NÉCESSAIRE DANGER ÉVITER TOUT CONTACT PROLONGÉ AVEC LA PEAU LAVER À L EAU FROIDE EN CAS DE CONTACT UTILISER DANS UN ENDROIT BIEN AÉRÉ TENIR LE CONTENANT BIEN FERMÉ GARDEZ HORS DE LA PORTÉE DES ENFANTS CONTIENT DU TRICHLORETYLÈNE AVERTISSEMENT L INHALATION DE CE PRODUIT EST NOCIF N P 293 530 036 FABRIQUÉ AU F01B1Z4 APPLICATION Decals Sea Doo Clea...

Страница 27: ...lic parts only A White 926 P N 293 500 029 B Purple 930 P N 293 500 020 Sea Doo paint F01B0Q4 APPLICATION A Engine assembly B Tuned pipe and muffler Gun Kote 000 Not sold by Bombardier Kal Gard Coating Mfg Corp F000 000 000 APPLICATION Magneto and armature plate Gelcoat liquid 1 liter super white 943 P N 293 500 075 F000 000 000 APPLICATION All models Epoxy glue Not sold by Bombardier 3M 05900 F00...

Страница 28: ...ABLE OF CONTENTS 02 00 1 Section 02 MAINTENANCE TABLE OF CONTENTS PERIODIC INSPECTION CHART 02 01 1 FLUSHING AND CARE 02 02 1 FLUSHING 02 02 1 PROCEDURE 02 02 1 CARE 02 02 3 WATER FLOODED ENGINE 02 03 1 STORAGE 02 04 1 ...

Страница 29: ...nt including choke throttle cable adjustment and linkage Oil injection pump adjustment Fuel filter and oil filter inspection Fuel filter and oil filter replacement Engine head screws retorque Steering system Throttle shifter VTS controller inspection adjustment Reverse system reverse cable adjustment Fastener tightening flame arrester s carburator s engine s exhaust system s etc Muffler s battery ...

Страница 30: ...a well ventilated area Do not touch any electrical parts or jet pump area when engine is running 1 Clean jet pump by spraying water in its inlet and outlet and then spray a soapy solution WARNING Always remove safety lanyard cap from DESS post to prevent accidental engine starting before cleaning the jet pump area Engine must not be running for this operation 2 Open rear storage compartment and re...

Страница 31: ...opening the water tap Otherwise water will back flow through the tuned pipe into the engine and may cause damage to internal parts Open water tap immediately after engine is started to prevent overheating 5 Run the engine about 3 minutes at a fast idle around 3500 RPM CAUTION Never run engine longer than 5 minutes Drive line seal has no cooling when boat is out of water 6 Close the water tap then ...

Страница 32: ...s onto fittings or when troubleshooting for water intake in the bilge ar ea confirm that all hoses are properly secured to the fittings 6 Check monitoring beeper operation by jumping terminal of thermosensor wire to ground Beeper must operate At every verification of monitoring beeper always apply dielectric grease on thermosensor connec tor Verify wire terminal on connector for tightness If too l...

Страница 33: ... to replace spark plugs Do NOT in stall spark plugs on engine Crank engine s to drain crankcase CAUTION Be careful when cranking en gine s water will spray out from spark plug holes Spray BOMBARDIER LUBE lubricant P N 293 600 006 into spark plug holes Crank engine s again Reinstall spark plugs and spark plug cables then safety lanyard cap on DESS post Turn fuel valve s to ON position Start engine ...

Страница 34: ...Section 02 MAINTENANCE Sub Section 03 WATER FLOODED ENGINE 02 03 2 CAUTION Water must be supplied to cool engine s through the boat s flushing connector s ...

Страница 35: ...el stabilizer should be add ed prior engine lubrication to ensure car buretor protection against varnish deposit WARNING Fuel is flammable and explo sive under certain conditions Always work in a well ventilated area Do not smoke or allow open flames or sparks in the vicinity Al ways wipe off any fuel spillage from the boat Cooling System Flushing and Engine Internal Lubrication Cooling system has...

Страница 36: ... the engine a few turns to distribute the oil onto cylinder wall 8 Apply antiseize lubricant P N 293 550 001 on spark plug threads then reinstall them 9 Reinstall plug on air intake silencer cover CAUTION Do not run the engine during the storage period Propulsion System Lubricant in impeller shaft reservoir should be drained Reservoir should be cleaned and refilled with 90 mL 3 U S oz of BOMBARDIE...

Страница 37: ...boat must never be Ieft in water for storage Never leave the boat stored in direct sunlight UV radiation will dull finishes Make sure to turn OFF bilge pump and blower Anticorrosion Treatment Wipe off any residual water in the engine com partment Spray BOMBARDIER LUBE lubricant over all me tallic components in engine compartment Lubricate the throttle cable with BOMBARDIER LUBE lubricant Unscrew t...

Страница 38: ...antifreeze solution through the funnel Tie up all hoses higher than tuned pipe NOTE f hoses are not attached higher than tuned pipe coolant will drain out Sportster and Speedster TYPICAL 1 Hold hoses higher than tuned pipe 2 Flushing fitting Challenger Model TYPICAL 1 Hold hoses higher than tuned pipe 2 Flushing fitting The following steps should be performed to pro vide the boat enhanced protecti...

Страница 39: ... 08 05 Replace fuse Discharged battery Check recharge Ignition switch not turned ON or defec tive Check clean tighten Water fuel hydrolock Check refer to section 02 03 Starter or solenoid Check refer to section 08 07 Seized engine Check repair as needed Seized jet pump Check refer to section 09 01 Jammed pump Check clean out debris Engine slowly turns Discharged weak battery Check charge replace B...

Страница 40: ...Needle valve stuck open Check refer to section 06 03 Choke s not closing completely Adjust for complete closure Excessive rotary valve clearance Check refer to section 04 05 Internal engine damage Check refer to section 04 02 and04 04 Sheared flywheel key Check timing mark refer to section08 03 Incorrect rotary valve timing Check refer to section 04 05 No spark at spark plugs Grounded BLACK RED GR...

Страница 41: ...e carburetor Tighten carburetor s Rich fuel mixture Fouled spark plug Partially closed choke Check adjust choke cable Flame arrester dirty or restricted Check clean replace Carburetor adjustment or setting Check clean adjust refer to section 06 03 Main jet loose Check refer to section 06 03 Main jet O ring damage Check replace refer to section 06 03 Rotary valve shaft seal leaking Check replace re...

Страница 42: ...o far advanced Check reset Spark plug heat range too high Check change to correct range Engine temperature Engine overheating Check refer to section 02 03 and 05 01 or to engine overheat Poor quality fuel Use good quality fuel OTHER OBSERVATION POSSIBLE CAUSE REMEDY Weak spark Check replace refer to section08 03 Carburetion jetting too rich lean Check adjust refer to section06 03 Throttle does not...

Страница 43: ...oe air comes from inside the boat Check Reseal OR engine does not keep a steady top RPM assuming that engine is correct Retaining screws of intake grate air comes from inside the boat Check Reseal Other problem with jet pump related to performance Boat does not reach its top speed A wear ring with excessive clearance Check Replace A damaged or worn pump housing Check Replace A damaged impeller Che...

Страница 44: ...TION 04 02 4 ASSEMBLY 04 02 7 RAVE SYSTEM 04 02 12 SQUISH AREA 04 02 14 PTO FLYWHEEL AND MAGNETO 04 03 1 717 ENGINE 04 03 1 787 ENGINE 04 03 2 GENERAL 04 03 3 REMOVAL 04 03 3 CLEANING 04 03 8 INSTALLATION 04 03 8 BOTTOM END 04 04 1 717 ENGINE 04 04 1 787 ENGINE 04 04 6 CRANKSHAFT MISALIGNMENT AND DEFLECTION 04 04 3 GENERAL 04 04 4 DISASSEMBLY 04 04 4 CLEANING 04 04 6 INSPECTION 04 04 6 ASSEMBLY 04...

Страница 45: ...on F04D04S 10 10 N m 88 lbf in Loctite 242 25 N m 18 lbf ft 13 14 4 N m 35 lbf in 7 N m 62 lbf in 4 N m 35 lbf in Loctite 242 5 35 N m 26 lbf ft 12 25 N m 18 lbf ft Loctite 242 3 Loctite 242 6 25 N m 18 lbf ft 1 2 4 8 25 N m 18 lbf ft 12 25 N m 18 lbf ft Loctite 242 7 11 Loctite 242 9 25 N m 18 lbf ft 25 N m 18 lbf ft Loctite 242 14 30 N m 22 lbf ft 16 15 Sealant 732 14 ...

Страница 46: ...s illustration F04D05S 25 N m 18 lbf ft Loctite 242 25 N m 18 lbf ft 3 Loctite 242 2 4 25 N m 18 lbf ft Loctite 242 40 N m 30 lbf ft 7 Loctite 242 Loctite 648 9 Loctite 515 24 N m 17 lbf ft 8 25 N m 18 lbf ft 6 Loctite 242 3 25 N m 18 lbf ft 1 2 44 13 14 Sealant 736 10 N m 88 lbf ft 15 10 11 Sealant 732 4 N m 35 lbf in 4 N m 35 lbf in ...

Страница 47: ...IVE SYSTEMS 09 01 then re fer to Jet Pump Removal Electrical Connections WARNING Always disconnect starter or battery cables exactly in the specified or der BLACK negative cable first Electrolyte or fuel vapors can be present in the engine com partment and a spark might ignite them and possibly cause personal injuries It is recom mended to disconnect electrical connections prior to disconnecting f...

Страница 48: ... tools then using a chain block a hoist or other suitable equipment slowly lift engine 787 Engine Engine can be easily lifted by inserting a hook into exhaust manifold eyelet All Models Lift engine until oil pump supply line rotary valve oil lines supply and return are reachable Install a hose pincher on each line then disconnect Disconnect RED positive cable from starter post and ground cable whe...

Страница 49: ...ACK negative cable to wa ter injection hose TYPICAL 1 Bleed hose removed 2 Injection hose removed 3 Inlet hose removed Remove tuned pipe retaining screw from exhaust manifold side Remove tuned pipe mounting screws and nut from top of exhaust manifold NOTE Slightly lift tuned pipe to release nut as necessary Withdraw tuned pipe Disconnect drain hose on exhaust manifold fit ting Remove exhaust manif...

Страница 50: ...000 132 TUNED PIPE REPAIR All Models This procedure is given to repair tuned pipe cracks using T I G welding process Procedure Sand the cracked area to obtain bare metal Perform a 1 50 mm 1 16 in depth chamfer over crack Use pure argon gas with 5 55 mm 3 32 in tungsten electrode puretung green zirtung brown and AC current Use aluminum welding rod 5 55 mm 3 32 in no 4043 to fill crack Sand welding ...

Страница 51: ... off any spillage in bilge Clean with a bilge cleaner Discard all gaskets and O rings Clean external parts of engine INSTALLATION Installation of engine in jet boat is essentially the reverse of removal procedures However pay par ticular attention to the following 7 18 Exhaust Manifold and Screw Apply Loctite 242 blue on screw threads 717 engine Apply Loctite 515 on screw threads 787 engine Instal...

Страница 52: ...ctite 242 blue on stud and retaining screw threads Hand tighten nut and top screws only and assure that tuned pipe bushing s rests against manifold Use 8 mm flat washers P N 293 050 001 at tuned pipe flange instead of lock washers Refer to the following illustration for the torquing sequence TYPICAL Step Torque screws of tuned pipe to 12 N m 9 lbf ft Step Torque nut and screws of tuned pipe flange...

Страница 53: ...on threads then torque nuts in a criss cross se quence to 35 N m 26 lbf ft Electric Cables Oil Pump Rotary Valve Supply and Return Lines Make sure to reinstall lines and electric cables be fore completely lowering engine in bilge NOTE If fuel line ends are damaged cut damaged ends before reinstallation For fuel line clamping use special pliers P N 295 000 054 Engine Jet Pump Alignment Alignment is...

Страница 54: ...ly BOMBARDIER LUBE lubricant on its shaft and inside the housing to eliminate possible corrosion Electrical Connections Properly resecure electrical wires cables WARNING To prevent any possible spark that may occur at the battery termi nals while connecting the cables unscrew and disconnect the connector at the electrical box PRIOR TO CONNECTING THE BATTERY CA BLES 1 Electrical box connector After...

Страница 55: ...Section 04 ENGINE Sub Section 01 REMOVAL AND INSTALLATION 04 01 11 CAUTION Water must be supplied to cool engine s with a garden hose ...

Страница 56: ...24 N m 17 lbf ft on 717 engine Loctite 242 Synthetic grease 1 10 10 2 8 9 Loctite primer N Loctite 515 8 9 24 N m 17 lbf ft Loctite 242 4 5 3 6 5 4 6 7 40 N m 30 lbf ft on 787 engine 24 N m 17 lbf ft Loctite 242 12 717 type Synthetic grease 787 type Synthetic grease Synthetic grease Synthetic grease Synthetic grease Synthetic grease ...

Страница 57: ... intake silencer refer to ENGINE RE MOVAL AND INSTALLATION 04 01 then look for Air Intake Silencer Removal 1 2 Cylinder Head Cover and Cylinder Head Remove cylinder head cover If shells sand salt or any other particles are present in cylinder head clean with a vacuum cleaner Remove cylinder head If shells sand salt water or any other particles are present in cylinder cooling jacket clean with a va...

Страница 58: ...crew in extracting nut P N 290 877 155 with the movable extracting ring towards spindle PISTON PIN PULLER PÞ ÞN 290 000 105 1 Locating sleeve P N 290 877 181 2 Expansion sleeve P N 290 877 041 3 Extractor sleeve 4 Extractor spindle 5 Extracting nut P N 290 877 155 Firmly hold puller and rotate handle to pull pis ton pin 1 Circlip at this side not to be removed 2 Grease expansion sleeve By turning ...

Страница 59: ...for corrosion damage Inspect piston for damage Light scratches can be sanded with a fine sand paper Inspect plane surfaces for warpage Small defor mation can be corrected by grinding surface with a fine sand paper Install sand paper on a surface plate and rub part against oiled sand paper The inspection of engine top end should include the following measurements NOTE Replacement cylinder sleeves a...

Страница 60: ...ter in piston pin axis direction then perpendicularly 90 to it If the difference be tween readings exceed specification cylinder should be rebored and honed or replaced 1 Measuring in piston pin axis 2 Measuring perpendicularly 90 to piston pin axis A 16 mm 5 8 in Piston Cylinder Clearance Clearance can be quickly checked with a long feel er gauge Insert feeler gauge in cylinder then slide piston ...

Страница 61: ...ctangular ring which is bottom ring 1 Feeler gauge 2 Rectangular ring bottom Ring End Gap Position ring halfway between exhaust port and top of cylinder NOTE þIn order to correctly position ring in cylinder use piston as a pusher Using a feeler gauge check ring end gap If gap exceeds specified tolerance rings should be re placed 1 Top of cylinder 2 Ring end gap 12 Cylinder Base Gasket Five thickne...

Страница 62: ...ller P N 290 877 092 proceed as fol lowsþ Replacement bearings are held in place by a lo cating sleeve outside and 2 plastic cage halves inside Push needle bearing together with inner halves out of the locating sleeve into the connecting rod bore Use any suitable 23 mm 905 in diameter pusher as a tool Make sure thrust washers are present each side of needles 1 Pusher Insert piston pin into piston ...

Страница 63: ...boreþ outer plastic ring will release rollers 1 Outer ring removal after inner sleeve insertion into bore Make sure thrust washers are present each side of rollers 1 Thrust washer each side Insert piston pin into piston until it comes flush with inward edge of piston hub 1 Piston pin flush here 2 Thrust washers Place piston over connecting rod and align bores then gently tap piston pin with a fibe...

Страница 64: ...installation replace if circlip rotates after installation To easily insert circlip into piston use circlip in staller P N 290 877 016 1 Circlip installer Remove pusher from tool then insert circlip into its bore Reinstall pusher into tool and push until circlip comes in end of tool Position end of tool against piston pin opening Firmly hold piston against tool and push tool pusher to insert circl...

Страница 65: ...align ring end gap with piston locat ing pin Slide tool over rings 1 Ring end gap aligned with piston locating pin Install cylinder gasket and slide cylinder over pis ton When reassembling cylinders to crankcase it is important to have them properly aligned so that exhaust flanges properly match up with exhaust manifold Use aligning tool P N 290 876 902 or exhaust manifold itself F01D35A 1 4 1 4 3...

Страница 66: ... 2 10 Cylinder Head and O ring Apply Loctite 515 Gasket Eliminator P N 293 800 007 in cylinder sleeve O ring groove Make sure to install O rings around spark plug holes and cylinder head O ring where shown 1 O ring 1 11 Cylinder Head Cover and Screw Apply synthetic grease P N 293 550 010 below screw head Install cover over cylinder head Apply Loctite 242 blue on screw threads Torque cylinder head ...

Страница 67: ...engine speeds if the time the ex haust port is open is shortened Bombardier Rotax has patented a remarkably sim ple system to automatically change the exhaust port height based on pressure in the exhaust sys tem Located above the exhaust port is a guillotine type slide valve This rectangular valve is connect ed by a shaft to a diaphragm which is working against the return spring Two small passages...

Страница 68: ...o be instanta neous at item 7 Gradual application of the throttle however will result in the RAVE valve opening much later If the RAVE valve opens too late the engine will bog or hesitate momentarily as the RPM increas es Full peak performance item 6 is still available From a functional point of view It is better to have the valve open a bit early than a bit late Maintenance There are no wear part...

Страница 69: ... is within the specified tolerance 1 Squish gap If the squish gap is increased a loss in power will occur while too small a squish gap will lead to detonation Squish Gap Measurement The squish gap can be measured by inserting a piece of resin core solder into the combustion chamber Insert solder in combustion chamber Rotate the engine through Top Dead Center remove the solder and measure the thick...

Страница 70: ...asurement at the opposite side of the piston Repeat procedure for the other cylinder The lowest and the highest values of both cylin ders must be within the specified range If adjustment is required replace cylinder base gasket accordingly using a thicker or thinner cyl inder base gasket ENGINE SQUISH GAP 717 1 3 1 7 mm 051 067 in 787 1 2 1 6 mm 047 063 in F01D64A 1 2 ...

Страница 71: ...GNETO 3 717 Engine F04D07S 3 Anti seize lubricant 110 N m 81 lbf ft 8 Loctite 242 5 N m 44 lbf in 9 10 N m 89 lbf in 6 7 6 N m 53 lbf in Loctite 648 5 10 4 Loctite 242 1 2 Loctite 242 Loctite 242 4 N m 35 lbf in Anti seize lubricant 5 N m 44 lbf ft 105 N m 77 lbf ft Anti seize lubricant ...

Страница 72: ...N m 89 lbf in F04D08S 110 N m 81 lbf ft 3 Anti seize lubricant Synthetic grease 8 9 Loctite 242 4 5 Loctite 648 10 N m 89 lbf in Loctite 242 105 N m 77 lbf ft Loctite 648 10 N m 89 lbf in 7 6 10 N m 89 lbf in 1 Synthetic grease 9 N m 80 lbf in 2 Anti seize lubricant 6 N m 53 lbf in ...

Страница 73: ...de flywheel since pull er has to be installed on MAG flywheel 717 Engine For removal of both flywheels MAG flywheel is locked with puller plate P N 290 876 080 sleeves P N 290 847 220 and extension handle P N 295 000 111 1 Screw 2 Extension handle 3 Puller plate 4 Sleeve CAUTION Never lock crankshaft by in serting any tool through connecting rod bores nor through impulse fitting 3 PTO Flywheel 717...

Страница 74: ...PTO flywheel splines are worn out and PTO flywheel remover cannot be used Use a pipe wrench and install it on PTO flywheel as illustrated TYPICAL 1 Extension handle locking crankshaft 787 Engine Remove starter Lock ring gear using special tool Pþ þN 295 000 134 1 Tool Install PTO flywheel locking tool Pþ þN 295 000 001 in flywheel splines Using a suitable socket unscrew PTO flywheel COUNTERCLOCKWI...

Страница 75: ...e to be in serted in puller plate machine or grind its outside diameter as necessary Remove nut and lock washer from MAG flywheel MAG flywheel is easily freed from crankshaft with puller P N 295 000 106 Fully thread on puller in puller plate Tighten puller bolt and at the same time tap on bolt head using a hammer to release MAG fly wheel from its taper 1 Puller plate 2 Puller 3 Extension handle Ma...

Страница 76: ...mately 150 C 300 F to break the Loctite bond Tap lightly on ring gear using a hammer to release it from MAG flywheel 1 Magneto flywheel 6 7 Screw and Armature Plate Ass y 717 Engine To ease reassembly and further ignition timing in dexing marks should be made on armature plate and crankcase All Engines Remove 3 retaining screws and withdraw arma ture plate Crankcase Replacement 717 Engine Since re...

Страница 77: ... 1 Lug end of crankcase 2 Align mark and lug end here Find manufacturer s mark on armature plate In line with this mark punch another mark on ad jacent crankcase lug TYPICAL 1 Manufacturer s mark on armature plate 2 Punch a mark on crankcase lug aligned with plate mark From now on these marks will be used for further assembly positioning as a pre timing position TYPICAL 1 For further assembly use ...

Страница 78: ...vi ously traced marks on both parts 717 engine Apply a drop of Loctite 242 blue on screw threads and torque to 6 N m 53 lbf in on 717 engine and 10 N m 89 lbf in on 787 engine 4 5 MAG Flywheel and Ring Gear 717 Engine Apply Loctite 648 green to MAG flywheel mat ing surface Lay ring gear on a steel plate then heat with a propane torch in order to install it on MAG flywheel Pay particular attention ...

Страница 79: ...orque nut to 105 N m 77 lbf ft CAUTION Never use any type of impact wrench at magneto installation 3 PTO Flywheel Apply lubricant Anti Seize on crankshaft threads then screw on PTO flywheel Using same tool as for removal torque PTO fly wheel to 110 N m 81 lbf ft CAUTION Never use any type of impact wrench at PTO flywheel installation Ignition Timing For procedures refer to ELECTRICAL 08 03 un der ...

Страница 80: ... 7 3 Loctite 242 Anti seize lubricant 2 1 Primer N and Loctite 515 Loctite 515 Synthetic grease Loctite 515 Loctite 515 Loctite 515 Synthetic grease 40 N m 30 lbf ft 10 8 12 11 5 9 24 N m 17 lbf ft 6 3 4 10 N m 88 lbf in Anti seize lubricant Anti seize lubricant Lithium grease 24 N m 17 lbf ft 5 5 2 ...

Страница 81: ...nthetic grease Loctite 515 1 2 2 5 Synthetic grease Anti seize lubricant Anti seize lubricant Anti seize lubricant Anti seize lubricant 6 Loctite 515 5 Anti seize lubricant Anti seize lubricant 3 Synthetic grease 24 N m 17 lbf ft 8 Loctite 515 40 N m 30 lbf ft Synthetic grease 24 N m 17 lbf ft Synthetic grease Loctite 515 12 9 Synthetic grease 40 N m 30 lbf ft Loctite 515 Loctite 515 Synthetic gre...

Страница 82: ...g hole Insert a longer screwdriver in the other hole Lay a forearm over both screwdriver handles to feel piston displacements With the other hand slowly rotate engine by PTO flywheel 1 Lay 1 hand over screwdrivers to feel movement 2 Screwdrivers in spark plug holes As soon as one piston starts going up the other must immediately go down Any interval between strokes indicates a misaligned crankshaf...

Страница 83: ...fer to INSPECTION paragraph If deflection is found greater than specified toler ance this indicates worn bearing s bent and or disaligned crankshaft GENERAL Engine has to be removed from boat to open bot tom end If crankshaft end seal s has have to be replaced bottom end must be opened except for MAG side seal on 787 engine DISASSEMBLY Remove the following partsþ Ignition housing and PTO flywheel ...

Страница 84: ...75 On MAG side use distance ring P N 290 876 569 and ring P N 290 977 490 with ring halves P N 290 276 025 NOTE To facilitate ring or distance ring in stallation lubricate their inside diameters 1 Puller P N 290 876 298 2 Protective cap P N 290 876 557 3 Distance ring MAG side P N 290 876 569 4 Ring both side P N 290 977 490 5 AG side ring halves P N 290 276 025 6 PTO side ring halves P N 290 977 ...

Страница 85: ...nd paper on a surface plate and rub part against oiled sand paper Inspect crankshaft bearings Check for scoring pitting chipping or other evidence of wear Make sure plastic cage is not melted Rotate and make sure they turn smoothly If crankshaft and or components are found de fective it must be repaired by a specialized shop or replaced 787 Engine New oil seals do not necessitate the use of a cage...

Страница 86: ...deflection exceeds the specified toler ance it can be either ball bearings wear bent or twisted crankshaft at connecting rod journal 1 Measuring PTO side deflection in crankcase 1 Measuring MAG side deflection in crankcase Remove crankshaft bearings and check deflection again on V shaped blocks as illustrated 1 Measuring MAG side deflection on V shaped blocks 1 Measuring PTO side deflection on V s...

Страница 87: ...se installation Or as an alternate method apply heat with a pro pane torch Lay bearing on a steel plate then heat plate through bearing bore until smoke is noticed from bearing Install bearing carefully on crank shaft CAUTION Immediately stop heating as soon as smoke is noticed Overheating bearing will melt plastic cage Practice with used bearings on first try 1 Bearing against a steel plate 2 Pro...

Страница 88: ...excess as it will spread out inside crankcase NOTE On aluminum material it is recom mended to use Loctite Primer N to reduce curing time and increase gap filling capability Re fer to manufacturer s instructions CAUTION Rotary valve shaft must be in stalled in crankcase before closing halves Before joining crankcase halves make sure that crankshaft gear is well engaged with rota ry valve shaft gear...

Страница 89: ...e apply Loctite 271 red on stud threads Torque to 12 N m 9 lbf ft 787 Engine 8 9 Screw Torque crankcase screws to 12 N m 9 lbf ft as per following sequence Repeat procedure re tightening all screws to 24þN m 17 lbf ft As a final step torque only M10 screws of crank case to 40 N m 30 lbf ft as per following se quence When bottom end is assembled add 30 mL 1 oz of injection oil in the small hole nea...

Страница 90: ...case reinstall it with its end pointing towards igni tion housing Apply Loctite PST 592 on fitting threads For rotary valve timing and assembly procedures refer to ROTARY VALVE 04 05 If engine support is installed on crankcase before ignition housing electric starter must be installed before engine support 1 End towards ignition housing 2 Install starter before engine support F01D86A 1 F01D4KB 2 1...

Страница 91: ...Section 04 ENGINE Sub Section 05 ROTARY VALVE 04 05 1 ROTARY VALVE 5 F01D4LS 7 8 10 3 4 2 1 20 N m 15 lbf ft 9 5 6 ...

Страница 92: ...s prior removing rotary valve cover Refer to FUEL SYSTEM 06 03 then refer to Carburetor Removal 3 4 Rotary Valve Shaft and Snap Ring To remove rotary valve shaft assembly from crankcase first remove snap ring from crankcase TYPICAL 1 Removing snap ring CAUTION Bottom end must be opened to remove rotary valve shaft To remove rotary valve shaft use puller P N 290 876 487 for 717 engine and 290 876 4...

Страница 93: ...remove plug against bearing in upper crankcase half 1 Do not remove this plug End bearing can be easily removed using the fol lowing suggested tool Snap on hammer puller including Handle CJ93 1 hammer CJ125 6 or claws CJ93 4 Close puller claws so that they can be inserted in end bearing Holding claws turn puller shaft clockwise so that claws open and become firmly tight against bearing Slide pulle...

Страница 94: ... and the cover must be 0 30 0 05 mm 0 012 0 002 in NOTE If the clearance is below 0 25 mm 0 010 in this could create an overheating situation and if the clearance is over 0 35 mm 0 014 in this could create a hard starting situa tion 45 Feeler Gauge Method Remove rotary valve cover and its O ring Reinstall cover in place WITHOUT its O ring and torque screws to 20 N m 15 lbf ft Feeler gauge blade fr...

Страница 95: ... 0 03 mm 039 001 in Reverify the clearance At assembly the rotary valve timing must remain as per original setting NOTE If rotary valve crankcase surface is worn it is possible to have it rework at the factory Contact Bombardier service department Rotary Valve Shaft Gear Backlash Remove PTO flywheel guard Remove spark plugs rotary valve cover and valve Manually feel backlash at 1 position then tur...

Страница 96: ...ssentially the reverse of disassem bly procedures However pay particular attention to the following 1 Bearing To install end bearing in crankcase use a pusher P N 290 876 500 1 Pusher Position ball bearing shielded side towards rotary valve TYPICAL 1 Shielded side here towards gear Push bearing until it stops on its seat TYPICAL 1 Bearing 2 Pusher NOTE Do not remove plug against bearing in crankca...

Страница 97: ...p Ring and Bearing Install ball bearing as illustrated 1 Seal 2 Ball bearing 3 Bearing extractor Snap on CJ 950 Install shim snap ring and slide distance sleeve on shaft 1 Seal 2 Ball bearing 3 Snap ring 4 Distance sleeve 5 Shim 0 5 mm 020 in 6 Rotary valve shaft 3 4 Rotary Valve Shaft Ass y and Snap Ring CAUTION Crankcase halves must be separated and crankshaft must not be present to install rota...

Страница 98: ...t its sharp edge faces outwards ROTARY VALVE The rotary valve controls the opening and closing of the inlet ports Therefore its efficiency will de pend on the precision of its installation Identification of the Rotary Valve There is no identification code on the valves To find out the duration place an angle finder on the valve and measure the valve cut out angle or use the following template F01D...

Страница 99: ...Section 04 ENGINE Sub Section 05 ROTARY VALVE 04 05 9 TEMPLATE F01D73S TEMPLATE 159 cut out angle 290 924 502 actual size ...

Страница 100: ...e on degree wheel and mark crankcase at this point EXAMPLE Step Bottom of MAG inlet port Align 360 line of degree wheel here Step Find 130 on degree wheel and mark here 1 Opening mark NOTE Do not rotate the crankshaft For closing mark first align 360 line of degree wheel with TOP of MAG side inlet port Then find 65 line on degree wheel and mark crank case at this point ENGINE TYPE TIMING OPENING B...

Страница 101: ...ave edges as close as possible to these marks with the MAG piston at TDC NOTE Rotary valve is asymmetrical There fore try flipping it over then reinstall on splines to obtain best installation position Apply BOMBARDIER injection oil on rotary valve before reassembling rotary valve cover Remove TDC gauge 1 2 Rotary Valve Cover and Screw Install O ring and cover then torque screws to 20 N m 15 lbf p...

Страница 102: ...ection 05 COOLING SYSTEM TABLE OF CONTENTS COMPONENTS 05 01 1 SPORTSTER AND SPEEDSTER 05 01 1 GENERAL 05 01 2 WATER FLOW REGULATOR VALVE 05 01 3 CIRCUIT 05 02 1 GENERAL 05 02 1 717 ENGINE COOLING SYSTEM 05 02 4 787 ENGINE COOLING SYSTEM 05 02 5 ...

Страница 103: ...Section 05 COOLING SYSTEM Sub Section 01 COMPONENTS 05 01 1 COMPONENTS 1 Sportster and Speedster F04E0GS 1 3 Loctite 592 Loctite 592 Loctite 592 Loctite 592 Loctite 592 1 1 1 1 2 2 ...

Страница 104: ... from the tuned pipe The elbow fitting has a cali brated inside diameter to optimize water flow The water injection also helps in reducing noise level and cools components of the exhaust sys tem CAUTION The elbow fittings are cali brated for each engine model and can not be interchanged with one of a different size as severe engine damage could result The elbow fitting can be identified by using t...

Страница 105: ...n inside diameter limits water flow into the resonnator WATER FLOW REGULATOR VALVE The water flow regulator valve has a calibrated spring and a tapered needle which regulate the injected water in the tuned pipe CAUTION Do not change the calibration of the spring otherwise serious engine damage can occur At low speed water pressure in the supply hose of the regulator valve is not sufficient to over...

Страница 106: ...tomer is experiencing poor performance the water flow regulator valve might be out of ad justment The nominal adjustment as done at the factory is as follows On the top of the water flow regulator valve locate the red plastic adjustment screw Mark the location of the screw with a dab of paint for reference purposes Turn the screw clockwise tighten until the top edge of the screw is flush with the ...

Страница 107: ...t pump has a T fitting to supply the wa ter flow regulator valve which is mounted directly on the muffler This mounting position provides im mediate cooling for the muffler 1 Engine water supply hose 2 Water injected directly into the muffler The remaining outlet from the water flow regula tor valve supplies the water injection fitting at the tuned pipe head with a predetermined volume of water th...

Страница 108: ... gases is controlled by the water flow regulator valve as explained previ ously All Models Water injected through the exhaust gases contin ues to flow out through the exhaust outlet Water in the tuned pipe water jackets continues to flow through the exhaust manifold water jackets to ward the engine cylinder water jackets via pas sages below exhaust ports TYPICAL SPORTSTER SPEEDSTER 1 Water enters ...

Страница 109: ...r to illustration above On Challenger draining of the system is accom plished by a fitting at the bottom of each cylinder Fittings are linked to a common line The line is connected to the exhaust outlet at the stern of the craft CHALLENGER 1 Drain hose For a complete view of cooling system arrange ment refer to the next pages CAUTION Never modify cooling system arrangement otherwise serious engine...

Страница 110: ...let fitting limits water flow ALSO used as flushing connector Cooling System Indicator CSI Small stream of water flows out of bleed outlet located behind stern ring Engine water hose outlet Pressure zone Calibrated outlet fitting limits water flow Tuned pipe bleed hose injects water into muffler to cool exhaust components Lowest point of circuit allows draining whenever engine is stopped Water inj...

Страница 111: ...her la détonnation Ce tuyau de purge est situé au point de purge le plus élevé du moteur soit au niveau du tuyau d échappement calibré Cette sonde actionne l avertisseur sonore lorsque la température exède 96 99 205 210 F Cette culasse calibrée limite le débit d eau L eau circule dans les chemises d eau du tuyau d échappement calibré et du collecteur d échappement L eau contrôlée par la soupape es...

Страница 112: ...LENGER 06 01 1 SPEEDSTER 06 01 2 GENERAL 06 01 3 AIR INTAKE 06 02 1 CARBURETORS 06 03 1 GENERAL 06 03 2 CARBURETOR REMOVAL 06 03 2 CLEANING 06 03 2 DISASSEMBLY AND INSPECTION 06 03 2 PUMP VERIFICATION 06 03 2 CARBURETOR ASSEMBLY 06 03 3 CARBURETOR INSTALLATION 06 03 5 ADJUSTMENTS 06 03 7 FUEL SYSTEM PRESSURIZATION 06 03 9 ...

Страница 113: ...Section 06 FUEL SYSTEM Sub Section 01 FUEL CIRCUIT 06 01 1 FUEL CIRCUIT 1 Sportster and Challenger F04F05S To engine 4 5 1 2 Loctite 242 3 Loctite 242 ...

Страница 114: ...Section 06 FUEL SYSTEM Sub Section 01 FUEL CIRCUIT 06 01 2 Speedster To engine To engine Right engine Left engine 4 5 3 Loctite 242 Loctite 242 1 2 F04F06S ...

Страница 115: ...ent and a spark might ignite them and possi bly cause personal injuries Empty fuel tank WARNING Fuel is inflammable and ex plosive under certain conditions Always work in a well ventilated area Do not smoke or allow open flames or sparks in the vicinity Al ways wipe off any fuel spillage from the boat Challenger Only Remove ski post braces and fuel filter bracket All Models Remove hoses from baffl...

Страница 116: ...06 FUEL SYSTEM Sub Section 01 FUEL CIRCUIT 06 01 4 Fuel Tank Removal Remove the following parts to allow fuel tank removal jet pump s engine s electrical box Speedster only battery and its case when applicable ...

Страница 117: ...Section 06 FUEL SYSTEM Sub Section 02 AIR INTAKE 06 02 1 AIR INTAKE 2 F04F04S 10 N m 88 lbf in Loctite 242 Loctite 242 7 18 Loctite 242 10 N m 88 lbf in Loctite 515 10 N m 88 lbf in Loctite 242 ...

Страница 118: ...Section 06 FUEL SYSTEM Sub Section 03 CARBURETORS 06 03 1 CARBURETORS 3 F04F07S 6 16 15 7 4 5 3 Synthetic grease PTO Loctite 242 Loctite 242 11 9 10 8 1 13 12 Synthetic grease 2 MAG 14 Loctite 242 ...

Страница 119: ... cable and choke cable Remove screws and lock washers retaining car buretors Remove linkage rod from carburetors Remove carburetors from intake manifold CLEANING The entire carburetor should be cleaned with a general solvent and dried with compressed air be fore disassembly CAUTION Be careful at carburetor clean ing not to remove paint Paint removal will cause carburetor to rust very rapidly Re pa...

Страница 120: ... If pressure drops replace diaphragm 4 Pump Body Inspect valves The pumping area should be free of holes tears or imperfections Replace as need ed 5 Filter To verify filter condition proceed as followsþ Remove pump cover gasket diaphragm and then pump body and gasket Remove filter from carburetor body then clean fil ter and blow carefully with compressed air low pressure Replace filter if damaged ...

Страница 121: ...bstruct outlet nipple with a finger Pump tester until inlet release pressure is reached seen by a sudden pressure drop This must occur within 280 392 kPa 40 56 PSI On Sportster and Speedster and within 189 273 kPa 27 39 PSI on Challenger The pressure drop will vary but it should not go less then 83 kPa 12 PSI NOTE Pressure test should be performed 3 times to obtain a valid reading TYPICAL 1 Pump g...

Страница 122: ...et or main jet check valve housing must be removed TYPICAL 1 Pilot jet 2 Gasket 3 Main jet 4 Check valve housing 11 Check Valve Assembly The check valve is needed if a back pressure oc curs into carburetor It will prevent fuel from flow ing back into carburetor lower portion Inspect check valve it should be free of holes tears or imperfections Replace as needed 1 Check valve NOTE Prior to check va...

Страница 123: ...or levers Ensure both throttle plates are still in closed posi tion NOTE The linkage installation is done with the marks located near PTO carburetor throt tle lever to ease adjustment if to be performed in the boat 717 ENGINE SHOWN 1 Throttle lever PTO side 2 Marks CAUTION Throttle plates must open si multaneously otherwise this will cause engine to vibrate and or back fire Turn idle speed screw u...

Страница 124: ...hrottle stop le ver will almost contact carburetor body 0 4 mm 1 64 in 717 ENGINE SHOWN 1 Throttle lever stoppers behind levers 2 Adjustment nut Speedster Only Ensure that at full throttle both throttle levers op erator s control are synchronized at the same po sition All Models CAUTION Improper cable adjustment will cause strain on cable and or damage cable support or throttle lever at carburetor...

Страница 125: ... cables unscrew and dis connect the connector at the electrical box PRI OR TO CONNECTING THE BATTERY CABLES 1 Electrical box connector WARNING Always connect RED positive cable first then BLACK negative cable last After connecting the battery reinstall the electri cal box connector 2 Low Speed Mixture Screw 717 ENGINE SHOWN 1 PTO low speed screw 2 MAG low speed screw not shown CAUTION Do not attem...

Страница 126: ...peed screw Turning screw clockwise increases engine idle speed and turning screw counterclockwise de creases engine idle speed NOTE There is only one idle speed screw for both carburetors It is located on the MAG side carburetor Connect an induction type tachometer P N 295 000 100 on spark plug cable of magneto side to measure engine speed NOTE To adjust idle speed ensure flame arrester and air in...

Страница 127: ... pressurize once more If pressure is not maintained locate leak and re pair replace component leaking To ease leak search spray a solution of soapy water on com ponents bubbles will indicate leak location En sure the leak does not come from vent hose that could not be sealed completely NOTE To minimize time of fuel system pressurization the fuel tank should be quite full The system must maintain a...

Страница 128: ...ION RESERVOIR 07 01 1 SPORTSTER AND CHALLENGER 07 01 1 SPEEDSTER 07 01 2 GENERAL 07 01 3 OIL INJECTION PUMP 07 02 1 SPORTSTER AND SPEEDSTER 07 02 1 CHALLENGER 07 02 2 CLEANING 07 02 3 DISASSEMBLY 07 02 3 ASSEMBLY 07 02 3 ADJUSTMENTS 07 02 4 CHECKING OPERATION 07 02 5 OIL SYSTEM PRESSURIZATION 07 02 6 ...

Страница 129: ...Section 07 LUBRICATION SYSTEM Sub Section 01 OIL INJECTION RESERVOIR 07 01 1 OIL INJECTION RESERVOIR 1 Sportster and Challenger F04G0BS 1 2 1 3 ...

Страница 130: ...Section 07 LUBRICATION SYSTEM Sub Section 01 OIL INJECTION RESERVOIR 07 01 2 Speedster F04G0CS 1 2 1 3 Left engine Right engine ...

Страница 131: ...ion system al ways verify for water infiltration in reservoir 1 2 Clamp and Hose Verify oil filler neck hose for damage Always en sure that clamps are well positioned and tight ened Torque clamps to 3 N m 27 lbf in 3 Check Valve Black side of the one way check valve is the valve outlet It allows air to get in reservoir ...

Страница 132: ...07 02 1 OIL INJECTION PUMP 2 Sportster and Speedster F04G0FS 6 N m 53 lbf in 2 Loctite 242 1 3 10 N m 89 lbf in Loctite 242 6 N m 53 lbf in 8 N m 71 lbf in 8 N m 71 lbf in 4 5 N m 40 lbf in Loctite 242 X X X X X X X X 5 N m 44 lbf in X 4 5 N m 40 lbf in Loctite 242 ...

Страница 133: ...Section 07 LUBRICATION SYSTEM Sub Section 02 OIL INJECTION PUMP 07 02 2 Challenger F04G0DS 6 Loctite 242 Loctite 242 4 5 N m 40 lbf in 4 5 N m 40 lbf in Loctite 242 Loctite 242 6 N m 53 lbf in ...

Страница 134: ...ls and O rings Clean metal compo nents in a solvent DISASSEMBLY NOTE Some oil pump parts are not avail able in single parts 1 2 Oil Pump Gear and Lock Nut Sportster and Speedster To remove retaining nut lock gear using gear hold er P N 290 277 905 1 Gear holder ASSEMBLY 3 Screw Sportster and Speedster Torque to 10 N m 89 lbf in TYPICAL A 10 N m 89 lbf in 2 Lock Nut Sportster and Speedster Apply Lo...

Страница 135: ...lign marks on pump NOTE A mirror may be used to facilitate this verification TYPICAL 1 Adjustment screw not shown 2 Aligned marks Tighten jam nut and recheck alignment marks CAUTION Proper oil injection pump ad justment is very important Any delay in the opening of pump can result in serious en gine damage Bleeding CAUTION Oil injection system must be bled and adjustment checked before op erating ...

Страница 136: ...a Repeat the procedure until this condition is attained Reconnect banjo fittings with a washer on each side and torque screws to 8 N m 71 lbf in Start engine and run at idle while holding the pump le ver in fully open position Oil columns must ad vance into small oil lines TYPICAL 1 Engine at idle 2 Fully open position 3 Oil columns advancing If not remove pump assembly and check the pump gear for...

Страница 137: ...hers on oil inlet lines close to oil pump and to rotary valve Install a hose pincher on oil return line Connect pump gauge tester to oil reservoir vent inlet line Pressurize oil system to 21 kPa 3 PSI If pres sure is not maintained locate leak and repair replace component leaking To ease leak search spray a solution of soapy water on com ponents bubbles will indicate leak location NOTE To minimize...

Страница 138: ...D GAUGES ACCESSORIES 08 01 5 MAGNETO SYSTEM 08 02 1 717 ENGINE 08 02 1 REMOVAL 08 02 2 DISASSEMBLY 08 02 2 ASSEMBLY 08 02 3 INSTALLATION 08 02 3 787 ENGINE 08 02 4 MAGNETO ROTOR AND ENGINE FLYWHEEL REMOVAL 08 02 5 ASSEMBLY 08 02 5 IGNITION SYSTEM 08 03 1 ELECTRICAL SYSTEM 08 03 1 SPORTSTER 08 03 1 ELECTRICAL BOX 08 03 2 SPORTSTER 08 03 2 ELECTRICAL SYSTEM 08 03 3 SPEEDSTER 08 03 3 ELECTRICAL BOX 0...

Страница 139: ...EM 08 06 1 ELECTRICAL TESTS FOR THE MPEM 08 06 2 CHARGING SYSTEM 08 07 1 TESTING PROCEDURE 717 ENGINE 08 07 1 TESTING PROCEDURES 787 ENGINE 08 07 2 STARTING SYSTEM 08 08 1 ELECTRIC STARTER 08 08 1 STARTING SYSTEM TROUBLESHOOTING 08 08 3 REMOVAL 08 08 4 DISASSEMBLY 08 08 4 CLEANING 08 08 4 INSPECTION 08 08 5 ASSEMBLY 08 08 5 STARTER INSTALLATION 08 08 7 STARTER SPECIFICATION 08 08 8 BATTERY 08 08 9...

Страница 140: ...F CONTENTS 08 0 3 INSTRUMENTS AND ACCESSORIES 08 09 1 SPORTSTER 08 09 1 SPEEDSTER 08 09 2 FUEL OIL GAUGE 08 09 3 WIRING DIAGRAM 08 010 1 WIRE COLOR 08 010 1 WIRE TERMINAL REMOVAL 08 010 1 ACCESSORIES INSTALLATION 08 010 1 FUSES LOCATION 08 010 1 ...

Страница 141: ...ome external components neutral switch For the ignition system the A C voltage from the magneto is stepped up to 40 000 V Keep that in mind when dealing with voltages in the electrical system MAGNETO SYSTEM It is the primary source of electrical energy It transforms magnetic field into electric current through generator coil for the ignition system and through another separate 3 pole generator coi...

Страница 142: ...ry The magneto supply unregulated A C current to a voltage regulator rectifier The half wave rectifier receives the A C current and changes it to D C current to allow battery charging This regulated D C current then supplies the MPEM starting system the fuse block and the accessories 1 Voltage regulator rectifier 2 Battery 3 Magneto system STARTING SYSTEM The battery supplies the D C current to th...

Страница 143: ...Section 08 ELECTRICAL Sub Section 01 OVERVIEW 08 01 3 1 Battery 2 Fuse block 3 Accessories F04H0YA 3 1 2 ...

Страница 144: ...ponents neutral switch For the ignition system the D C voltage from the battery is stepped up to 40 000 V Keep that in mind when dealing with voltages in the electrical system MAGNETO SYSTEM It is the source of electrical energy to charge the battery and keep it at a full state of charge It transforms magnetic field into electric current through a 3 phase Y wound stator on 18 poles 1 Charging syst...

Страница 145: ... Module DC CDI The DC CDI module receives the input from the trigger coil and signals the ignition coil when to fire It also has the rev limiter function built into its circuitry as well as the ignition timing curve The DC CDI module is mounted in the electrical box Multi Purpose Electronic Module MPEM The MPEM has a micro controller inside of its sealed case and basically is responsible for the D...

Страница 146: ...2 1 MAGNETO SYSTEM 2 717 Engine F04H0ZS 5 N m 44 lbf in Loctite 242 105 N m 77 lbf ft Loctite 648 Loctite 242 4 1 2 6 Loctite 242 5 6 N m 53 lbf in 4 N m 35 lbf in 7 Loctite 242 5 N m 44 lbf in Loctite 242 10 N m 89 lbf in Dielectric grease 24 N m 17 lbf ft ...

Страница 147: ...lame Remove screws Uncrimp and unsolder BLACK RED wire from coil 1 Uncrimp and unsolder wire here Strip end of old wire then crimp and solder on new coil 1 2 Ignition System Generator Coil and Screw Apply Loctite 242 blue to screws and install the new coil on armature plate Use magneto coil centering tool P N 290 876 922 and install so that it fits around armature plate before tightening screws 1 ...

Страница 148: ...o assembly apply Loctite 242 blue Use magneto coil centering tool P N 290 876 922 and install it so that it fits around armature plate before tightening screws 1 Magneto coil centering tool P N 290 876 922 ASSEMBLY NOTE Always apply dielectric grease on all electrical connections 5 6 Screw and Armature Plate Position the armature plate on the crankcase aligning the marks on both parts Apply a drop...

Страница 149: ...M 08 02 4 787 Engine F01D7TT Loctite 242 10 N m 88 lbf in 10 N m 88 lbf in Loctite 242 Loctite 648 Synthetic grease Synthetic grease 105 N m 77 lbf ft 10 N m 88 lbf in 6 N m 53 lbf in 10 N m 88 lbf in Loctite 648 9 N m 80 lbf in Anti seize lubricant 1 ...

Страница 150: ...l locking ring gear Engine flywheel is easily freed from crankshaft with puller P N 420 976 235 and crankshaft pro tective cap P N 290 876 557 Insert crankshaft protector to outer end of crankshaft and fully thread puller in engine flywheel 1 Puller Tighten puller screw and at the same time tap on screw head using a hammer to release engine fly wheel from its taper ASSEMBLY Assembly is essantially...

Страница 151: ...Section 08 ELECTRICAL Sub Section 03 IGNITION SYSTEM 08 03 1 IGNITION SYSTEM 3 ELECTRICAL SYSTEM Sportster F04H10S See Electric Box Wires BLACK RED See Electrical Accessories Dielectric grease ...

Страница 152: ...Section 08 ELECTRICAL Sub Section 03 IGNITION SYSTEM 08 03 2 ELECTRICAL BOX Sportster F04H11S ...

Страница 153: ... IGNITION SYSTEM 08 03 3 ELECTRICAL SYSTEM Speedster F04H27S See electrical accessories Dielectric grease LEFT engine RIGHT engine See electrical box BLACK RED Wires Dielectric grease Dielectric grease Dielectric grease Dielectric grease ...

Страница 154: ...Section 08 ELECTRICAL Sub Section 03 IGNITION SYSTEM 08 03 4 ELECTRICAL BOX Speedster F04H26S ...

Страница 155: ...e first 5 items can be checked with common automotive equipment For item 6 refer to MPEM section For items 7 and 8 refer to the fol lowing procedures MPEM Multi Purpose Electronic Module ENGINE RPM LIMITER On Speedster model there is one RPM limiter for each engine in the MPEM A defective RPM limiter may cause the following problems No spark Misfiring black fouled spark plugs Uninterrupted spark w...

Страница 156: ...EST RESULT Indicator Lamp Lights at Specific Setting Output is as specified Test results should repeat 3 times If readings do not repeat output is erratic and cause should be investigated loose connec tions or components etc Indicator Lamp Lights at Lower Setting This indicates that the output is less than that de signed to operate in a satisfactory manner How ever before coming to the conclusion ...

Страница 157: ...faulty ignition system generator coil Re place it Ignition Coil Output A paper clip of approximately 20 mm 3 4 in will be used as a test adapter for the following test 1 Install the test adapter to spark plug cable close to MAG side spark plug 2 Connect tester wires then set switch and dial as follows TYPICAL 1 Paper clip 2 P lead to GROUND 3 N lead on spark plug cable 3 Start engine and observe i...

Страница 158: ... because they are resistor caps The cap resistance is 4 5 5 5 K ohms 1 Resistor cap 2 High tension cable IGNITION TIMING 717 ENGINE This section is mainly divided in 2 parts the first one using a top dead center TDC gauge to verify PTO Flywheel Timing Mark Position The second one using a stroboscopic timing light to check Ig nition Timing Flywheel timing mark position verification is re quired to ...

Страница 159: ...pter lock nut then holding gauge with dial facing toward PTO screw adapter in spark plug hole Slide gauge far enough into adapter to obtain a reading then finger tighten adapter lock nut Rotate PTO flywheel counterclockwise until piston is at Top Dead Center Unlock outer ring of dial and turn it until zero 0 on dial aligns with pointer Lock outer ring in position 5 From this point rotate flywheel ...

Страница 160: ... 20 seconds idling 1 Connect timing light pick up to MAG side spark plug lead TYPICAL 1 Timing light pick up on MAG side 2 Connect an induction type tachometer to spark plug wire 3 Start engine and point timing light straight in line with timing tool slot Bring engine to 6000 RPM for a brief instant IMPORTAN Place shifter in forward or reverse position to allow engine reaching 6000 RPM NOTE On thi...

Страница 161: ...mark is on right side of timing tool slot it indicates advanced timing 1 Too advanced timing In this case turn armature plate clockwise When PTO flywheel mark is on left side of timing tool slot it indicates retarded timing 1 Retarded timing In this case turn armature plate counterclock wise After adjustment tighten armature plate retaining screws CAUTION Armature plate screws must have Loctite 24...

Страница 162: ...ER A defective RPM limiter may cause the following problems No spark Misfiring black fouled spark plugs Uninterrupted spark when engine stop safety lanyard ignition switch is used Incorrectly controlled engine maximum RPM To diagnose spark problems that might come from the MPEM first check that its BLACK wire is perfectly grounded then if there is no spark temporarily bypass the RPM limiter by dis...

Страница 163: ...2 The meter function should be on resistance connect the meter leads to the spark plug leads of the MAG and PTO cylinders and your resis tance should be 12 71K ohms 10 3 Lastly check resistance of spark plug caps In stall a meter lead where the high tension wire normally goes and the other meter lead where the spark plug connects A reading of 4 5 to 5 5K ohms is normal WIRE COLOR FUNCTION RE PU CD...

Страница 164: ...per clip 2 P lead to GROUND 3 N lead on spark plug cable 3 Start engine and observe indicator NOTE If engine starts allow it to idle while observing indicator Then shut engine off 4 Push reset button and repeat step 3 twice RESULTS a Indicator lamp lights Ignition coil is OK b Indicator lamp does not light on one or both cylinder s Repeat the test 3 times to get conclusive results Ignition coil is...

Страница 165: ...So when checking timing at 3500 RPM a change in engine speed within 500 RPM will not affect the timing mark when checked with the timing light Ignition Timing Procedure STATIC TEST 1 To install the new timing mark pointer tool first remove PTO flywheel guard Then remove mid dle screw securing the engine to the rear cross over motor mount Reinstall screw with timing mark pointer tool attached 1 Tim...

Страница 166: ...d the corresponding degree and if the correction was made to advance or re tard the timing Knowing that you select the higher or lower num ber to advance or retard the actual timing correc tion by referring to the chart Examples a You found the flywheel mark advanced You must retard the timing The programmer gives you the number 3 Re ferring to the chart number 3 returns 2 The timing correction is...

Страница 167: ...grammer 1 Connect the communication cable to the MPEM programmer and the other end to the safety lanyard post on the craft 2 Press the ON C button on programmer and enter you password 3 Press 3 to choose Vehicle info in program mer 4 Press 4 to choose Engine param 5 Press 2 to choose Timing adjust 6 The programmer display a number that is ac tually stored in the MPEM 7 Press__ to choose yes for mo...

Страница 168: ...old 18 mm 14 mm 10 mm 12 mm 8 mm 12 mm x 19 mm Reach A B C D E J Special Design Single Ground Special Alloy Dual Ground Special Alloy Racing Type Racing Version of V Type Half Heat Range Standard Center Electrode Fine Wire Center Electrode Booster Gap V Grooved Center Electrode A GV B C G L S V X Y Blank 18 mm ø 12 mm 31 64 14 mm ø 9 5 mm 3 8 Compact Type Projected Insulator Type Resistor Type Sur...

Страница 169: ...t up red hot and cause pre ignition or detonation FOULING Fouling of the spark plug is indicated by irregular running of the engine decreased engine speed due to misfiring reduced performance and in creased fuel consumption This is due to a loss of compression Other possible causes are prolonged idling or running on a too rich mix ture due to a faulty carburetor adjustment or incor rect fuel The p...

Страница 170: ...Section 08 ELECTRICAL Sub Section 04 SPARK PLUGS 08 04 3 1 Proper socket 2 Improper socket SPARK PLUG CHART Engine type Spark plugs Torque N m lbf ft Gap mm inch All NGK BR8ES 24 17 0 55 022 A00E0BA 2 1 ...

Страница 171: ...he one from another boat can not be used on your boat unless otherwise programmed as explained be low NOTE Technically the boat s MPEM is the component that is actually programmed to recognize a safety lanyard The MPEM stores the digital serial number from the safety lanyard cap in its memory However for the sake of clarity we will refer to safety lanyard programming in the following technical dis...

Страница 172: ...ITALLY ENCODED SECURITY SYSTEM 08 05 2 The boat MPEM features a permanent non vola tile memory and keeps programmed safety lan yard s active even when the boat s battery is disconnected When replacing an MPEM reprogramming safety lanyard s is required ...

Страница 173: ...e the system is ready to allow engine starting Wrong safety lanyard Use the safety lanyard that has been programmed for the boat If it does not work check safety lanyard condition with the MPEM programmer Replace safety lanyard if reported defective If it still does not work enable the advanced diagnostic mode to obtain more detail about the failure Salt water or dirt in safety lanyard cap Shake a...

Страница 174: ... BEEPS CAUSE REMEDY No beep Engine actually starts Everything is correct 1 long and 1 short No safety lanyard has ever been programmed in boat s MPEM Us programmer and program a safety lanyard This code can occur only when you receive a new MPEM from the factory and no key has ever been progammed 2 shorts MPEM can not read the electronic circuit in safety lanyard or the magnet is defective in safe...

Страница 175: ...nd to the monitoring beeper Obviously when in tempo rization mode engine will not start The main function of this mode is to read fuel level To Start Engine Install safety lanyard on boat s DESS post The MPEM will be energized instantly and will check the safety lanyard cap If the lanyard is not pro grammed for the boat the beeper emits one long beep If it is programmed the beeper emits 2 short be...

Страница 176: ...nspect terminals for moisture corrosion or dull appearance Clean properly then apply silicone dielectric grease when reassembling Speedster Only Both batteries must be properly connected Never alter connections of batteries They are connected in parallel Electric systems are simply doubled 2 ignition coils 2 starting solenoids 2 charging systems etc Basically the components ignition coil rec tifie...

Страница 177: ...ly fuse 2 on Speedster Also check the wire condition in positions no ee and no 1 of connector addi tional no and no for port side LH of Speedster 4 If the start stop switch still does not work the MPEM can be suspected If the STOP function of the start stop switch does not work it is necessary to check if engine runs over 1000 RPM If it does so check the BLACK RED GREEN wire connection additional ...

Страница 178: ...e positive sup ply wire to the PURPLE TAN wire Overheat Sensor In order to check the engine s overheat sensor wires proceed as for beeper Accessories If an accessory does not work first check acces sory fuse on MPEM It is also possible to check the operation of an accessory by connecting it di rectly to an external 12 Vdc source Unplug the 2 wire connector from the fuse block in front stor age com...

Страница 179: ...le bul let is linked to regulator rectifier It allows to charge the battery when the engine runs If the charging system does not work check charging system fuse then RED GREEN wire connection For testing procedures refer to CHARGING SYS TEM 08 07 ACCESSORY SWITCH TYPE COUNTER CLOCKWISE CENTER CLOCKWISE Blower On Off NONE OFF ON B1 L1 closed Bilge Pump On Off NONE OFF ON B1 L1 closed Nav Anc L2 On ...

Страница 180: ...ceed 15 V as engine speed is increased Magneto Charging System Generator Coil OUTPUT TEST WITH BOMBARDIER IGNITION TESTER Operate it as for ignition system verifications 1 Unplug magneto connector at engine Connect the 4 pin magneto test harness P N 295 000 131 between the unplugged connectors 2 Connect tester wires then set switch and dial as follows TYPICAL 1 YL 2 YL BK 3 Start engine and observ...

Страница 181: ...ance same as step no 1 If the readings are out of specifi cation the stator will need to be replaced TYPICAL STATIC TEST INSULATION With the stator leads disconnected insert either meter lead onto AC 1 and ground the other meter lead to the engine or the stator iron core and note the reading There should be no continuity infini ty between the stator insulated coils and ground If there is a reading...

Страница 182: ...00 RPM DC out put should be above 13 5 volts but below 14 8 volts If voltage is above or below these read ings the rectifier regulator is defective and needs to be replaced All Engines NOTE If it is continually necessary to add distilled water to the battery this indicates an over voltage situation requiring replacement of the rectifier regulator If on the other hand the battery will not stay char...

Страница 183: ...L Sub Section 08 STARTING SYSTEM 08 08 1 STARTING SYSTEM 8 ELECTRIC STARTER F01H1MS 9 8 7 6 10 11 15 1 2 3 4 5 13 5 N m 44 lbf in Dielectric grease 12 16 Loctite 271 Ground cable Dielectric grease 22 N m 16 lbf ft 17 14 18 ...

Страница 184: ...of maintenance on starting sys tem Do not place tools on battery MPEM Supply Fuse Make sure the MPEM supply fuse in good condi tion Battery To check battery condition refer to ELECTRICAL SYSTEM 08 07 Ignition Switch Engine Start Stop Switch and Safety Lanyard Switch Refer to MPEM 08 05 for procedures Solenoid NOTE Solenoid is located in electrical box Disconnect large cables from solenoid Inspect ...

Страница 185: ...lenoid switch Poor contact of brush Straighten commutator and brush Burnt commutator Turn commutator in lathe Worn commutator segments Undercut mica Shorted armature Repair or replace armature Weak brush spring tension Replace brush holder Weak magnet Replace bushings Worn bushings Replace bushings Weak battery Recharge or replace battery Starter turns but overrunning clutch pinion does not mesh w...

Страница 186: ...ar and Spring Tap the pinion stop collar using a screwdriver Re move circlip Disassemble pinion stop collar and spring 1 Pinion stop collar 6 7 8 9 Clutch Ass y Housing O ring and Armature Turn assembly clockwise to remove it from arma ture assembly Pull housing from armature CLEANING CAUTION Yoke ass y and drive unit as sembly must not be immersed in cleaning solvent Discard all O rings and gaske...

Страница 187: ...th Measure brush length If less than 8 5 mm 335 in replace them NOTE New brush length is 12 mm 472 in 1 New 2 Wear limit 8 5 mm 335 in Overrunning Clutch Pinion of overrunning clutch should turn smoothly in clockwise direction and should not slip in a counterclockwise direction If defective replace Check pinion teeth for wear and damage If defec tive replace NOTE Always check engine ring gear teet...

Страница 188: ...s 1 3 4 Yoke Ass y End Frame and Through Bolt Open brushes and slide over commutator Align end frame locating notch with yoke locating protrusion and properly sit brush holder into yoke 1 Locating protrusion is the higher one 1 Brush holder locating notch To ease end frame installation retain brush holder with a small screwdriver while installing end frame A03E0EA 1 2 4 3 F01H0QA 1 F01H0SA 1 F01H0...

Страница 189: ... screws to 22 N m 16 lbf ft 12 Nut Connect the RED battery cable to the starter and torque nut to 6 N m 53 lbf in Apply dielectric grease on terminal and nut 16 18 Screw and Teeth Washer Apply Loctite 271 red on screw Connect BLACK cable to starter using flat washer teeth washer and screw Torque screws to 22 N m 16 lbf ft Apply dielectric grease on termi nal and screw WARNING Always connect RED po...

Страница 190: ...V 170 A max 2200 RPM 2 2 N m 20 lbf in 787 engine 8 5 V 170 A max 2200 RPM 2 2 N m 20 lbf in Stall 717 engine 5 V 350 A max 0 RPM 3 N m 27 lbf in 787 engine 5 V 350 A max 0 RPM 3 2 N m 29 lbf in Battery Sportster and Challenger Every RV24 130 25 A h 130 minutes reserve minimum or RV24 160 160 minutes or equivalent WARNING Never use automotive type battery Its mechanical construction does not allow...

Страница 191: ...ng CLEANING Clean the battery casing caps cables and battery posts using a solution of baking soda and water CAUTION Do not allow cleaning solu tion to enter battery interior since it will destroy the electrolyte chemical properties TYPICAL 1 Baking soda Remove corrosion from battery cable terminals and battery posts using a firm wire brush Rinse with clear water and dry well INSPECTION Visually i...

Страница 192: ...light coat of dielectric grease on terminals Clean battery casing and caps using a solution of baking soda and water CAUTION Do not allow cleaning solu tion to enter battery otherwise it will de stroy the electrolyte Rinse battery with clear water and dry well using a clean cloth Store battery on a wooden shelf in a cool dry place Such conditions reduce self discharging and keep fluid evaporation ...

Страница 193: ...stand for 30 minutes MIN IMUM so that electrolyte soak through battery cells 1 30 min 4 Allow gas bubbles to escape by lightly shaking battery by hand 5 Readjust the electrolyte level to the UPPER LEVEL line 1 Battery electrolyte 2 Upper level line 6 Connect a 2 A battery charger for 3 to 5 hours CAUTION If charging rate raises higher than 2 4 A reduce it immediately If cell temperature rises high...

Страница 194: ... After water is added continue charging for 1 to 2 hours to mix water with electrolyte 11 Reinstall caps and clean any electrolyte spill age using a solution of baking soda and water 1 Baking soda 12 Reinstall battery Hook up battery cables ob serving correct polarity and coat terminals with dielectric grease Install vent line NOTE A check valve is installed on vent line to prevent water infiltrat...

Страница 195: ...ocedure is properly followed a good battery may be needlessly replaced Measure the voltage at the battery posts with an accurate voltmeter If it is below 10 volts the battery will accept current at very low rate in term of milliamperes because electrolyte is nearly pure water as explained above It could be some time before the charging rate increas es Such low current flow may not be detect able o...

Страница 196: ...reate a gas accumulation that could result in an explosion Gases given off by a battery be ing charged are highly explosive Always charge in a well ventilated area Keep battery away from cigarettes or open flames Avoid skin contact with electrolyte WARNING To prevent any possible spark that may occur at the battery terminals while connecting the cables unscrew and dis connect the connector at the ...

Страница 197: ...9 1 INSTRUMENTS AND ACCESSORIES 9 Sportster F04H14S Dielectric grease Dielectric grease Dielectric grease Dielectric grease Dielectric grease Dielectric grease Dielectric grease Dielectric grease Dielectric grease Dielectric grease Dielectric grease See Electrical System ...

Страница 198: ... Speedster F04H17S Dielectric grease Dielectric grease Dielectric grease Dielectric grease Dielectric grease Dielectric grease Dielectric grease Dielectric grease Dielectric grease Dielectric grease Dielectric grease Dielectric grease See Electrical System Dielectric grease ...

Страница 199: ... Level Oil Sensor The sensor sends the signal to the low oil level light in the fuel gauge The bottom of the sensor has a small reservoir with 2 small holes underneath to let the oil enter inside and 1 at the top to let the air enter to allow the oil flowing out 1 0 Bombardier F01G07A 1 F01F20A 1 2 3 FUEL LEVEL AND RESISTANCE FUEL LEVEL RESISTANCE mm in Ω From 46 6 68 6 1 27 32 à 2 45 64 0 0 1 Fro...

Страница 200: ...0 seconds before taking any reading to give the oil enough time to flow out or inside sensor reservoir To reinstall sensor Remove rubber seal from sensor Install seal in oil tank sensor Push sensor in seal Plug connectors NOTE This sensor turns the low level oil light to ON if the connector has been forgot ten unconnected even when there is enough oil in tank This warns the operator that something...

Страница 201: ...nside the bilge Provide a 12 Vdc to the sensor Connect the wire to the PURPLE YELLOW wire and con nect the wire to the BLACK wire Connect the voltmeter probe to the BLUE PURPLE wire and the probe to the BLACK wire Slowly turn the paddle wheel You should read a voltage variation with the voltmeter F04H20A BATTERY VOLTMETER BLUE PURPLE BLACK PURPLE YELLOW ...

Страница 202: ...ACK is a YELLOW wire with a BLACK tracer YELLOW BLACK RED is a YEL LOW wire with a BLACK tracer and a RED tracer WIRE TERMINAL REMOVAL To remove terminal from connector housing use Snap on TT600 4 tool ACCESSORIES INSTALLATION WARNING Never secure electrical wires cables with fuel lines Keep wires away from any rotat ing moving heating vibrating or sharp edge Use proper fastening devices as requir...

Страница 203: ... CARRIER 09 01 2 GENERAL 09 01 3 JET PUMP INSPECTION ON JET BOAT 09 01 3 JET PUMP REMOVAL 09 01 4 CLEANING 09 01 11 PARTS INSPECTION 09 01 11 JET PUMP ASSEMBLY 09 01 15 PUMP PRESSURIZATION 09 01 20 JET PUMP INSTALLATION 09 01 22 REVERSE SYSTEM 09 02 1 ALL MODELS 09 02 1 DISASSEMBLY 09 02 2 INSPECTION 09 02 2 ASSEMBLY 09 02 2 VARIABLE TRIM SYSTEM VTS 09 03 1 CHALLENGER 09 03 1 ADJUSTMENTS 09 03 2 ...

Страница 204: ... m 15 lbf ft 25 N m 18 lbf ft 10 Loctite 242 Loctite 515 5 3 Loctite 242 11 9 Speedster Sportster Challenger 4 7 N m 62 lbf in Loctite 242 18 Loctite 515 29 17 Loctite PST 592 7 N m 62 lbf in 28 Loctite 271 25 27 26 22 8 35 N m 26 lbf ft 7 If required 30 Loctite PST 592 22 21 16 19 20 Speedster only 31 12 13 Sealant 732 Loctite 598 14 Loctite 242 15 Loctite 515 20 N m 15 lbf ft ...

Страница 205: ...DRIVE SYSTEMS Sub Section 01 PROPULSION AND DRIVE SYSTEMS 09 01 2 DRIVE SHAFT AND SEAL CARRIER F04J0US Loctite 271 Loctite 515 23 35 36 34 25 25 32 Synthetic grease Synthetic grease Loctite 495 2 N m 18 lbf in 33 Loctite 495 24 ...

Страница 206: ...of impeller boot and ring can be quickly checked from underneath of the jet boat Remove grill and look through water inlet opening 1 Boot with ring Impeller Wear Ring Clearance This clearance is critical for jet pump perfor mance Clearance can be checked from water inlet open ing after inlet grill removal or from venturi side after venturi nozzle assembly removal MEASURING FROM WATER INLET SIDE 1 ...

Страница 207: ...eplacement Remove parts as described in Oil Inspection Remove 3 screws retaining cover Using a fiber hammer gently tap cover to release it from housing cover Thoroughly clean reservoir and inside of cover with a solvent Apply Loctite 518 and reinstall cover with its O ring Remove plug from cover Pour approximately 90 mL 3 oz of oil through hole until oil reaches the bottom of hole threads Use SEA ...

Страница 208: ...e pliers to draw hooks together and dis engage windows from locking hooks 1 Locking hooks TYPICAL 1 Unfasten small clamp Keep clamp for later use Hold floating ring and compress protective boot then pull out O ring from driveshaft groove TYPICAL 1 Floating ring 2 O ring 3 Protective boot 4 Remove this O ring F01J0GA 1 F01J2AA 1 F01J29A 1 F02J0PC F05I0BA 2 4 1 3 ...

Страница 209: ...ump unit a shim could have been installed between hull and pump housing be careful not to dam age shim If shim is not reinstalled engine and jet pump alignment will be altered If the drive shaft is jammed into PTO flywheel or if bearing is seized on shaft at floating ring level a hammer puller can be used to withdraw drive shaft DRIVE SHAFT PROTECTOR If it is required to remove the protector tube ...

Страница 210: ...joints boots nuts half rings and O ring from cables From inside of hull disconnect water supply hose from its fitting Remove fasteners retaining sup port to hull Using a heat gun heat support until it can be pulled off JET PUMP DISASSEMBLY NOTE Whenever removing a part visually check for damage such as corrosion crack split break porosity cavitation deformation dis tortion heating discoloration we...

Страница 211: ...rill a 2 40 mm 3 32 in hole in center of deep socket as shown in following illustration Install 2 40 mm 3 32 in roll pin in the center hole 1 Deep socket 14 mm 9 16 in 2 Roll pin 2 40 mm 3 32 in A 42 50 mm 1 43 64 in B 36 80 mm 1 29 64 in 17 18 Housing Cover and Screw With pump assembly in horizontal position re move 3 retaining screws Place container under cover to catch oil Using a fiber hammer ...

Страница 212: ...ousing in a brass jaw vise so that it is firmly retained by a lug Cut wear ring at 2 adjacent places NOTE Wear ring can be cut using a jigsaw a small buffer or a low clearance hacksaw such as Snap on HS3 or equivalent CAUTION When cutting ring be careful not to damage impeller housing TYPICAL 1 Snap on HS3 After cutting ring insert a screwdriver blade be tween impeller housing and one end of ring ...

Страница 213: ...ghten claws to always maintain them tight against seal Continue pulling until seal is out 1 Pulling seal out of housing NOTE If bearings and seal need to be re newed the special pusher described further on in bearing removal can be used Simply insert pusher from the rear and push towards the front 1 Same tool for bearing removal 2 Removing seal and bearings out from rear 22 Needle Bearing NOTE It ...

Страница 214: ...ts in a solvent Carefully check water passages Cooling system and oil passages Blow low pressure compressed air through them and make sure they are not clogged 1 Water passages 2 Oil passages PARTS INSPECTION 33 34 35 36 Protective Boot Carbon Ring O Ring and Floating Ring Inspect carbon ring for wear at the inside and at the flange where it contacts the floating ring Inspect the floating ring fla...

Страница 215: ...ld cause vibration and damage to drive shaft splines impeller flywheel or seal carrier Install drive shaft in V blocks and set a dial gauge in center of shaft Slowly rotate shaft difference between highest and lowest dial gauge reading is deflection Refer to the following illustration Maximum permissible deflection is 0 5 mm 020 in MEASURING DRIVE SHAFT DEFLECTION 1 Dial gauge 2 V blocks 19 Impell...

Страница 216: ...r contact surface Check for scoring pitting chipping or other evi dence of wear With a finger nail feel contact surface of seal If any irregular surface is found renew impeller shaft Install bearings then install impeller shaft and ro tate it Make sure it turns smoothly Radial Play Radial play is critical for jet pump unit life span Radial play of impeller shaft is checked with shaft in housing wi...

Страница 217: ...rust washer 26 27 Thrust Washer and Thrust Bearing Visually inspect thrust washer thrust bearing and their contact surface Check for scoring pitting flaking discoloration or other evidence of wear TYPICAL 1 Worn roller trunnion worn on end of roller 2 Good roller cylindrical shape 3 Lock for scoring on retainer NOTE When replacing either washer or bearing it is recommended to renew both 17 25 Hous...

Страница 218: ... Renew as necessary JET PUMP ASSEMBLY Speedster Only The jet pump and all its components are the same on port and starboard LH RH However there are different ride shoes intake grill on port and starboard LH RH 20 Wear Ring The wear ring features a lip on one edge position lip outwards of housing NOTE To ease insertion into housing apply a soapy solution P N 293 600 006 onto outside circumference o...

Страница 219: ... ring slides equally all around until it seats into bottom of housing 1 Piece of wood 2 Seal lip here 3 Wear ring 21 22 Seal and Needle Bearing Bearings and seal will be properly installed in housing using bearing seal installer tool P N 295 000 107 BEARING SEAL INSTALLER TOOL 1 Seal end 2 Bearing end Stamped end of bearings showing identification markings must be located toward outside of housing...

Страница 220: ...eal seat 2 Stamped end of bearing 3 Thrust washer seat 4 Stamped end of bearing A 1 5 2 5 mm 060 100 in B 2 3 mm 080 120 in Seal must be installed so that lips raised edges are toward outside of housing toward impeller Apply Loctite 515 P N 293 800 007 in seal hous ing all around outer diameter and on seal seat Properly insert seal on tool NOTE Be careful when installing seals to pack seal with gr...

Страница 221: ...shaft groove To prevent seal lip damage when inserting impel ler shaft use impeller shaft guide P N 295 000 002 Insert tool onto shaft end then carefully slide housing over shaft 1 Carefully insert housing onto shaft 2 Impeller shaft guide tool Remove special tool Brush and clean impeller shaft threads and impel ler splines with Loctite Safety solvent 755 P N 293 800 019 or equivalent Free threads...

Страница 222: ...impeller shaft threads Carefully engage threads making sure they are well aligned Install impeller remover tool into impeller splines and tighten CAUTION Make sure thrust washer and bearing are not wedged in shaft groove To check manually pull and push impeller housing an axial play must be felt Torque impeller to 70 N m 52 lbf ft then remove tools CAUTION Never use any impact wrench to tighten im...

Страница 223: ...st in order to seat the new seal otherwise it will leak Proceed as follows Apply Loctite PST 592 on threads fitting tool P N 295 000 086 then secure on cover Connect pump gauge tester P N 295 000 083 to fitting Pressurize pump to a maximum of 70 kPa 10 PSI Pump must maintain this pressure for 10 min utes CAUTION Repair any leak failure to cor rect a leak will lead to premature wear of pump compone...

Страница 224: ...on outer circumference of boot 1 Boot Clean drive shaft splines with Loctite solvent 755 Free splines from any residue Allow solvent to dry thoroughly Generously apply synthetic grease P N 293 550 010 on drive shaft splines and impeller splines Make sure rubber damper is on drive shaft end Insert drive shaft in impeller then carefully insert boot in impeller Use screwdriver blade to push on boot T...

Страница 225: ...tic hull insert Mix epoxy glue 3M 05900 follow manufacturer instructions Apply epoxy glue on aluminum insert P N 292 000 075 knurled surface and on plastic insert in ner bore CAUTION A clearance between plastic insert and aluminum insert could possibly be noticed If so ensure to fill gap with epoxy glue to obtain aluminum insert adhesion 1 Knurled surface 2 Inner bore Install insert into plastic h...

Страница 226: ... 271 red Loctite to the threads of the stud Reinstall leaving 30 mm 1 1 18 in 04 of the stud extending from the transom surface refer to the following illustration TYPICAL Jet Pump Unit Apply Loctite 598 Ultra black on pump as shown in the following illustration 1 Apply Loctite 598 Ultra Black where indicated by dark area Install a new neoprene seal on ride shoe TYPICAL 1 Neoprene seal Generously ...

Страница 227: ...nut on the stud while maximizing the installed length of the stud in the transom anchor plate At PTO flywheel compress the protective boot slide floating ring toward the boot and properly in stall the remaining O ring in drive shaft groove Release boot and firmly push floating ring against the O ring Secure PTO flywheel boot clamp as follows Use pliers P N 295 000 069 as for removal Manually engag...

Страница 228: ...cable to Chal lenger and Sportster TYPICAL 1 Torque to 20 N m 15 lbf ft 2 5 raise front and give a little more speed 3 0 factory position WARNING Loctite must be applied on screw threads and screw must be torqued as specified Challenger Install nozzle trim ring assembly Torque screws to 14 N m 10 lbf ft NOTE Trim ring has a tight fit to install in sert both sides at the same time taking care not t...

Страница 229: ...5 N m 23 lbf in Check steering alignment Refer to STEERING SYSTEM 10 02 then refer to adjustment Proper install VTS cable Challenger For adjust ments refer to VARIABLE TRIM SYSTEM 09 03 Slightly lubricate wear ring with a soapy solution before starting to minimize friction during initial start To allow impeller adjustment into wear ring start engine to let impeller rotate for a few seconds CAUTION...

Страница 230: ...Section 09 PROPULSION AND DRIVE SYSTEMS Sub Section 02 REVERSE SYSTEM 09 02 1 REVERSE SYSTEM 2 All Models F04J0ES 1 2 3 4 Loctite 271 Loctite 242 Loctite 242 Loctite 242 Loctite 242 Loctite 242 ...

Страница 231: ...to STEERING SYSTEM 10 2 then look for alignment Ensure that steering ca ble ball joint is parallel with cable lever Reverse Gate Locking System Verification and Adjustment Fully pull throttle lever s to idle position then pull shifter in reverse position Ensure reverse gate ear contacts the stopper IN REVERSE POSITION 1 Must touch Fully push shifter in forward position A latching sound should be h...

Страница 232: ...le ball joint from cable lever on reverse gate then unscrew ball joint from cable From inside of hull slacken lock nut From outside of hull pull cable to allow half rings removal For the other end of cable remove throttle shifter control from boat and detach cable from mecha nism At assembly ensure to properly tighten lock nut Check watertightness Adjust as explained above 1 F04L0GA 2 ...

Страница 233: ...9 PROPULSION AND DRIVE SYSTEMS Sub Section 03 VARIABLE TRIM SYSTEM VTS 09 03 1 VARIABLE TRIM SYSTEM VTS 3 Challenger F04J0WS 14 N m 10 lbf ft Loctite 242 Loctite 242 14 N m 10 lbf ft 14 N m 10 lbf ft Loctite 242 ...

Страница 234: ...terfering with the venturi housing Check in both directions If adjustment is required it can be done at the jet pump unit Turn adjuster as re quired Ensure the cable end remains protruding the adjuster CAUTION Trim ring and or nozzle must not interfere with venturi Damage to ca bles and or venturi housing may occur if ad justment is not done adequately After adjustment ensure the cable end remains...

Страница 235: ...ARIABLE TRIM SYSTEM VTS 09 03 3 TYPICAL 1 Adjust slider mechanism cable here while shifter is at FORWARD 2 Adjust cable so that blocks hold together with a tension in the cable 3 Ensure cable locking devices are properly installed 4 VTS lever F04K0BA 4 3 2 1 ...

Страница 236: ...EM 10 01 1 SPORTSTER 10 01 1 SPEEDSTER 10 01 2 STEERING SYSTEM INSPECTION 10 01 3 STEERING CABLE REPLACEMENT 10 01 3 STEERING HELM REPLACEMENT 10 01 3 ALIGNMENT 10 02 1 THROTTLE SHIFTER VTS CONTROLLER 10 03 1 REMOVAL 10 03 1 INSPECTION 10 03 1 LUBRICATION 10 03 1 ADJUSTMENTS 10 03 1 ASSEMBLY 10 03 3 ...

Страница 237: ...RING SYSTEM 10 01 1 STEERING SYSTEM 1 Sportster F04K0DS 6 7 8 9 10 10 N m 89 lbf in 10 N m 89 lbf in Loctite 242 6 N m 53 lbf in 5 Silicone sealant Loctite 242 3 40 N m 30 lbf ft 4 Loctite 242 12 11 40 N m 30 lbf ft 2 Loctite 242 20 N m 15 lbf ft 1 ...

Страница 238: ...n 01 STEERING SYSTEM 10 01 2 Speedster F04K0CS 6 7 8 9 10 10 N m 89 lbf in 10 N m 89 lbf in Loctite 242 6 N m 53 lbf in 5 12 40 N m 30 lbf ft 2 Loctite 242 20 N m 15 lbf ft 1 11 Silicone sealant Loctite 242 3 40 N m 30 lbf ft 4 Loctite 242 ...

Страница 239: ...of the steering helm can lead to steering failure Replace complete assembly For cable assembly use supplied hardware only Do not use substi tutes STEERING CABLE REPLACEMENT Removal Remove nut no 1 from adjuster no 2 then from nozzle Remove nut no 3 from cable From inside of hull remove silicone around lock nut no 4 of cable Pull cable out of transom Detach cable end from helm arm Detach cable hous...

Страница 240: ...alling steering helm to boat position screws no 9 as required in slots on mounting plate to keep space between helm cable and body Centering screws in slots is a good start ing point 1 Screw centered in slot 2 Mounting plate Torque screws as indicated in exploded view Ensure to install Woodruff key Torque lock nut of steering as indicated in ex ploded view Proceed with steering alignment Refer to ...

Страница 241: ...d straight edge Speedster Model Check jet pump nozzle alignment synchroniza tion by placing a straight edge across both nozzle ends 1 Straight edge across nozzle ends All Models A small adjustment can be made with adjuster on nozzle On Speedster any nozzle can be adjust ed CAUTION Cable end must remain pro truding adjuster TYPICAL 1 Cable end must protrude here 2 Adjuster If not enough adjustment ...

Страница 242: ... and Challenger Models Step Remove nut Step Slacken lock nuts Step Turn to adjust 1 Cable end must protude here Speedster model 1 Adjust here 2 Cable end must protrude here Ensure to apply Loctite on parts as indicated on exploded view F04K0AA 1 1 3 2 1 2 3 F04K02A 2 1 ...

Страница 243: ...BARDIER LUBE Spray BOMBARDIER LUBE on cable of the VTS slider mechanism ADJUSTMENTS Throttle shifter and VTS cable adjustment are covered in FUEL SYSTEM Carburetors section 06 03 PROPULSION AND DRIVE SYSTEM Re verse System section 09 02 and Variable Trim System section 09 03 respectively Lever Friction Adjustment Lever friction can be adjusted to suit operator s preferences Throttle lever friction...

Страница 244: ...adjust shifter friction turn set screw that is on the same side as shifter lever The set screw of the VTS lever has very little ef fect because of the ratchetting mechanism To adjust throttle lever turn set screw on center of pivot point of lever The ratchetting effect for the VTS lever is pro vided by 2 spring loaded steel balls see illustra tion If the ratchetting is not felt check those compone...

Страница 245: ... reverse efficiency ADJUSTMENT Place the shifter in FORWARD position Adjust the slider mechanism cable so that a tension in the cable maintains the slider blocks together Check the operation by moving the VTS lever The blocks must remain together while the nozzle re sponds to the lever movement via the inner part of the cable TYPICAL 1 Adjust the slider mechanism cable here while shifter is at FOR...

Страница 246: ...ALLATION 11 01 8 REPAIR 11 02 1 HULL AND DECK REPAIR 11 02 1 GENERAL 11 02 1 AIR BUBBLES 11 02 1 BLISTERS 11 02 2 MINOR GELCOAT FRACTURES 11 02 2 COMPOUND FRACTURES 11 02 2 TOOLS AND MATERIALS LIST 11 02 4 PAINTING 11 03 1 PARTS THAT CAN BE PAINTED 11 03 2 CONCEPTTM PAINTING PROCEDURE 11 03 4 SURFACE PREPARATION 11 03 4 FULL PANEL AND OVERALL REPAIRS 11 03 4 SPOT PANEL REPAIRS 11 03 4 DELTATM PAIN...

Страница 247: ...Section 11 HULL DECK Sub Section 01 COMPONENTS 11 01 1 COMPONENTS 1 F04L3FS Loctite 242 Loctite 242 Loctite 242 Loctite 242 Some models only Loctite 271 5 N m 44 lbf in ...

Страница 248: ...Section 11 HULL DECK Sub Section 01 COMPONENTS 11 01 2 F04L3GS SPORTSTER model only SPEEDSTER and CHALLENGER models Synthetic grease Loctite 242 Loctite 271 5 N m 44 lbf in Silicone sealant ...

Страница 249: ...Section 11 HULL DECK Sub Section 01 COMPONENTS 11 01 3 F04L1QS Silicone sealant clear Loctite 271 SPEEDSTER model only Silicone sealant clear SPEEDSTER and SPORTSTER models only ...

Страница 250: ...on 11 HULL DECK Sub Section 01 COMPONENTS 11 01 4 F04L3HS Some models only CHALLENGER model only Silicone sealant clear Silicone sealant clear Loctite 271 Sealant Ultra Black Loctite 242 SPEEDSTER model only ...

Страница 251: ...Section 11 HULL DECK Sub Section 01 COMPONENTS 11 01 5 F04L3IS Loctite 242 ...

Страница 252: ...ion There are 2 types of decals used on jet boat One has a protective film on back side and the other has a protective film on both sides They are used on 3 types of materials plastic gelcoat and met al Decals Having a Protective Film on Back Side Only These decals usually contain written information ex warning and are used on gelcoat or metal Clean surface with a good solvent such as ACRYLICLEAN ...

Страница 253: ... SHOCKS If cover does not lift by itself when latch is re leased replace gas shock s Each shock should be checked individually by detaching them one at a time At shock installation position it so that the piston rod is at bottom LATCH ADJUSTMENT Front and rear storage compartment cover latch es are adjustable If cover is not tight enough or if it is hard to close adjust as necessary 1 Using a heat...

Страница 254: ...on See illus tration above SEAT REMOVAL INSTALLATION NOTE A screwdriver may be used carefully to pry seat backrest out CAUTION Ensure to protect body prior to prying Whenever removing seat and or backrest al ways replace darts prior to reinstalling Rear Seat Carefully pry sides of seat to release the darts The 4 retaining screws can be reached from en gine compartment underneath seat Rear Backrest...

Страница 255: ...int mask Always read warning labels on products AIR BUBBLES Possible Cause Air pocket trapped between layers of laminate and gelcoat 1 Preparation of Surface Remove all of the damaged gelcoat surrounding the air bubble with a putty knife or preferably a carbide grinding tip Make sure all loose and weak areas are completely removed Sand a small area of the gelcoat surface with 220 grit sandpaper If...

Страница 256: ...s Over Large Surface Prepare the area for spray application of liquid gelcoat Wipe down the surface with acetone Mask the area off to protect the boat from over spray Mix the needed quantity of gelcoat and catalyst according to suppliers recommendations The gelcoat can be thinned with acetone up to 10 If it needs more consistency you can add cabosil Make sure that the air supply is free of oil dir...

Страница 257: ...mall crack use an epoxy filler in the same way you would use Bombardier s gelcoat repair putty When laying up a larger area you will use mat cloth and fiberglass resin and hardener Use a clean container to mix the resin mix only what you will need Follow the recommended catalyst ratio Using a clean paintbrush brush the mixed resin on the surface Place the smallest piece of mat over the fracture an...

Страница 258: ...uffing pad heavy duty polisher power sander paint brush plastic container mixing spray gun plastic squeegee Materials fiberglass mat fiberglass cloth polyester resin cardboard masking tape sandpaper 100 grit 220 grit 220 grit 320 grit 400 grit 600 grit 1000 grit 24 grit sanding disks Bombardier gelcoat putty Bombardier liquid gelcoat acetone cabosil epoxy filler medium compound white fine compound...

Страница 259: ...at surfaces refer to the appropriate Bombardier Sea Doo Jet Boat Parts Catalog it contains a few spray can part numbers NORTH AMERICA CANADA Quebec Phone 1 800 363 2816 All Other Provinces Phone 1 905 855 5802 Communications are available in english and french U S A Phone 216 572 6100 This phone number is also good for all countries Communications are available in english frech and spanish EUROPE ...

Страница 260: ...ust Manifold 8 Engine Support 9 Ignition Housing 10 Ignition Housing Cover 11 Deck Storage Compartment Cover 12 Flame Arrester Support 13 Flame Arrester Base 14 Ride Shoe 15 Reverse Gate and Support 16 Venturi 17 Steering Nozzle 18 Rear Storage Compartment Tray 19 Throttle Shifter Controller Cover F04L3KS 1 2 3 18 4 9 11 13 12 19 10 14 15 17 16 8 6 7 5 ...

Страница 261: ...te 98209 White 98209 White 98209 8 Engine Support Black 9551 Black 9551 Black 9551 9 Ignition Housing White 98209 White 98209 White 98209 10 Ignition Housing Cover White 98209 White 98209 White 98209 11 Deck Storage Compartment Cover Super White 98260 Super White 98260 Super White 98260 12 Flame Arrester Support White 98209 White 98209 White 98209 13 Flame Arrester Base Black 9551 Black 9551 Black...

Страница 262: ...y CONCEPTTM color is 6 to 8 hours at 21 C 70 F Medium solids option is 2 to 4 hours at 21 C 70 F FULL PANEL AND OVERALL REPAIRS Application Apply 1 medium wet coat and give 5 10 minutes flash followed by 2 wet coats with 15 minutes flash time between each coat Adjust metallic on the last full wet coat If necessary apply a mist coat For medium solids option apply 2 full wet coats Air Pressure 275 3...

Страница 263: ...ECOMMENDED SPRAY EQUIPMENT Dry Time at 21 C 70 F Dust free 25 35 minutes Tack free 2 1 2 to 3 hours Tape Sand Overnight Force Dry Allow 20 minutes purge time at 27 32 C 80 90 F before bake Bake 75 minutes at 65 C 150 F or 40 minutes at 82 C 180 F Allow to cool after force dry before sanding or taping GUN MANUFACTURER DE VILBISS BINKS GRACO HVLP GUN MODEL JGA 62 800N Can Am Model 900 FLUID TIP SIZE...

Страница 264: ... 05 mm 002 in Piston ring type and quantity 1 Semi Trapez 1 Rectangular Ring end gap New 0 25 0 40 mm 010 016 in Wear limit 1 00 mm 039 in Ring piston groove clearance New 0 025 0 070 mm 001 003 in Wear limit 0 2 mm 008 in Piston cylinder wall clearance New 0 06 0 08 mm 002 003 in Wear limit 0 20 mm 008 in Cylinder taper maximum 0 10 mm 004 in Cylinder out of round 0 08 mm 003 in Connecting rod bi...

Страница 265: ...TION Engine cold 6000 RPM with shifter in forward or reverse position Recommended Exide RV24 130 12 V 25 A h 130 minutes reserve or RV24 160 160 minutes or equivalent Battery pot On top Round taper type Battery maximum allowed size 285 mm 11 1 4 long x 190 mm 7 1 2 wide x 238 mm 9 3 8 high WARNING Never use automotive type battery Its mechanical construction does not allow to meet the shock condit...

Страница 266: ... mm 005 021 in Impeller shaft side play 0 05 mm 002 in Impeller pitch material Progressive pitch 11 24 stainless steel Progressive pitch stainless steel ADDITIONAL INFORMATION Do not mix different brands or oil types DIMENSIONS SPORTSTER 5895 SPEEDSTER 5894 Number of passenger driver incl 3 1 Draft angle 20 Dead rise 30 cm 12 in Overall length 442 cm 14 ft 6 in Overall width beam 216 cm 85 in Over...

Страница 267: ... gauge Standard Oil injection low level warning device Standard Overheating warning device and CSI Cooling System Indicator Standard Speedometer Optional Standard Tachometer Optional Standard Stern light and navigation lights Standard Shifter control Forward Neutral Reverse Standard Electric bilge pump manual switch auto Standard Blower Standard Storage compartment front middle rear Standard Grab ...

Страница 268: ...2 lbf ft 2 Pump hull nuts 35 N m 26 lbf ft 1 Venturi pump housing screws 25 N m 18 lbf ft 1 Nozzle venturi screws 20 N m 15 lbf ft 1 Pump housing cover screws 7 N m 62 lbf in 1 Reverse gate venturi screws 25 N m 18 lbf ft 1 Intake grill screws 8 N m 71 lbf in 1 Ride shoe screws 10 N m 88 lbf in 1 STEERING Steering wheel nut 40 N m 30 lbf ft Steering support screws 10 N m 88 lbf in 1 Steering cable...

Страница 269: ...g type and quantity 1 Semi Trapez 1 Rectangular Ring end gap New 0 25 0 40 mm 010 016 in Wear limit 1 00 mm 039 in Ring piston groove clearance New 0 025 0 070 mm 001 003 in Wear limit 0 2 mm 008 in Piston cylinder wall clearance New 0 10 0 12 mm 004 005 in Wear limit 0 15 mm 006 in Cylinder taper maximun 0 10 mm 004 in Cylinder out of round maximun 0 08 mm 003 in Connecting rod big end axial play...

Страница 270: ...in forward or reverse position Recommended Exide RV24 130 12 V 25 A h 130 minutes reserve or RV24 160 160 minutes or equivalent Battery post On top Round taper type Battery maximun allowed size 285 mm 11 1 4 long x 190 mm 7 1 2 wide x 238 mm 9 3 8 high WARNING Never use automotive type battery Its mechanical construction does not allow to meet the shock condition where boats operate Only use the t...

Страница 271: ... in Impeller shaft end play new 0 12 0 54 mm 005 021 in Impeller shaft side play 0 05 mm 002 in Impeller pitch material Progressive pitch stainless steel ADDITIONAL INFORMATION Do not mix different brands types DIMENSIONS CHALLENGER 5896 Number of passenger driver incl 4 1 Draft 20 Dead rise 30 cm 12 in Overall length 442 cm 14 ft 6 in Overall width beam 216 cm 85 in Overall height 107 cm 42 in Dr...

Страница 272: ...Oil injection low level warning device Standard Overheating warning device and CSI Cooling System Indicator Standard Speedometer Standard Tachometer Standard VTS Variable Trim System Standard Retractable ski post Standard Stern light and navigation lights Standard Shifter control forward neutral reverse Standard Electric bilge pump manuel switch auto Standard Blower Standard Storage compartment fr...

Страница 273: ...uri pump housing screws 25 N m 18 lbf ft 1 Nozzle venturi screws 20 N m 15 lbf ft 1 Pump housing cover screws 7 N m 62 lbf in 1 Reverse gate venturi screws 25 N m 18 lbf ft 1 VTS ring nozzle screws 13 5 N m 120 lbf in 1 VTS ring VTS arm screws To be distributed Intake grill screws 8 N m 71 lbf in 1 Ride shoe screws 10 N m 88 lbf in 1 STEERING Steering wheel nut 40 N m 30 lbf ft Steering support sc...

Страница 274: ......

Отзывы: