49
The Sapling Company, Inc.
670 Louis Drive
Warminster, PA 18974
USA
P. (+1) 215.322.6063
F. (+1) 215.322.8498
www.sapling-inc.com
Accessing the Clock After it has been Installed
If the user observes an issue with the clock, please contact your dedicated dealer or us for
support.
The below instructions are provided for accessing the clock for the purpose of changing its settings after
it has been installed.
Surface (wall) Mounted, Dual-Faced, Flag Mounted Clocks:
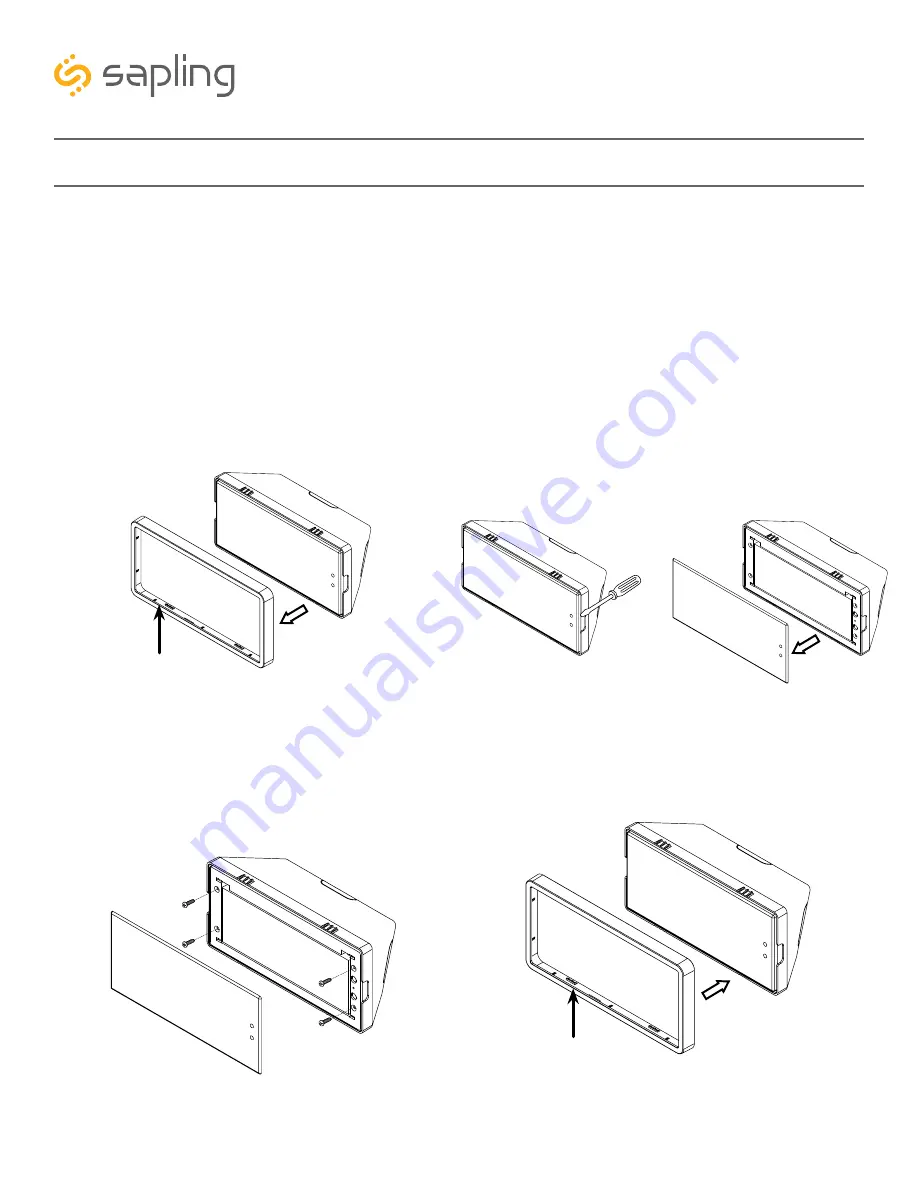
The clock housing consists of an outer frame (rim) that snaps on to the clock using mounting tabs.
Flush Mounted Clocks:
Begin at Step 2.
outer clock frame (rim)
outer clock frame (rim)
1) To access the clock’s electric board, there is a
need to gently pull the rim out of the housing as
shown in the below image.
2) Once the frame (rim) has been removed, gently
pull off the clock filter (which is held by four tabs).
You may use a flat head screwdriver to pop off
the filter by wedging it between the filter and the
housing, as shown in the below image.
3) Once the filter has been removed, a Phillips
screwdriver should be used for unscrewing the
clock display from the housing. The clock display
is attached to the clock main electrical board,
which consists of jumper switches, access to the
power and data wires, as well as other ports and
interfaces, depending on the clock model (3200 or
3300).
Placing the clock outer frame (rim) back:
Depending on the clock size, there may be 4 or 6
tabs. Gently push the outer frame (rim) onto the
housing, allowing all tabs to latch into position so
the rim will evenly align with the clock display.


